The Snowplow Analytics custom tag template is an official tag template for Google Tag Manager’s community template gallery.
| Resource |
|---|
| Vendor documentation |
| Blog post |
| Gallery entry |
| GitHub repo |
Description
This template implements the Snowplow Analytics JavaScript tracker. The template supports the full spread of features of the tracker, with a few exceptions due to the limitations of custom templates’ sandboxed JavaScript.
Install the template
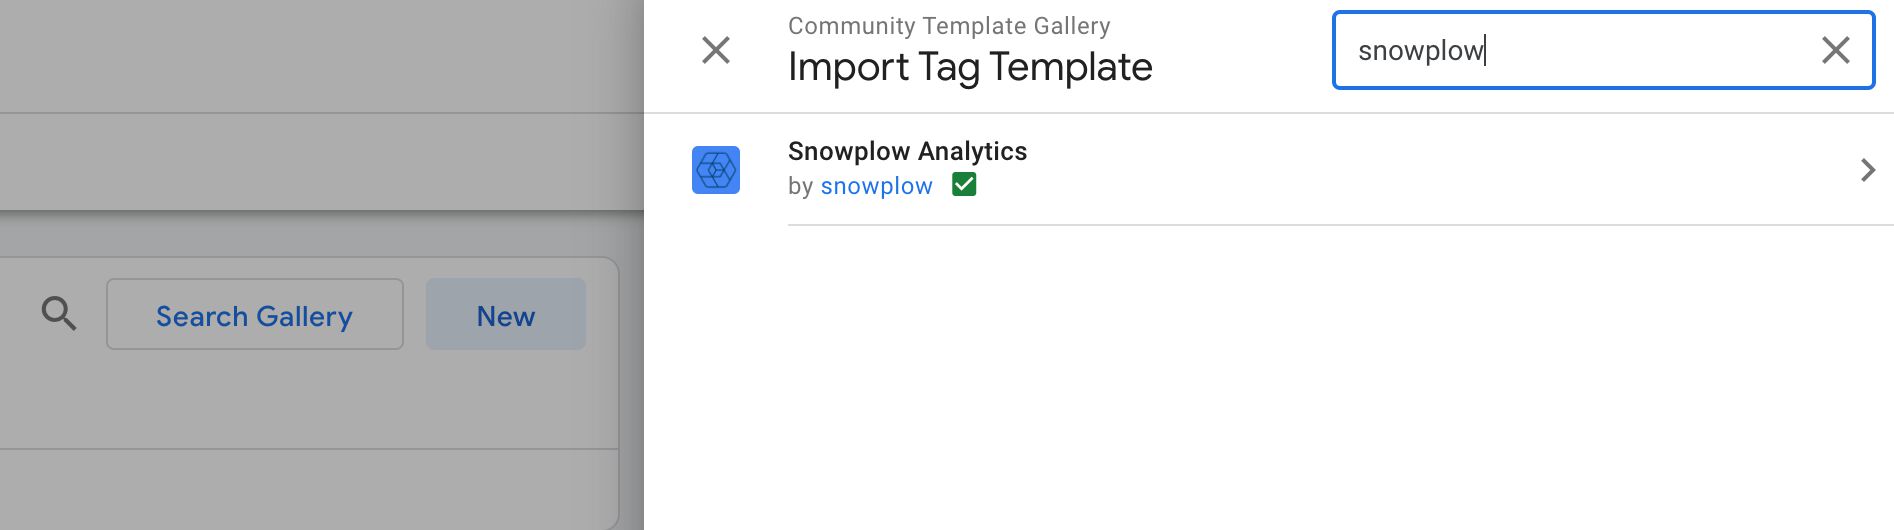
To install the template, browse to Templates in the Google Tag Manager user interface.
Under Tag Templates, click Search Gallery, and type snowplow into the gallery overlay search bar.
Click the Snowplow Analytics template name, and then click Add to Workspace in the next screen. Review the permissions and click Add to finalize the import.
After importing the template, you can follow the normal process of creating a new tag in Google Tag Manager, and the Snowplow Analytics template will be listed among the Custom tag types you can choose from.
Caveats
To begin with, some of the caveats of using the Custom Template.
- Any methods that require the parsing of HTML elements (e.g. link tracking filter functions) will not work and are thus disabled.
- Automatic error tracking does not work due to lack of support for the
ErrorEventAPI. - There is no implementation for the standard ecommerce events. Users are encouraged to implement the enhanced ecommerce setup instead.
Instructions
Here are basic instructions for how to instrument the JavaScript tracker. You are encouraged to consult the technical documentation for more information on each individual feature.
In general, when the tag fires, it first checks if the Snowplow JavaScript library has been loaded from the self-hosted URL provided in the template settings (more on this below). Then, the tag checks whether a tracker with the given Tracker Name has already been initialized. If not, it proceeds to initialize the new tracker.
Finally, the tag bundles a command from the settings in the tag, and sends it to the given Collector Endpoint.
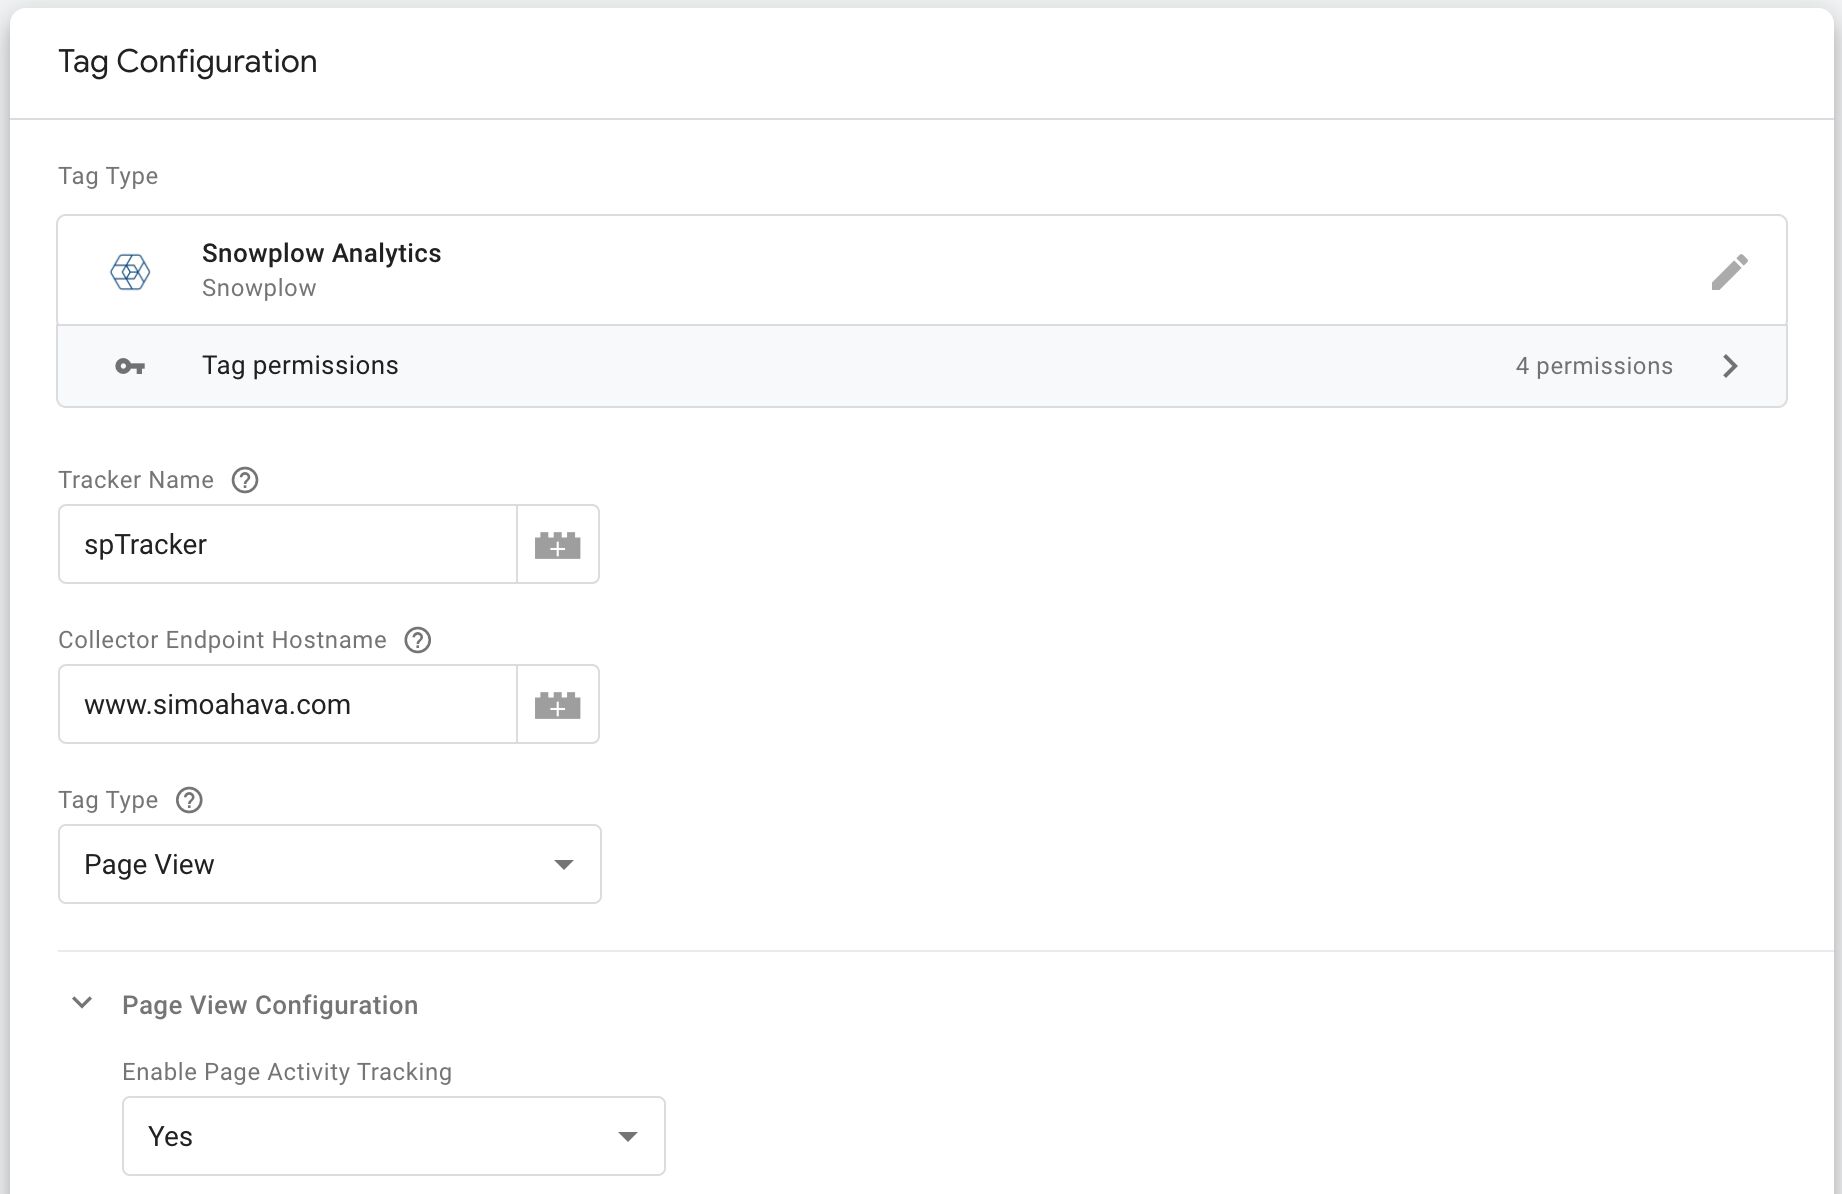
Tracker Name
The first field requires you to add the tracker name. The reason you might have more than one tracker name generated on the site is if you have different configuration objects or tracking endpoints to which you want to send commands.
When the tag runs, it first checks if a tag with this name has already been initialized. If it has, it then proceeds to send the command to this tracker name. If a tracker with this name has not been initialized, a new tracker is initialized with the tracker configuration derived from the tag (or from the linked Snowplow Analytics Settings variable).
This means that a tracker configuration is applied only once to the tracker. Thus if you have more than one tag running on the site, each with the same tracker name but different tracker configurations, only the configuration of the tag that fires first will be applied to the tracker.
Collector Endpoint Hostname
This needs to be set to the hostname (e.g. www.domain.com) on which you’ve configured the Snowplow Analytics collector.
Advanced Configuration
Jumping to the end of the template, the Advanced Configuration group has two important settings:
- Global Method Name: If you want to change the global namespace from
snowplowto something else (due to a conflict, for example), change the value in this field. - Self-hosted Library URL: You need to host the Snowplow JavaScript library yourself. Set this field to the URL where the browser will download the JavaScript library from.
Update permissions
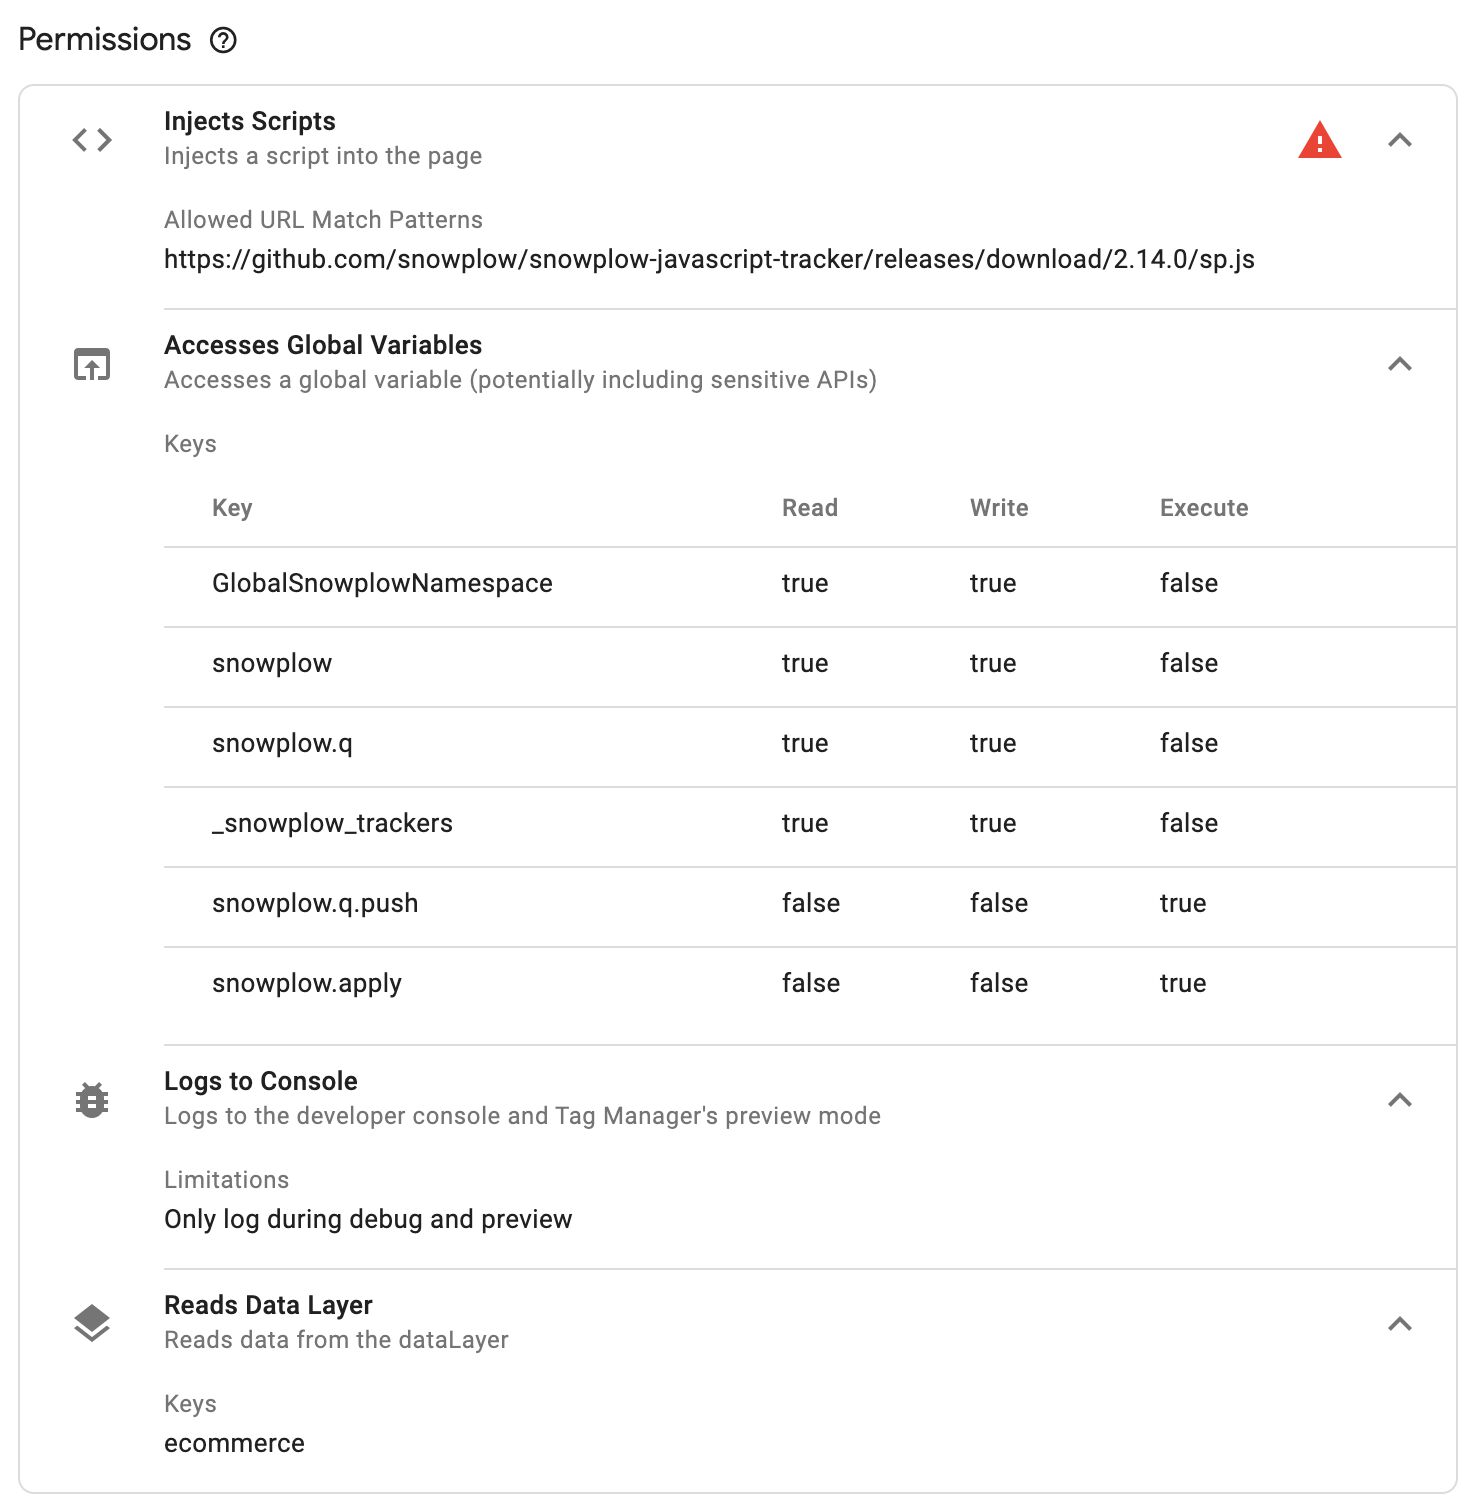
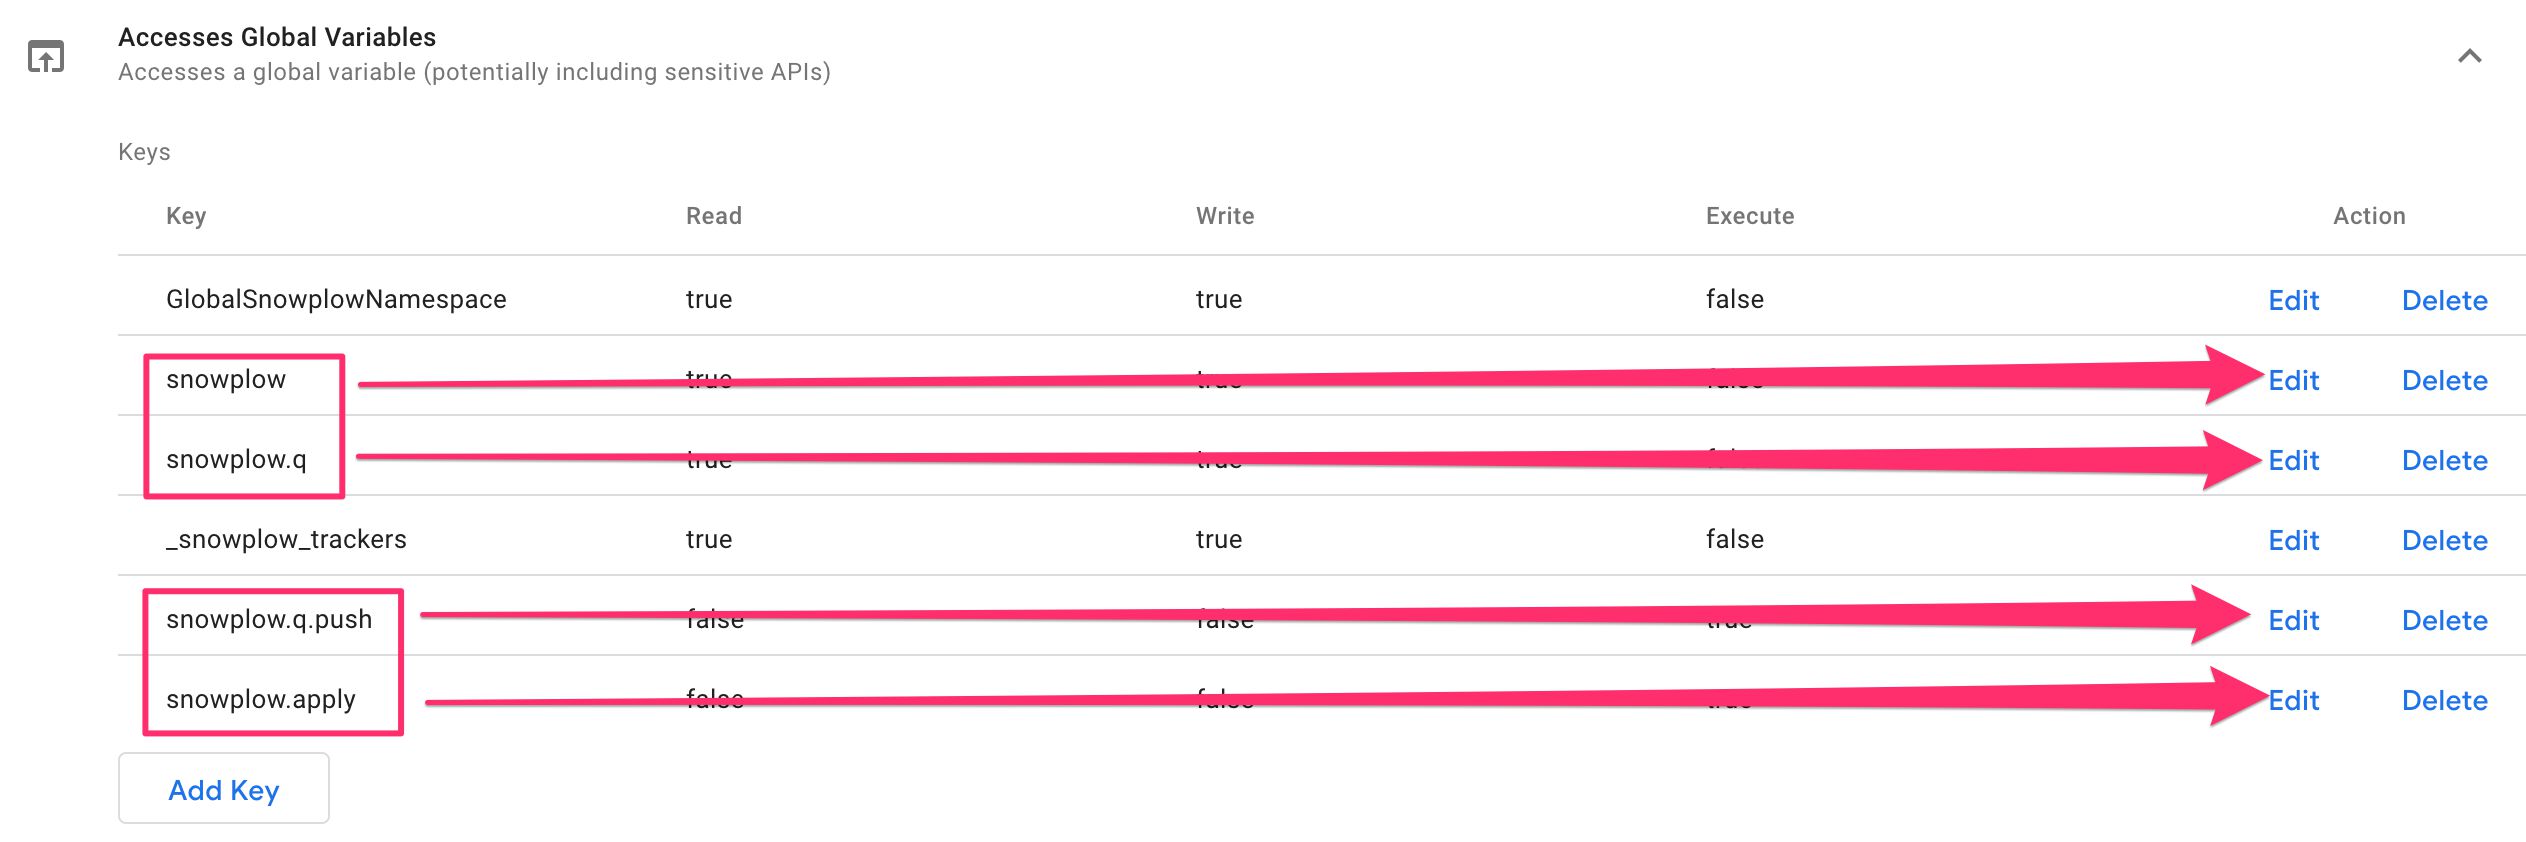
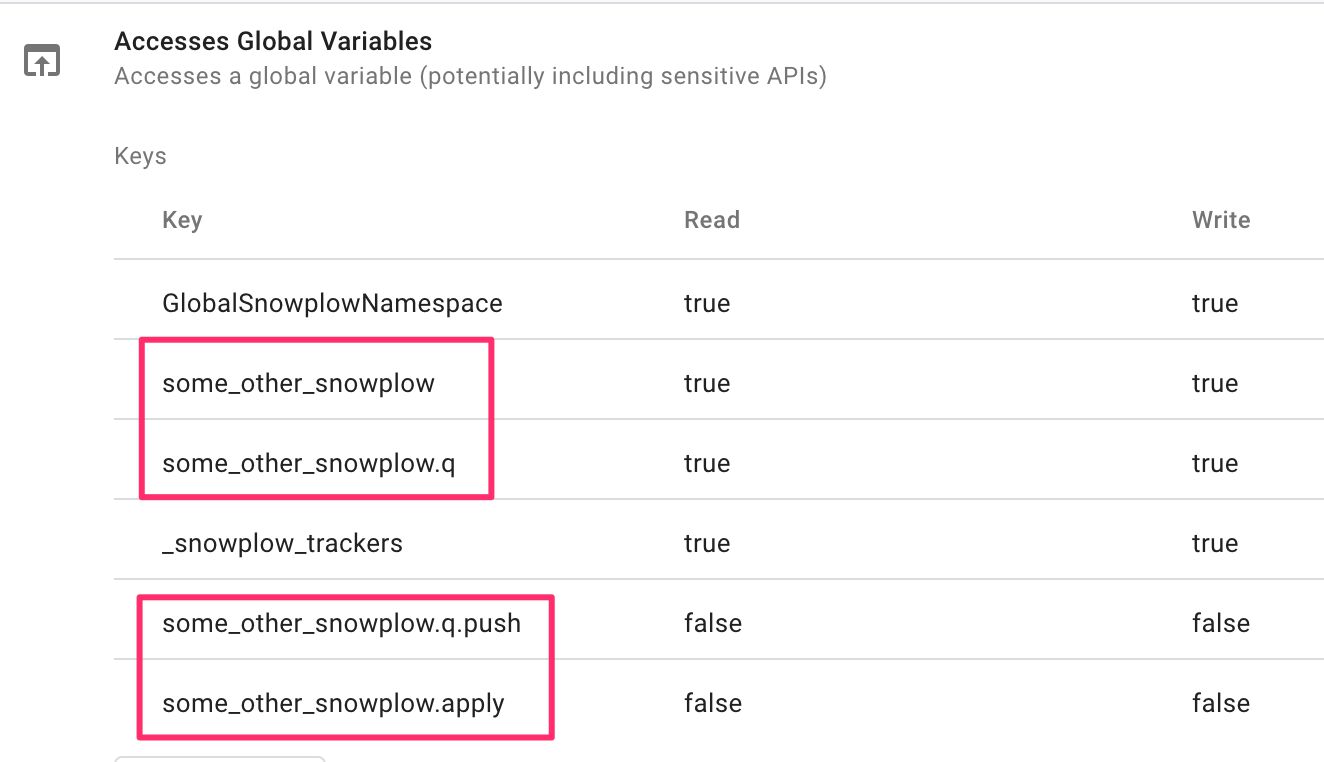
If you change the Global Method Name from snowplow to anything else, you need to make a change to the template. Open the template for editing (from the “Templates” section of the container), and browse to the Permissions tab. Under Accesses Global Variables, edit the four permissions that start with the name snowplow.
Change the text snowplow to whatever your preferred method name is (it must match the name set in the tag once you create it). Remember to leave everything else as it is: permissions and suffixes. This is what the changed list would look like if the method name were changed to some_other_snowplow:
UPDATE 18 May 2020: The template has been updated to have AWS Cloudfront and Google Cloud Storage destinations supported by default (
https://*.cloudfront.net/*andhttps://storage.cloud.google.com/*). If you load the library from either location, you do not need to update permissions forinjectScript!
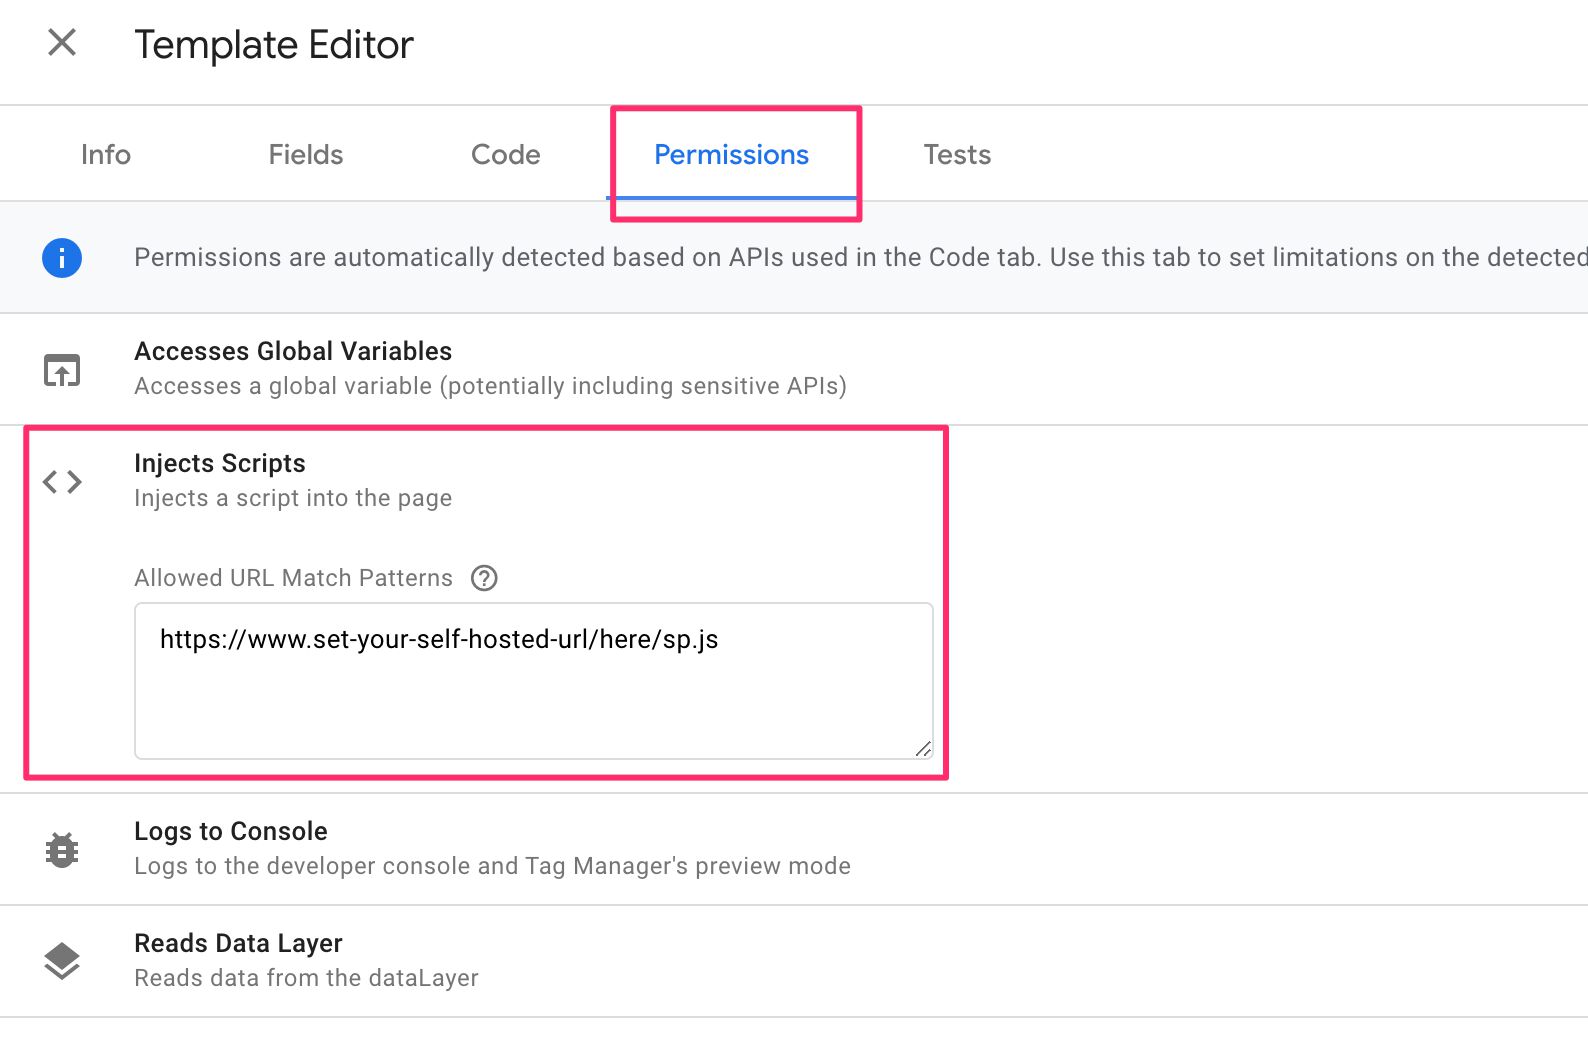
Next, once you have the Snowplow library self-hosted, you need to update the Injects Scripts permission to reflect the new location. Delete the content of the Allowed URL Match Patterns field, and type the full URL to the library there. Again, it must match what you input into the tag itself when creating it.
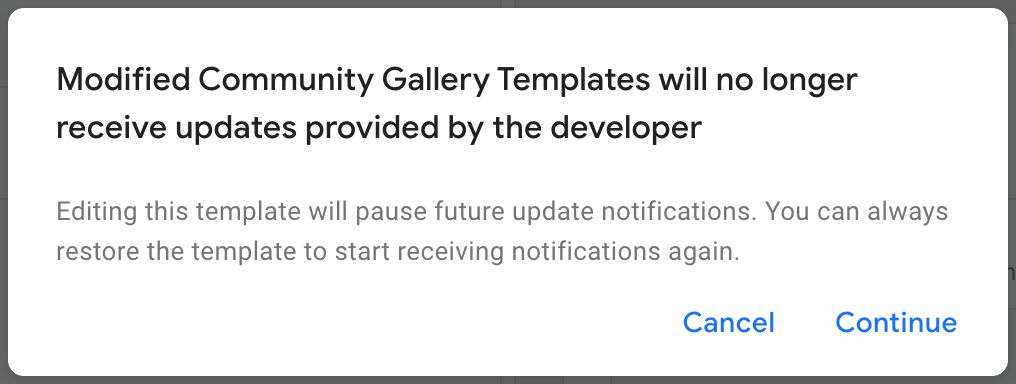
Unfortunately, modifying permissions breaks the gallery link and you will no longer be notified about updates to the template. Being able to modify permissions without having the link break is a feature request I hope will get solved very soon.
Tag Type
Under Tag Type, you can choose what type of command is compiled and sent to the endpoint. The tag types are split here into three groups: commands that utilize a common parameters object, commands that have special conditions, and custom commands.
Tags with a parameter object
Tags that can derive their parameters from a Google Tag Manager variable are:
- Ad Tracking
- Cart Tracking
- Error Tracking
- Consent
- Self-describing Event
- Site Search
- Social Interaction
- Structured Event
- Timing
You can set the Retrieve Parameters From Variable setting to a Google Tag Manager variable. This parameter must return an object. In the object, the key-value pairs should reflect the named parameters in the event documentation. For example, to have the variable populate an Error event, you could use a Custom JavaScript variable like this:
function() {
return {
message: 'Some Error Happened',
filename: 'somefile.js',
lineno: 5,
colno: 236,
error: null
}
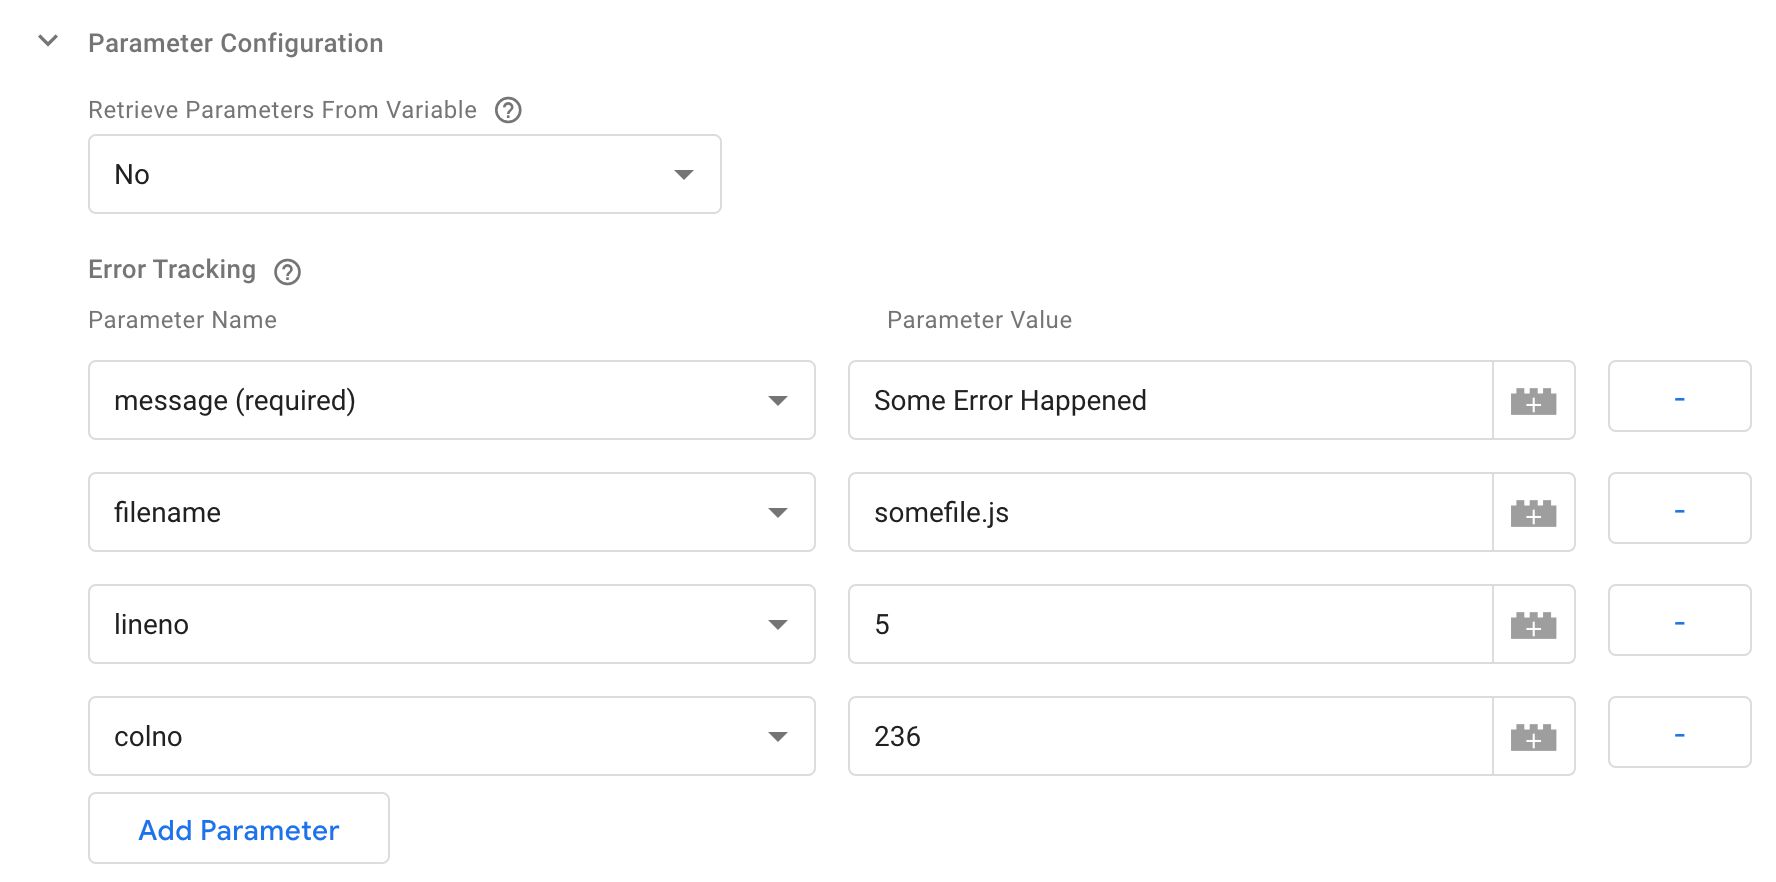
}Alternatively, you can set the drop-down to the value No, and add the parameters manually instead:
Some tag types will add additional selections to this section. Follow the official tracker documentation for more information about what each option does.
Special tags
Some tag types have special conditions and have been separated into their own configurations.
Enhanced Ecommerce
When you select Enhanced Ecommerce, you are left with two options: Use Data Layer or Choose Variable. The way it works is very similar to Enhanced Ecommerce in Google Analytics.
If you choose the first, the template will look into the dataLayer structure for the most recently pushed Enhanced Ecommerce object, and map this object to the request to Snowplow Analytics.
If you selected Choose Variable, you need to provide a GTM variable that returns an object in the correct, expected format.
Form Tracking
Form tracking has just two options, because filters and transformations won’t work with the custom template (due to lack of support for processing HTML elements). The options are to set form and/or field blacklists and whitelists.
Blacklists and whitelists for forms are a list of comma-separated HTML class names. If blacklisted, then any form element with a listed class will not trigger the form event. If whitelisted, then only form elements with a listed classname will be tracked.
For fields, blacklists and whitelists work similarly, except they use the name attribute rather than the class.
Link Click Tracking
The Track Link Click event is similar to regular parameter-based events, as it lets you add parameters and track a link click as a manually encoded hit.
The Enable Automatic Link Click Tracking adds listeners to the page, which will track clicks on links permitting they adhere to the blacklisted/whitelisted class names you can optionally provide.
The Fix Middle-click Tracking adds a fix for some browsers where middle-clicks were not tracked properly.
If you check Track HTML Content Of Clicked Link, then the full text content of the link element will be sent to Snowplow as well.
Page View
You can provide a Custom Page Title if you wish, and you can add a custom context function to the request.
If you enable Page Activity Tracking, the tag will setup a heartbeat tracker, and send page pings to Snowplow at intervals that you can specify.
The Callback Function is something you can set to a JavaScript function. If you set the callback, then instead of sending the page ping to Snowplow, the function gets invoked instead.
Custom Commands
Here is the list of custom commands you can execute, with details about the arguments (if any).
| Command | Description | Arguments |
|---|---|---|
flushBuffer | Sends all the queued events in the buffer. | N/A |
setVisitorCookieTimeout | Change the timeout (default 2 years) of the visitor cookie / localStorage entry. | Timeout in seconds. Set 0 to use a session cookie, and -1 to disable persisting this information. |
setCountPreRendered | To enable tracking for pre-rendered pages, set to true. | Set to true to enable. |
setUserId | Set the user ID to a custom value. | Variable or hard-coded value for the user ID. |
setUserIdFromCookie | Set the user ID with a 1st party cookie value. | Cookie name. |
setUserIdFromLocation | Set the user ID with a URL parameter value. | URL parameter name. |
setUserIdFromReferrer | Set the user ID with a URL parameter value in the document.referrer. | URL parameter name. |
setCustomUrl | Set the current page URL to a custom value. | URL string. |
setReferrerUrl | Set the referring page URL to a custom value. | URL string. |
preservePageViewId | Restore the (buggy) way the webPage context used to work on single-page apps. | N/A |
updatePageActivity | Trigger a page ping manually. | N/A |
refreshLinkClickTracking | Parse the page for new links to track with automatic link click tracking. | N/A |
setOptOutCookie | Give the name of a cookie. If this cookie exists, the user will not be tracked. | Cookie name. |
enableGdprContext | Set a GDPR context object for all events that fire after this command is run. | GTM variable that returns a Context object. |
addGlobalContexts | Set to an array of global contexts to add to events. | GTM variable that returns the global contexts array. |
removeGlobalContexts | Set to an array of global contexts to remove. | GTM variable that returns the global contexts array. |
clearGlobalContexts | Remove all global contexts. | N/A |
Additional Tracking Parameters
You can choose a Google Tag Manager variable from the drop-down titled Add Custom Contexts. This lets you add custom contexts to the current hit. The variable must return an array of valid context objects.
You can also choose to override the device timestamp with the Set Custom Timestamp field. The format must be UNIX time in milliseconds.
Tracker Configuration Parameters
In this group, you can establish the tracker configuration which is applied when the tracker is first created.
NOTE! If you are adding configurations to a tracker that has already been created, the configuration fields will not do anything.
You have three ways of applying the configuration:
- Using only a Snowplow Analytics Settings variable.
- Using only manually added parameters.
- Using a combination of the two.
If you choose to use a Snowplow Analytics Settings variable, you need to pick the variable from the drop-down menu. If you choose a variable that is not a “Snowplow Analytics Settings” variable, the tag will fail, so be careful.
You can also check the Enable Overriding Settings For This Tag option. This expands a parameter field where you can add key-value pairs of individual tracker configuration fields. See the documentation to know what fields are available.
If you choose to use both a Snowplow Analytics Settings variable and the manually entered parameters, then any conflict between the two will be resolved in favor of the manually entered parameters. For example, here we use a Snowplow Analytics Settings variable, but we’ve decided to override some fields in the configuration.
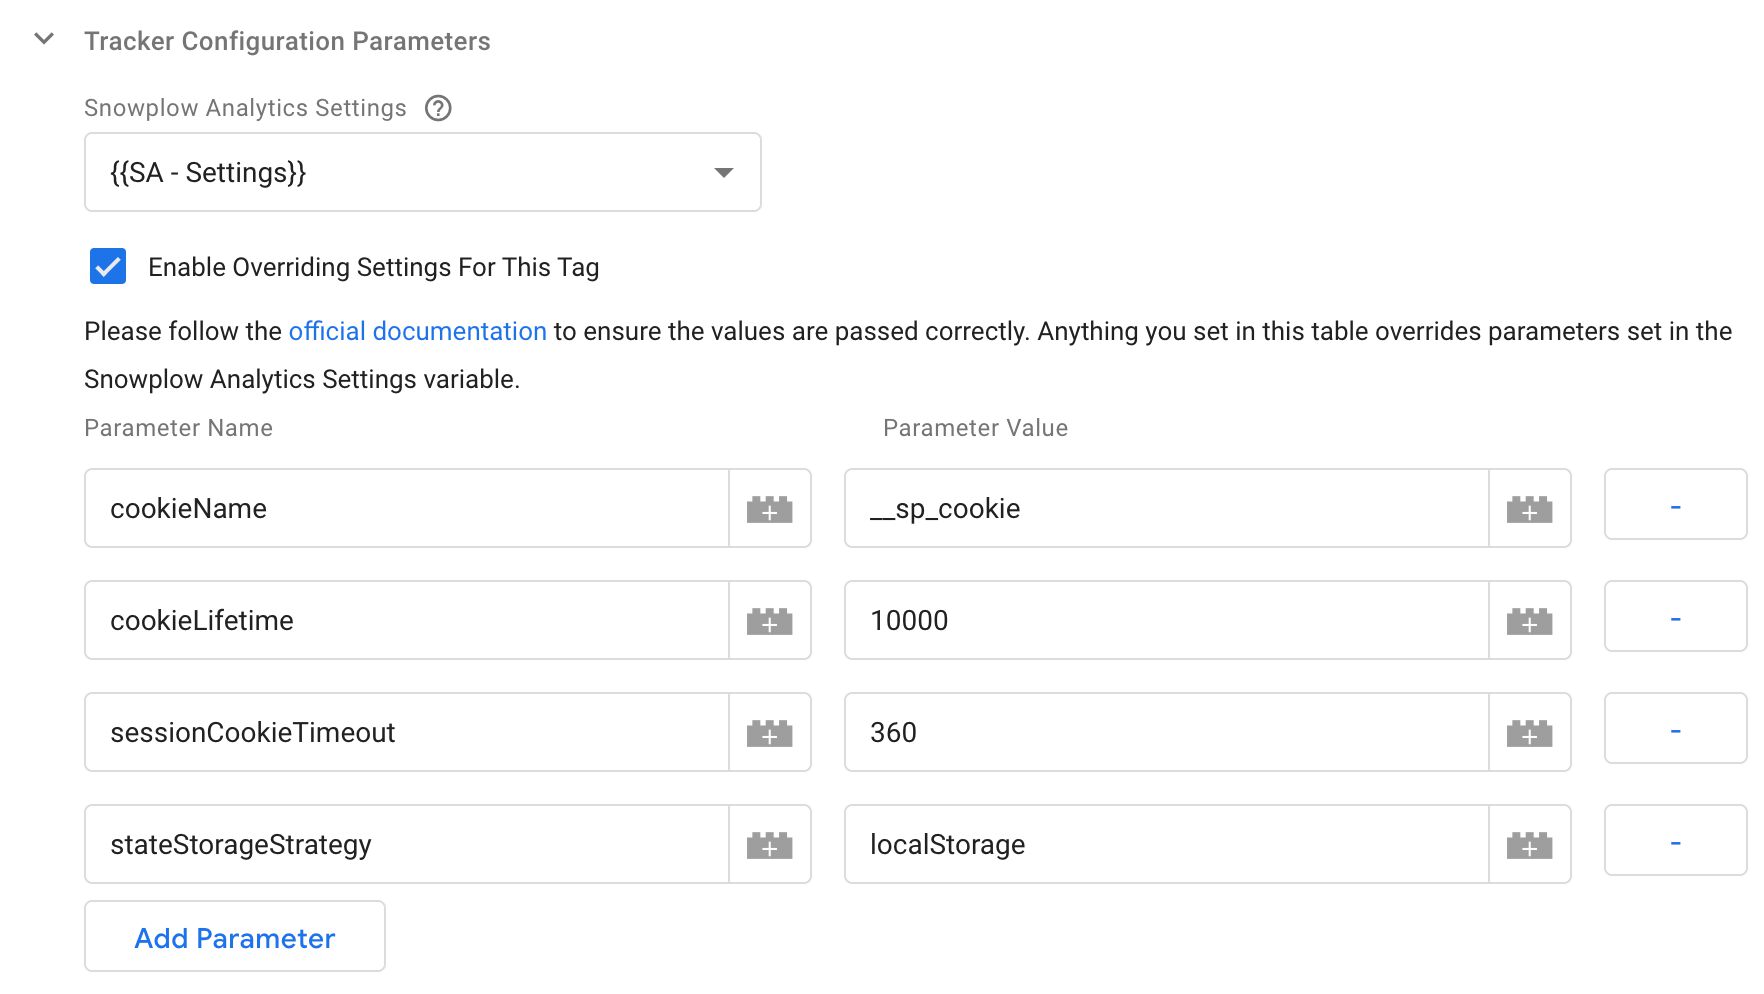
Advanced Configuration
Release notes
| Date | Changeset |
|---|---|
| 26 May 2020 | Fixed a number of issues with the Enhanced Ecommerce integration. |
| 20 May 2020 | Updated injectScript permissions to default to GCS and AWS Cloudfront. |
| 14 May 2020 | Initial release. |