Apart from the unlimited number of workspaces, the 360 Suite version of Google Tag Manager didn’t have any differentiation from the free version feature-wise, until today.
GTM just introduced an approval workflow, which allows you to exercise some additional control over what changes are pushed to the live site, or created into versions.
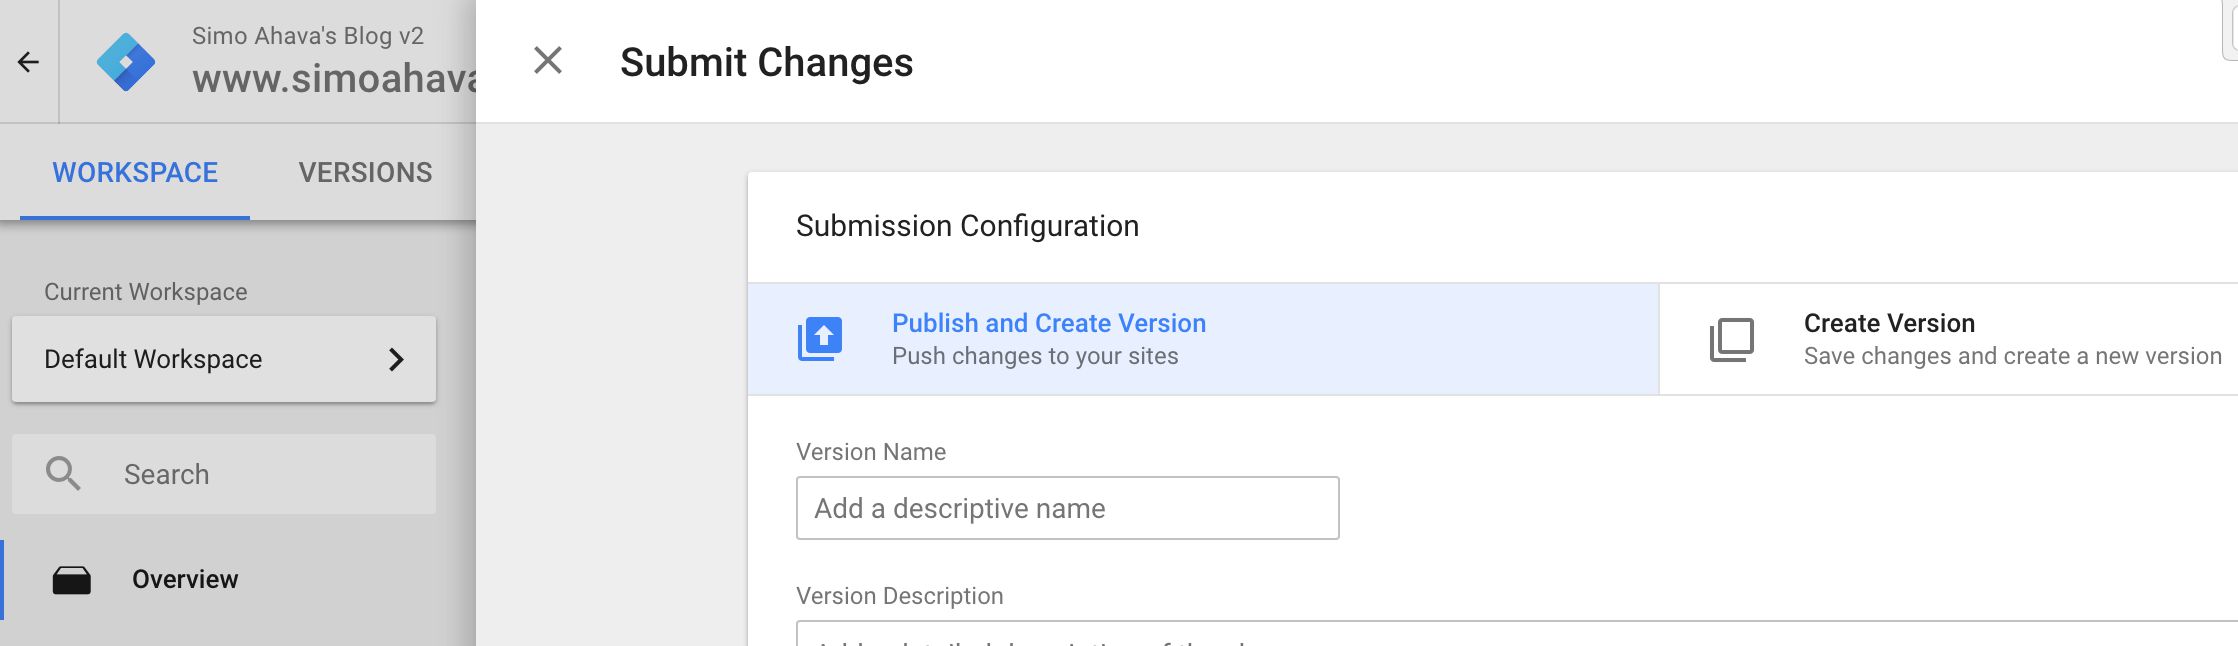
Note that this update also introduced a small change in the regular GTM UI - mainly, the menu that used to have “Create Version”, “Publish” and “Preview” is now changed into a dual button layout with just Preview and Submit as the options.
When you click Submit, a new overlay opens with tabs for creating a version, publishing the workspace, and, if you are using GTM 360, for requesting approval of your changes.
In this article, I want to take a quick look at the new approval workflow and how it works.
The Simmer Newsletter
Follow this link to subscribe to the Simmer Newsletter! Stay up-to-date with the latest content from Simo Ahava and the Simmer online course platform.
Changes to user permissions
First of all, user permissions are more useful now. The permission levels per container haven’t changed in name, but their functionality has changed somewhat if you are using GTM 360.
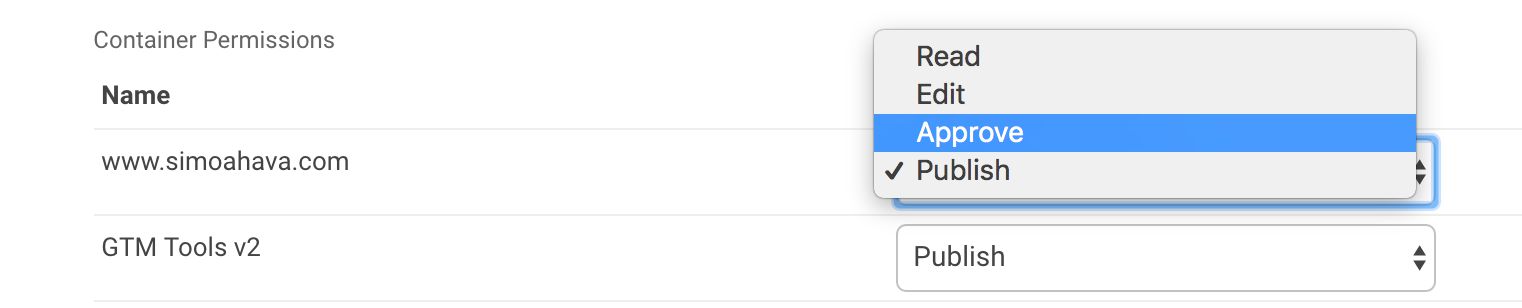
View still lets you only view the container and preview older versions. Nothing’s changed here.
Edit lets you make changes to a workspace, but instead of creating a version and publishing a version, you can only submit a request for approval.
Approve lets you create versions and approve requests, but you still can’t publish a version.
Publish gives you full access in the container.
If you are using GTM 360, the new way to sort these permissions would be to allow Edit access for users who should be able to contribute to the container, but who must always submit their changes into the approval queue before they can be created into a version (or published).
You can give Approve access to users who can process this queue, comment on and approve the requests, but who still don’t have the power to actually update the live container on the site by publishing a version.
This new duality is interesting, as it can definitely be used for good and bad. Restricting access can create friction in an organization, which is why, I guess, the approval workflow is an optional feature that you can choose to ignore if you want. Personally I would have liked to see a flag in the settings that sets the approval process as mandatory or optional. By mandatory I mean that even users with full access would still need one other member to approve their changes.
How the process works
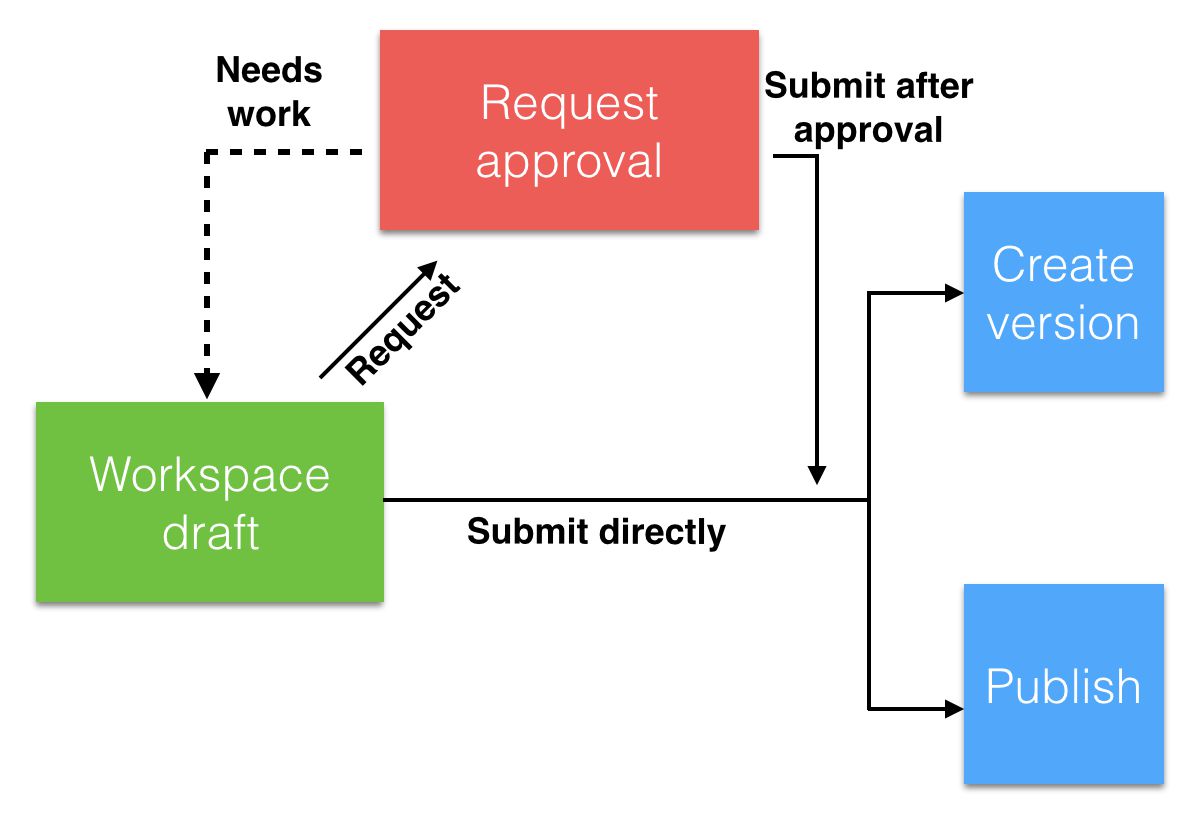
First, take a look at my patented, crappy-as-hell, Powerpoint illustration below:
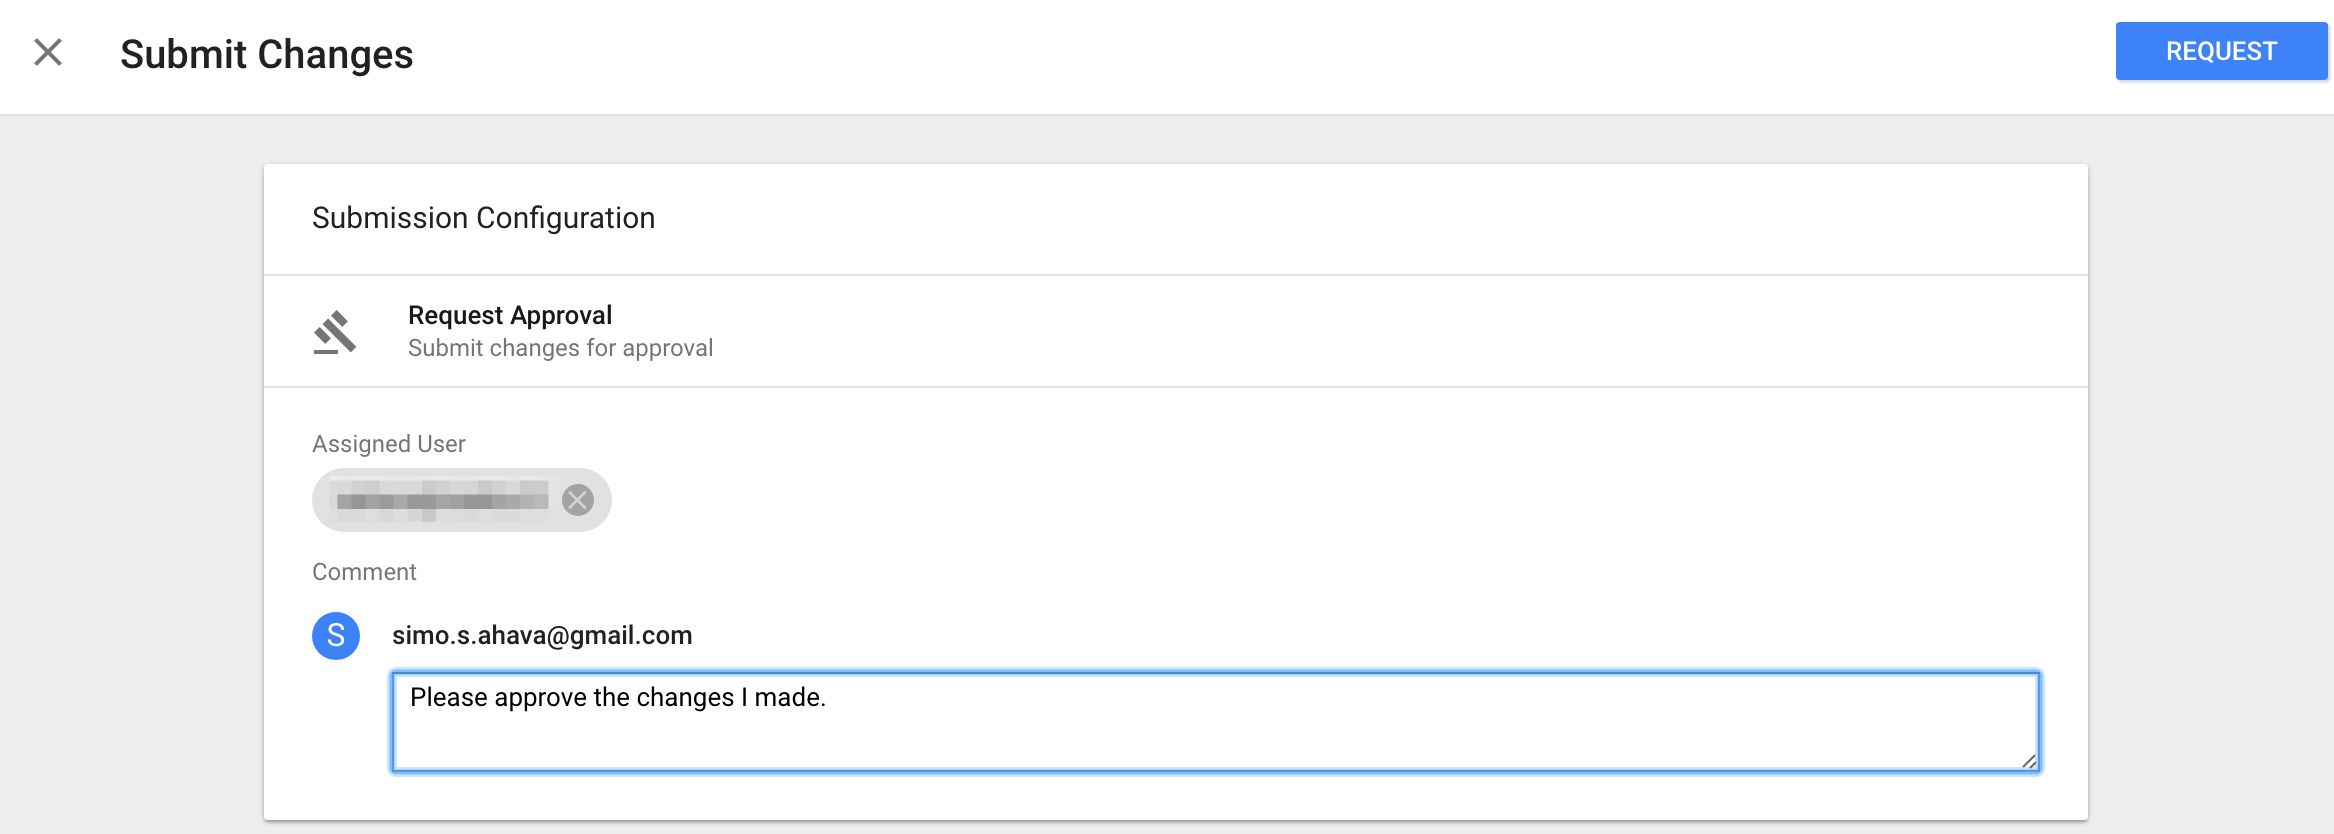
The workflow starts after you’ve made changes to the workspace, and you are ready to submit the workspace draft for approval. You can start the approval process by clicking the Submit button and opening the Request Approval tab.
In this tab, you can choose a user from whom you are requesting approval by clicking the Choose Approver button. Note that this is optional. If you do not choose an approver, the request can be processed by any user with at least Approve user permissions.
Next, you can add a Comment to the request. This is highly recommended, as typing a comment actually starts a dialogue between you and any approvers. It’s a good way to keep tabs on why a request was rejected, for example, and the comment thread can also include notes on how to improve the quality of the changes.
As before when creating or publishing a version, you can see all changes to the workspace in the bottom of the approval request.
So, what happens when you click the Request button?
Workspace submitted for approval
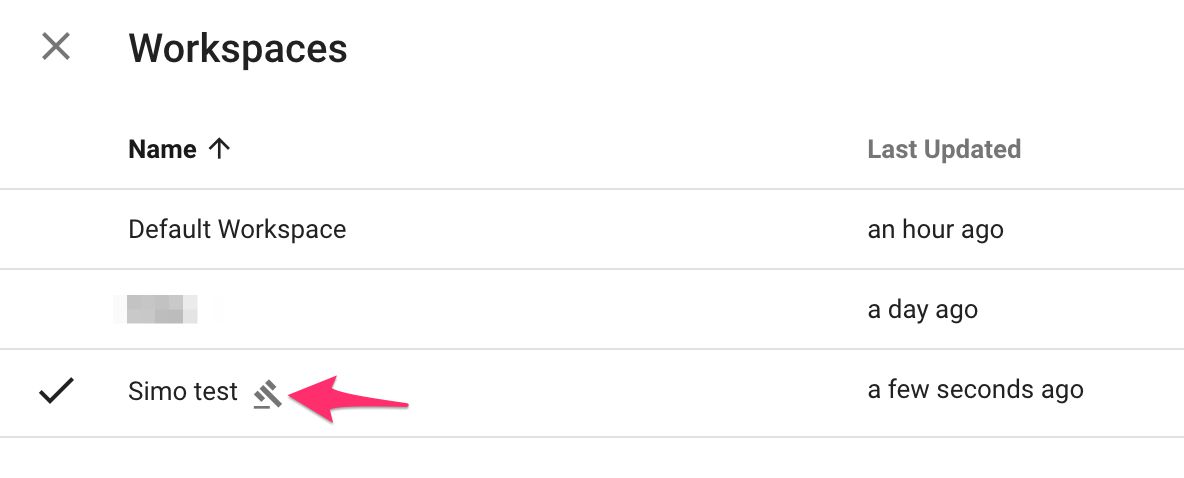
First of all, the workspaces selector will show a gavel symbol next to the workspace name, indicating that there is a pending approval request for this workspace.
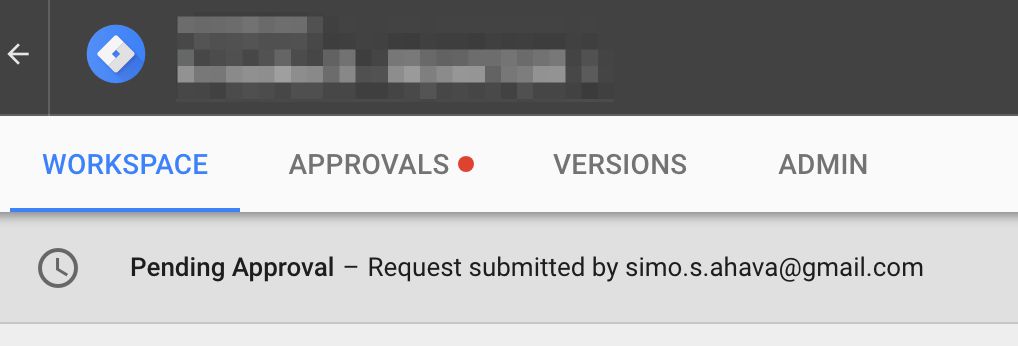
Next, all users will see a blue or red notification symbol next to the Approvals menu item, which tells them that a new approval request has been submitted. The symbol is red if you are the named approver who received the request, and blue otherwise.
There will also be a new notification just below the main menu, indicating that there is a pending approval, and the name of the user who requested the approval.
All these UI signals are used to make sure the workflow doesn’t end up being an obstruction in your regular GTM use.
Note that an approval workflow doesn’t prevent changes to the workspace. The approval workflow isn’t supposed to be a gatekeeper - rather, it’s a way for you to communicate changes you have committed to the workspace to other users of GTM.
Thus, you can continue making changes to the workspace, and the approval request will simply be updated with the changes you make.
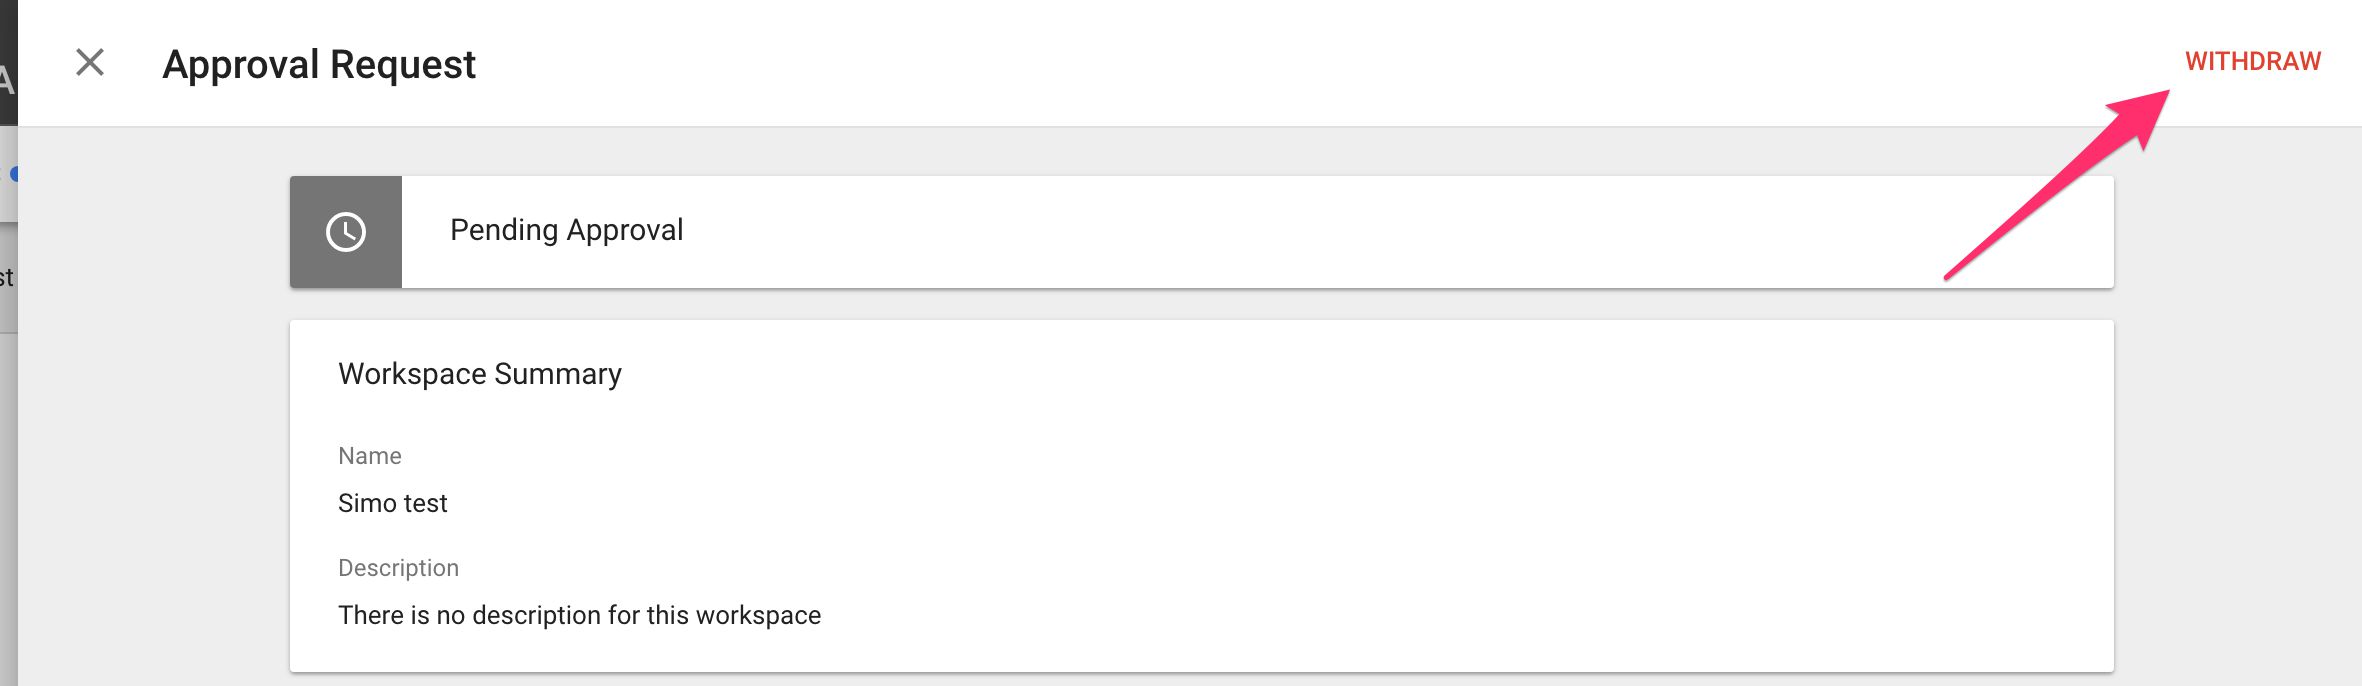
If you are the user who submitted the request, you can always choose to Withdraw the request, i.e. remove it from the approval workflow. This won’t delete your workspace changes, just the approval request.
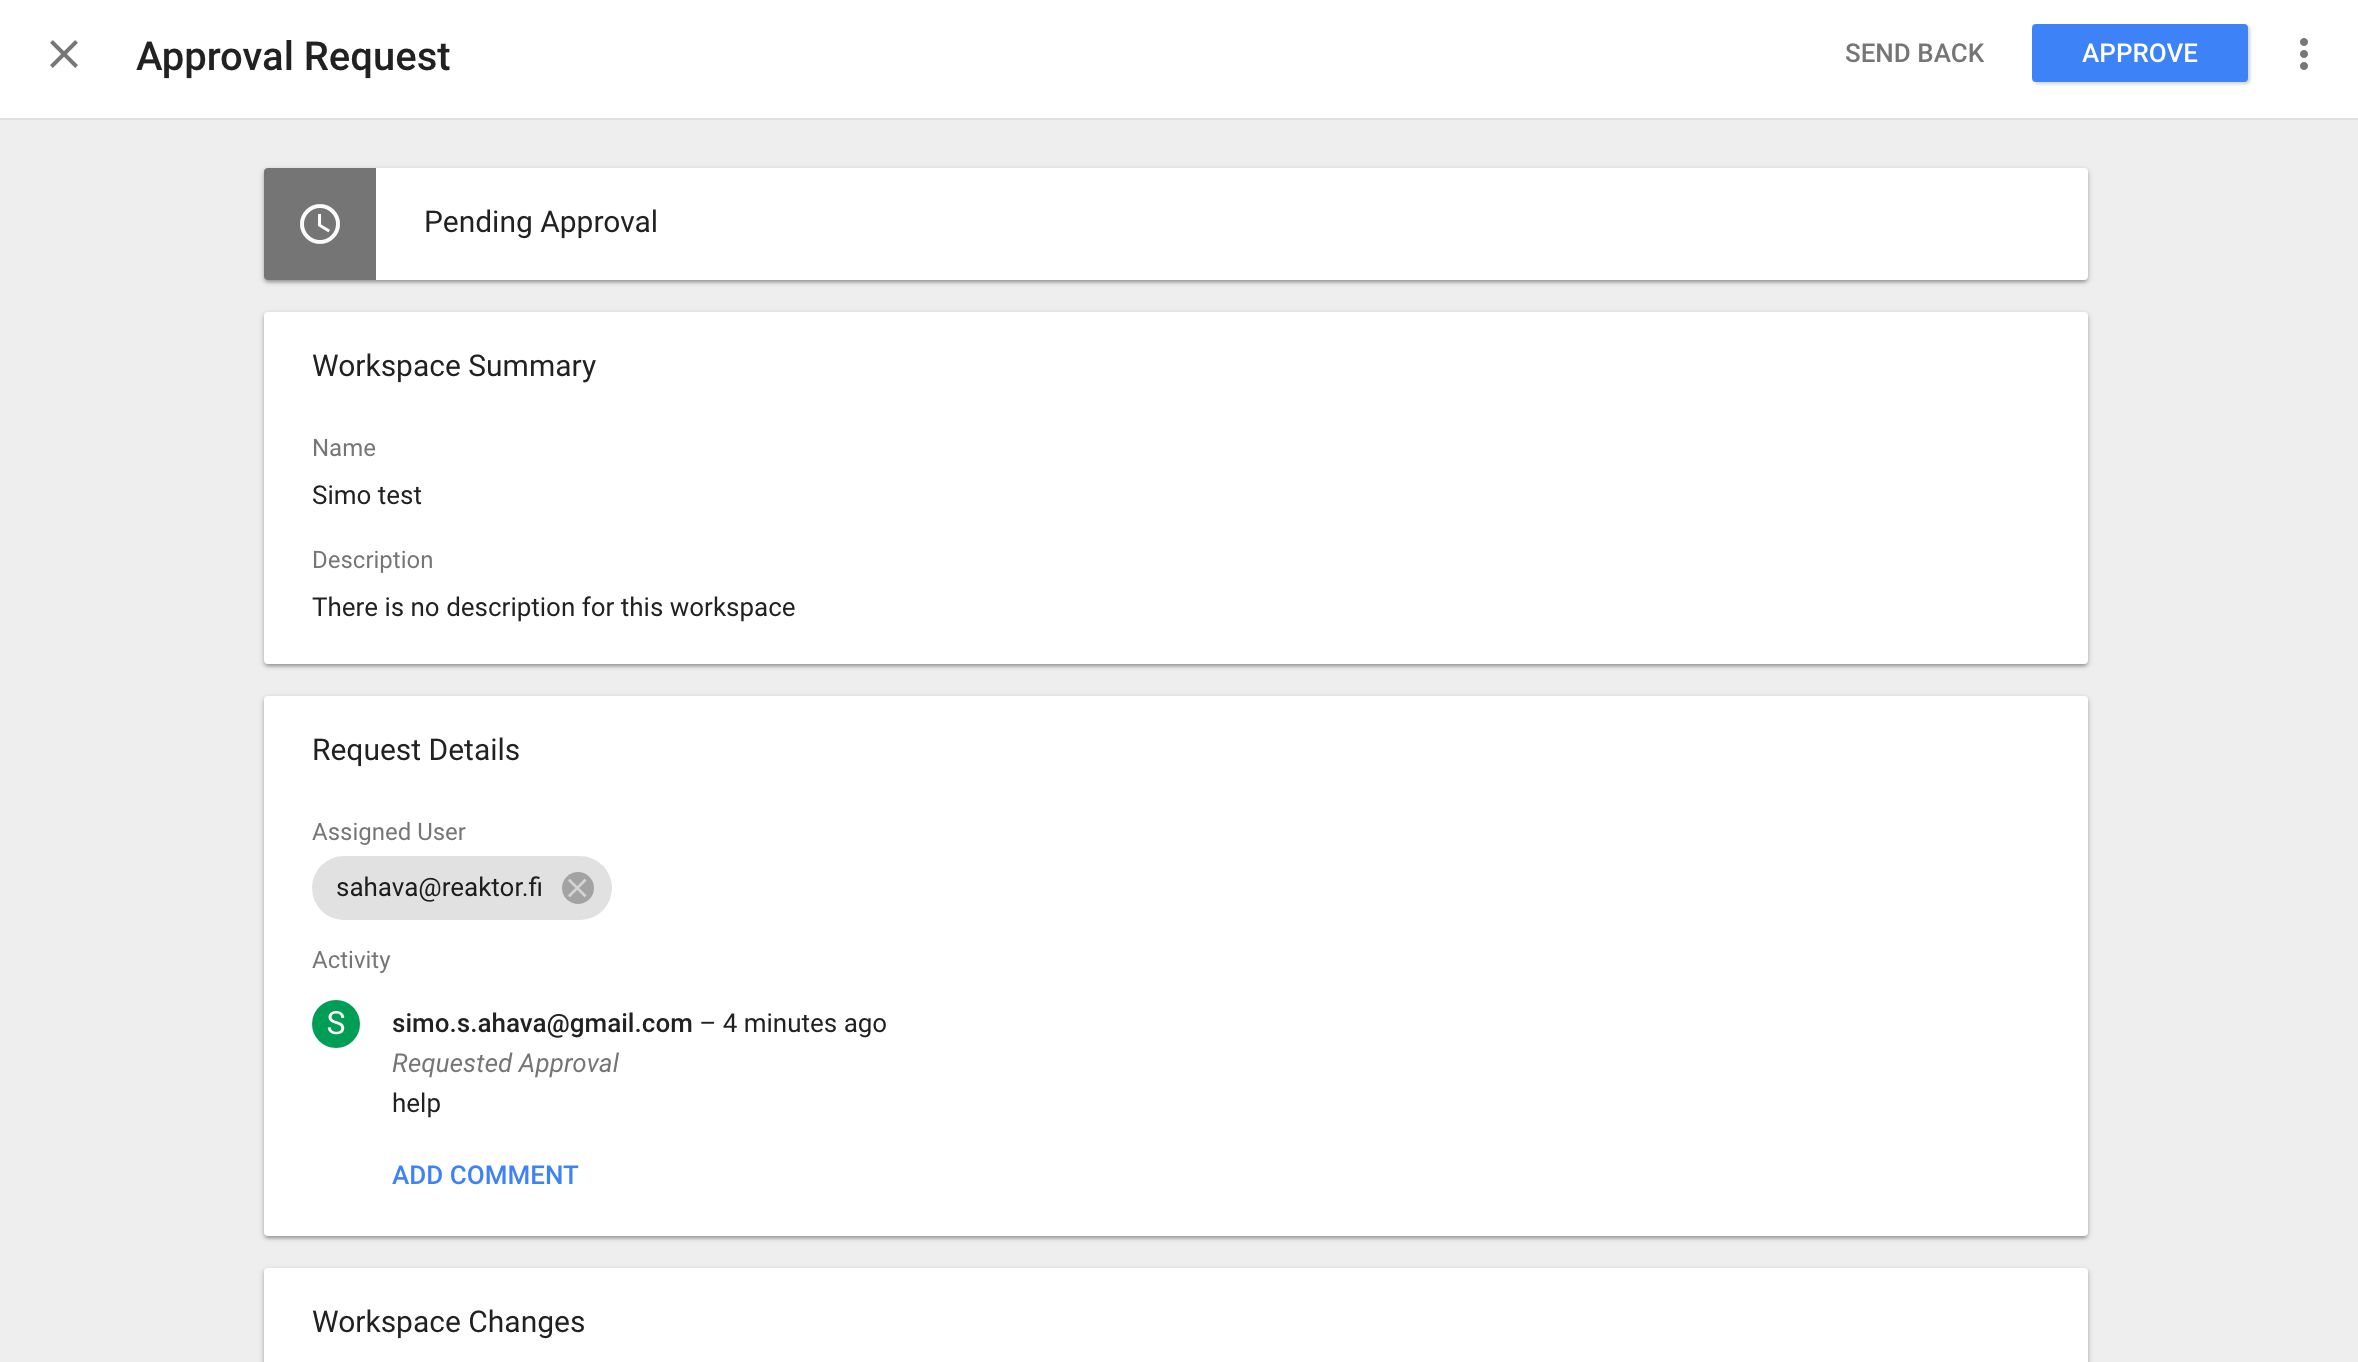
If you are someone with at least Approve rights, this is what you’ll see when you open the approval for processing:
Send Back request
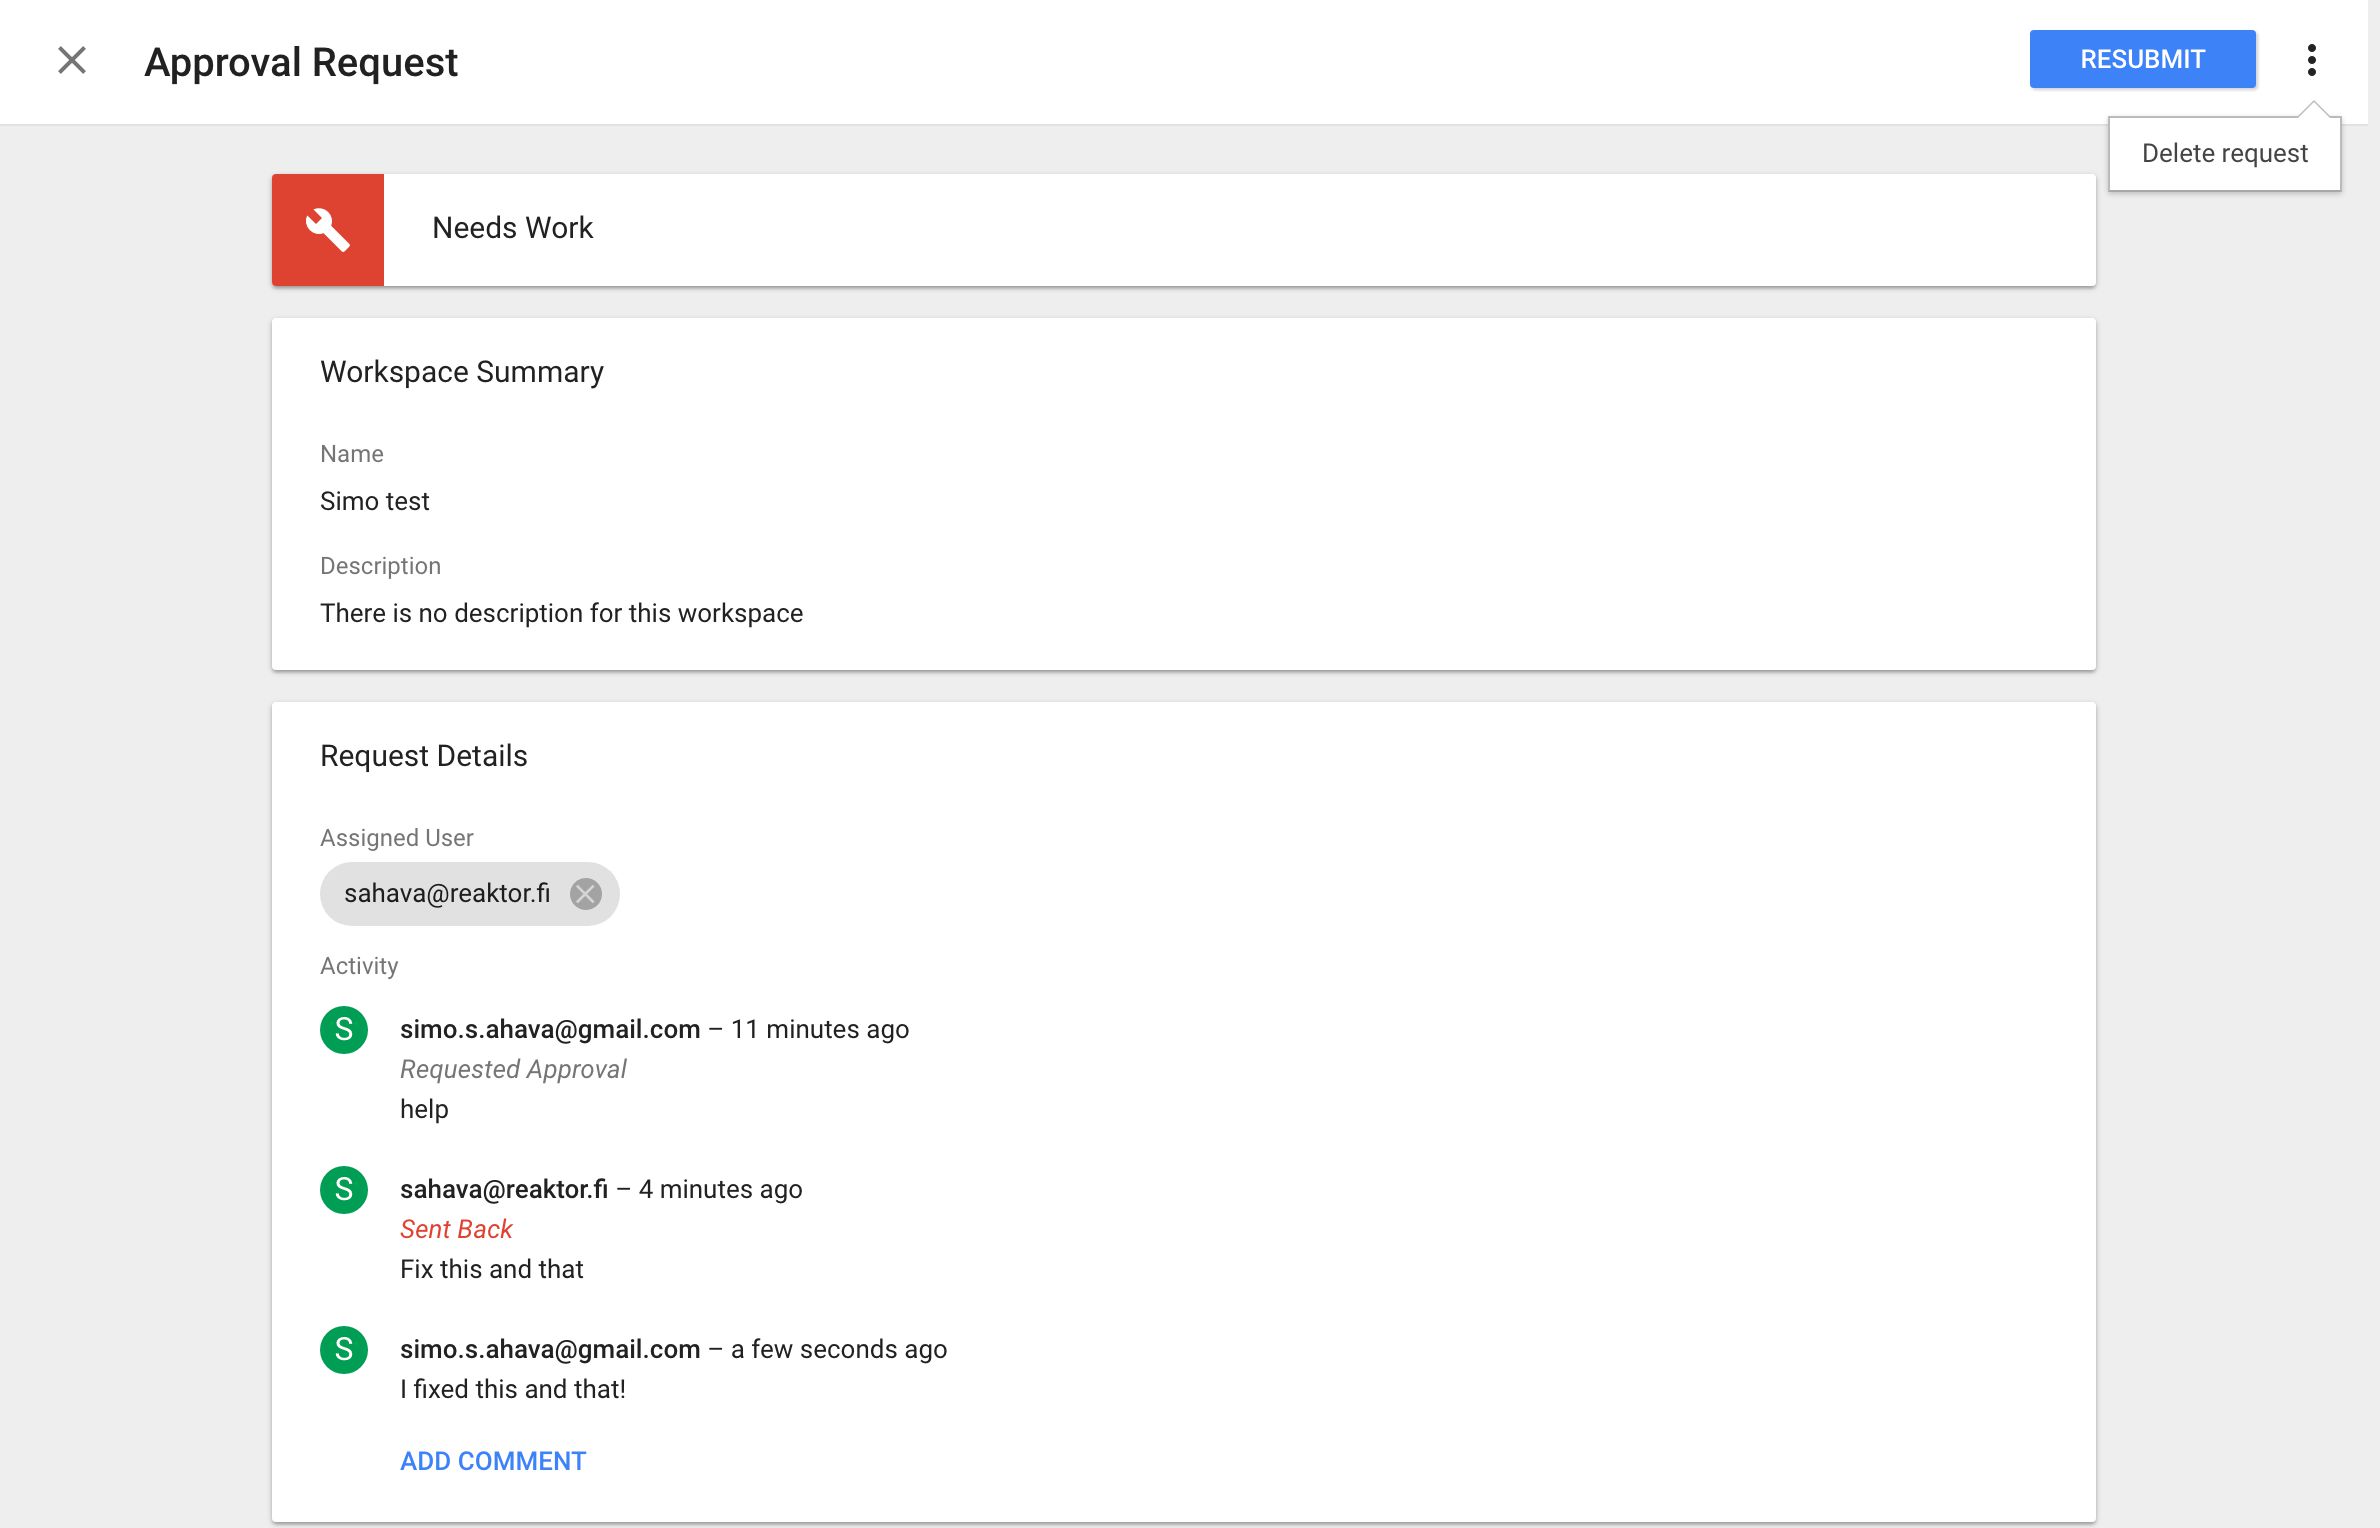
When the approver clicks Send Back, hopefully after having added some comments to the request, the approval request is returned to the user who made the request, and its state will be set to Needs work.
At this point, you should open the approval request and see what comments were left by the person who sent it back (hopefully they left a comment!).
Once you’re done with your changes, you can Resubmit the request (after adding a comment yourself), or you can simply delete the request via the dot menu.
By clicking Resubmit, you simply submit the request again to the user you’re requesting approval from.
Approve request
If you have at least Approve user permissions, you can choose to approve the request (even if you’re not the user approval was requested from).
When you click Approve, you’ll see the following dialog:
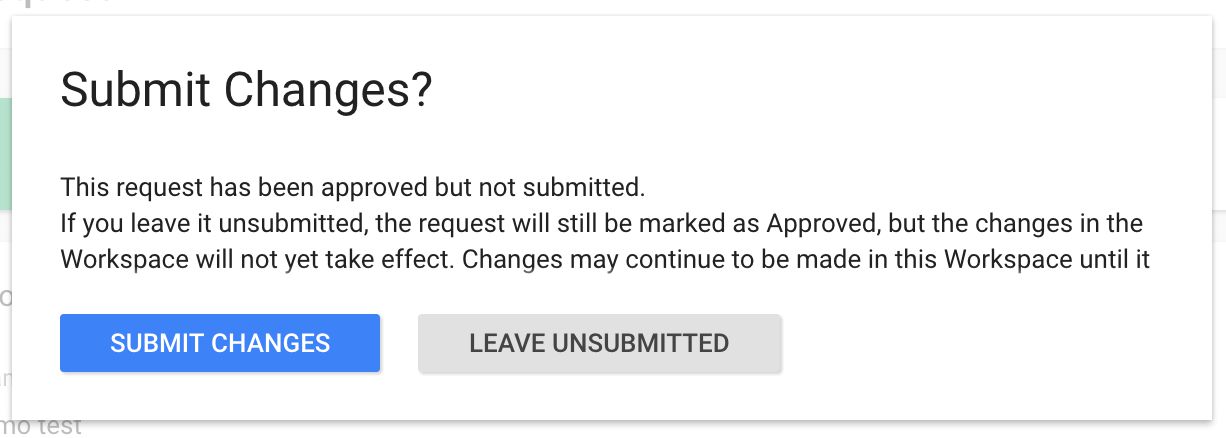
At this point you can choose to Submit the changes, meaning the overlay with Create a version and Publish a version flies out, and you can commit the changes to the latest and/or the live container version.
If you choose to Leave Unsubmitted, the request will be approved, but the workspace will not be created into a version.
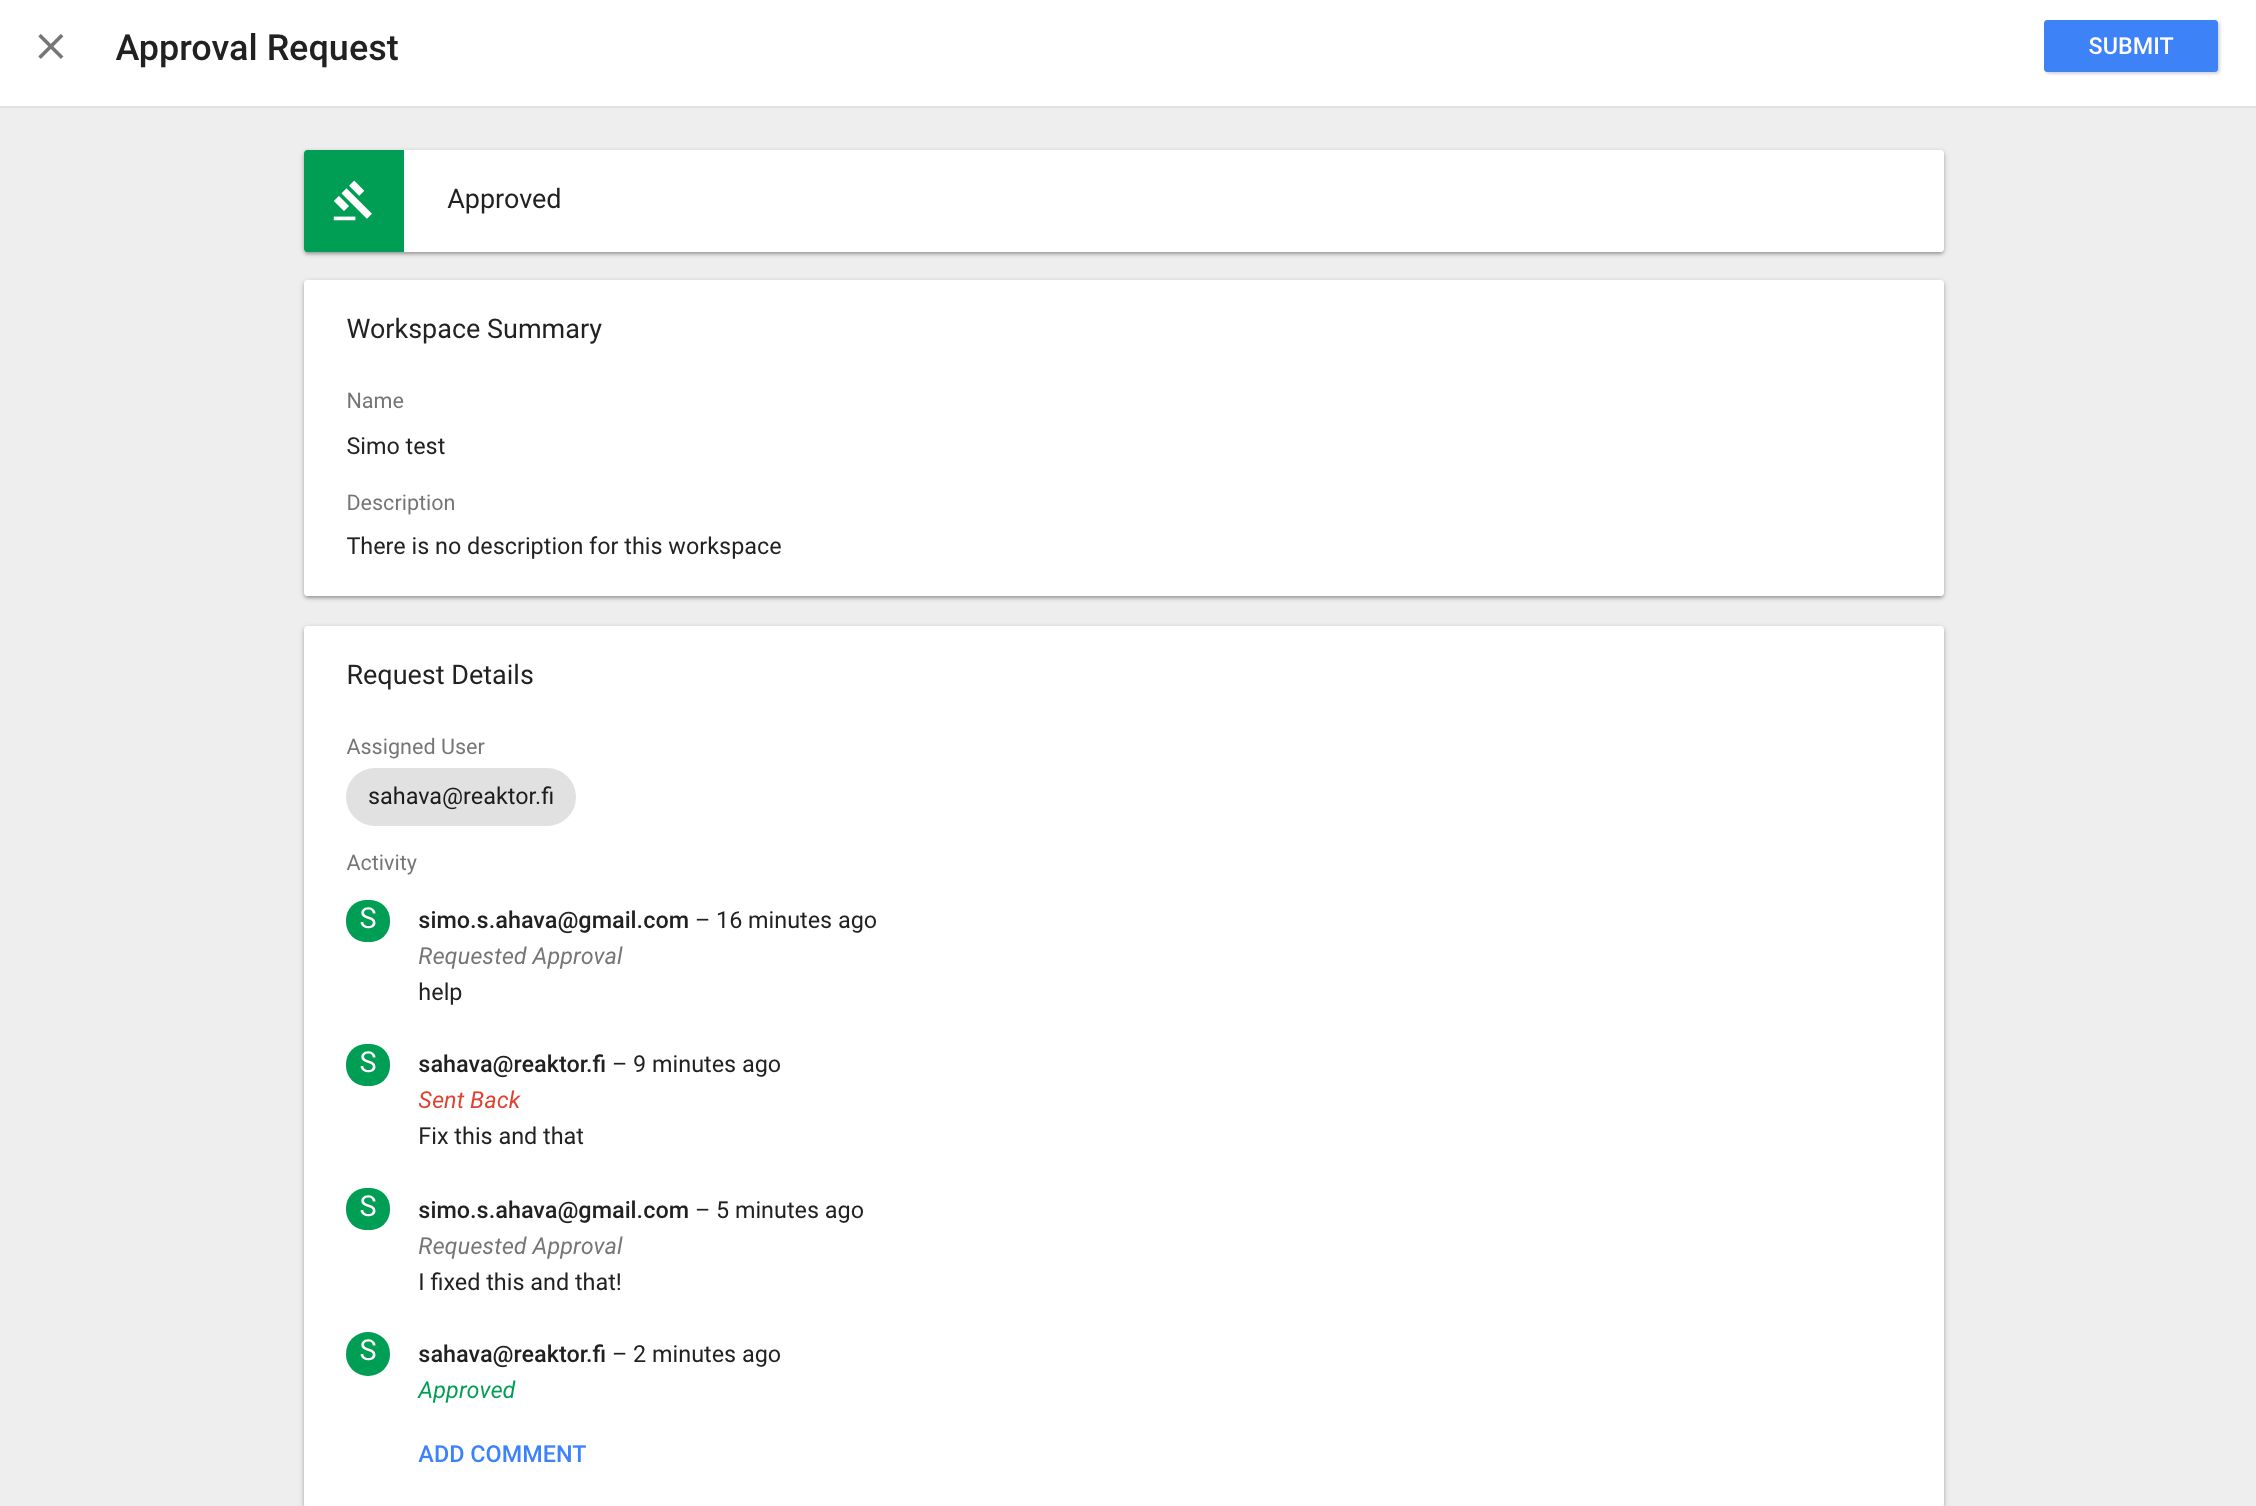
At this point, the workspace can still be worked on, but the changes have been approved, meaning the next time a user clicks Submit they can only create a version or publish the workspace. This is an odd state of limbo, and I would personally recommend to have version creation or publish as the final step of all approval workflows.
This is the extent of the approval workflow, for now. As said, the UI doesn’t enforce the workflow - you can continue using GTM as you have before. However, if you want added transparency, and if you want to leverage the user permission levels more efficiently, I recommend at least taking a look at the workflow.
Summary
In many ways, this change is in line with the direction Google Tag Manager has been moving towards ever since Environments was released a long while ago. It’s clear that GTM containers have many uses and users, and often there’s a lot of friction in how these moving parts mesh together. With things like Environments, Workspaces, and now the Approval workflow, you have more control over what takes place, by whom, and in what order.
It’s still just a feature. You still need to have an understanding of how it works as well as a need to use the Approval feature. I think it’s very useful in multi-user projects, especially when the container is operated on by users who might not have a clear idea of how the container works in the current organization.
Naturally, I would have enjoyed this more had it been a feature in the free version of Google Tag Manager, and hopefully at some point it will trickle to free GTM as well.