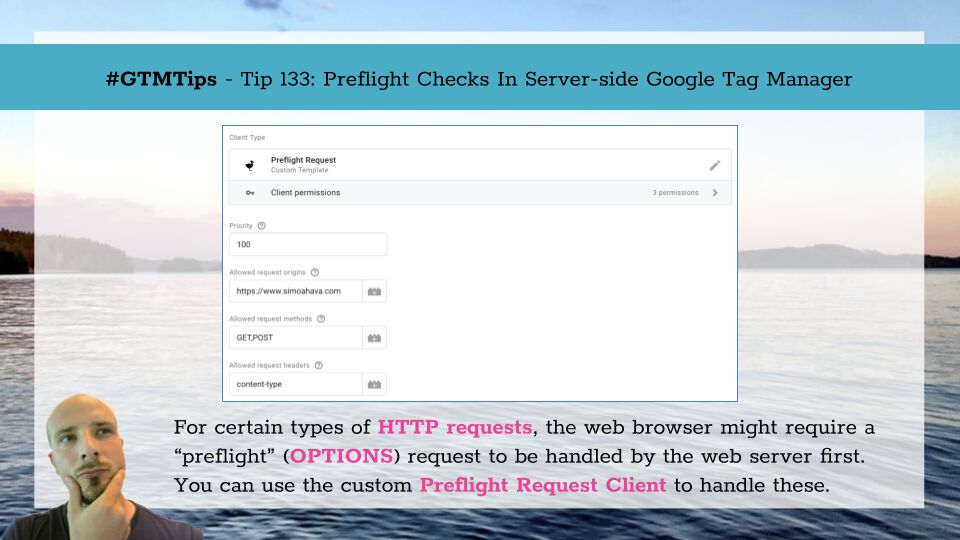
With certain types of HTTP requests, the web browser might first dispatch a request with the OPTIONS method, also known as a preflight request.
The purpose of the preflight request is to “check” with the web server that it’s equipped to handle the type of cross-origin request the browser wants to dispatch.
If the server doesn’t handle this preflight request, or if it returns a response that doesn’t agree with what the web browser wants to actually dispatch, the check fails and the browser refuses to send the actual request.
In this article, I’ll show you how you can handle these OPTIONS request in your server-side Google Tag Manager container.
The Simmer Newsletter
Follow this link to subscribe to the Simmer Newsletter! Stay up-to-date with the latest content from Simo Ahava and the Simmer online course platform.
Tip 133: Handle preflight requests in server-side Google Tag Manager
First, some context.
If any of the following criteria are met with a browser-initiated HTTP request, the browser sends the preflight check automatically (source):
- The request is sent with a method other than
GET,POST, orHEAD. - It uses the Content-Type header with values other than
application/x-www-form-urlencoded,multipart/form-data, ortext/plain. - It sets additional request headers that are not
Accept,Accept-Language, orContent-Language. - The
XMLHttpRequestcontains upload events.
As you can see, it’s pretty easy to trigger a preflight check. A regular POST request with an application/json Content-Type will do it, for example.
Install a custom Client template
To handle preflight requests in server-side Google Tag Manager, you’ll need a custom Client template deployed in the live container version.
You can’t preview preflight requests, because they don’t carry cookies (or other HTTP headers) that GTM uses to enable Preview mode. So once you’ve configured the Preflight Request Client (see below), you must publish the container for the preflight handling to work.
Download the Client template.tpl here
In a Google Tag Manager Server container, head on to the Templates section of the container, and click to create a new Client template.
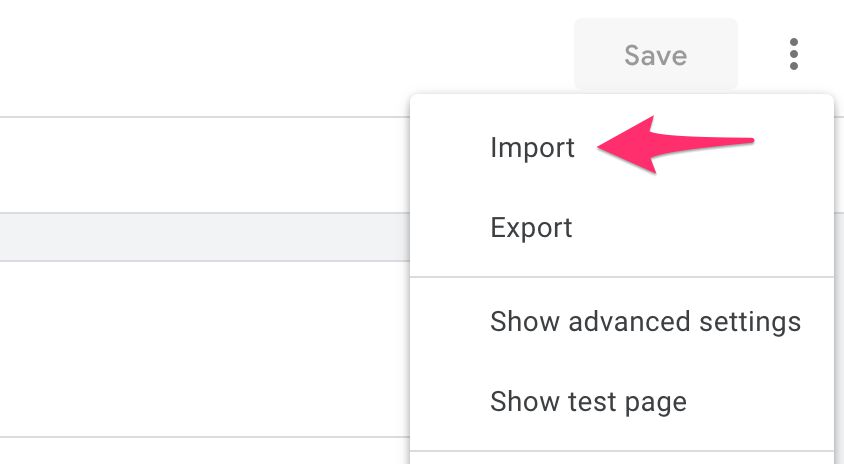
In the template editor, click the overflow menu open in the top-right corner of the editor, and choose Import.
Locate the template.tpl file you just downloaded, import it into the editor, and then save the template.
Next, go into Clients in the GTM container UI, and click to create a new Client.
Choose the Preflight Request Client template.
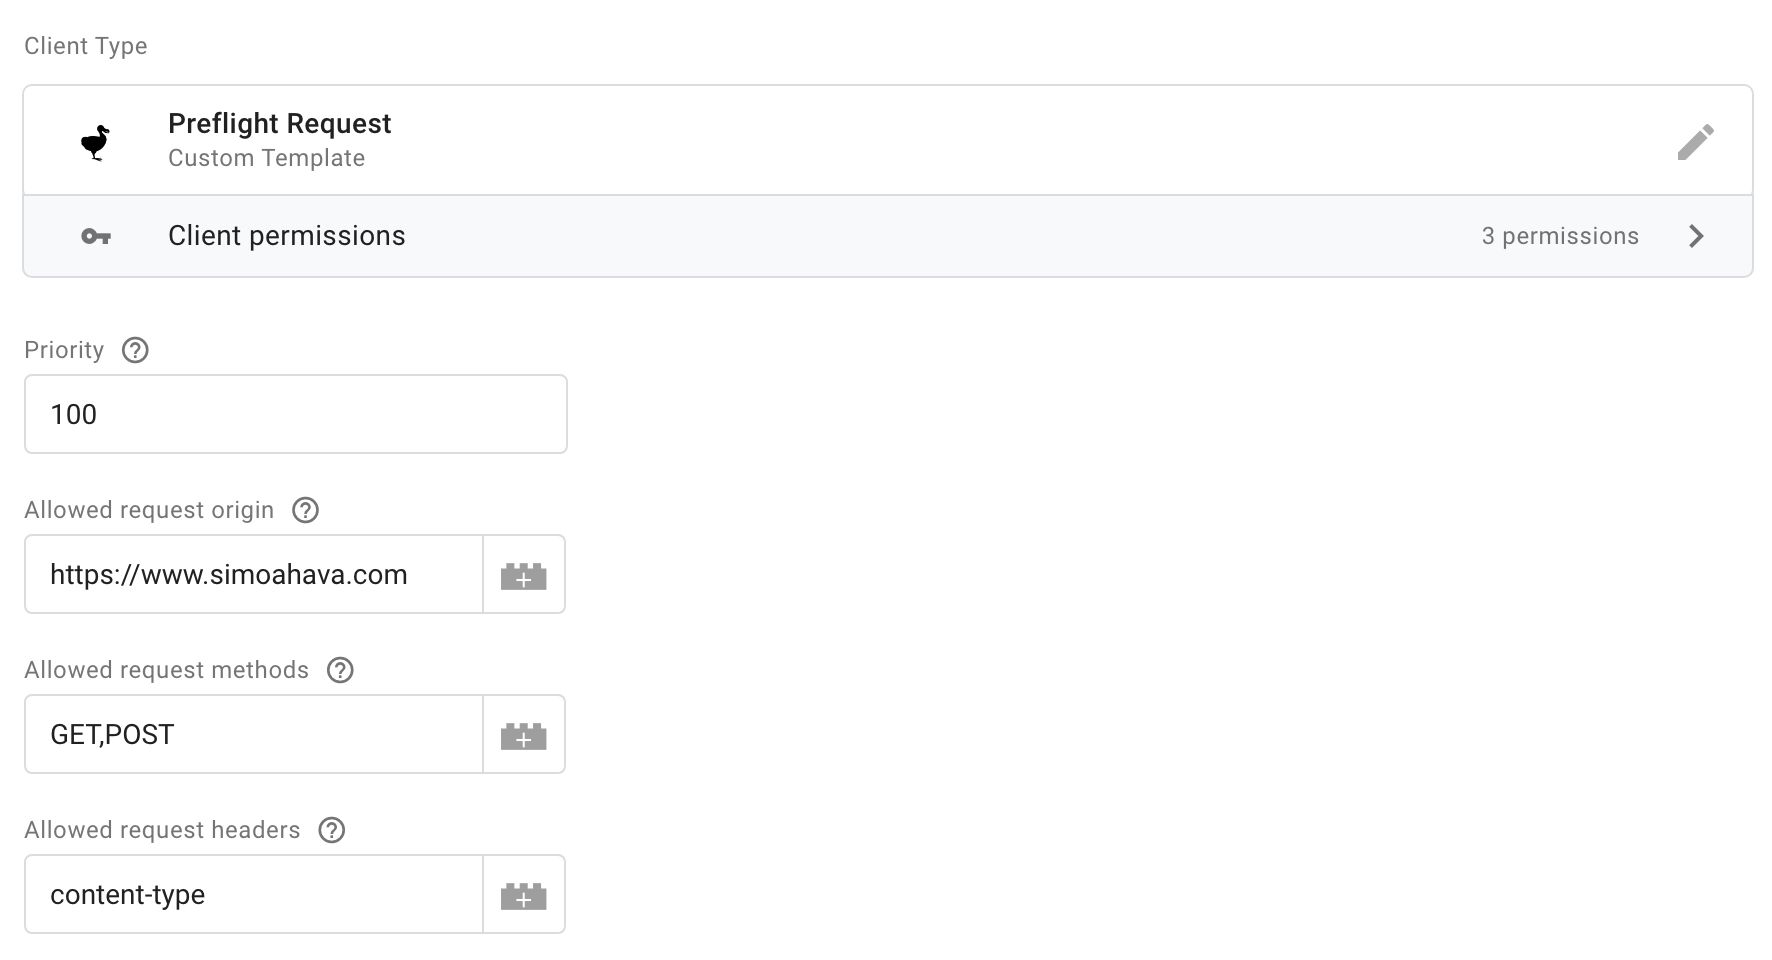
In Allowed request origin, add the origin from where you want to accept requests. This should match the URL origin (basically protocol + hostname) of the site sending the request. You can set the value to auto to have the Client attempt to approve all origins.
In Allowed request methods, add a comma-separated list of HTTP methods you want to accept. This would typically be just POST, but you might want to add other methods if they trigger the preflight check, too.
In Allowed request headers, add all the headers that don’t pass the criteria listed earlier in this article. The most common one is Content-Type, but if you want to preview your custom HTTP request in server-side GTM, you’ll want to add x-gtm-server-preview, too, for example.
Once you’re done, save the Client, and then publish the container. I can’t stress this enough – you must publish the container for the preflight handling to work.
You can now test your tag or script that triggers the preflight check. If everything worked out fine, you should see both the OPTIONS request and the actual HTTP request pass with flying colors.
Please let me know if you are having trouble with preflight requests! Just make sure you…
- Add the correct origin to the Client template,
- Add all the request methods you want to use,
- Add all the request headers that trigger the preflight check, and
- Publish the version with the custom Preflight Request Client.