Important! I really do not recommend using this in production. The only proper way of loading Google scripts from server-side Google Tag Manager containers is to use the official Web Container Client. This template was introduced at a time when the script loading mechanism in server-side Google Tag Manager wasn’t as complex as it was today, and I also noticed that most people use templates like these to avoid ad blockers, which is not something I condone.
Last updated: 18 October 2021. Peview works now with the proxied container even if the container ID is overridden..
While server-side tagging already has a wonderful built-in Client for proxying the Google Tag Manager container via your own first-party domain, it’s not perfect.
The main issues are that it doesn’t let you delimit access on a per-origin basis, so requests for the allowlisted container IDs can be sent from anywhere, and that it doesn’t let you freely choose the path via which the container ID is loaded.
To address these issues, I’m happy to reveal that I’ve written a new Client template for Server containers, named GTM Loader.
The main features of this template are:
- Freely choose which request path the Client responds to. You can keep the default
/gtm.js, or you can go for something more imaginative, such as/green-dragons. - Always load a container of a specific ID, regardless of what (if anything) is in the
?id=parameter of the request. - Only allow requests from specific origins.
Read on for more information!
The Simmer Newsletter
Follow this link to subscribe to the Simmer Newsletter! Stay up-to-date with the latest content from Simo Ahava and the Simmer online course platform.
Get the template
As the Community Template Gallery doesn’t distribute Client templates yet, you’ll need to manually import the template file.
First, fetch the raw template.tpl file from the GitHub repo by following this link and saving the page as template.tpl in your computer.
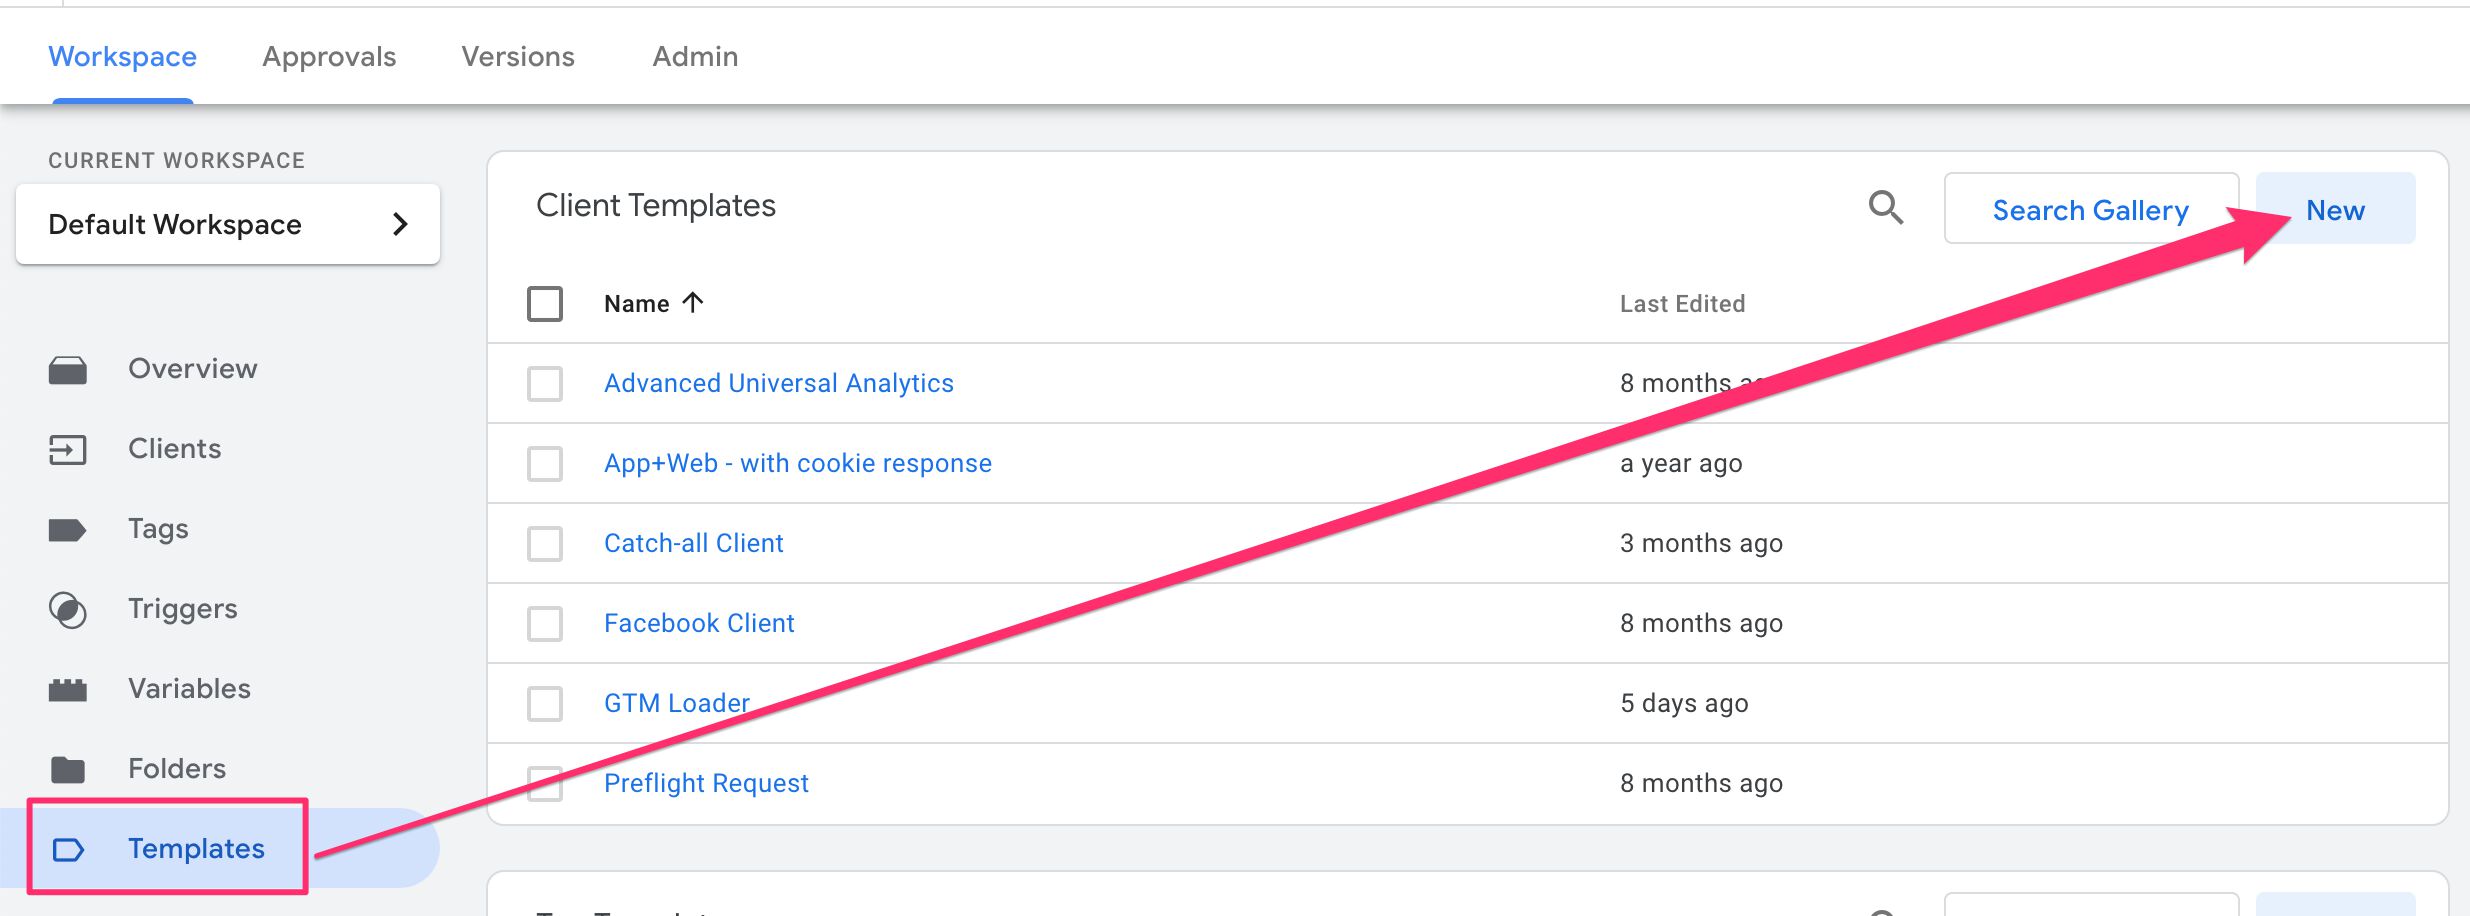
Then, in your Server container, go to Templates and click New in the box for Client templates.
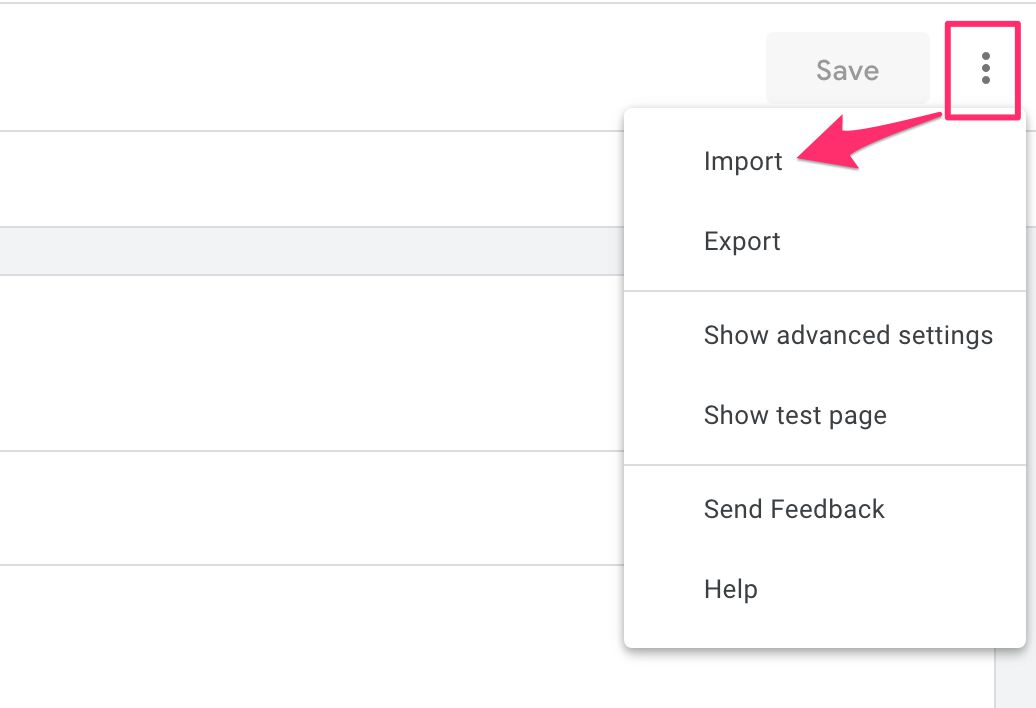
In the overflow menu in the top-right corner of the screen, choose Import.
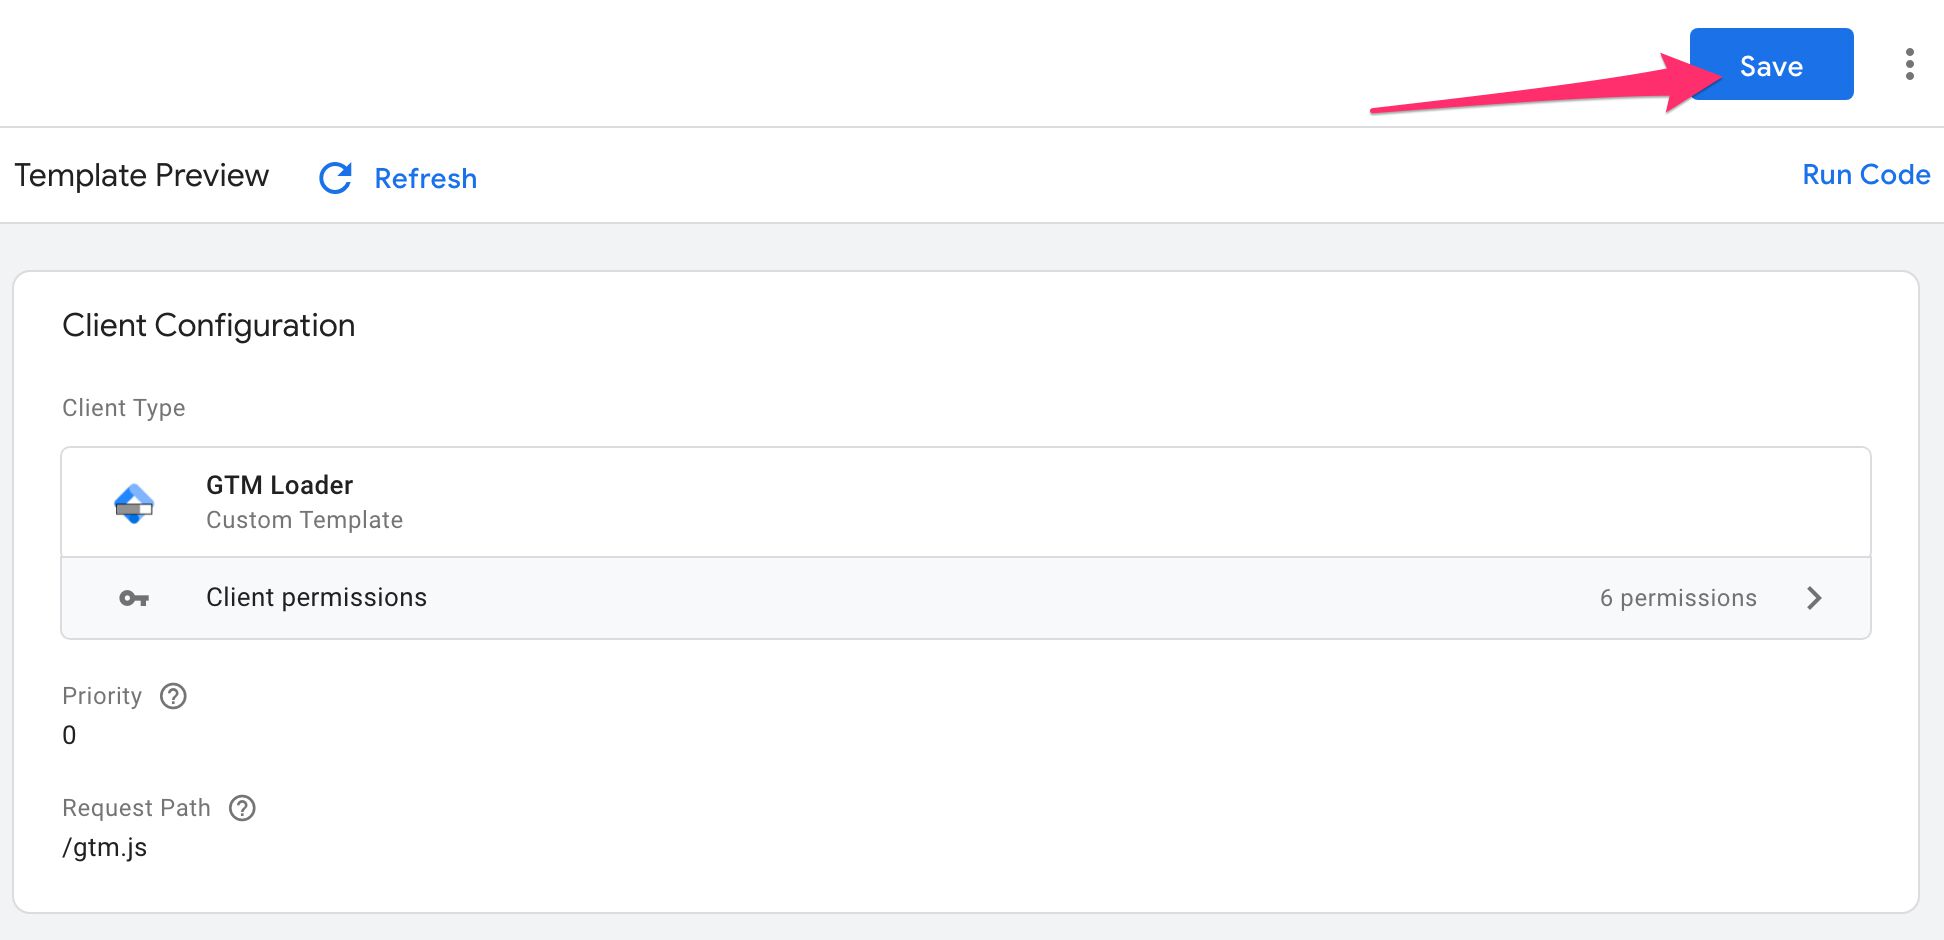
Locate the template.tpl file from your container, wait for the editor to refresh with the GTM Loader template, and then click Save to save the template.
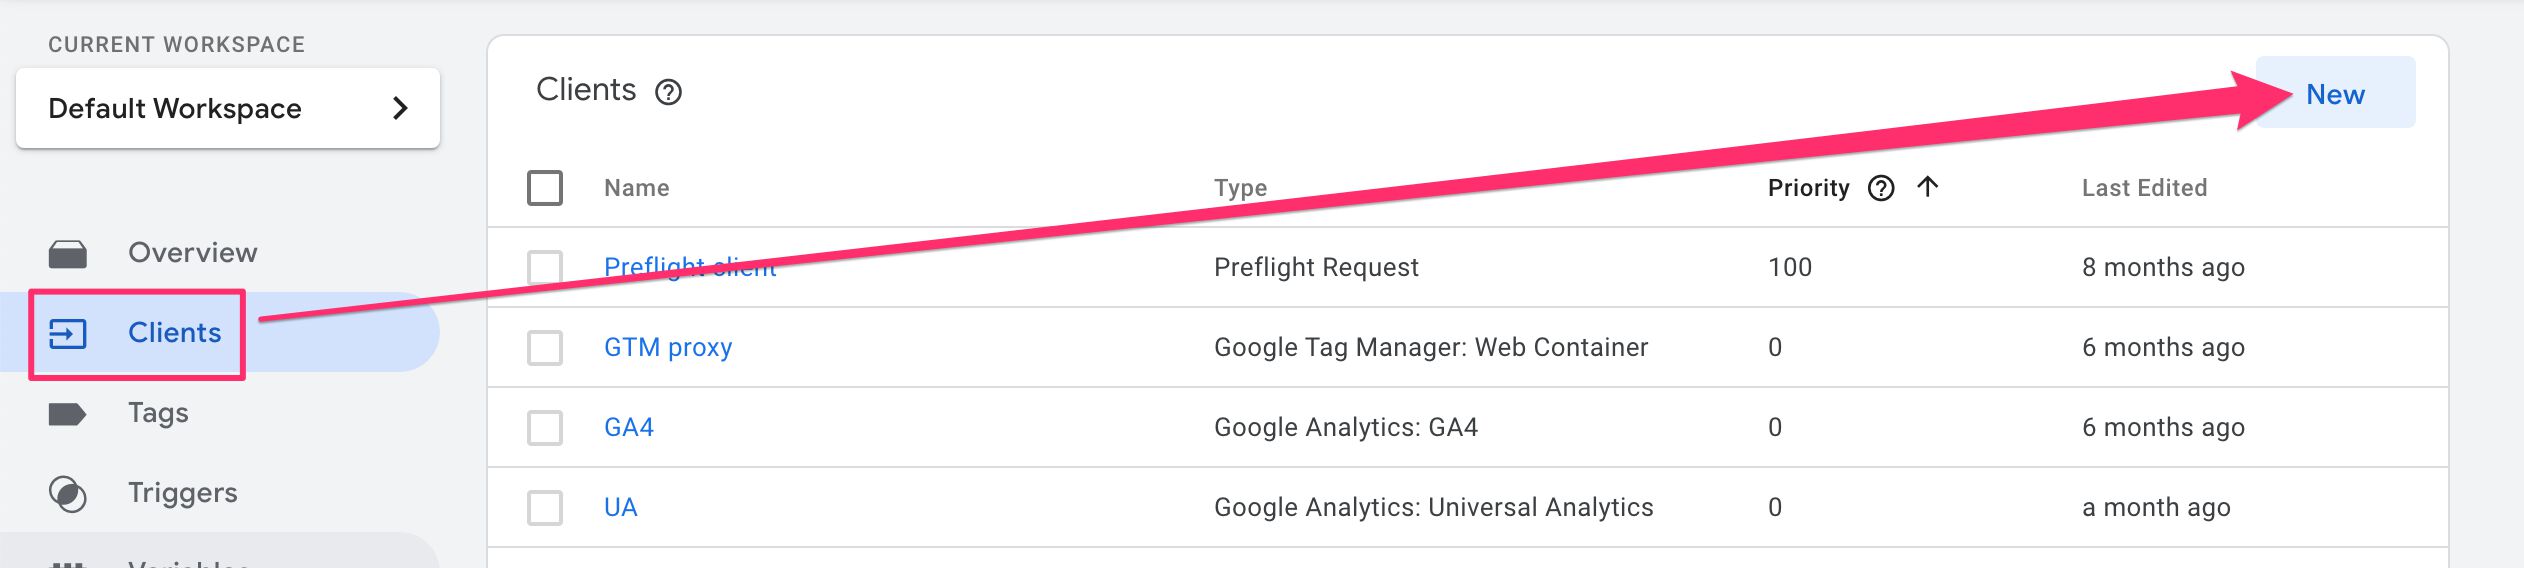
Create a new Client
Head on over to Clients in your container, and click New to create a new Client.
From the list of available Clients, choose the GTM Loader Client.
You should be ready now to customize the new Client!
Configure the Client
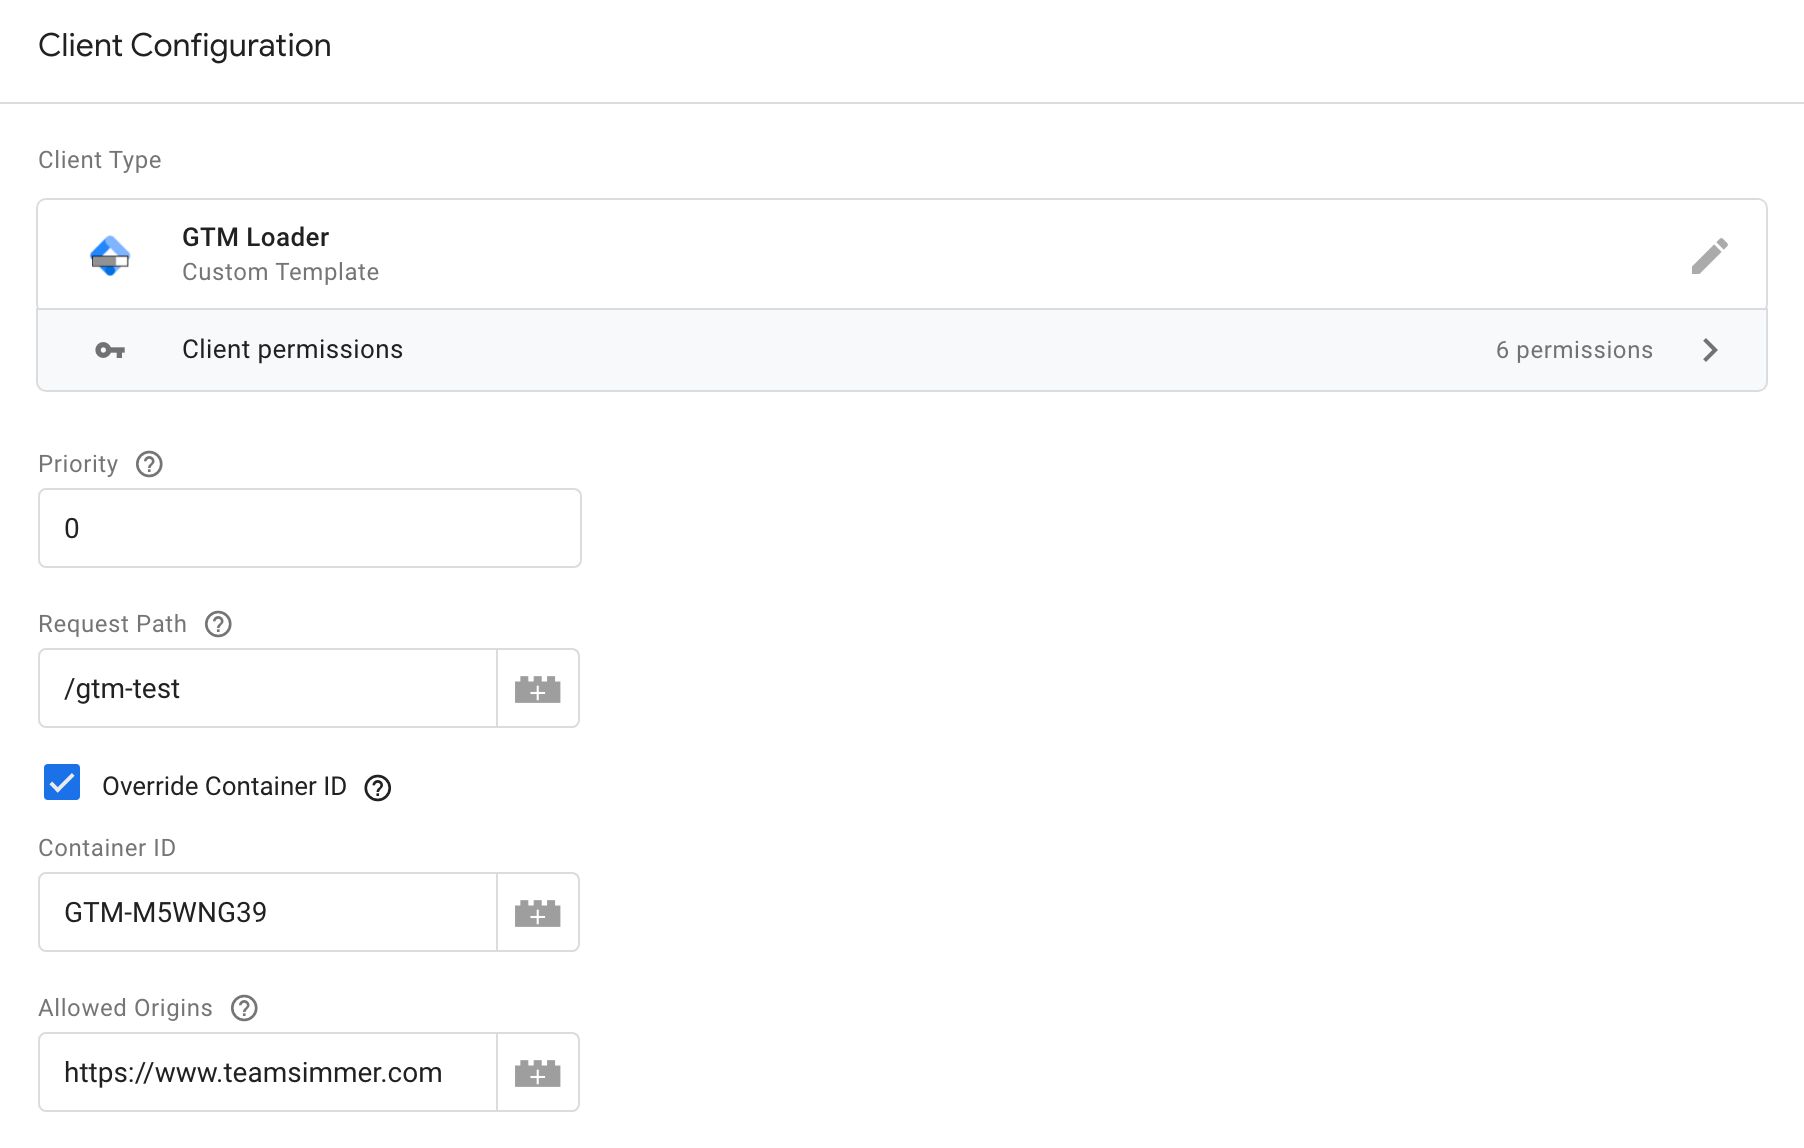
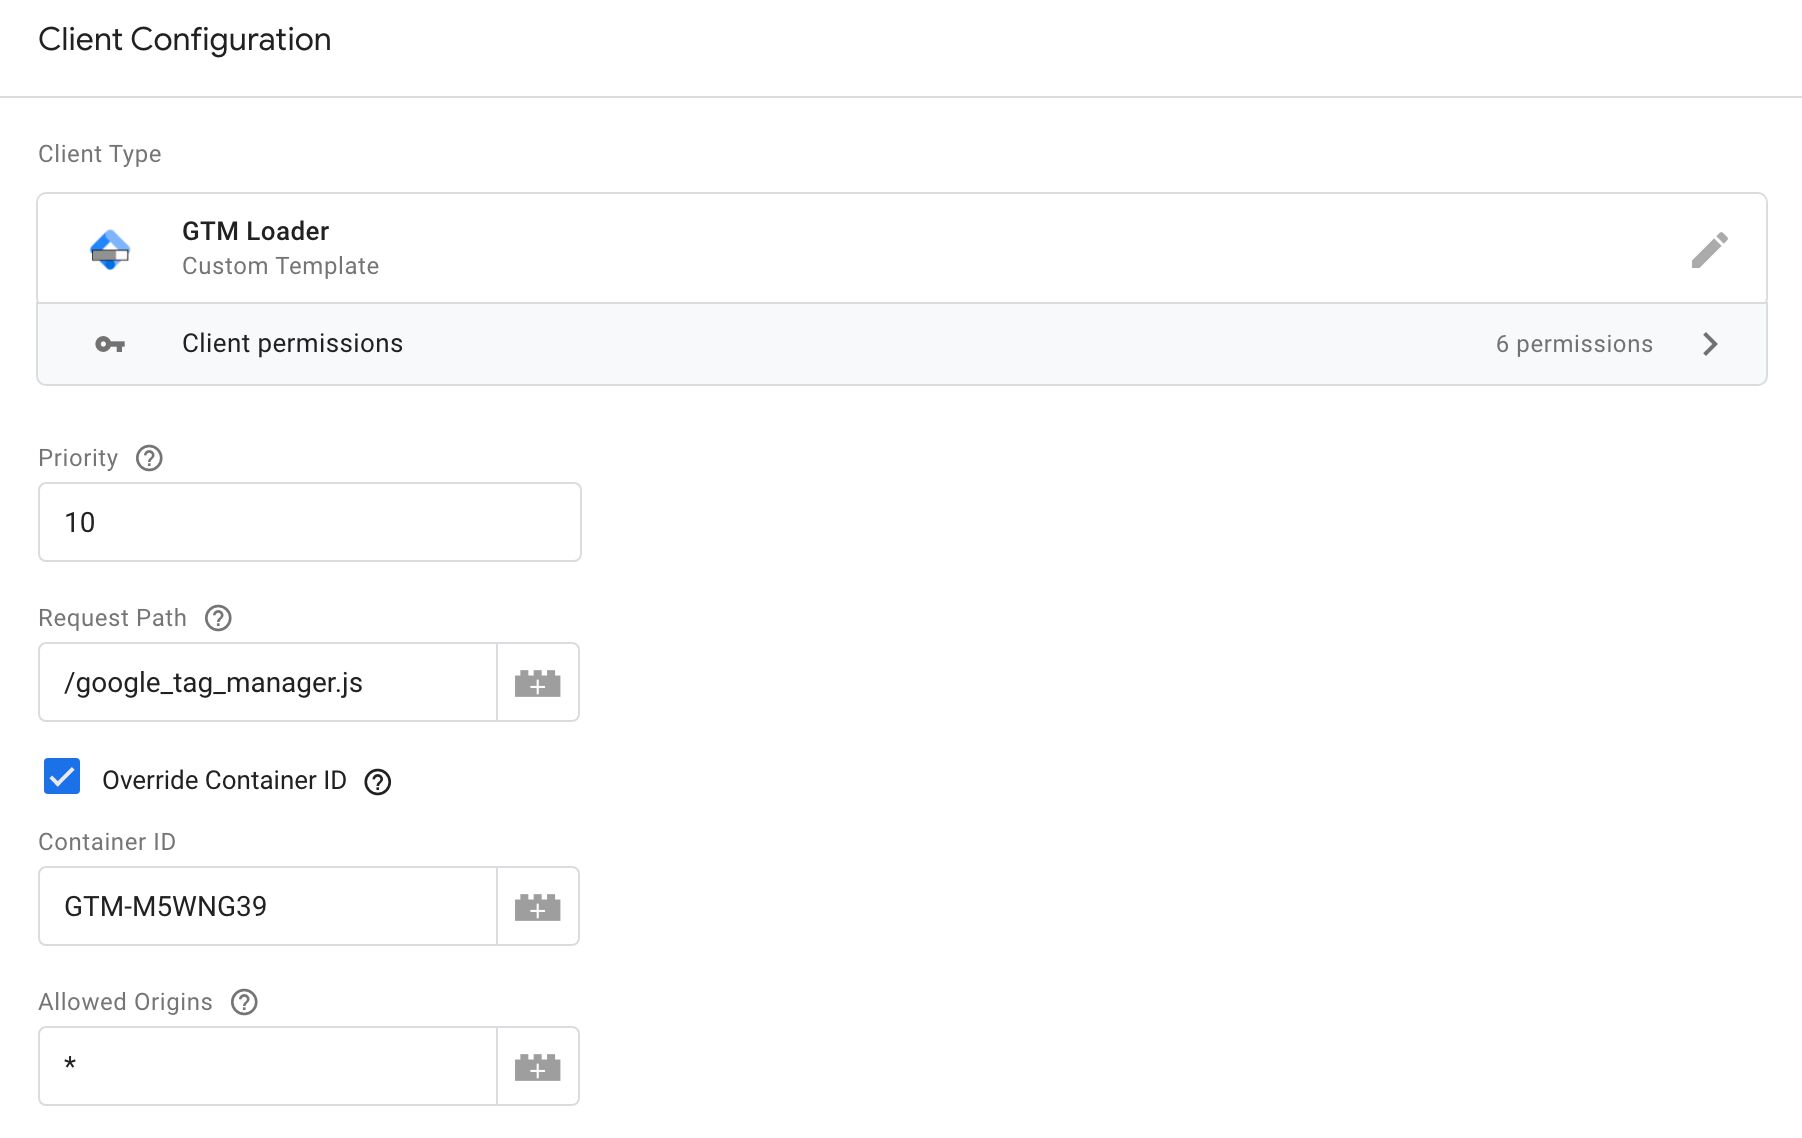
Here’s what the Client looks like with all the available fields in display:
Request Path
Set this to a path (include the leading slash). You can also just keep the default /gtm.js if you wish.
The Client will be listening for requests to this path, and if an exact match is made, the Client will claim the request and work its wonders.
For example, if you set the path to /google_tag_manager.js as in the screenshot above, then a request to https://<your server-side domain>/google_tag_manager.js?id=GTM-ABCDEFG will load the Google Tag Manager container with ID GTM-ABCDEFG unless you also have the Override Container ID setting checked (more on this below).
Remember that it’s exact match! The request must be with a path that exactly matches the setting you configure in this Client.
Override Container ID
Important! If you override the Container ID, Preview containers will be loaded, but the browser has to make an additional request to
www.googletagmanager.com. So if your site has a Content Security Policy,https://www.googletagmanager.commus still be added to it for Preview mode to work properly.
If you check this setting, you can then add a valid Google Tag Manager container ID to the respective field.
This setting means that regardless of what is in the ?id= parameter, a container with the configured ID will be returned.
When you have this setting checked, you can actually drop the ?id= parameter from the request altogether, as the container with the configured ID will be loaded in all cases.
Allowed Origins
In this field, you can add a comma-separated list of origins from which requests will only be respected.
For example, if you add https://www.teamsimmer.com,https://www.simoahava.com to the field, then only requests from those two origins will be able to fetch the container.
Remember that the origin is the scheme (http or https) plus :// plus hostname plus port. So basically everything up to the request path.
You can also add * to this field, in which case the Client will claim the request regardless of where it originated from.
If you need to manually provide the origin (e.g. when working with an embedded resource or when testing), you can add &origin=<origin> to the request URL. For example, to load the container even when I’m not on https://www.simoahava.com and I’ve set that into the Allowed Origins field, I can browse to this:
https://<your server-side domain>/google_tag_manager.js?id=GTM-ABCDEFG&origin=https://www.simoahava.com
How it works
A Client created with the template listens for requests that are dispatched to the request path defined in the Client settings.
Validate the request
When a request like that is received, the Client does two checks:
- Is the Override Container ID setting checked and a valid GTM container ID has been configured, OR is there a valid GTM container ID as the value of the
idquery parameter in the request? - Is the value of Allowed Origins the wildcard (
*) OR does the request come from an allowed origin OR does it have an allowed origin as the value of theoriginquery parameter in the request?
// If the incoming request matches the request configured in the Client
if (requestPath === data.requestPath) {

  // If the request is for a valid GTM container ID
  if (!containerId.match('^GTM-.+$')) return;

  // If the request comes from a valid origin
  if (!validateOrigin()) return;

  ...
}
If both resolve to true, the request is claimed.
Fetch the preview container
If the request is for a preview container, meaning it has the gtm_debug, gtm_auth, and gtm_preview query parameters, the Client acts as a transparent proxy.
It simply forwards the request to GTM servers with all the headers and parameters intact, and returns the result back to the request source.
const fetchPreviewContainer = () => {
sendHttpGet(
httpEndpoint +
'&id=' + containerId +
'>m_auth=' + gtm_auth +
'>m_debug=' + gtm_debug +
'>m_preview=' + gtm_preview,
(statusCode, headers, body) => {
sendResponse(body, headers, statusCode);
}, {timeout: 1500}
);
};Importantly, when a preview container is fetched, the result is not cached. This is vital to make preview useful, as otherwise the user would need to wait for the cache to expire before the refreshed preview container becomes available.
Fetch the live container
When a live container is fetched, on the other hand, the process changes quite a bit.
The template uses templateDataStorage, which is an API designed to persist information across requests in the Server container.
When a request for the live container comes in, the Client checks if there already is a cached version of the library and if the resource was cached less than 7.5 minutes ago. In this case, the cached library (and any cached headers) are returned to the request source.
This way the Client saves resources by not having to fetch the resource from Google servers anymore.
Why 7.5 minutes cache duration? Well, that’s half of the browser cache time for the GTM library itself (15 minutes). This way the browser cache still has the final say on how long to cache the resource, but unlike a browser cache, all users benefit from the server-side cache even if the user has never downloaded the resource before.
If the resource is not cached or if the cache has expired, then the container is fetched from Google servers.
const fetchLiveContainer = () => {
  const now = getTimestampMillis();

  // Set timeout to 7.5 minutes
  const storageTimeout = now - cacheMaxTimeInMs;

  // If the cache has expired fetch library from Google servers and write response to cache
  if (!templateDataStorage.getItemCopy(storedJs) ||
      templateDataStorage.getItemCopy(storedTimeout) < storageTimeout) {
    sendHttpGet(
      httpEndpoint + '&id=' + containerId,
      (statusCode, headers, body) => {
        if (statusCode === 200) {
          templateDataStorage.setItemCopy(storedJs, body);
          templateDataStorage.setItemCopy(storedHeaders, headers);
          templateDataStorage.setItemCopy(storedTimeout, now);
        }
        sendResponse(body, headers, statusCode);
      }, {timeout: 1500}
    );
  // Otherwise, pull the item from cache and do not make a request to Google servers
  } else {
    sendResponse(
      templateDataStorage.getItemCopy(storedJs),
      templateDataStorage.getItemCopy(storedHeaders),
      200
    );
  }
};
So templateDataStorage functions as an additional layer of caching here, reducing server response latency and network egress costs.
Summary
Why create a template like this when the built-in web container client works just fine?
Cynics could say that this is an improved way to circumvent ad blockers. And they’d be right! This does make it easier to circumvent ad blockers, as their heuristics target not just the googletagmanager.com domain but also the gtm.js file and the GTM-... container ID.
However, I designed the template to introduce additional flexibility to moving Google Tag Manager to a first-party context. Being able to optimize for request paths and query parameters seems like an obvious enhancement. The templateDataStorage setup adds an additional layer of cost optimization.
But there’s also the twist that maybe ad blockers targeting Google Tag Manager are throwing the baby out with the bathwater. GTM itself is not a tracking tool, and many use it for purposes completely unrelated to tracking or data collection.
Having said that, if I were to design an ad blocker today, I would probably block GTM as well, as it’s more than likely that the bathwater is so dirty it must be chucked regardless of the collateral damage it causes.
So it’s a tough balance to make. The only things I can recommend are these:
- You should approach server-side tagging with best intentions at heart.
- Do your best to improve rather than erode transparency.
- Be honest and respectful to your site visitors.
- Make sure these mechanisms are documented somewhere so that if someone were to audit the data flows on the site and the server, your tags would not obstruct this important work.
This way we’ll all have a good time with server-side tagging.