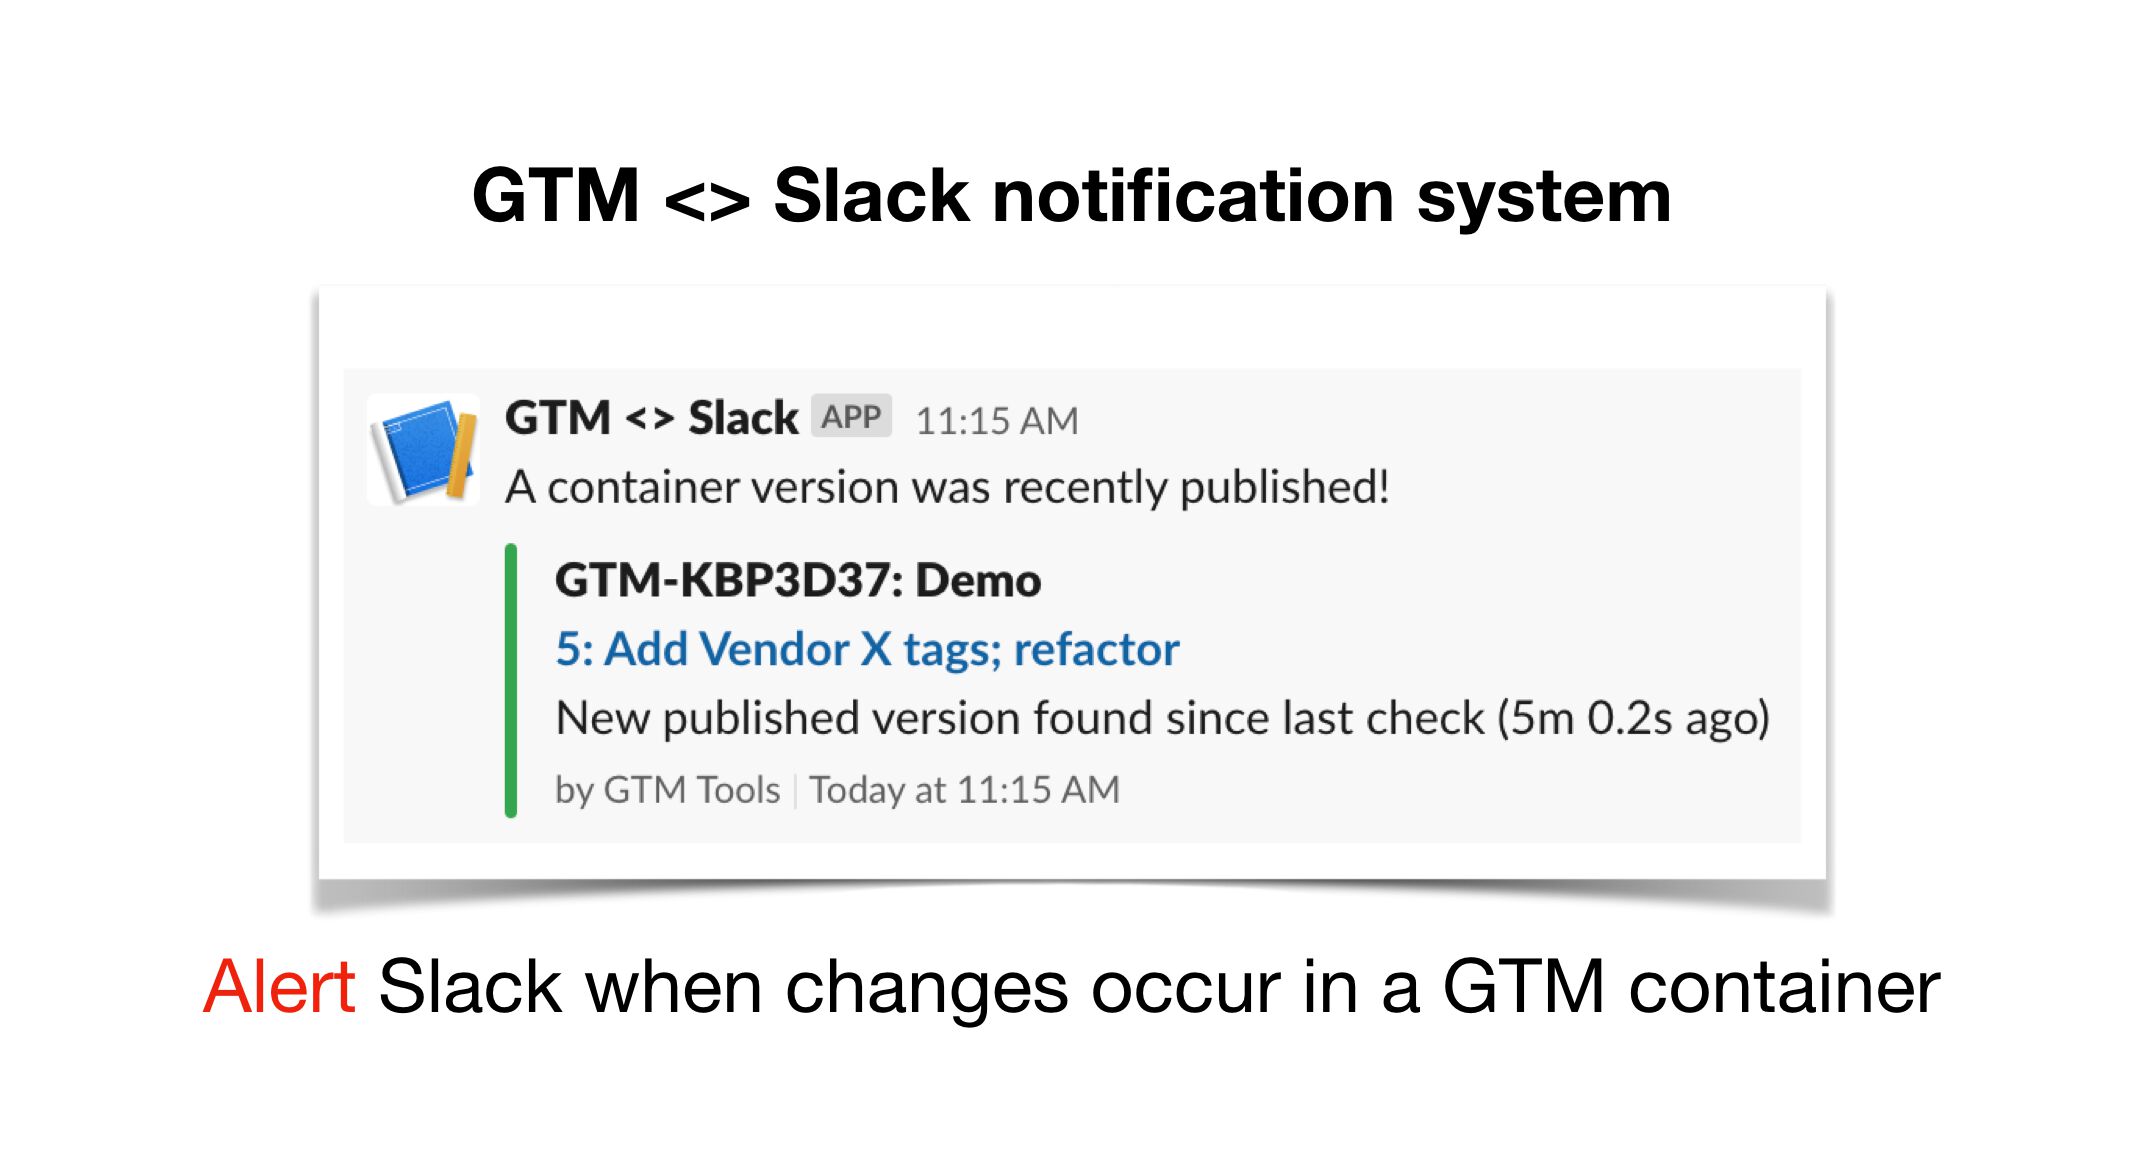
Until recently, I had a feature on GTM Tools that polled the user’s Google Tag Manager container(s) for a recently published version. If one was found, a notification was sent to a Slack app, which forwarded it to a workspace and channel of the user’s choice.
This was fine, except for the fact that polling the GTM and Slack APIs for dozens upon dozens of containers is a total resource hog, and the only way I can maintain GTM Tools is it doesn’t have API leaks like that.
I thus deprecated the feature. Feeling bad about the decision (and because I got a bunch of feedback that users were actually using the feature), I wanted to share a step-by-step guide on how anyone can setup a simple Slack notification system for changes in a Google Tag Manager container.
It’s a Node.js application running on Google Cloud Functions. Google Cloud Functions are serverless, self-contained functions on the Google Cloud Platform (GCP) that can be triggered with different stimuli, such as an HTTP request or a Pub/Sub message. For our purposes, it’s the perfect tech because what we’re trying to do is a very simple operation that needs to run periodically with zero- or low-cost.
The Simmer Newsletter
Follow this link to subscribe to the Simmer Newsletter! Stay up-to-date with the latest content from Simo Ahava and the Simmer online course platform.
How it works
Once it’s up and running, here’s how the solution works:
- Every N minutes (you can choose the interval), a cron job running on Cloud Scheduler will send a Pub/Sub message.
- This Pub/Sub message triggers the Cloud Function, which hosts a simple, serverless Node.js application.
- The application downloads a state object from Cloud Storage, which contains the most recent information (since the previous triggering) about each Google Tag Manager container you’ve specified in the application configuration*.
- Then, the application polls the Google Tag Manager API to fetch details about the published version of each container.
- If the application detects a change in the version ID of the published version (compared to that stored in the state object), it sends a message using a Slack Incoming Webhook.
- This webhook posts the message to the appropriate channel in the Slack workspace you’ve chosen for the integration.
Once everything is done, the application stores the new, updated state back into Google Cloud Storage and finishes execution.
What you’ll need
To make the whole thing work, you’ll need a Google Cloud Platform account. In addition to that, you’ll need:
- Access to a Slack workspace, with permissions to add a bot to a channel.
- A credit card (this solution will most likely be zero-cost, but you need to add your billing information regardless).
- A Google Cloud billing account.
- Permissions to add a new READ user to the Google Tag Manager container(s) you want to observe.
Step 1: Create a new Google Cloud Platform project
The first thing you’ll need to do is create a new project in GCP.
You can do this by following this link.
Give your project a name, and make sure you select a valid Billing Account for it.
The console will hang for a while as your new project is being created. Once the project is created, you can visit it via the project selector.
Step 2: Configure the GCP project
Enable the APIs
Next thing you’ll need to do is enable the APIs that the application will require. You’ll also need to create a bucket in Google Cloud Storage, but we’ll get to that after the APIs have been enabled.
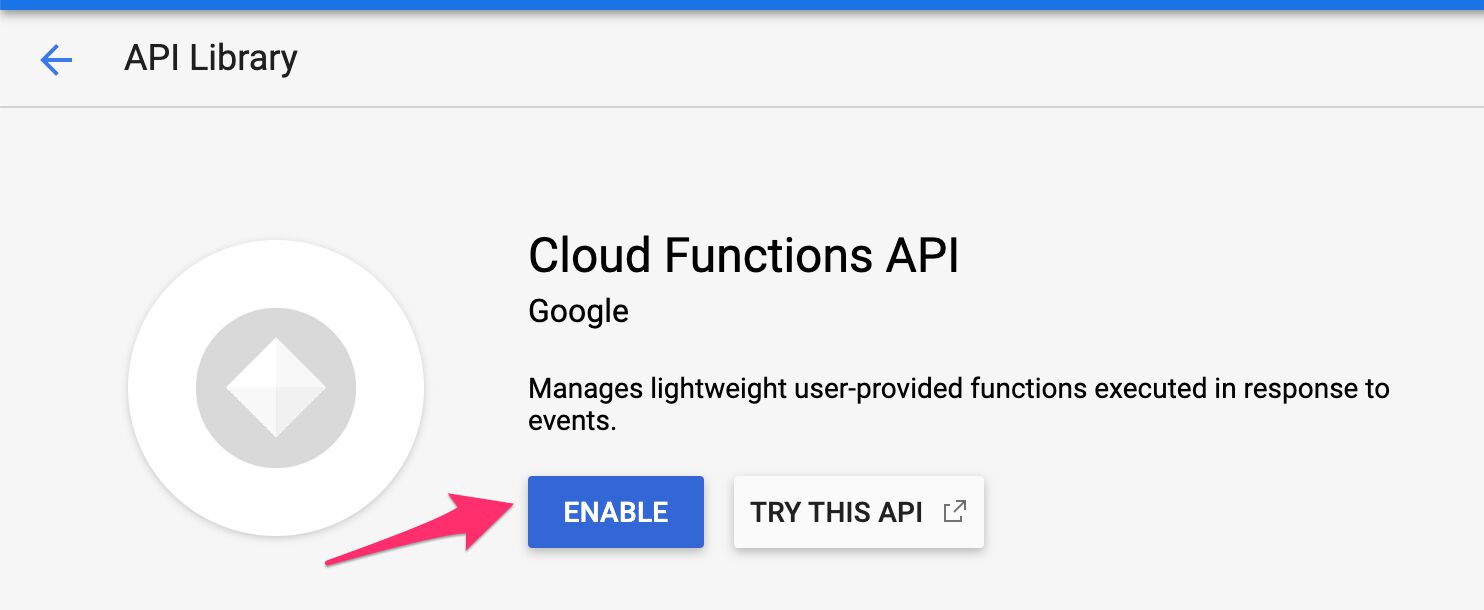
While making sure your new project is selected in the console, type Cloud Functions API into the search bar and click the result.
In the screen that opens, click Enable.
Do the same for Tag Manager API.
Create a new Cloud Storage bucket
Once you’ve enabled these two APIs, it’s time to create a new bucket in Google Cloud Storage. This is where we’ll store the state of the GTM container. Follow this link to reach the storage browser.
Click the big blue Create Bucket link in the middle of the screen.
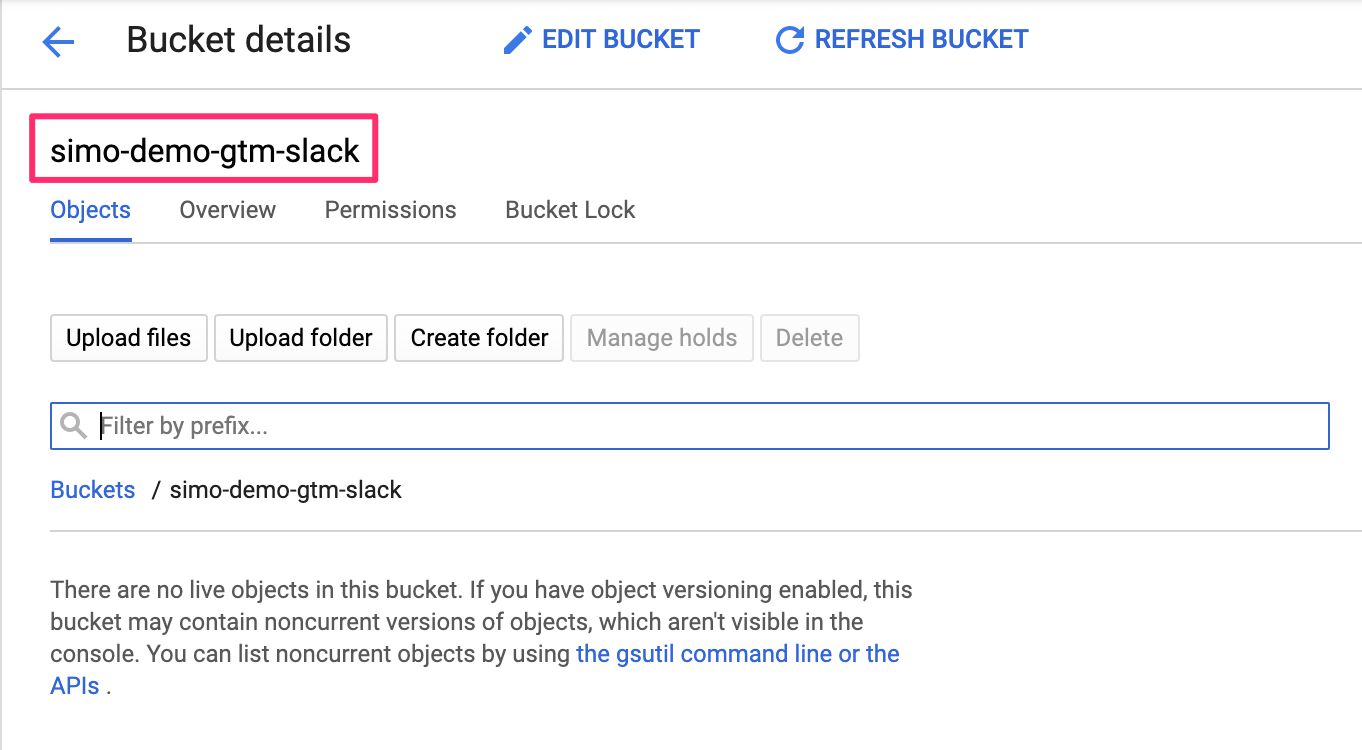
Give the bucket a global, unique name. I simply named it the same thing as my project: simo-demo-gtm-slack.
As Location type, choose Region, and select one that’s available for Cloud Functions as well. For example, I chose europe-west1 as the region for the Google Cloud Storage bucket, and I’ll use the same location eventually for the Cloud Function.
Keep the storage class as the default (Standard).
Keep access control as the default (Fine-grained).
Don’t touch the Advanced settings.
Click the blue Create button when ready.
Make sure you remember your bucket name (simo-demo-gtm-slack in my example) - you’ll need it when configuring the Cloud Function.
Step 3: Create a new Slack app
Create the app
You need to create a new Slack app. This application will be in charge of forwarding the messages sent by the Cloud Function to your Slack workspace and channel.
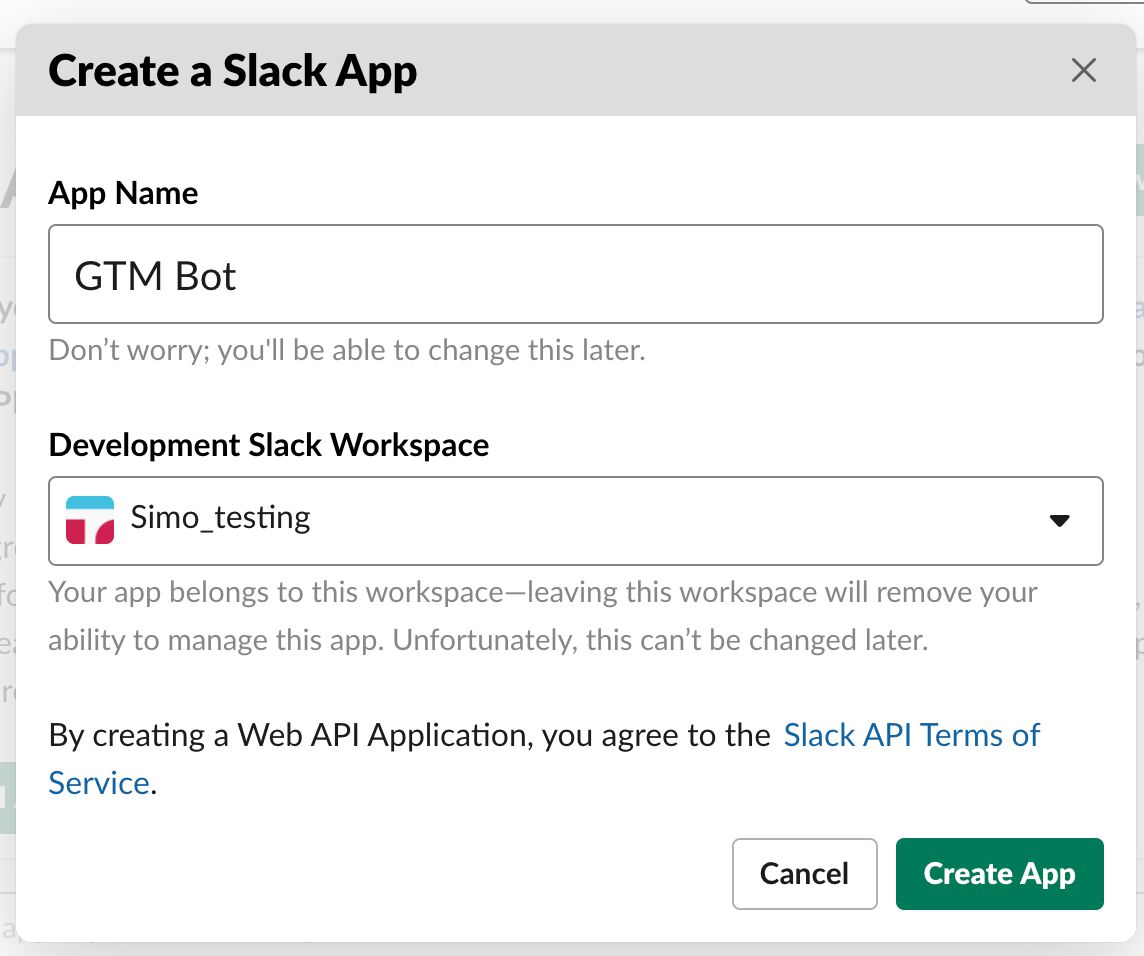
To create a new app, visit https://api.slack.com/ and click the big green Start Building button in the middle of the screen.
Give the app a name (this will appear as the name of the bot in Slack). Choose the workspace you want to add this bot to.
When done, click Create App.
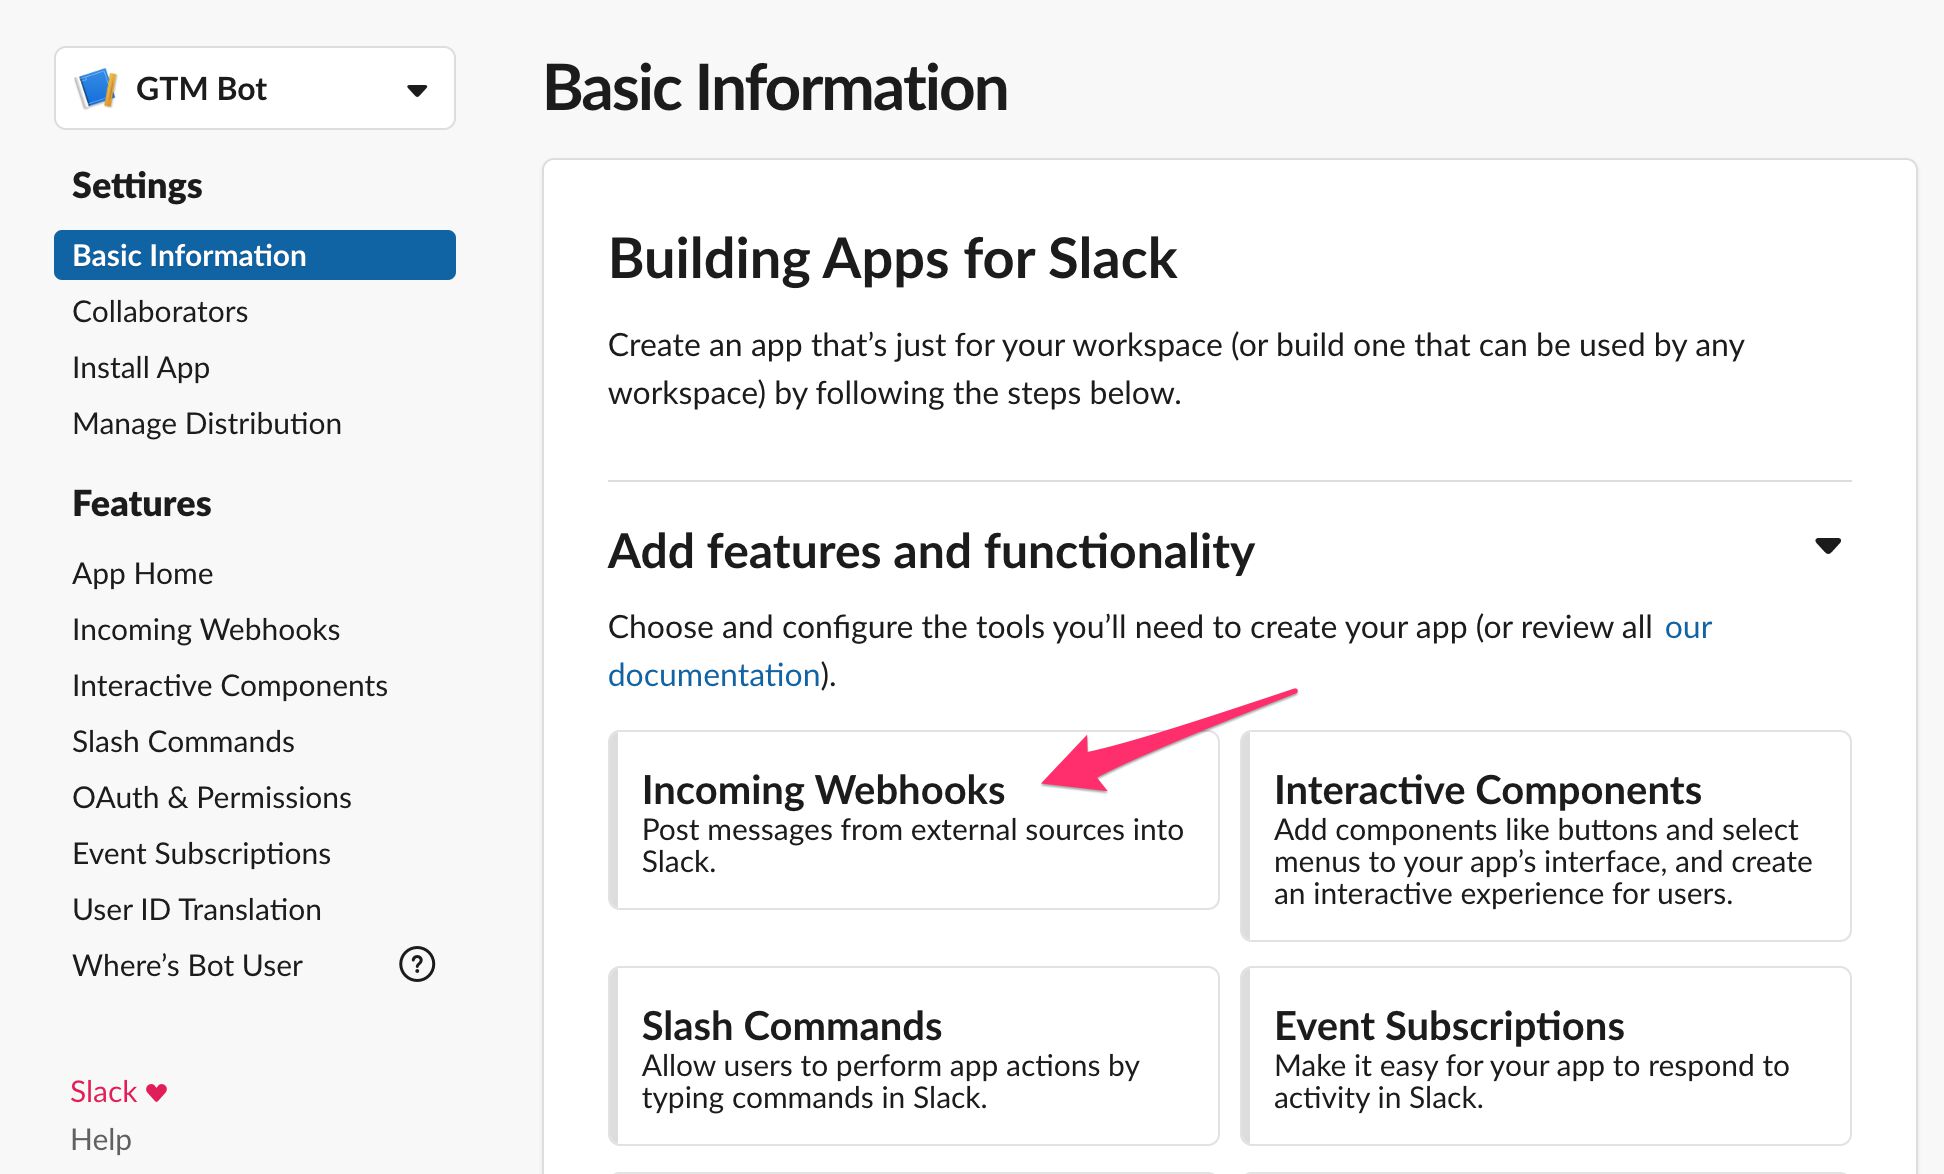
Create an incoming webhook
In the dashboard that opens, choose the Incoming Webhooks functionality.
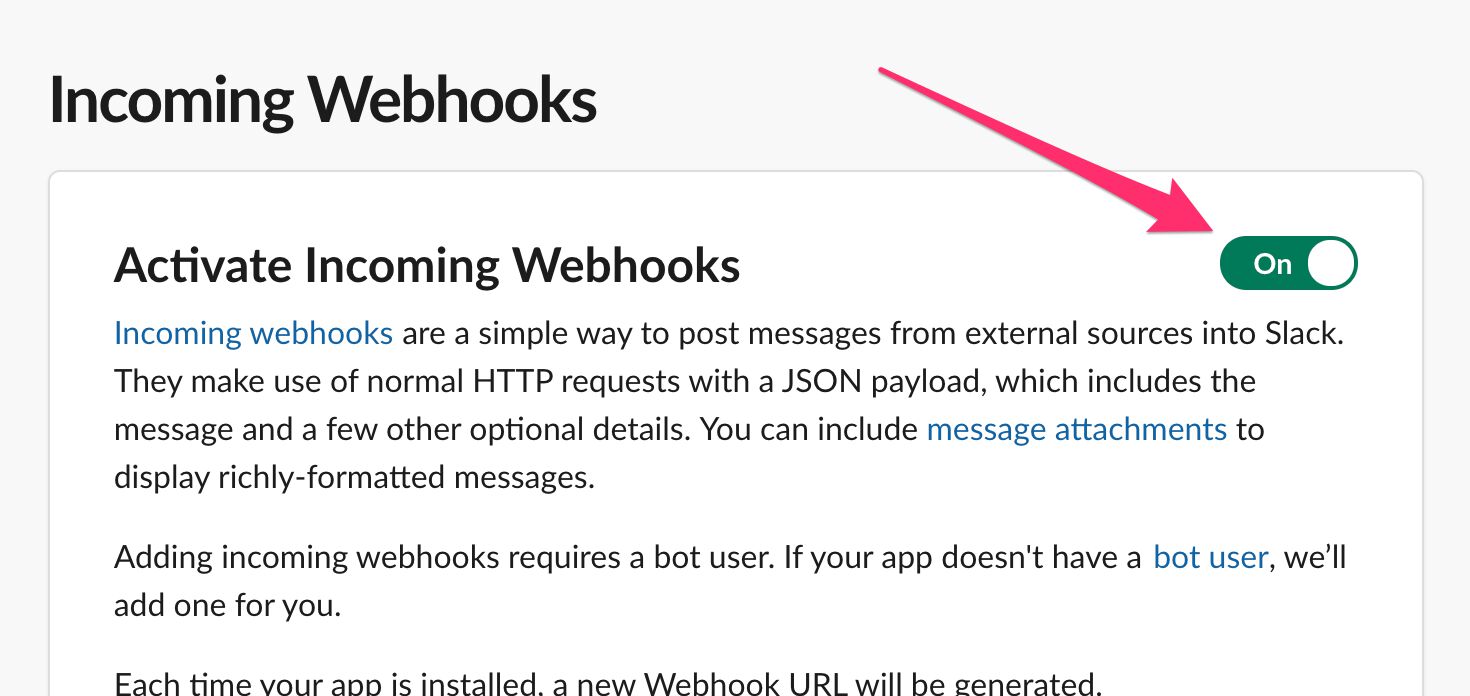
In the configuration screen that opens, click the toggle to activate webhooks.
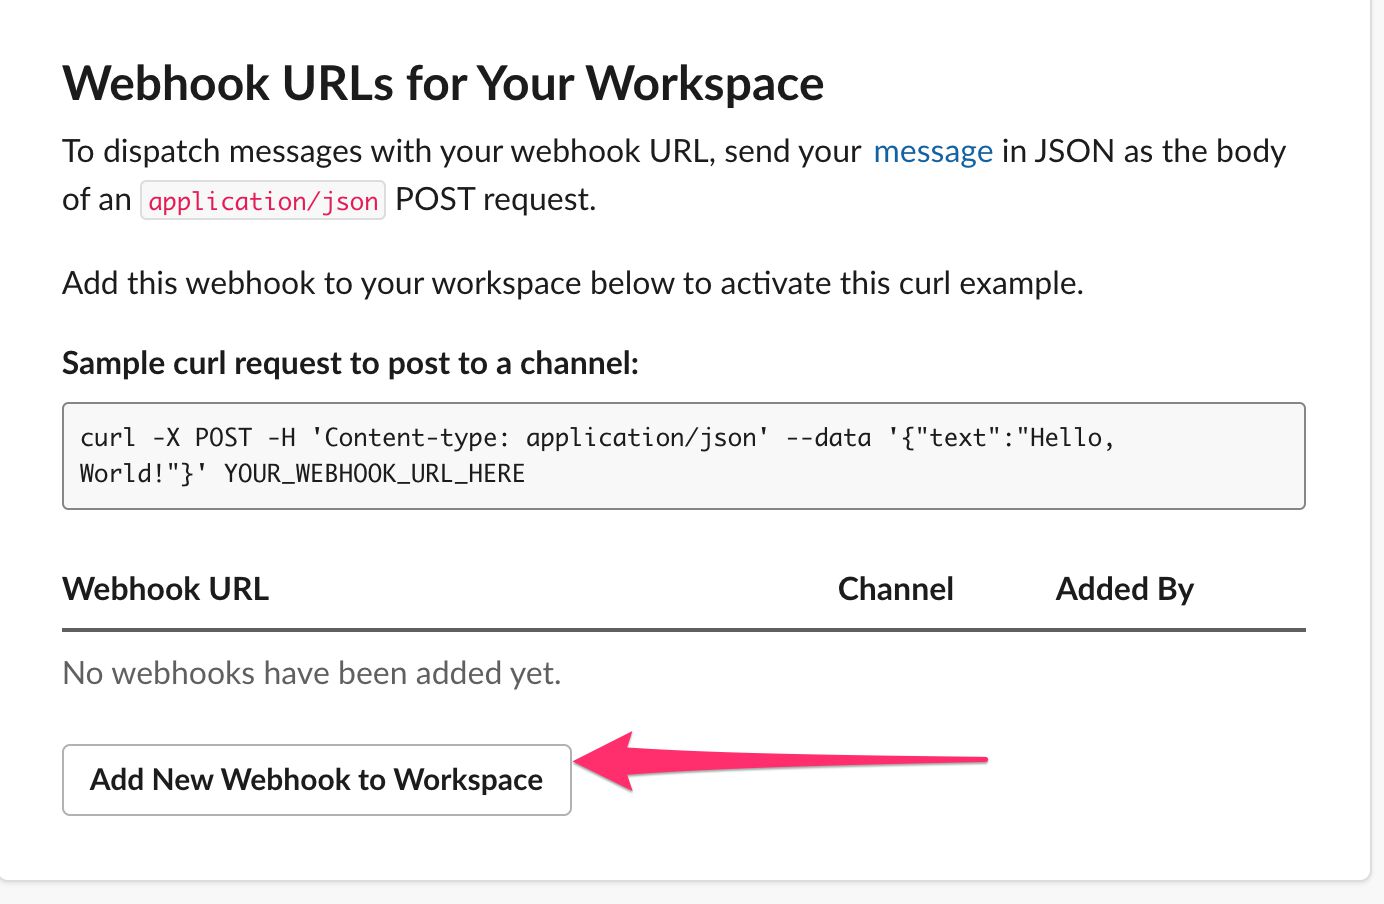
Then, scroll down the configuration screen and click the button to Add New Webhook To Workspace.
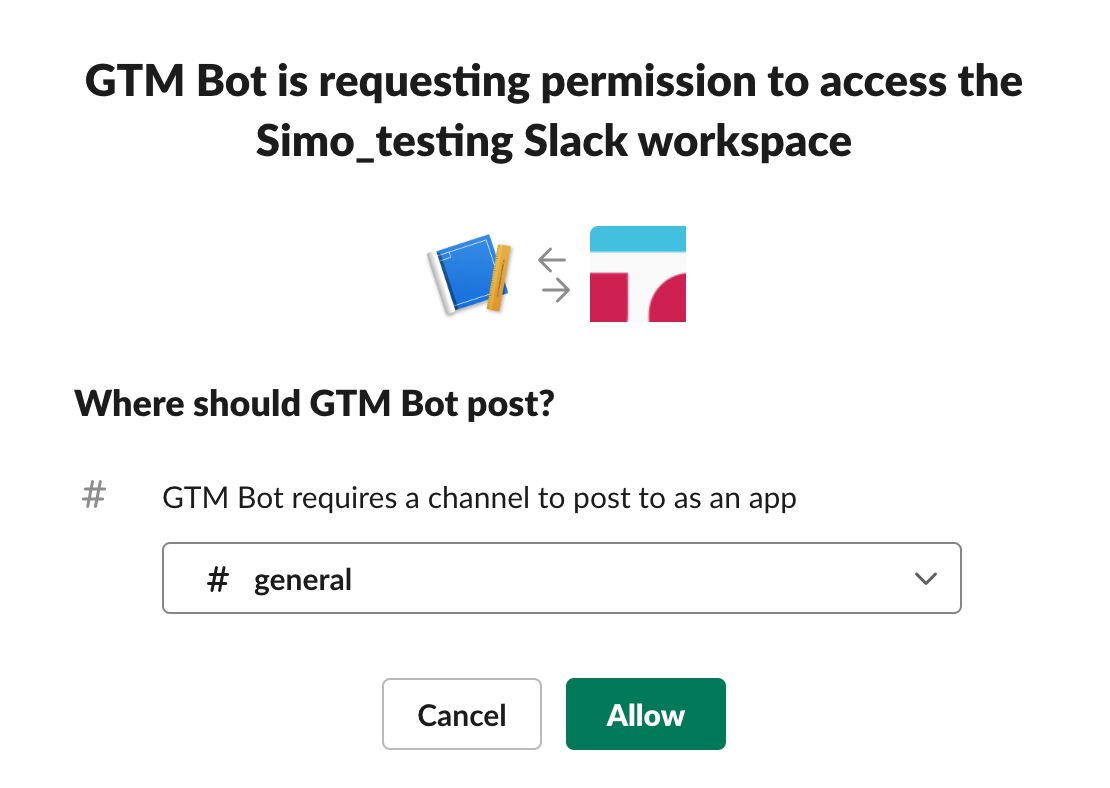
Now you need to choose which channel to post the messages on, so select one from the list. Once done, click Allow.
You should see your new bot enter as a new user into the channel.
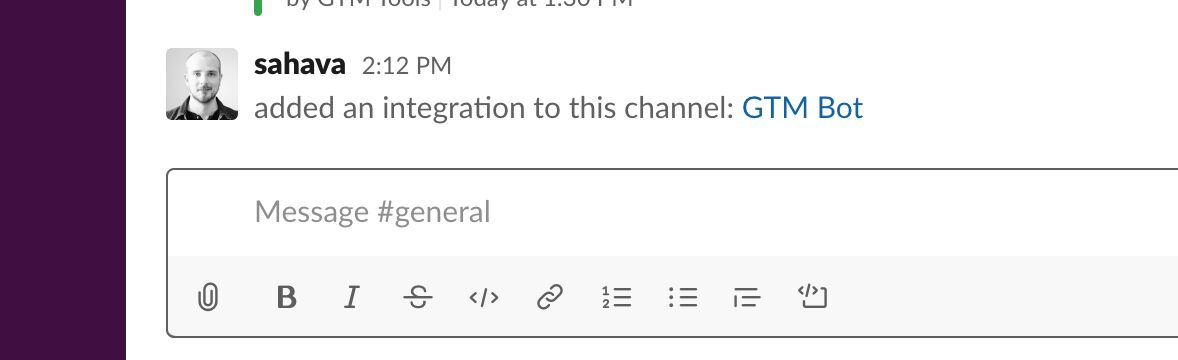
In the list of webhooks for your app, there should now be a new URL. Keep this tab open for a while, as you’ll soon need the URL.
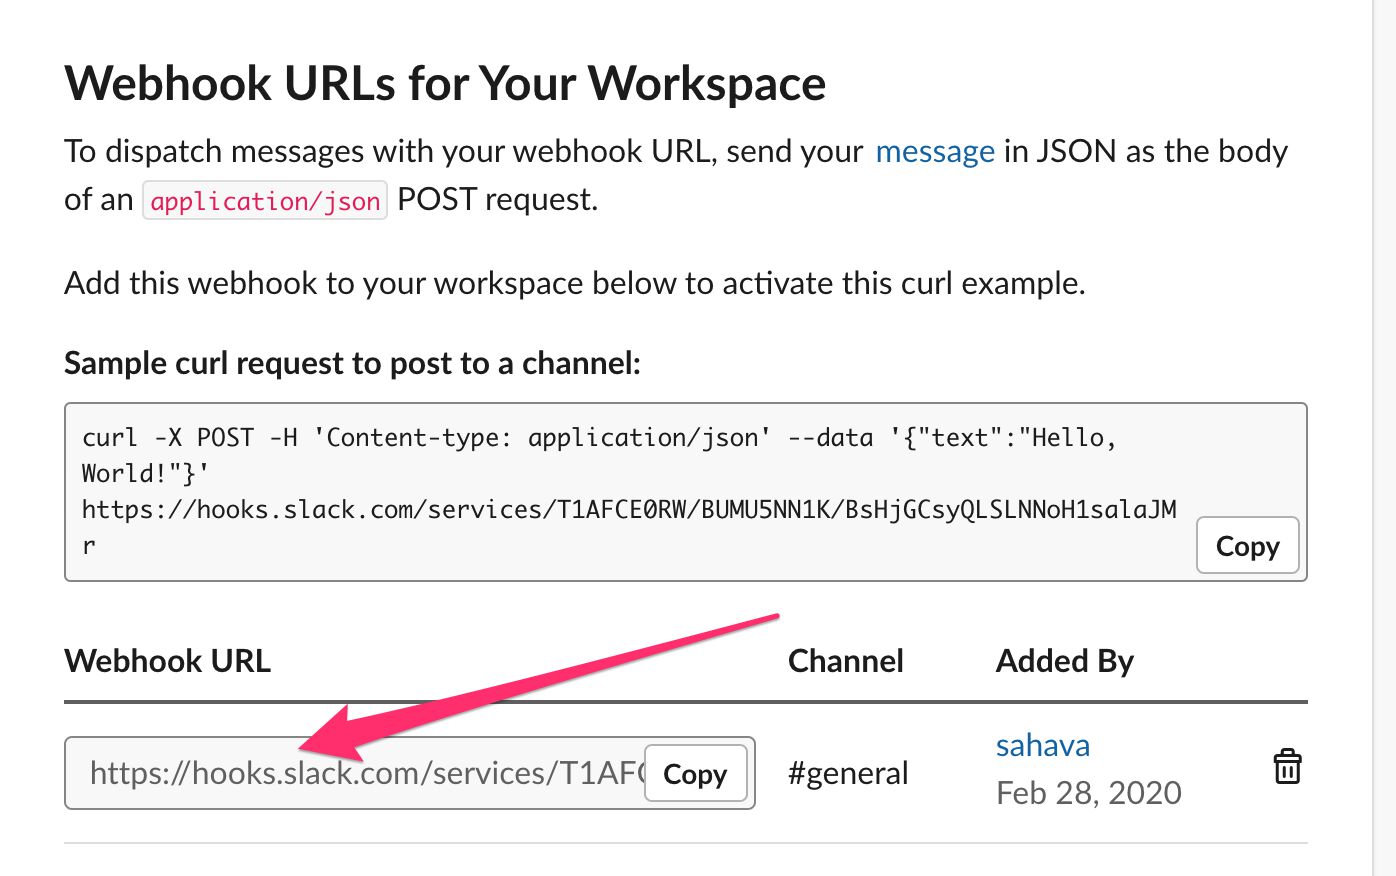
Step 4: Configure the Cloud Function
Almost done!
Now, download this archive:
https://github.com/sahava/gtm-slack-integration/raw/master/function.zip
Unzip the archive to a folder on your computer.
Modify the config.json file
Rename the config.sample.json to config.json and open the file for editing with a text editor (or whatever you use to edit JSON files normally).
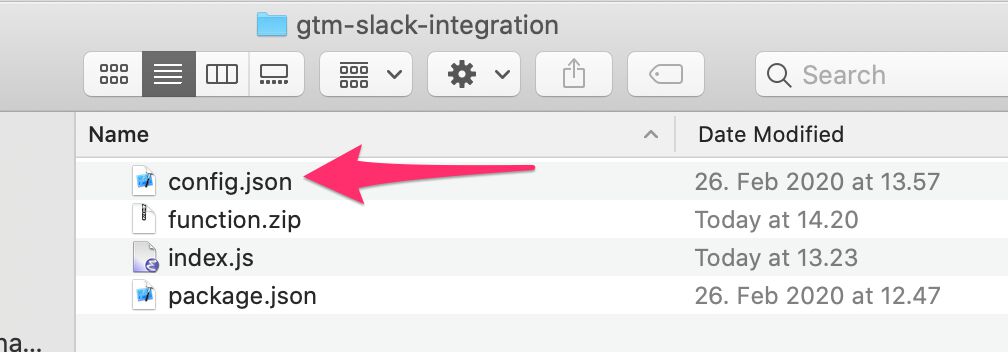
This is what the default config.json looks like:
{
  "gcs": {
    "bucketName": "gcs-bucket-name",
    "fileName": "filename.json"
  },
  "slackOutput": [{
    "slackWebhookUrl": "https://hooks.slack.com/services/YYYY/XXXX/ZZZZ",
    "gtmContainers": ["12345_23456", "12345_34567"]
  }],
  "verboseLogging": true
}
Change the bucketName value to what you set when creating the bucket.
Set the fileName to what you want to store the GTM state as. For all intents and purposes, this makes very little difference. You can just keep the name as filename.json if you wish.
Set slackWebhookUrl to the URL of the incoming webhook you created in the previous chapter.
Now, populate the gtmContainers array with all the combinations of Google Tag Manager account ID and container ID that you want to analyze for changes. The syntax is accountID_containerID, so in the default config.json, there are two containers:
- Account ID
12345, Container ID23456 - Account ID
12345, Container ID34567
You can find the account ID and container ID in the URL when visiting the container. The account ID is the first numerical string you see, and the container ID is the second one. For example, this is one of the containers I want to monitor:
And this is another one:
So the array would look like this:
"gtmContainers": ["23019854_8060344", "4702258931_12269166"]
Remember that you need enough access rights on these containers to add a new user to them!
You can keep the verboseLogging setting as true. My final config.json now looks like this:
{
  "gcs": {
    "bucketName": "simo-demo-gtm-slack",
    "fileName": "filename.json"
  },
  "slackOutput": [{
    "slackWebhookUrl": "https://hooks.slack.com/services/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",
    "gtmContainers": ["23019854_8060344", "4702258931_12269166"]
  }],
  "verboseLogging": true
}
Save the file when done.
Then, create a new ZIP archive that has the following files from the folder:
index.jsconfig.jsonpackage.json
NOTE! The files must be in the root of the ZIP archive, so do not compress a folder with the files. There should be no folders in the ZIP.
Keep this archive handy, you’ll need it very shortly.
Create a new Cloud Function
Go to the Cloud Functions dashboard, and click the Create Function link.
Give the function a name. Again, my lack of imagination steers me to name it the same as my project and my GCS bucket: simo-demo-gtm-slack.
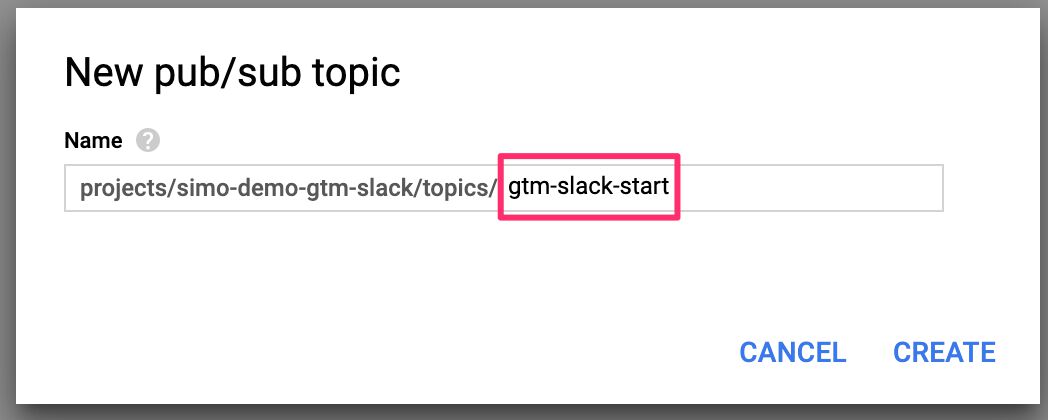
Keep the Memory allocated as its default (256MB), and then choose Cloud Pub/Sub from the list of triggers. In the Topic drop-down, click Create new topic.
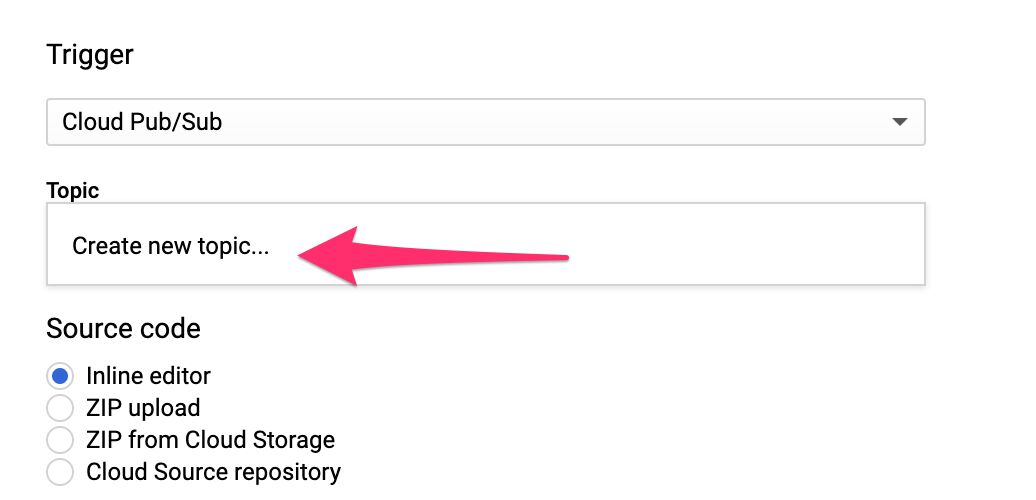
Set the topic name to gtm-slack-start and click CREATE.
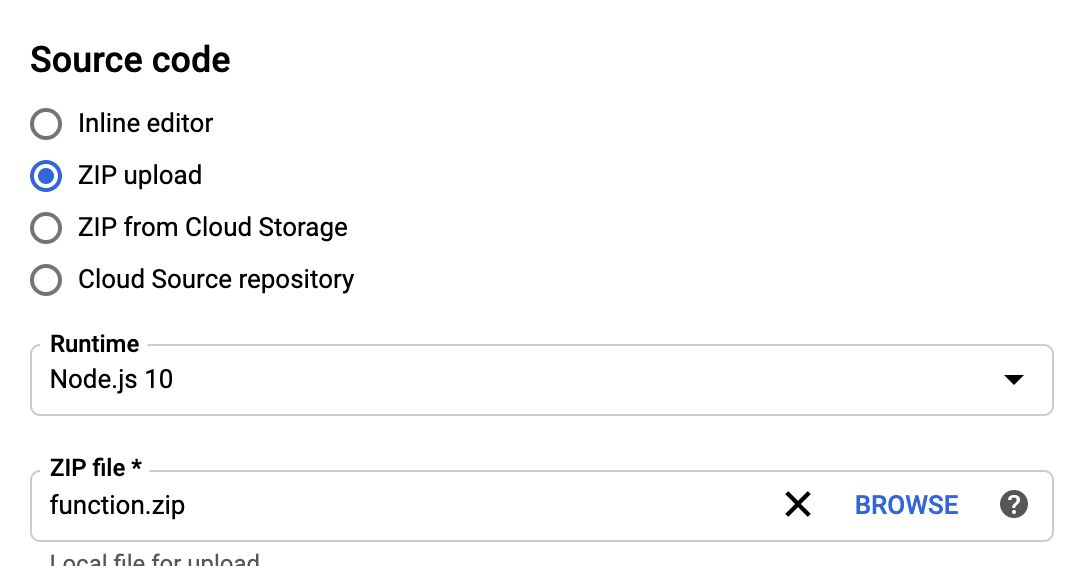
In the Source Code selection, choose ZIP upload. Set the Runtime to Node.js 10..
For ZIP file, click Browse and locate the archive you just created with your modified config.json included in it.
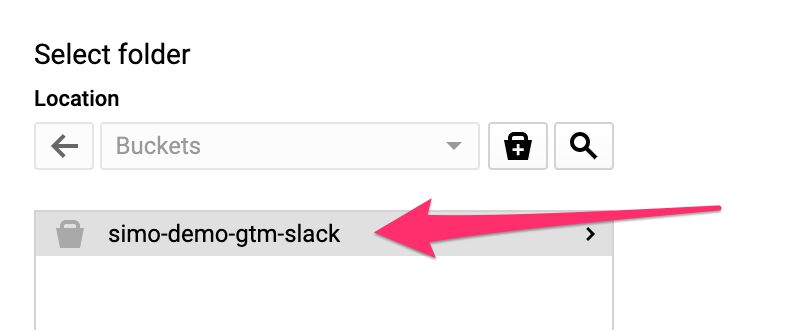
Next, click Browse next to Stage bucket, and choose the bucket you created in the beginning of this tutorial.
The Google Cloud Platform will use this bucket as a temporary location to stage the Cloud Functions files.
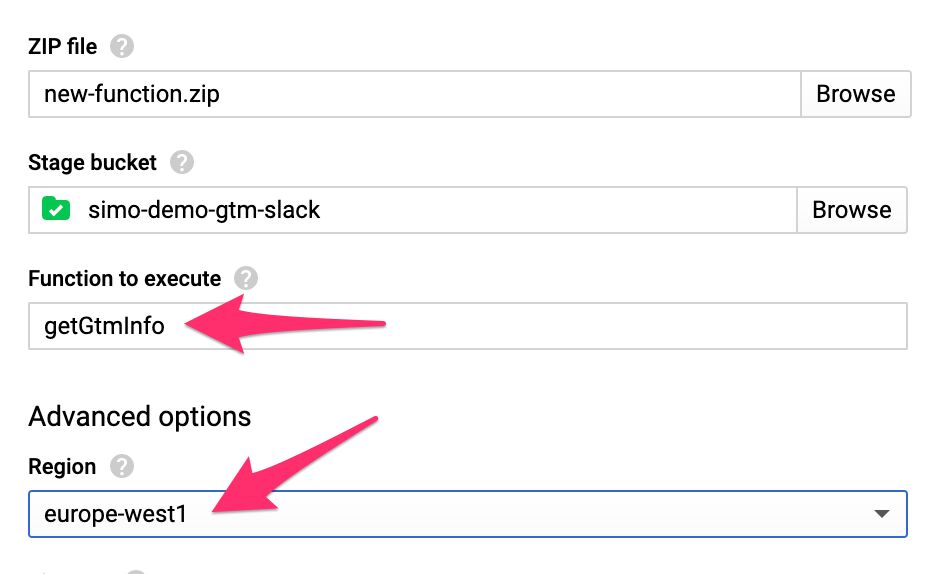
For Function to execute, type: getGtmInfo.
Finally, expand the Environment variables, networking, timeouts and more option, and set your Cloud Functions to run on the same region where you created the Cloud Storage bucket in.
This isn’t a necessary step - you can set the Cloud Functions to run on any region you wish. It does make the application run a bit smoother, and can keep any possible costs down.
Finally, click the blue Create button at the bottom of the configuration screen to create your Cloud Function.
If all goes well, the icon next to the function name should turn into a green checkmark.
Step 5: Add a service account as a user to your GTM containers
When you created the Cloud Function, GCP automatically created a service account for you.
Service accounts can be used for server-to-server access between different Google properties. In this case, we want the Cloud Functions to have access to the Google Tag Manager containers you specified in the config.json, so we need to add a service account from your project as a user in Google Tag Manager.
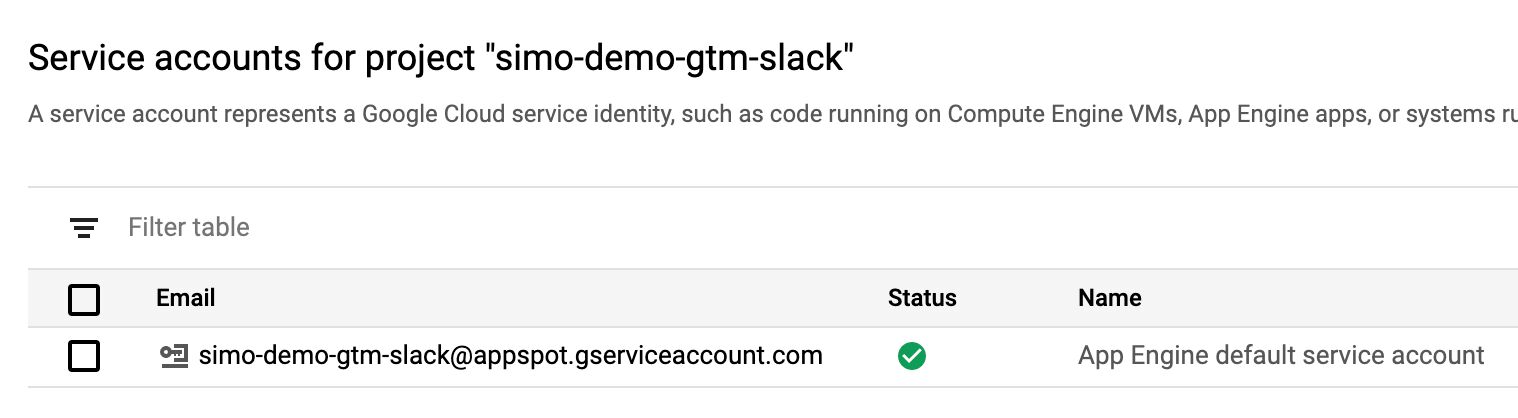
To find the service account email address, browse to https://console.cloud.google.com/iam-admin/serviceaccounts. You should see an App Engine default service account here, with email:
YOUR_PROJECT_ID@appspot.gserviceaccount.com
If you don’t see a service account here, you might need to wait 10 minutes or so after creating the function, and you might need to refresh the page.
Now, copy the email address and add it as a new READ user to all the containers you listed in config.json.
Once you’ve done these steps, you Cloud Function has permission to communicate with these Google Tag Manager containers.
Step 6: Test it
You can now test the setup.
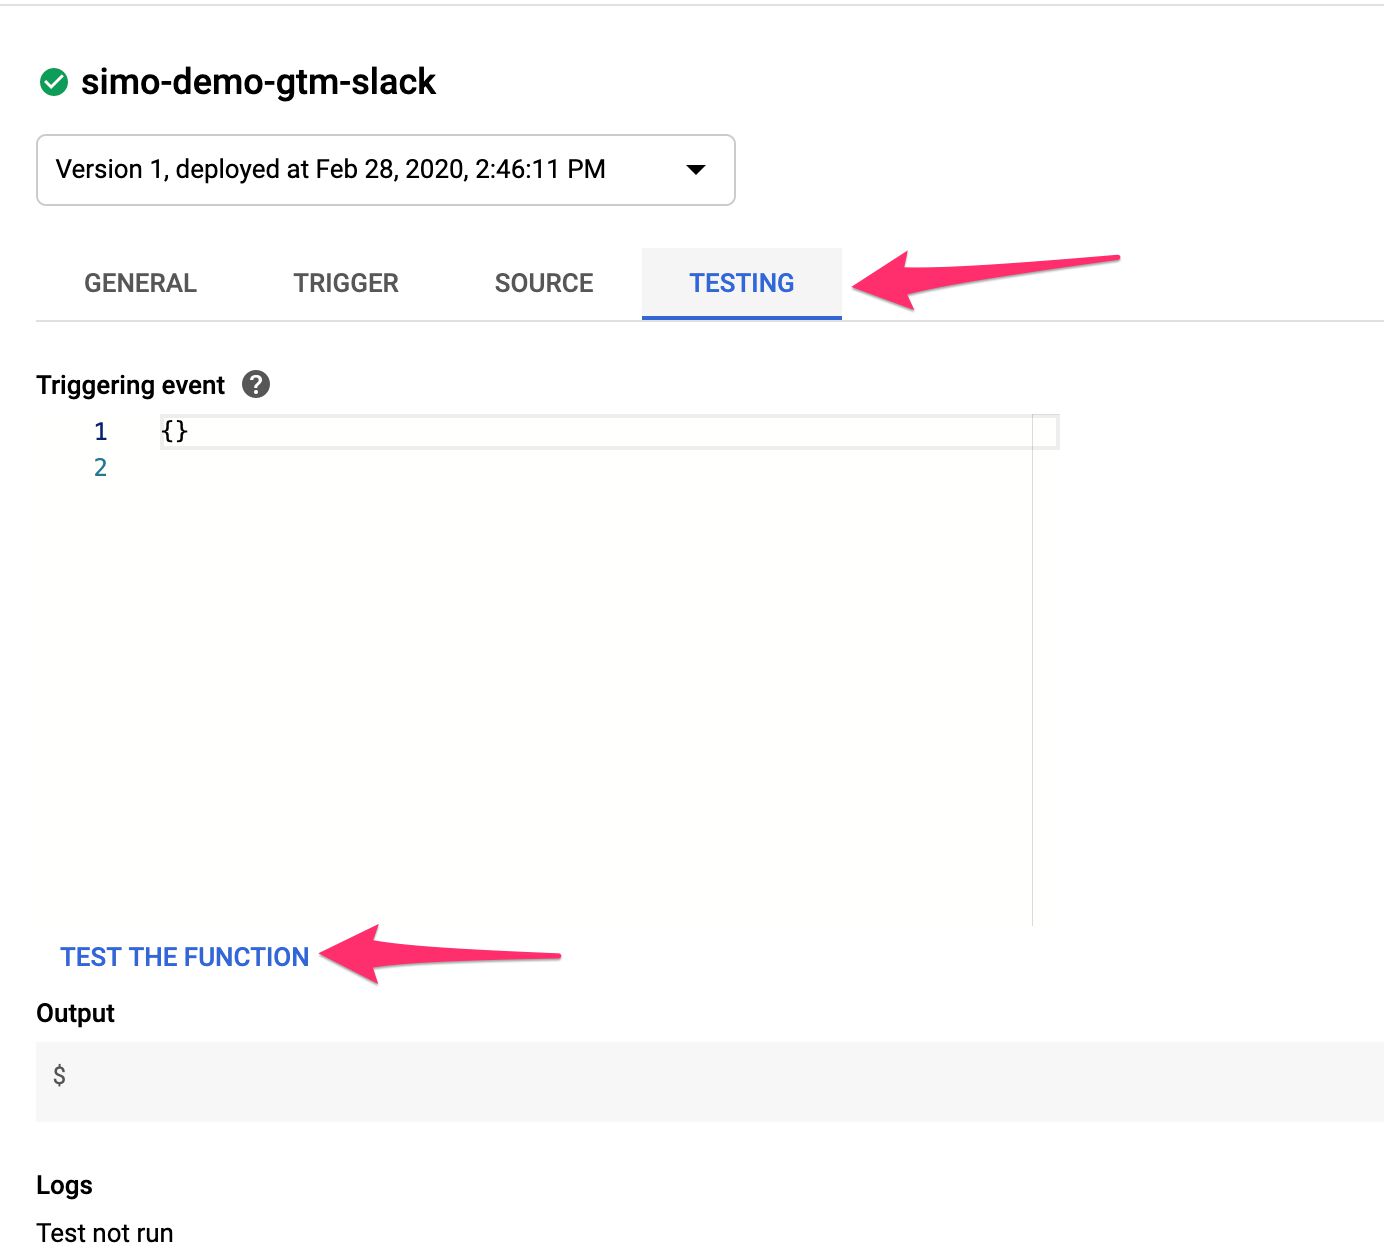
First, visit https://console.cloud.google.com/functions/list and click your function name to open it.
In the dashboard that opens, choose the TESTING tab. Here, click TEST THE FUNCTION.
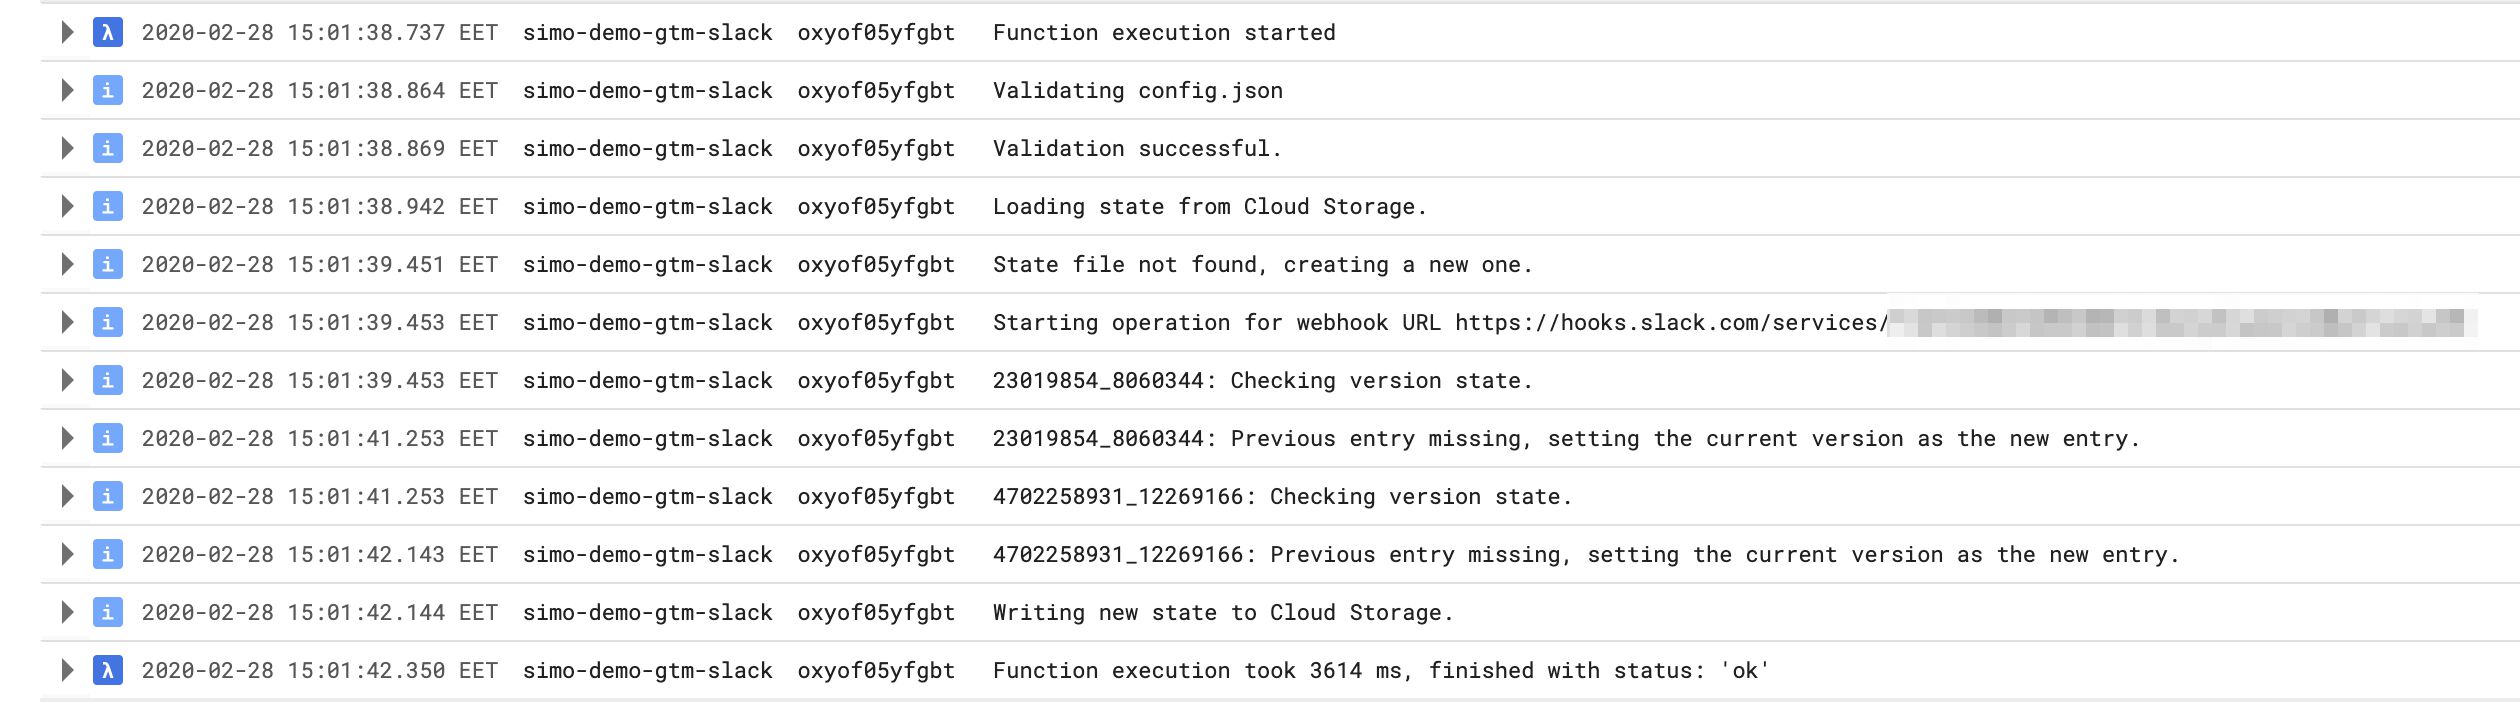
If all goes well, you should see a bunch of log entries like this:
Importantly, the state file has now been created. Thus, any time you run the function, if the version of the published containers is different from the one stored in the state file, Slack will be notified.
Let’s try this!
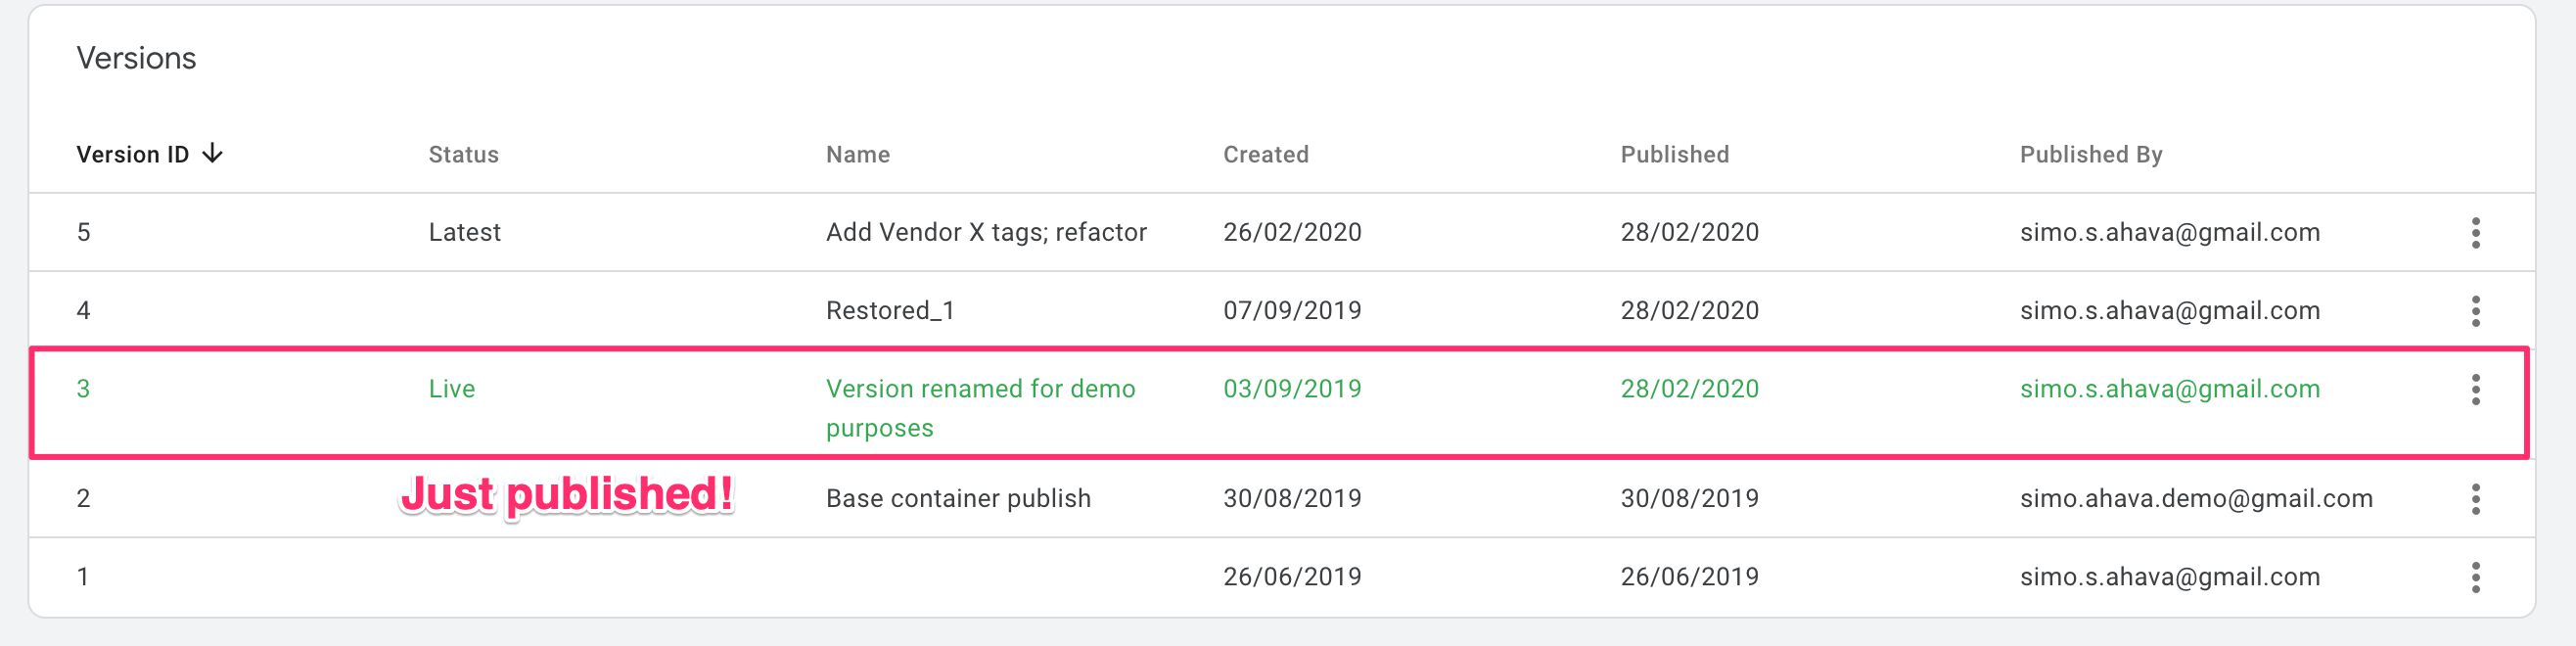
Go ahead and publish one of your containers. Remember to name the version to describe what was changed.
Now, test the Cloud Function again. You should see a new Slack message from your integration.
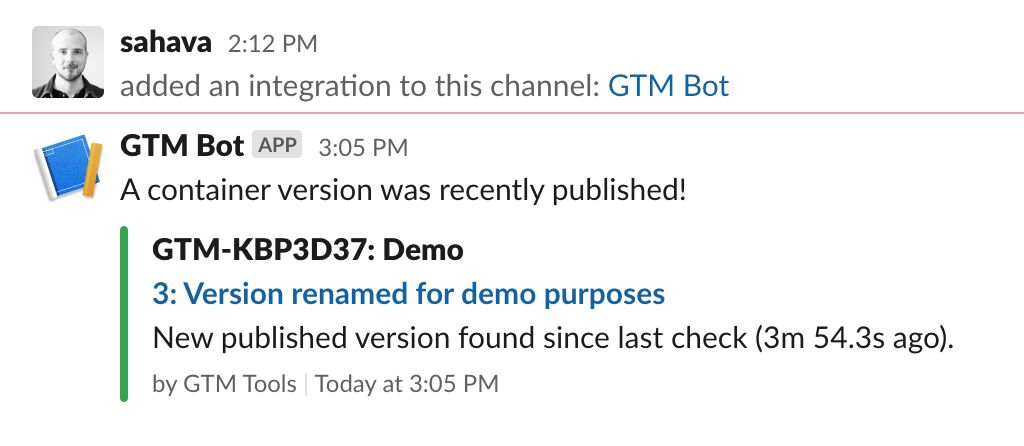
If you see this message, then everything works as it should.
Step 7: Setup Cloud Scheduler to run the function every X minutes
Final step is to automate the polling. You can use Cloud Scheduler for that. It’s basically a managed cron service, which you can configure to trigger the Cloud Function every five minutes, for example.
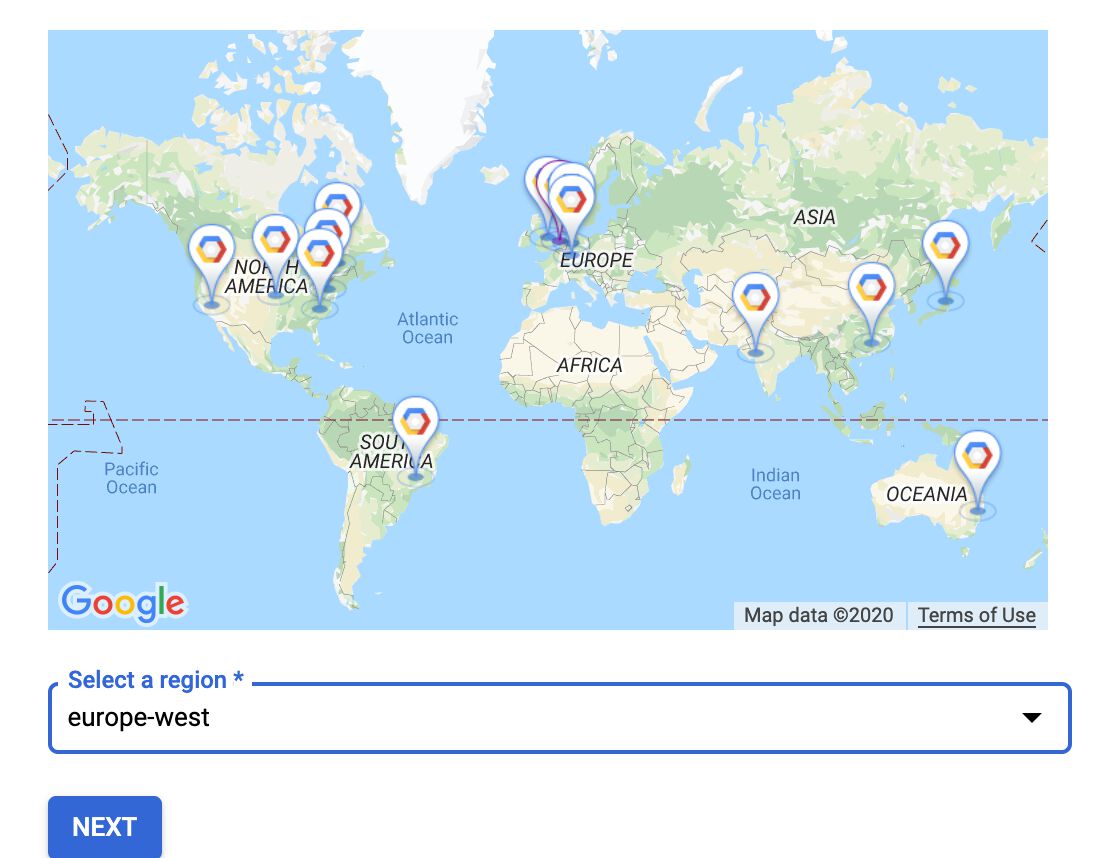
First, visit https://console.cloud.google.com/cloudscheduler and click CREATE JOB to create a new job.
From the location selector, choose a location as close to your Cloud Function as possible. I chose europe-west, as that’s the main region where my Cloud Function and Cloud Storage buckets are running.
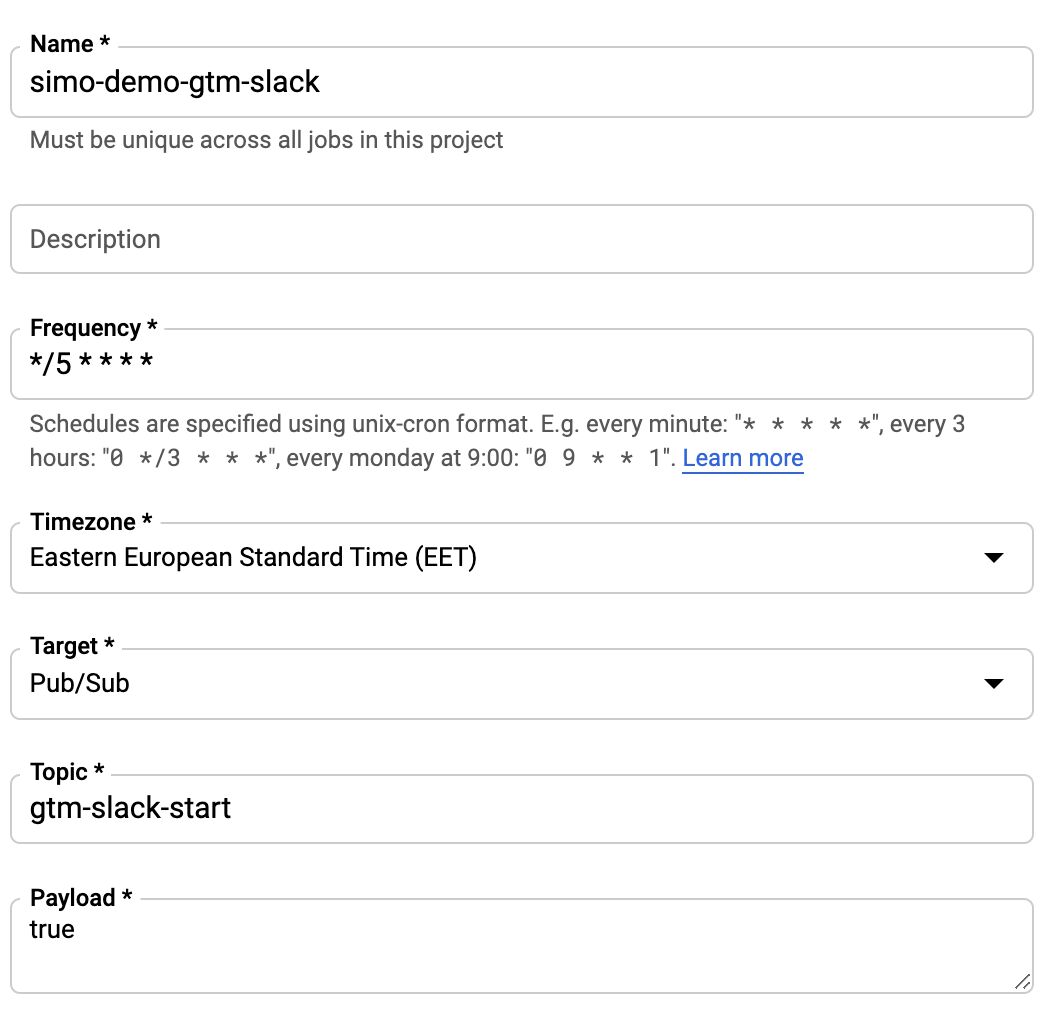
In the next screen, set the following options.
- Name: Whatever you wish, I chose
simo-demo-gtm-slack. - Description: Leave empty.
- Frequency: Use crontab.guru if you don’t know how to set schedule expressions. I chose
*/5 * * * *to fire the function every five minutes. - Timezone: Irrelevant - choose your own, for example.
- Target: Choose Pub/Sub.
- Topic:
gtm-slack-start. - Payload:
true.
Click CREATE when ready.
Now, publish a different container version again, and wait for the scheduler to go off. As I chose every 5 minutes, it means I have to wait a maximum of five minutes to verify the setup works.
Summary
You’ve now got a Cloud Scheduler running your Cloud Function periodically. Each time the Cloud Function runs, it pulls the most recent state object from Cloud Storage, and then it polls the Google Tag Manager API to check if any of the containers in the state object have a newly published version.
If a published version is found, the Cloud Function notifies your Slack Workspace with a message that a new version has been found.
You can follow the costs in your Google Cloud Platform dashboard. With two containers, my setup costs nothing.
Note that if you add many more containers to the setup, not only might your costs increase but you also might need to increase the timeout from 60 seconds to something higher from the Google Cloud Functions settings. Be sure to monitor the cloud logs!
You can modify index.js to check other properties as well. For example, with some programming you could notify Slack about what changes were done. Another useful feature would be to notify if new users have been added to the container, though before you do this you must make sure it’s OK to do this legally, as you’d have to store the list of users in the state object. You could hash this list to mitigate this, though.
Anyway, let me know in the comments if you have questions about the setup, or if you have other ideas for this type of a diff-machine!