In the new version of Google Tag Manager, auto-event tracking has received a considerable usability upgrade. It might seem quirky at first, especially if you’re used to the old auto-event tracking method, but the logic behind the new setup is brilliant.
The most important distinction is that auto-event tracking isn’t something you control with separate tags anymore. Rather, it’s now entirely trigger-driven, meaning you activate and specify the auto-event tracking of your choice using tag triggers (triggers are what ye olde folk used to call rules).
The Simmer Newsletter
Follow this link to subscribe to the Simmer Newsletter! Stay up-to-date with the latest content from Simo Ahava and the Simmer online course platform.
The trigger types
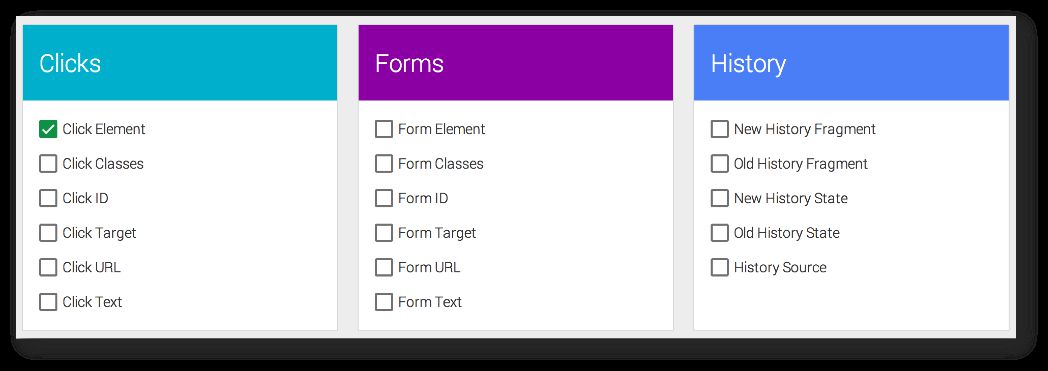
If you’ve used the new UI, you might have noticed how triggers are now grouped together logically. For example, you have your Click Triggers (which include both “Click” and “Link Click” trigger types):
I’ll get to how these triggers are set up in just a bit, but the important thing to understand is that the auto-event trigger controls both when your actual tag fires as well as when the auto-event listener should be active. That’s a huge simplification, since you no longer need a separate, discrete tag to control your auto-event listener with.
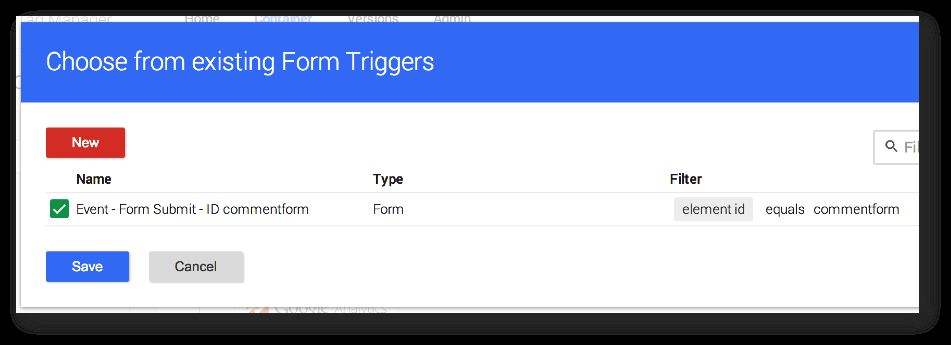
Then you have your Form Triggers:
And you also have auto-event triggers for History events, JavaScript Errors and Timers, as before.
So remember:
The auto-event trigger determines when your tag fires AND when the listener is active.
That’s the new auto-event tracking in a nutshell.
How to set it up
But if this was just a “in a nutshell” post, I would shame my reputation as someone who writes increasingly long guides when a simple, to-the-point, concise, non-repetitive, efficient, and disambiguated utterance would suffice (this sentence proves my point). So, here’s a step-by-step how to set up some useful listeners.
When you create a trigger for an auto-event, such as a Click trigger or a History trigger, they will always be on. What does this mean? Well it means exactly what I wrote. For example, when you create a Click trigger – regardless of what filters you have in place for the actual tag which uses it – every single click on every single page will create the gtm.click event. Go ahead, try it! You can’t limit the Click trigger type to only fire on certain pages.
There are two notable exceptions to this.
When you create a Timer, Link Click or a Form trigger, you will need to specify when that trigger is enabled, if you’re using the Wait For Tags or Check Validation options. This is because these listeners can behave erratically when other scripts on your page interrupt or control the event propagation flow. It’s thus not always prudent to have one of these triggers firing on a page where they might not play nicely with your other scripts.
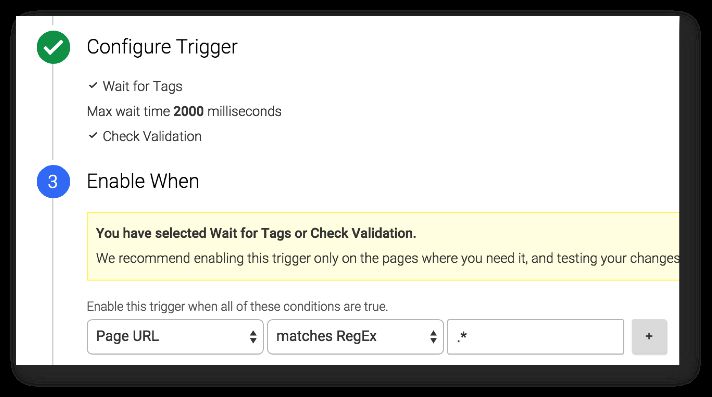
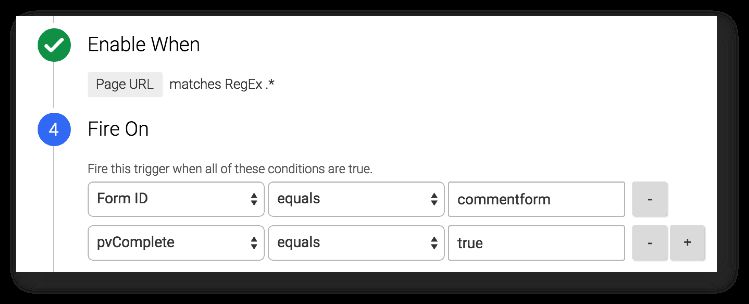
You control when these special triggers are enabled using the Enable When step in the trigger settings:
You will only see this option on the Timer, the Link Click, and the Form trigger type, when you’ve selected Wait For Tags or Check Validation. This filter lets you delimit the trigger to only be active on certain pages, for example. It’s best to start with a broad match (Page URL matches RegEx .*), and then modify it appropriately if problems arise.
The conditions for when a Tag that uses this trigger should fire are set in the Fire On step:
I hope this distinction is now clear. Enable When is for determining when the trigger listens for events, and Fire On is for when the tag should fire if the event is recorded.
So, back to the step-by-step. Here’s the key process:
Create the tag you want to be triggered by the auto-event (e.g. Event tag for Google Analytics)
Add the trigger you want to use for the tag (e.g. Click or Form)
In the trigger settings, specify what other conditions beside the Click or Form Submit you want in place for the tag (e.g. Click ID equals X or Form URL contains Y)
If it’s a Link Click or Form trigger, you need to also specify on what conditions should the auto-event listener itself be active
Let’s go over this step-by-step. I’ll create a tag which sends an event whenever someone clicks on a link which redirects out of my domain. An external link, in layman’s terms.
1. Built-in variables
First things first. The new UI introduced something called Built-In Variables. These little checkboxes let you quickly enable your most used variables for your tags to utilize. As I want to trigger the tag only when the clicked link HREF does not point to my domain, I will need to activate the Click URL variable. In the old UI, it’s the same thing as the {{element url}} macro, just simplified here for your convenience.
You’ll see me using it in just a bit.
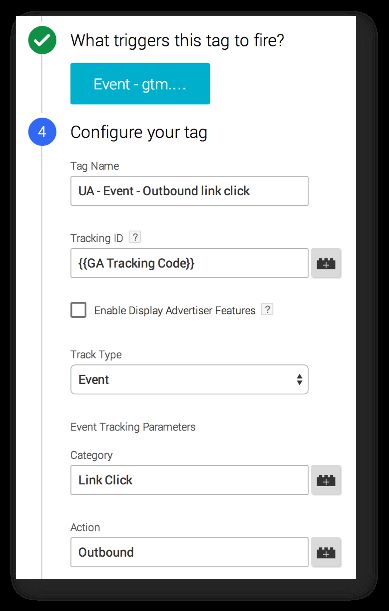
2. Set up your tag
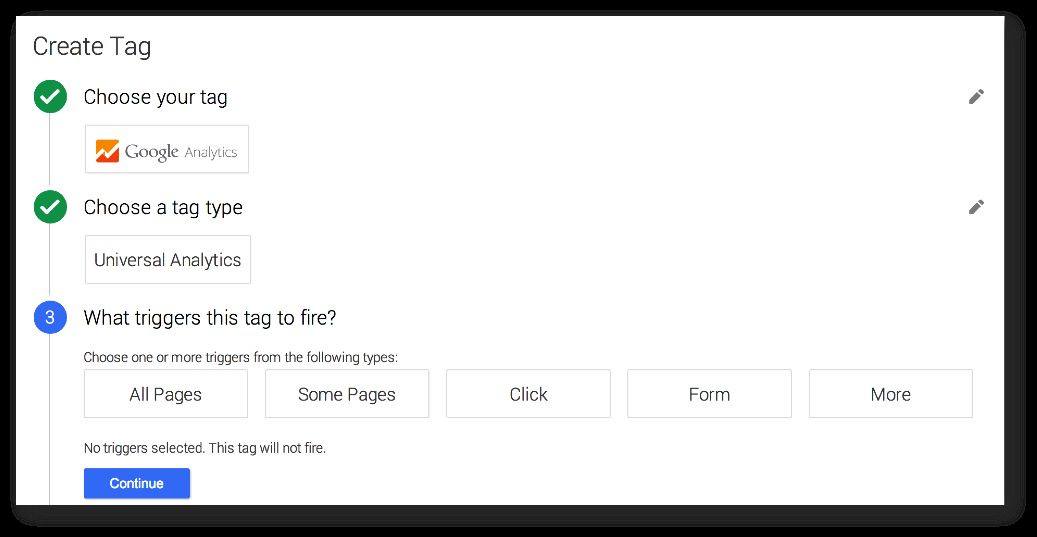
Next, create your tag. I’ll be using a Universal Analytics / Event tag for this. Let’s just stop short of adding the trigger:
Nothing surprising here, right?
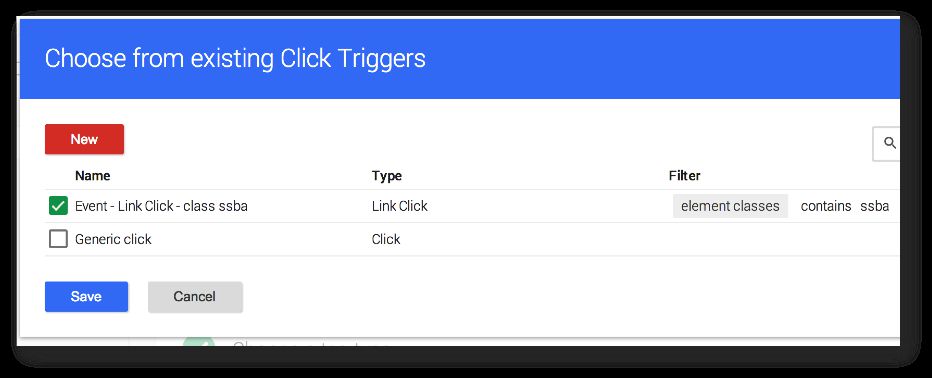
3. Create your trigger
Next, we need to create the Link Click trigger that makes this tag go BOOM. So, click on Click in the Triggers list to enter the Choose from existing Click Triggers (if you already have click triggers) or the Add a new trigger view if this is your first one. Whatever the case, you should now be in the process of creating a new Click trigger for your tag:
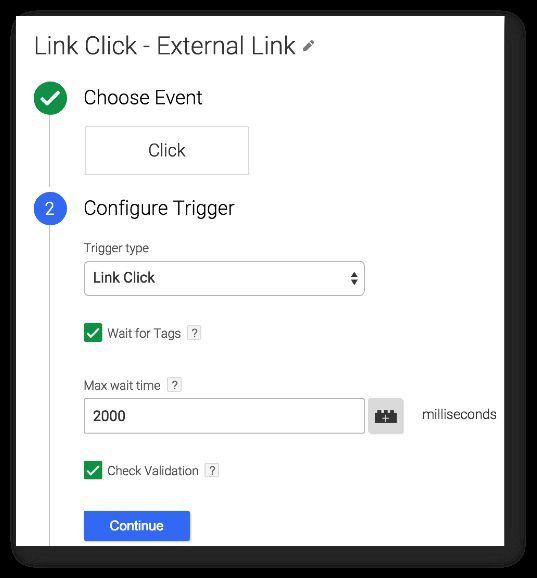
In Step 2, you’re asked to select Trigger Type. Choose Link Click from this list, and you should see two new options in this same step:
Wait For Tags - if you want the listener to wait for any tags to fire before proceeding with the original action (i.e. link redirect)
Check Validation - if you only want the listener to activate when a proper link click is registered
It’s a good idea to start with both checked, and then if it doesn’t work, debug by unchecking first one and then the other.
Note that since we’re creating a (Link) Click trigger, the underlying condition is that a click has occurred, so you don’t have to specify the gtm.(link)click event anymore! All you need to specify in these filters are the other conditions you might want to use to have your tag fire only under specific circumstances.
If you choose either Wait For Tags or Check Validation, Step 3 requires that you enter the condition for when the listener should be active and listening for clicks. Like I suggested before, start with a broad match like Page URL matches RegEx .*, test it thoroughly, and if some pages prove problematic, exclude them with a URL condition.
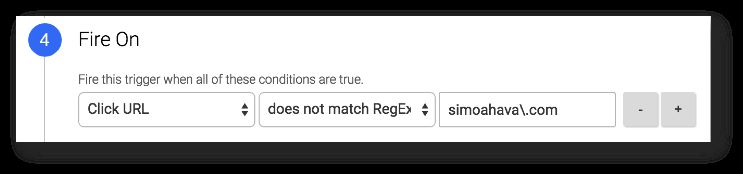
Step 4 is for specifying what happens when a (link) click event is registered. If a tag has this trigger attached to it, you should now specify any other conditions you want to check to make the tag only fire for certain link clicks, for example. Because we want to track external link clicks, we’ll start by choosing Some Clicks, and then entering the following Fire On condition:
So, by having Fire On: Click URL does not match RegEx simoahava.com, we’re making sure that any tag that uses this trigger is only fired if the click event is registered on a link pointing away from the simoahava.com domain.
And that’s it! The way you read the settings from Step 1 to Step 4 is roughly this:
This Link Click - External Link asset is a trigger of type Link Click. It will listen for link clicks on all pages where this container is installed on. When a link click event is registered, this trigger will activate any tag it is attached to only if the clicked link element URL does not match the regular expression pattern simoahava.com. The link click listener will also wait for any tags to fire before proceeding with the link redirection and only activate if the action is a valid link click.
So, this is now 95 % of auto-event tracking in the new UI. It’s trigger-based, so you just need to get your trigger right and everything will work smoothly. Save the trigger and return to the tag.
4. Fill in the rest of your tag
The rest is just regular tag creation. Remember to give your tag a name. You can use the other built-in variables (such as Page Path) to populate your fields, just like in the old UI.
And that should be it. Remember to test with the Preview mode to make sure the tag only fires when external clicks are registered!
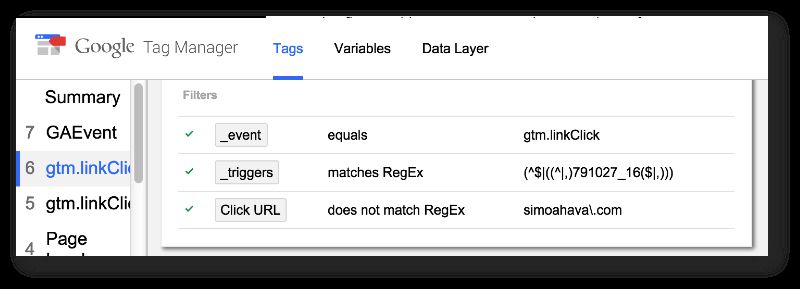
It’s important to notice that gtm.linkClick events are registered as usual with every link click, since my Link Trigger was set to be active with {{url}} matches RegEx .*. But it’s the first set of filters that make sure my tag only fires when the clicked element HREF doesn’t contain simoahava.com.
Summary
The new setup might seem daunting at first. It’s a bit confusing now, I admit, and I hope the UI will be improved. For some, it’s been difficult to distinguish between the first set of filters on the trigger (that determine when the tag fires), and the second set of filters on the Link Click and Form trigger types (that determine when the listener is active). This should be made more intuitive.
However, having trigger-based auto-event tracking is very logical, indeed. A listener should, after all, only exist to fulfil a condition on a marketing tag. They have no inherent value as tags themselves. It’s thus counter-intuitive to have a listener as a tag when its sole purpose is to create the foundations for a firing or blocking trigger.
As soon as you grasp the interplay between tags and triggers in this way, you’ll have a nice Eureka moment. Feel free to share that moment in the comments below :)
I only touched upon how the new UI works, and especially the new Built-In Variables only received a cursory glance, but I honestly love working with the new UI. Everything is more streamlined and the workflow is much clearer. I hope you’ve found it useful as well!