
Server-side Tagging With Azure App Service
To continue my extensive collection of Google Tag Manager’s server-side tagging articles, in this guide I’ll walk you through how to set up a Server container in Microsoft Azure’s App Service platform.
For my previous guides on manually provisioning a Server container, follow these links:
- Amazon AWS (Elastic Beanstalk): Deploy Server-side Google Tag Manager In AWS
- Google Cloud (App Engine): Provision Server-side Tagging Application Manually
Azure’s App Service is similar to AWS Elastic Beanstalk and GCP App Engine, in that it lets you create a web application from scratch with minimal effort.
Out of these three competitors, I found Azure’s setup to be the smoothest and the fastest. It’s probably not the cheapest, and there are some roadblocks related to securing your tagging domains behind HTTPS (more on this later), but other than that it’s a very pleasant ride.
Table of Contents
The Simmer Newsletter
Subscribe to the Simmer newsletter to get the latest news and content from Simo Ahava into your email inbox!
What you’ll need
The prerequisites are similar to the other cloud stacks:
- A credit card to set up billing (if you’re a first-time user, you’ll get USD200 trial credit).
- A custom domain name to map the endpoint to (optional but strongly recommended).
- Some way of securing the custom domain name behind HTTPS.
- A Google Tag Manager Server container, created through the regular GTM container creation flow.
If you recall from previous guides, a Google Tag Manager server-side tagging setup comprises two servers:
- The Preview server, which must be behind HTTPS, but doesn’t need to be running on a custom domain.
- The Tagging server, which should be behind HTTPS, and should run on a custom (sub)domain.
I will not be instructing you on how to integrate the BigQuery API – you can follow the official documentation for details on how to add service account credentials to your Azure service.
In this guide, I’ll walk you through the setup as a completely new user, so that you can follow the flow if you’ve never tried Azure before. If you already are an established Azure user, you can skip to the beginning of the actual setup.
Step 1: Create a new Azure account
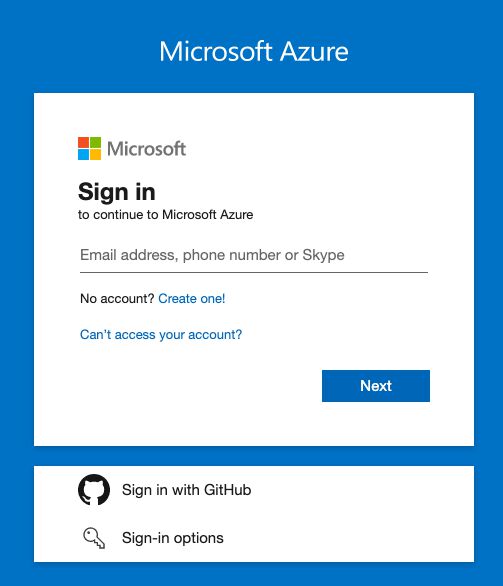
Browse to https://portal.azure.com/. You need to log in with a Microsoft account.
If necessary, follow the prompts to create a new Microsoft account with the email address of your choice.
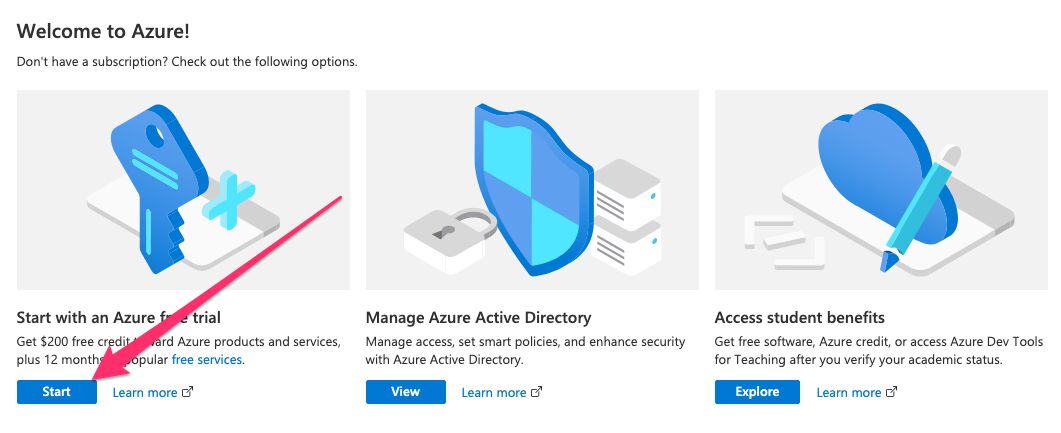
If you’re a new Azure user, you can start with the free trial, which gives you $200 credit to your billing.
When you click through to the free trial, you need to input some information to create your new Azure account.
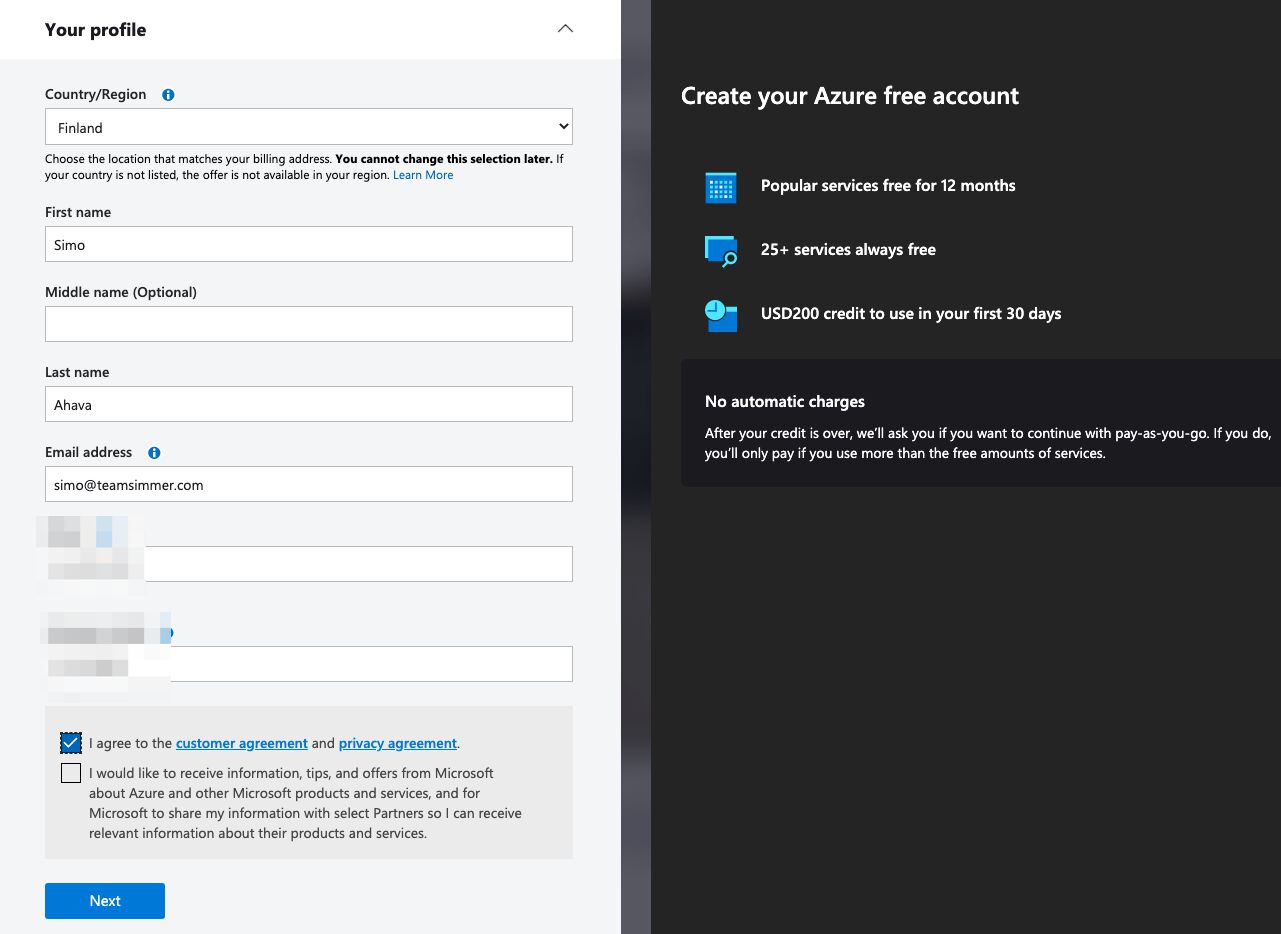
After the credit runs out or you use the services paste the first 30 days, Azure will prompt you if you want to continue with pay-as-you-go, so that you’ll only pay for the actual services you use (beyond the free tiers).
You’ll need to also provide your credit card information for identity verification. Azure will also use this card for billing you for services when necessary.
Once you’re done inputting the credit card information, click Sign up to finally create the account.
Azure hierarchy
In Azure, the hierarchy of management is this:
Management groups let you group together subscriptions to manage access, policy, and compliance across subscriptions. In this guide, we’ll use the default Root management group.
Subscriptions associate users with the resources they create. With subscriptions, you can set budgets and policies that cover the resources you create in the subscription. A subscription should have been automatically created for you when you set up your Azure account.
Resource groups group resources (d’oh) that have a similar purpose. In this guide, we’ll create a single resource group to contain all the resources we create for the server-side tagging setup.
Resources are the individual cloud components you work with while in Azure. We’re going to create a bunch of resources as we walk through the steps of this guide.
When you created the Azure account, a new subscription was automatically created for you, typically named Azure subscription 1.
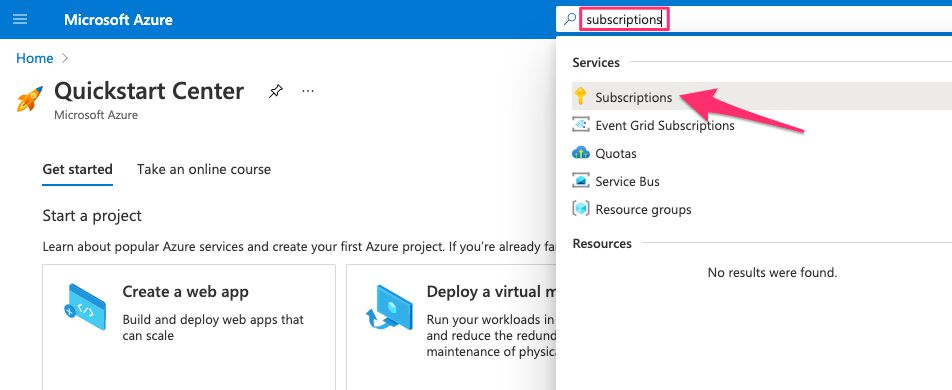
To find it, type subscriptions into the search bar in the top, and click the link to Subscriptions.
You might need to uncheck the “Show only subscriptions selected in the global subscriptions filter” option to see your subscription listed.

If you don’t have any subscriptions listed, you can click + Add to create a new one. Just follow the prompts and you’ll be fine.
If you click to open the subscription in the list, you can rename it, check its billing, and/or set cost alerts and budgets!
Step 2: Create a new Resource Group
Note! You could simply go ahead and directly create a new App Service resource and a resource group would be automatically generated for you. But I like a more methodological approach, which is why I want to create all the assets manually.
Type resource groups in the search bar and click the corresponding icon to open the Resource groups dashboard.
Here, click the + Create button to start creating a new resource group.

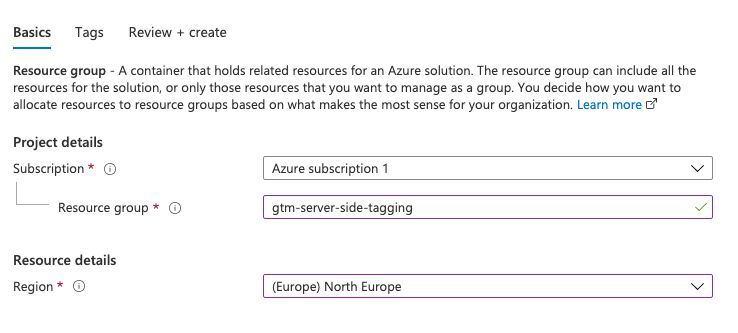
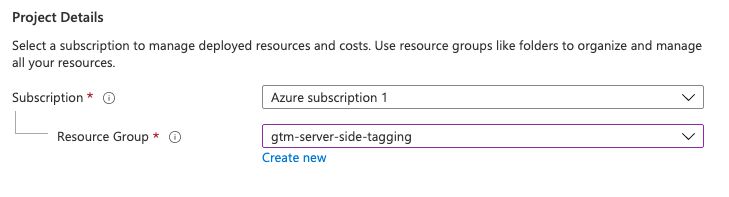
In the creation process, the three selections you need to make are:
- Subscription – Select the
Azure subscription 1or whatever subscription you want to use. - Resource group – Give the resource group a name (e.g.
gtm-server-side-tagging). - Region – Choose the Azure region that’s best for your use case.
For more details about region selection, see this page.
Here’s what I selected:
Once finished configuring, click Review + create in the bottom bar.
Once validation passes, click Create in the bottom bar.

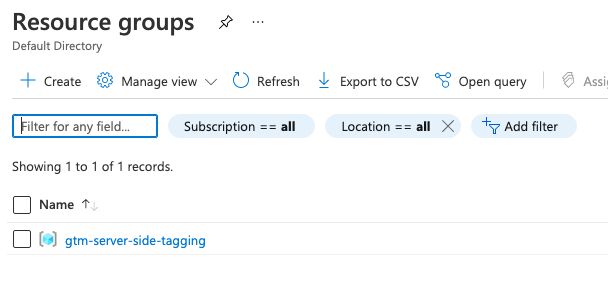
You should see your new resource group listed in the dashboard:
Step 3: Create the Preview server
The first thing we’ll create is the Preview server.
This is an HTTP endpoint to which the tagging server forwards all requests that need to be exposed in preview mode. The main requirement is that it’s behind HTTPS. It does not need to reside on a custom domain, and you can just use the default domain that Azure provides (which is, conveniently, automatically accessible through HTTPS).
Create the App Service
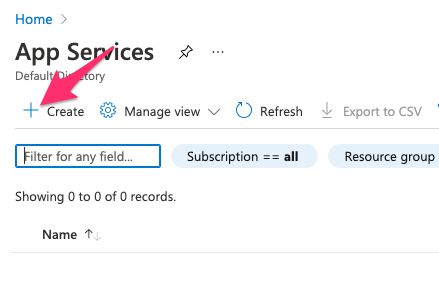
To create the server, type app services into the search bar and click the App Services link.
In the dashboard, click + Create to create a new App Service.
Configure the instance
The first thing to do in the creation flow is to select your subscription and resource group.
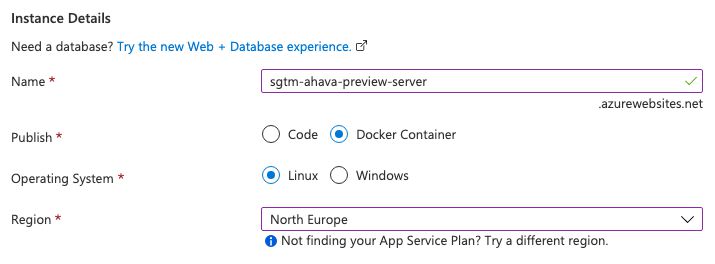
Next, give the Preview server a name. This will become the subdomain under azurewebsites.net you’ll use to access the server.
Select Docker Container as the publish option. Keep Linux checked for the operating system.
Select the App Service region you want to use – might make sense to select the same one you configured for the resource group earlier.
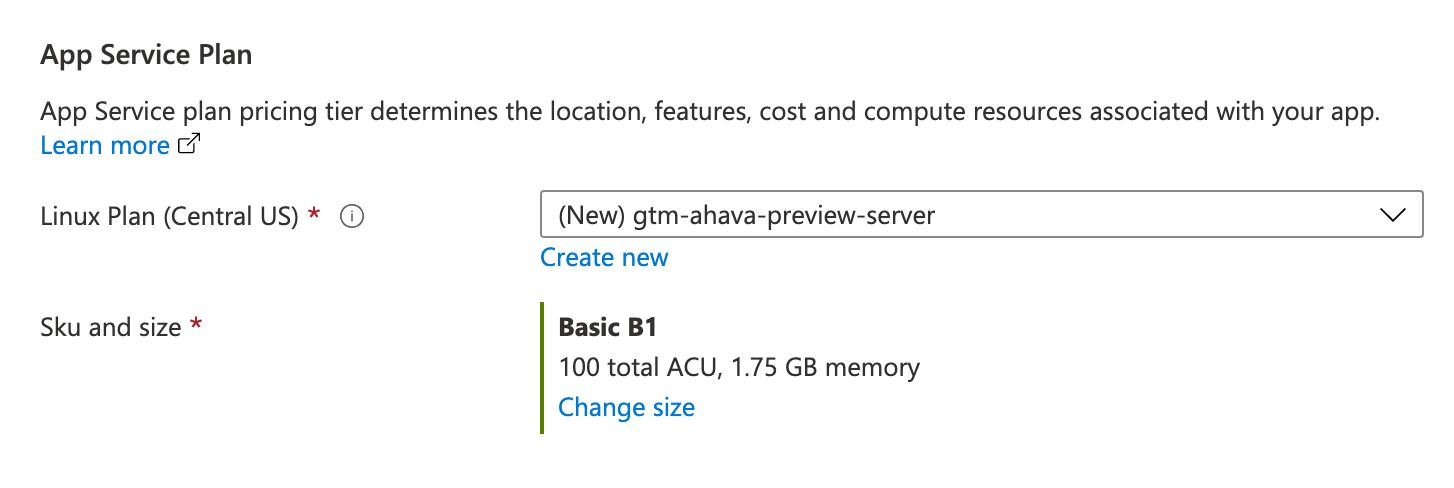
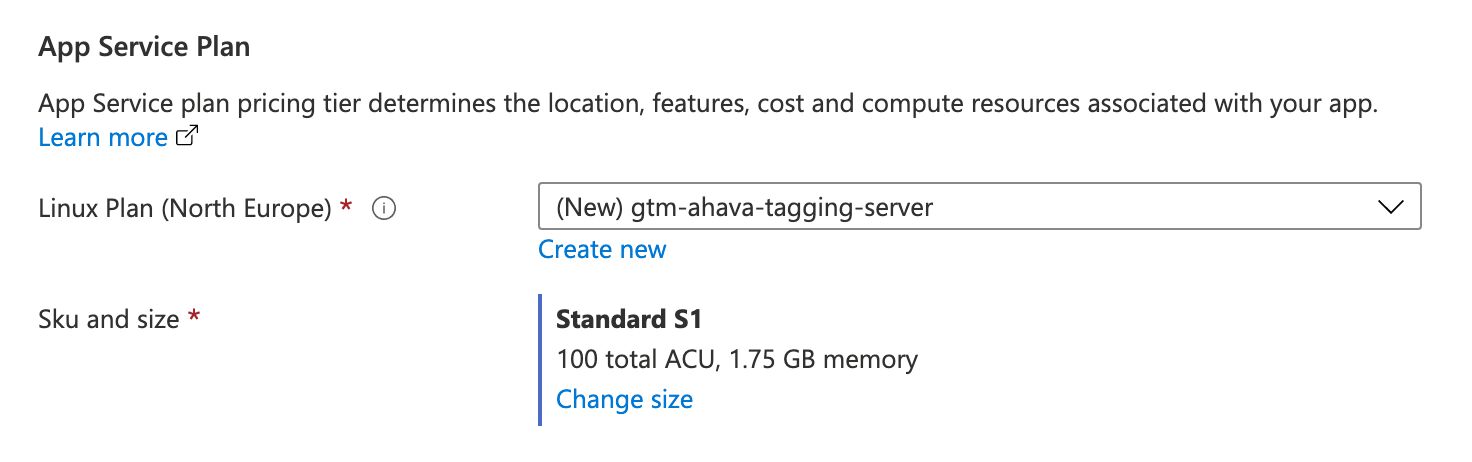
Finally, click Create new for the Linux Plan option. Give the plan a name – you can just use the same name you gave to the instance previously.
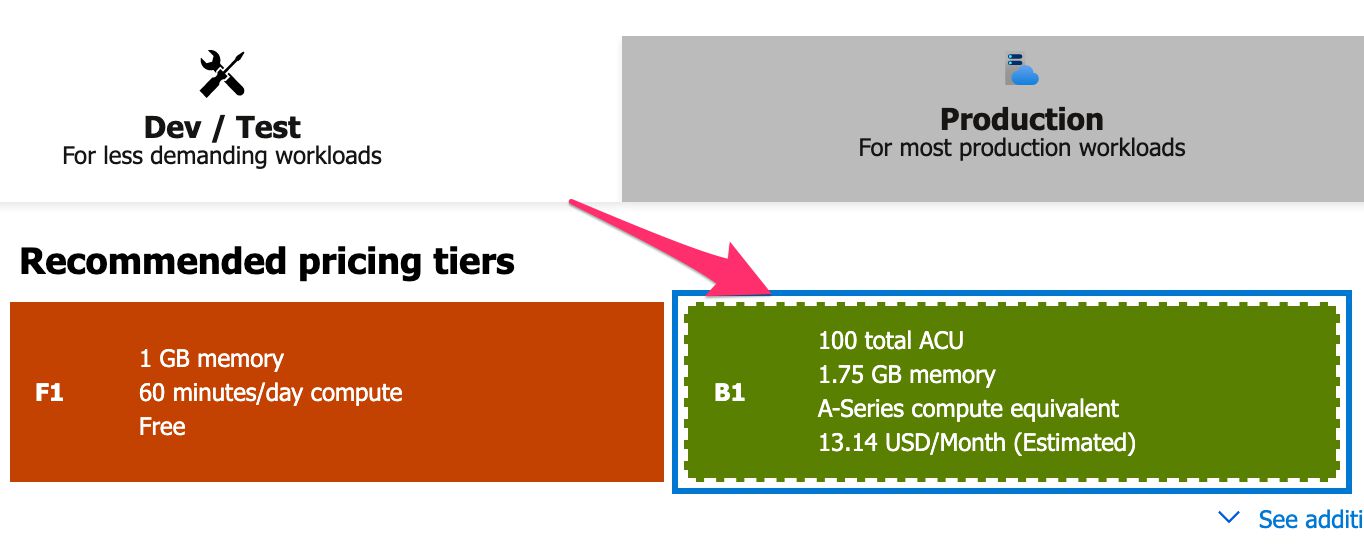
For Sku and size, click Change size. Under Dev / Test, choose B1 (one of the lowest specs).
We can choose a flimsy spec like this because the Preview server is only used occasionally and does not need to be that responsive. F1 might be tempting, but the lack of compute minutes will really make it difficult to use Preview mode for longer stretches.
This is what App Service Plan should look like now:
When happy, click the Next : Docker > button in the bottom bar to open the Docker tab.
Configure the Docker container
Docker is a technology that uses containers to provide all-inclusive application setups. For example, the entire Google Tag Manager server-side tagging infrastructure is handily available in a public Docker container, which you can configure with just a few environment variables (more on these in a bit).
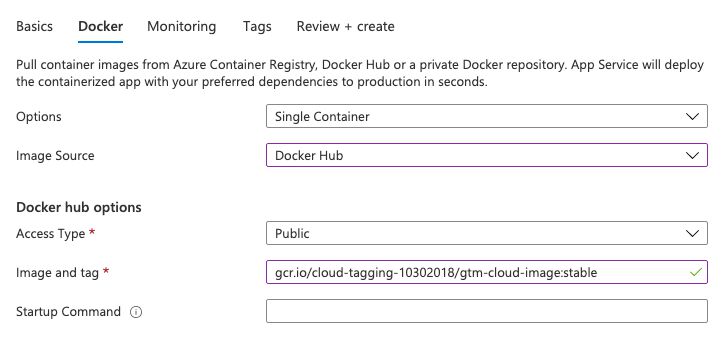
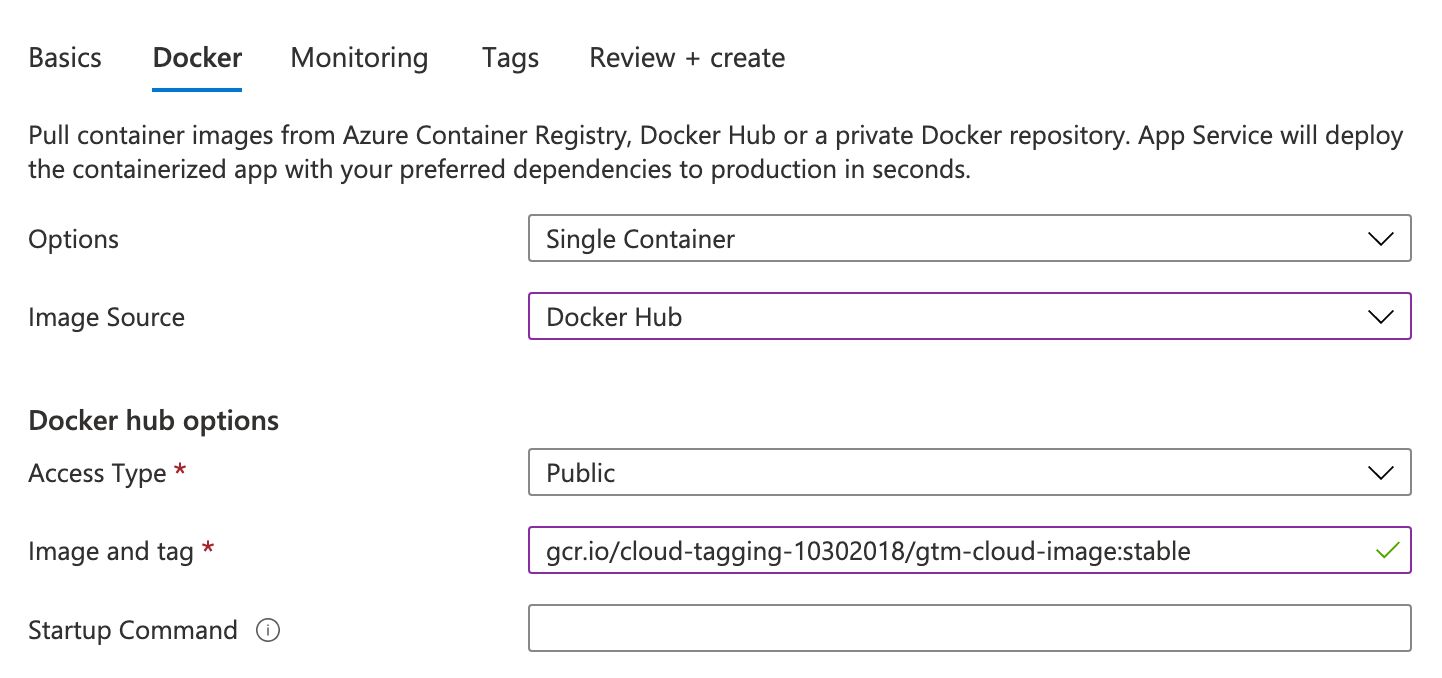
In the Docker tab, keep Options as it is (“Single Container”), but choose Docker Hub as the Image source.
Keep Access Type as Public, and past the following container URI into the Image and tag field:
gcr.io/cloud-tagging-10302018/gtm-cloud-image:stable
This is the public URL to the server-side GTM Docker container.
Here’s what your settings should look like:
Now, you can click the Review + create button in the bottom bar. Review your configuration, and then click Create in the bottom bar to create the Preview server!
Configure Application Settings
It will take a while for the service to deploy. Once it’s done, the dashboard should have a button Go to resource, so click that.
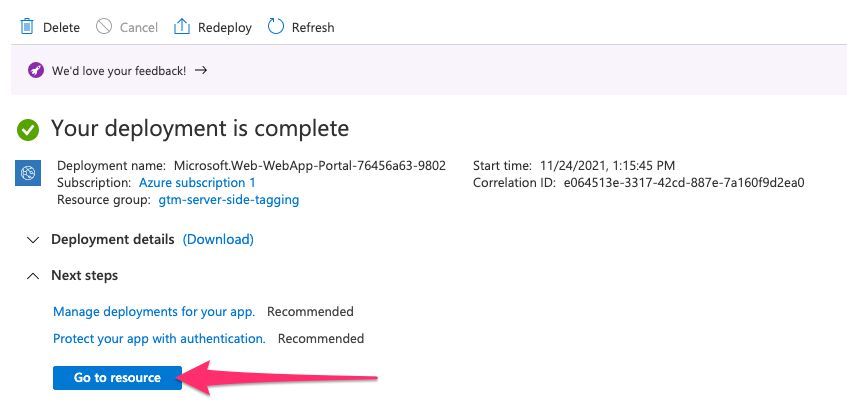
If, for some reason, you can’t see this button or you close the tab, you can always find your server by typing
app servicesin the Azure search bar, clicking over to App Services, and then selecting the Preview server service from the list.
The next thing we need to do is configure some environment variables, known as Application settings in Azure. These establish certain conditions for the Docker container.
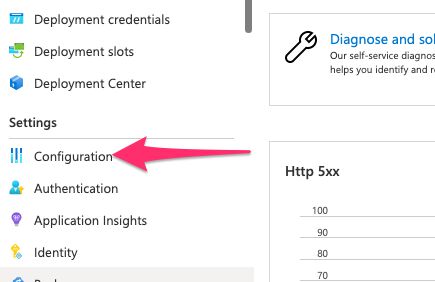
Click Configuration in the navigation.
You’re going to be adding two new Application settings here. The first instructs the service that this particular server is the Preview server. The second instructs the service to which Google Tag Manager server container this server should be linked.
Click + New application setting.
For Name, type RUN_AS_PREVIEW_SERVER. For Value, type true.
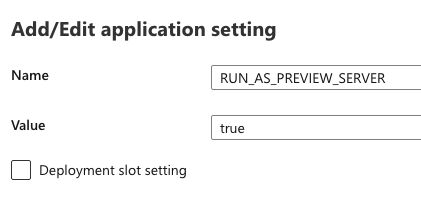
Click OK.
Click + New application setting to add another environment variable.
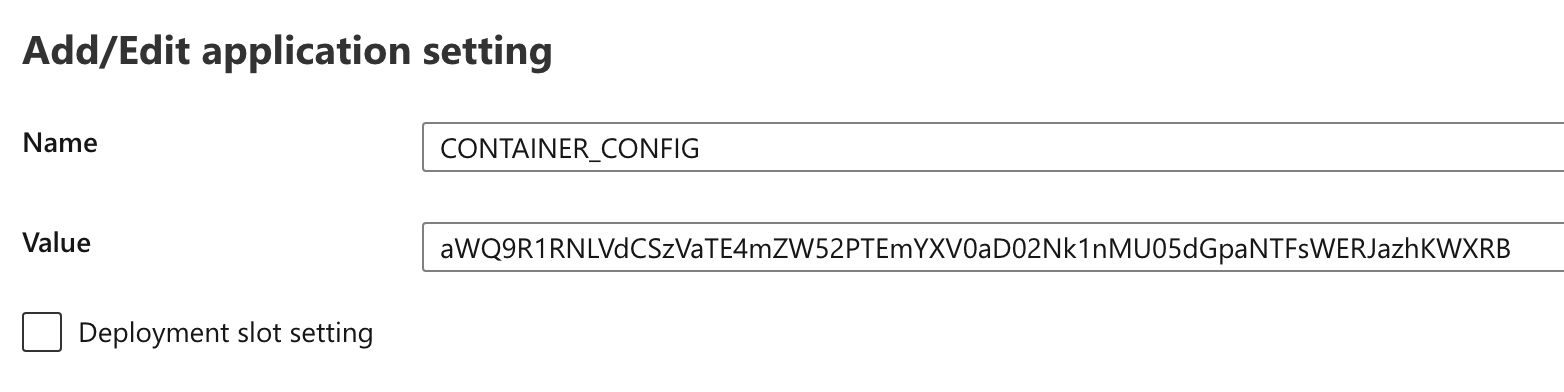
For Name, type CONTAINER_CONFIG.
For Value, open the Server container you’ve created in the Google Tag Manager user interface.
Click the Container ID in the top bar to open the container information overlay.
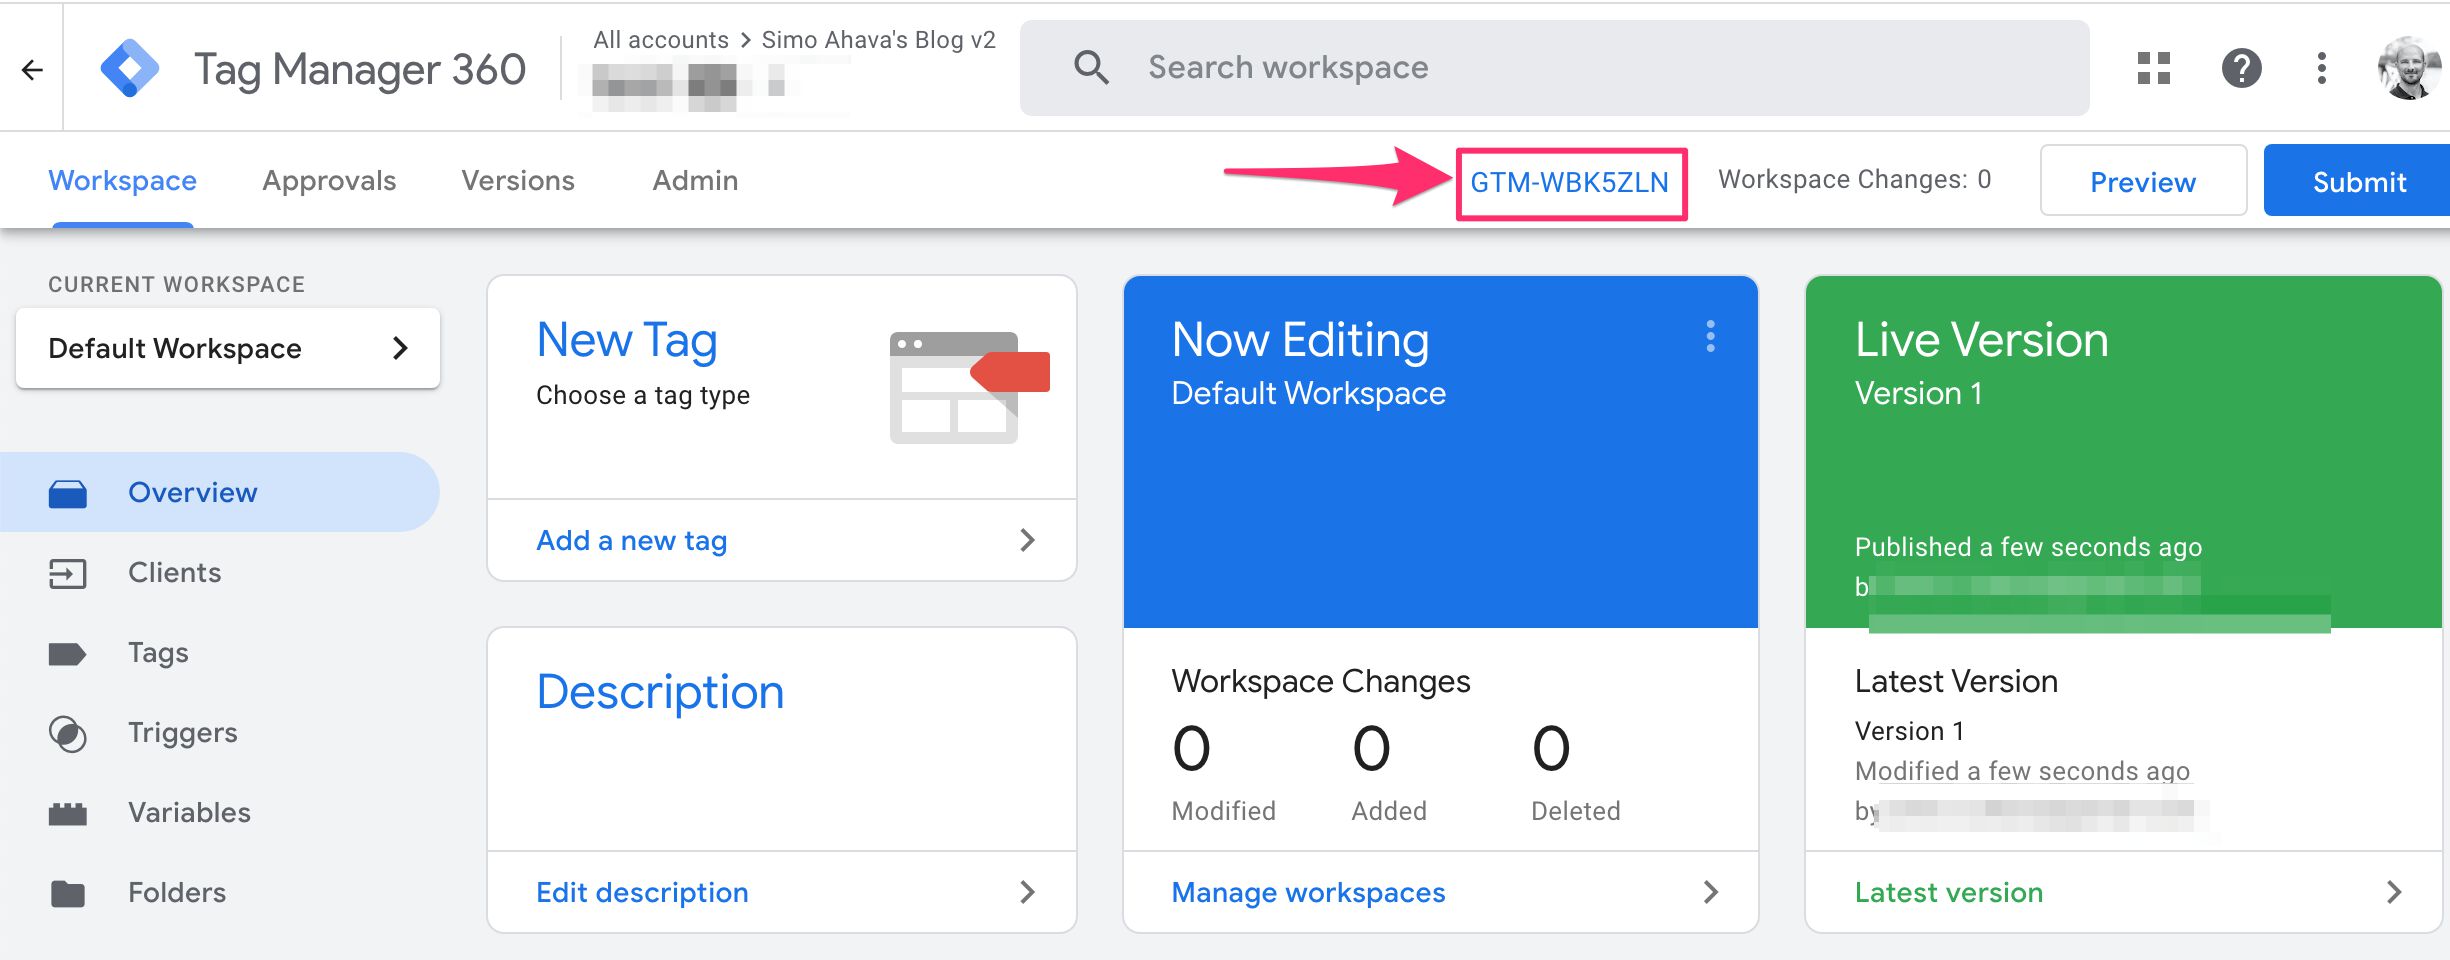
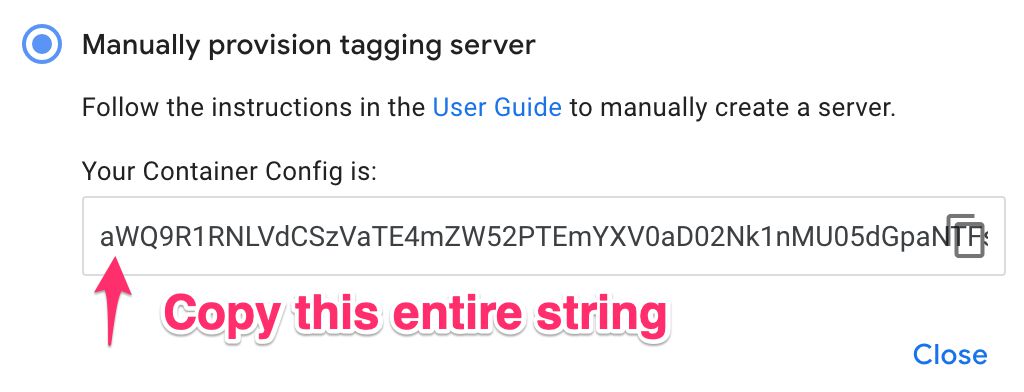
If you’re prompted about how to install Google Tag Manager, choose Manually provision tagging server.
In any case, what you’re looking for is the Container Config string. Copy it to the clipboard once you find it.
Back in Azure, set this Container Config string as the Value of the CONTAINER_CONFIG application setting. Click OK.
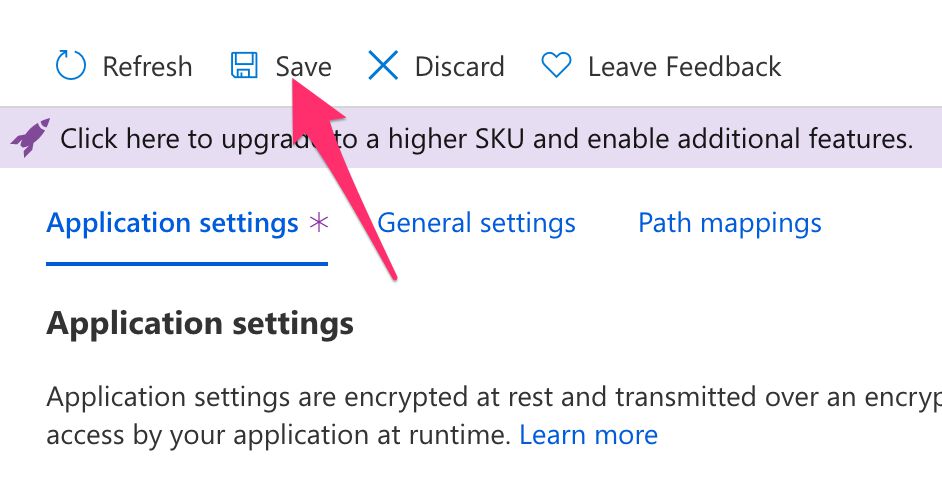
Finally, click Save in the top bar to save the new settings and force a redeployment of the Preview server.
Configure Health check
The last thing you need to do before being able to test your setup is to configure the Health check.
Azure can periodically ping a specific endpoint in your service to make sure that the service is up and running. If the service doesn’t respond with a valid status, Azure flags it as unhealthy, forcing a scale-down and redeployment of the instance.
This is very important, because Google Tag Manager also uses this mechanism to get your service to fetch the latest version of the server-side tagging software from Google server.
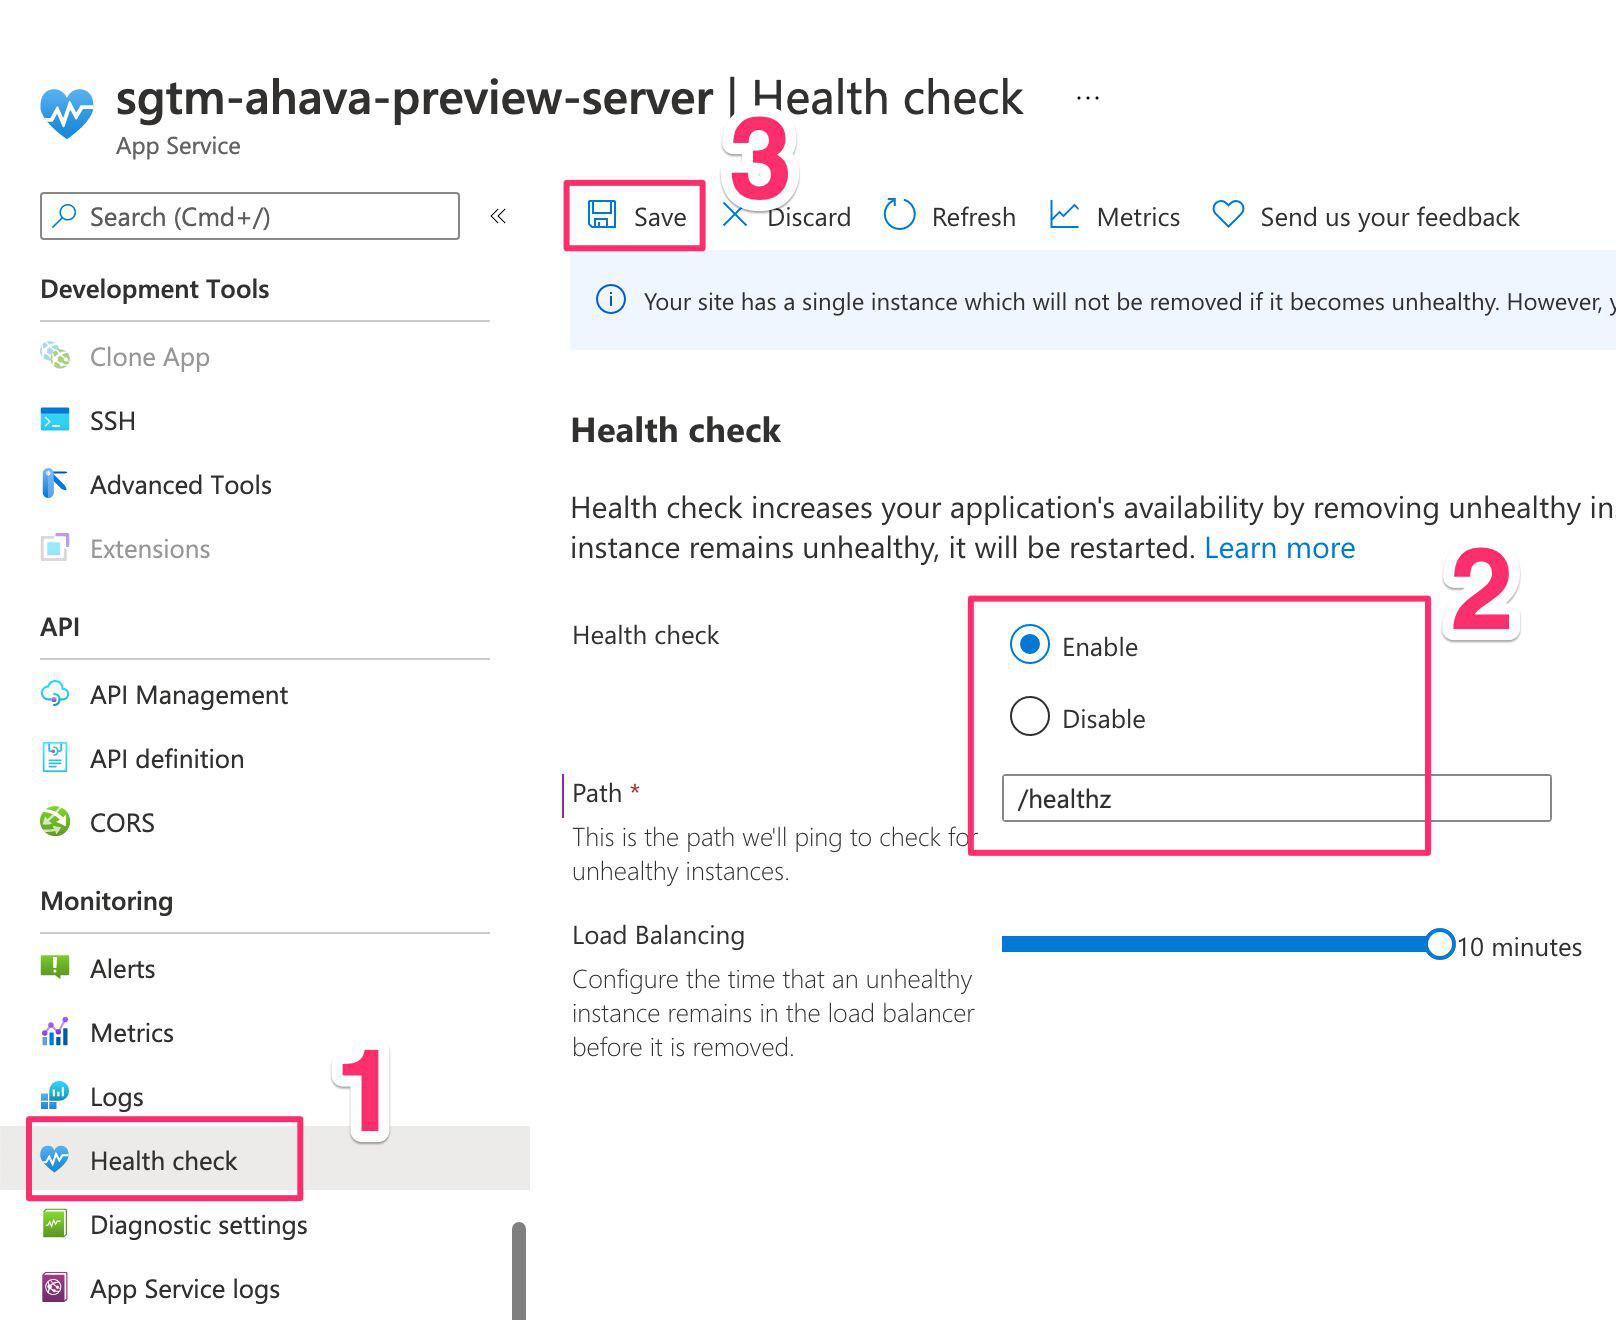
In your Preview server service, scroll down the menu until you find the Health check option. Click it.
Click Enable to activate the health check and type /healthz as the Path.
Finally, click Save to save the changes and force yet another redeployment of the service.
Test the Preview server
You’re finally ready to test the server!
Browse to the Overview dashboard of your App Service.
Here, keep hitting the Refresh button in the top bar of the dashboard until the Health Check response is good. It might take a while!
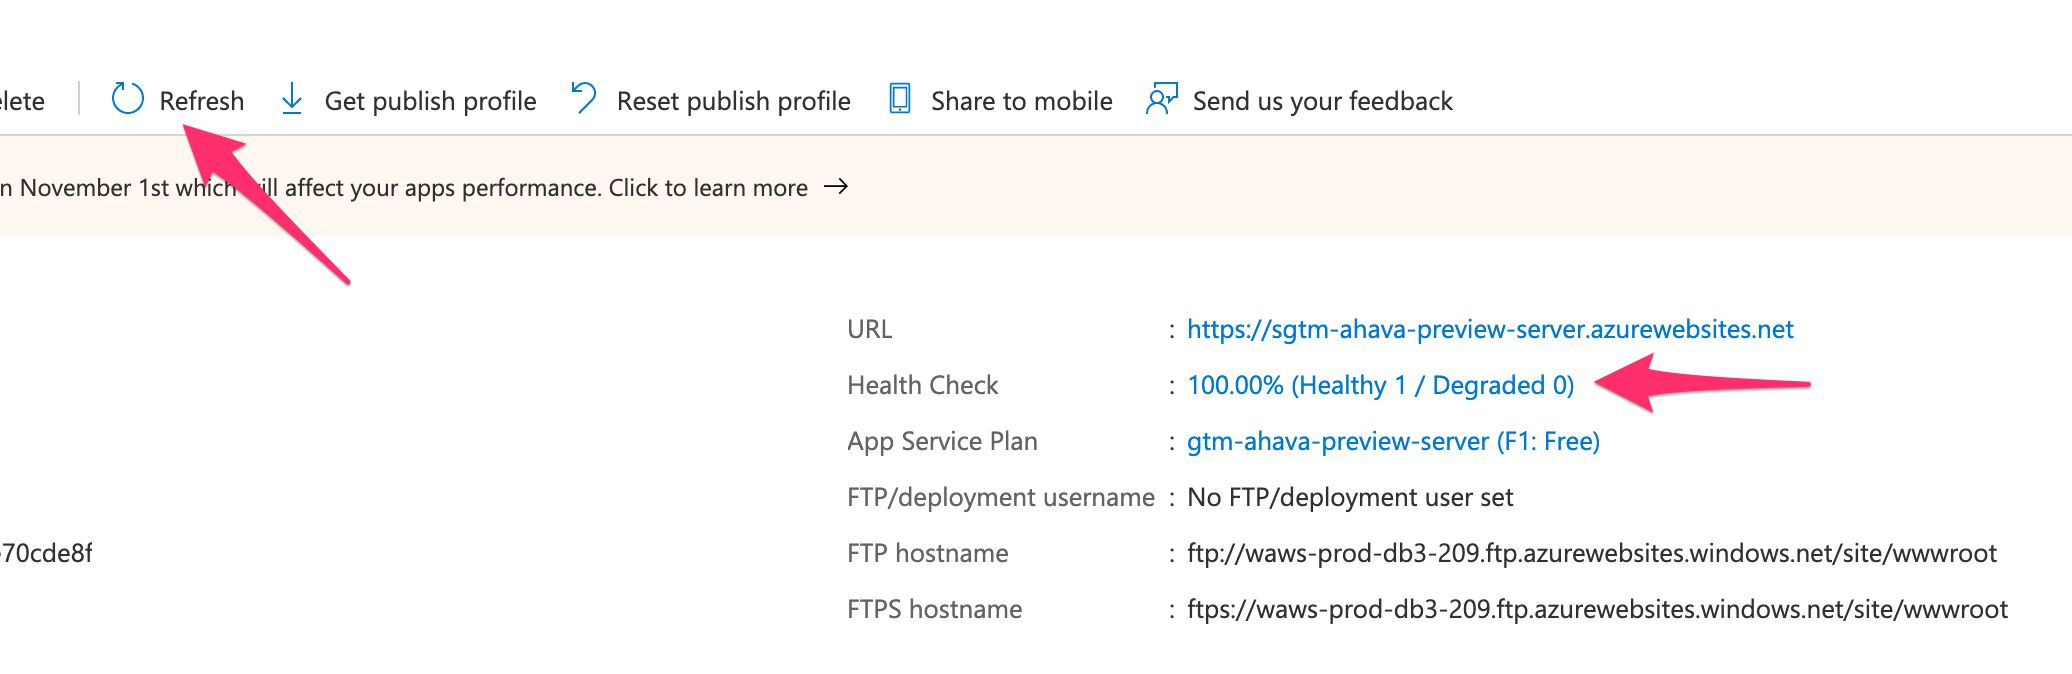
The health check might even indicate that there’s a Degraded instance, but keep hitting Refresh. If you’ve followed these steps it will show Healthy soon.
Finally, click the URL to open the .azurewebsites.net URL for your Preview server in a new tab. You should see a Not Found message on the page.
Add the path /healthy to the end of the URL and load the page. Now you should see ok.

Congratulations! You’ve created the Preview server. Now it’s just the Tagging server left – luckily it’s almost exactly the same steps, so it should be easy to do.
Step 4: Create the Tagging server
The Tagging server becomes the actual endpoint with which you’ll be communicating.
This means that ideally, you’d map one or more custom domains to this server, each of which is a subdomain of whatever website is sending data to your container. This is to ensure the data stream happens in a first-party HTTP request-response context.
But let’s not get ahead of ourselves.
Setting up the Tagging server is remarkably similar to setting up the Preview server.
Create the App Service
Type app services into the search bar, and click the App Services option.
As before, click + Create to create a new service.
Configure the instance
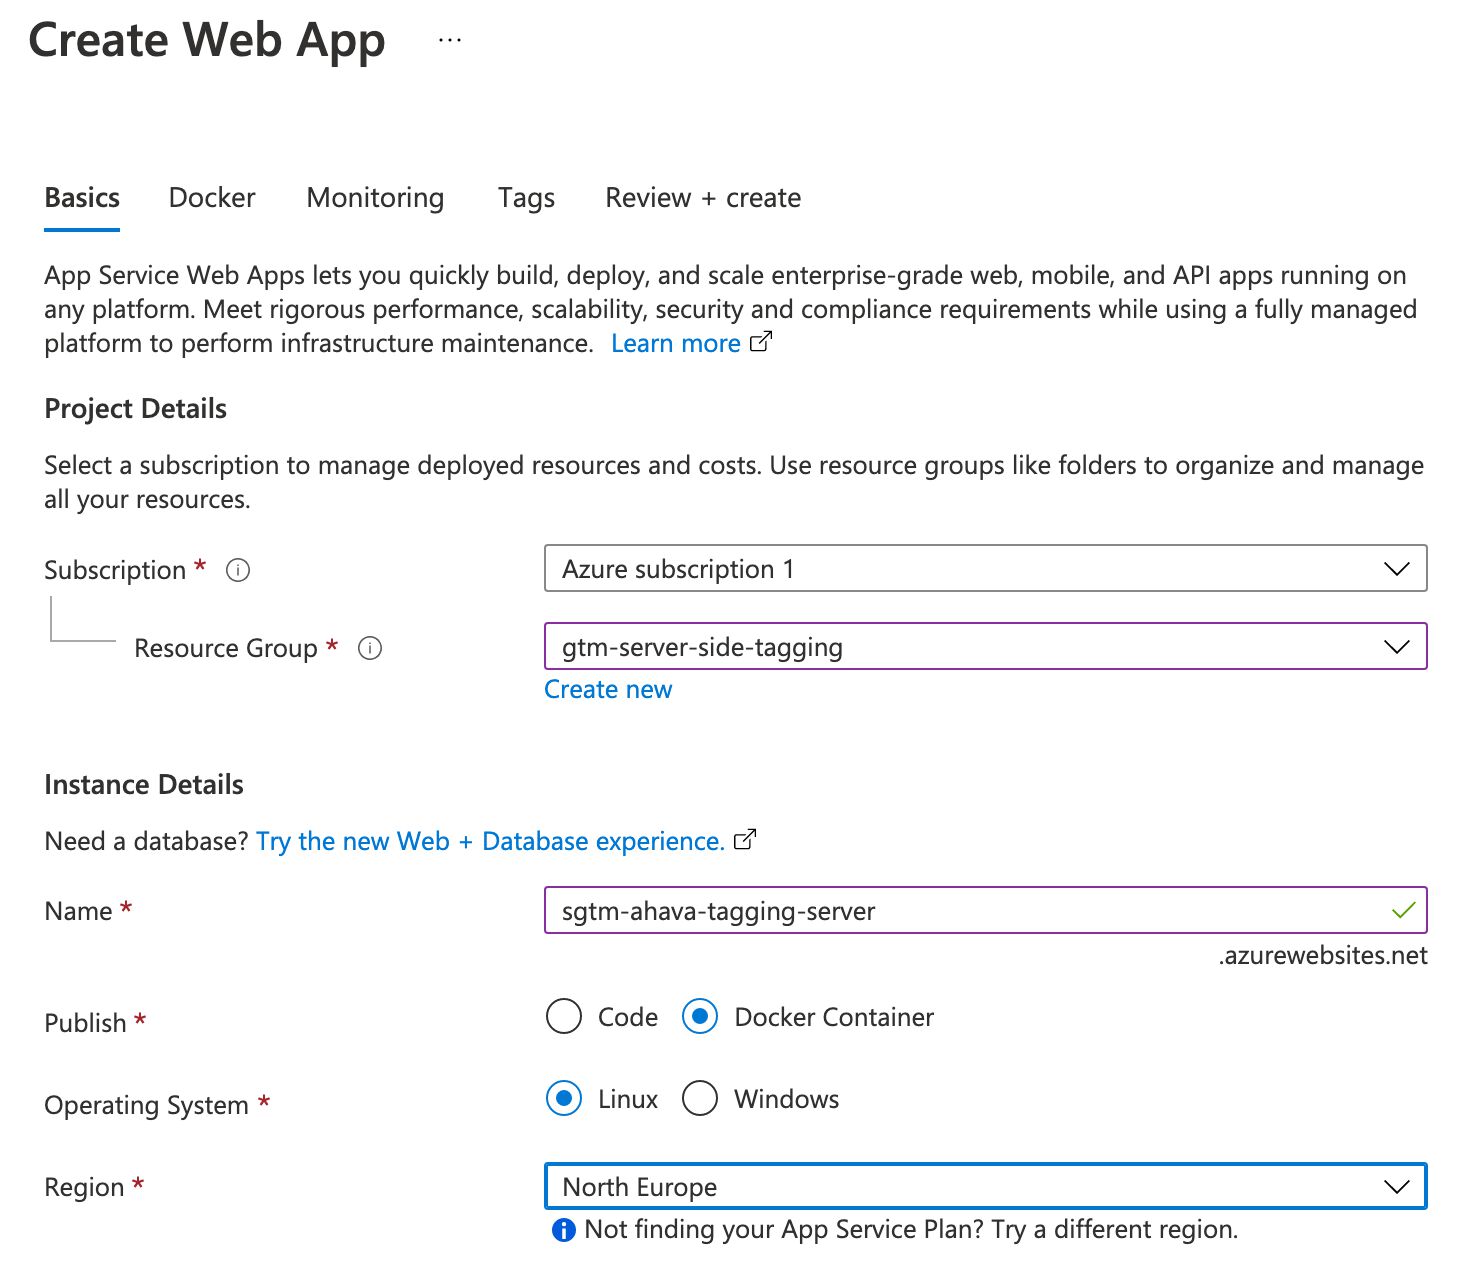
Under Project Details, choose the Subscription you used before, and choose the Resource Group you used for the Preview server, too.
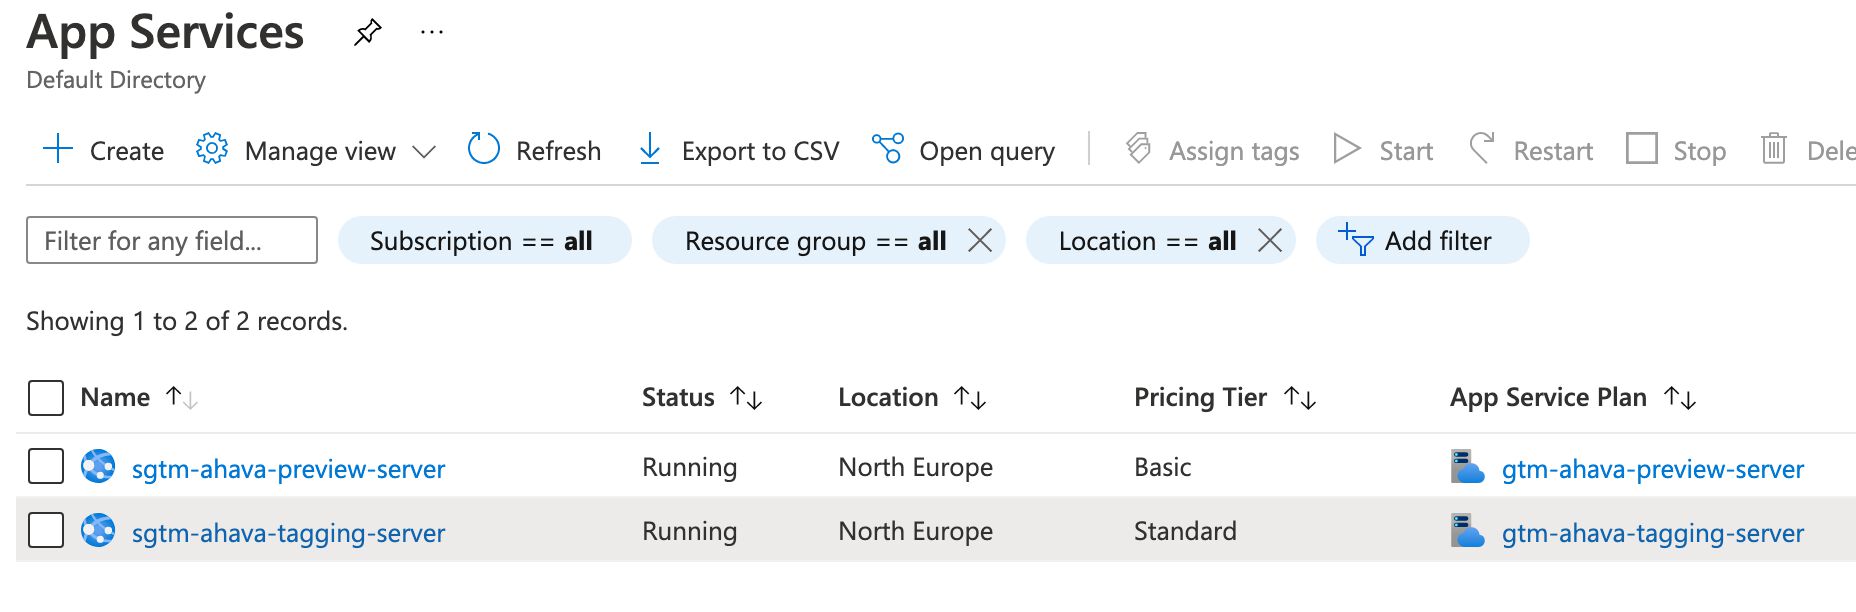
Under Instance Details, give the server a descriptive name. It’s a good idea to mirror the name you gave to the Preview server, so in my case the name would be sgtm-ahava-tagging-server.
Choose Docker Container as the Publish type, keep Linux as the OS, and select the same region from the Region selector that you configured for the Preview server.
This is what the setup should look like thus far:
For App Service Plan, click Create new. Give it a descriptive name, such as the same one you set for the service instance. In my case, I set the name to gtm-ahava-tagging-server.
Click Change size under Sku and size to choose the instance profile.
For this example, I chose the S1 instance type, which is the smallest instance type for Production setups.
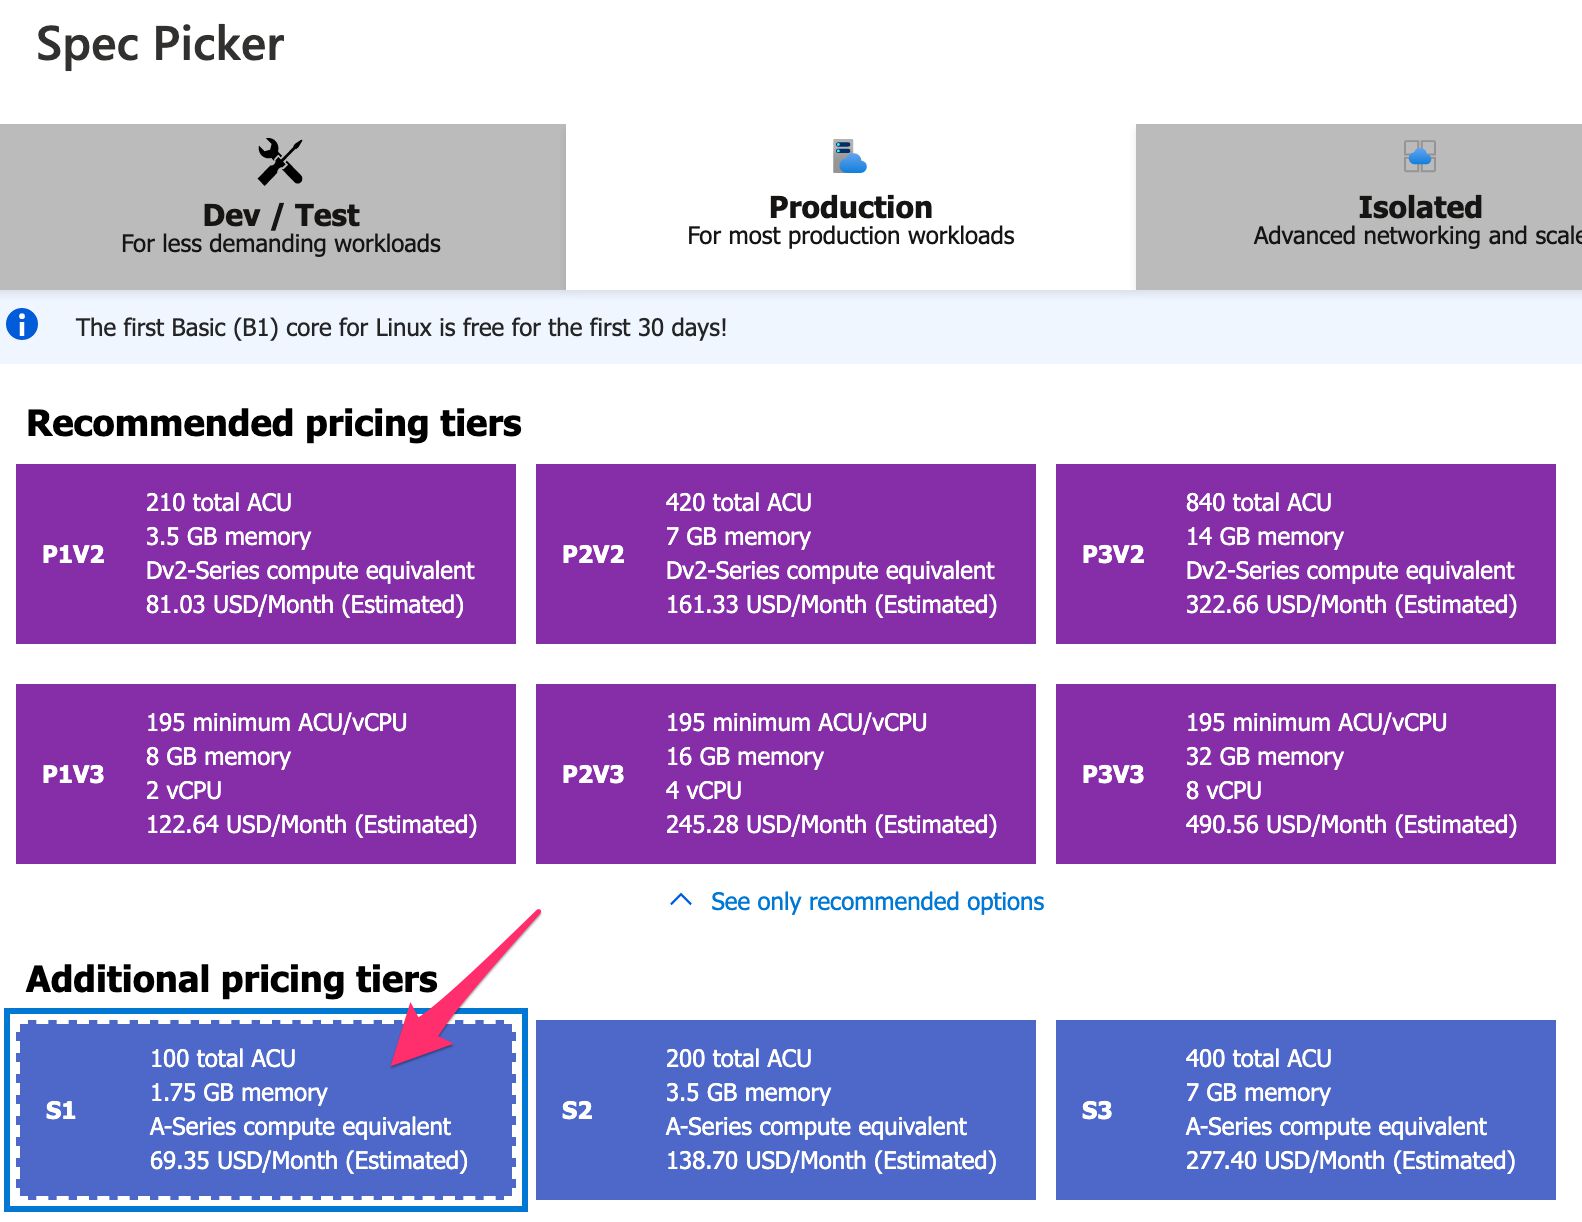
Whatever you choose, make sure it supports Custom domains and Auto scale.
Click Apply when you’ve selected the instance type.
Click the Next : Docker > button in the bottom bar when ready.
Configure the Docker container
Here, set the exact same settings as with the Preview server.
Remember to set gcr.io/cloud-tagging-10302018/gtm-cloud-image:stable as the value of the Image and tag field.
Finally, click Review + create in the bottom bar. Click Create if you’re happy with your configuration overview.
Once the instance has been deployed, click Go to resource on the deployment overview page.
Configure the Application settings
It’s time to add the environment variables again.
Choose Configuration from the service navigation.
Click + New application setting.
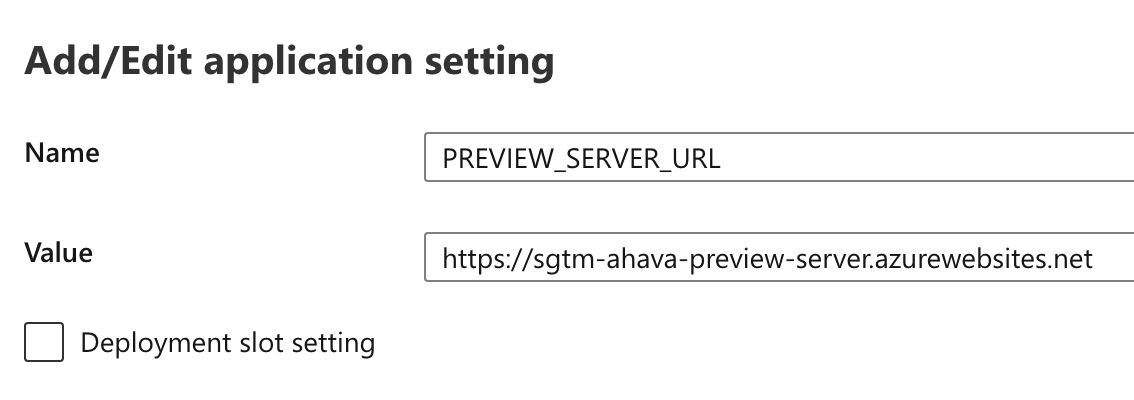
As the Name, set PREVIEW_SERVER_URL.
As the value, add the origin URL of your Preview server. That is, everything up to the first / path divider. This is what my setting looks like:
Then, click + New application setting to add a second setting.
This is CONTAINER_CONFIG again, so copy-paste the Container Config string from the Google Tag Manager user interface as you did before.
Click Save to apply the settings.
Configure the Health Check
Next, browse to the Health check settings in the service navigation.
Configure this exactly as you did before. Here’s a reminder of what it should look like:
Click Save to apply the settings.
Configure autoscaling
Autoscaling means that the number of instances your app uses should scale out when the need for more instances arises (e.g. CPU utilization passes a threshold), and scale in when it’s OK to decrease the number of instances.
You don’t have to configure autoscaling. You could use just the single instance you started with if it’s powerful enough to handle your traffic.
However, having at least one instance for redundancy is a good idea, especially if there are resource availability issues in your Azure region.
Autoscaling is also a good idea to adjust to potential traffic peaks that you need to quickly react to with enough capacity to make sure that your endpoint doesn’t become unresponsive.
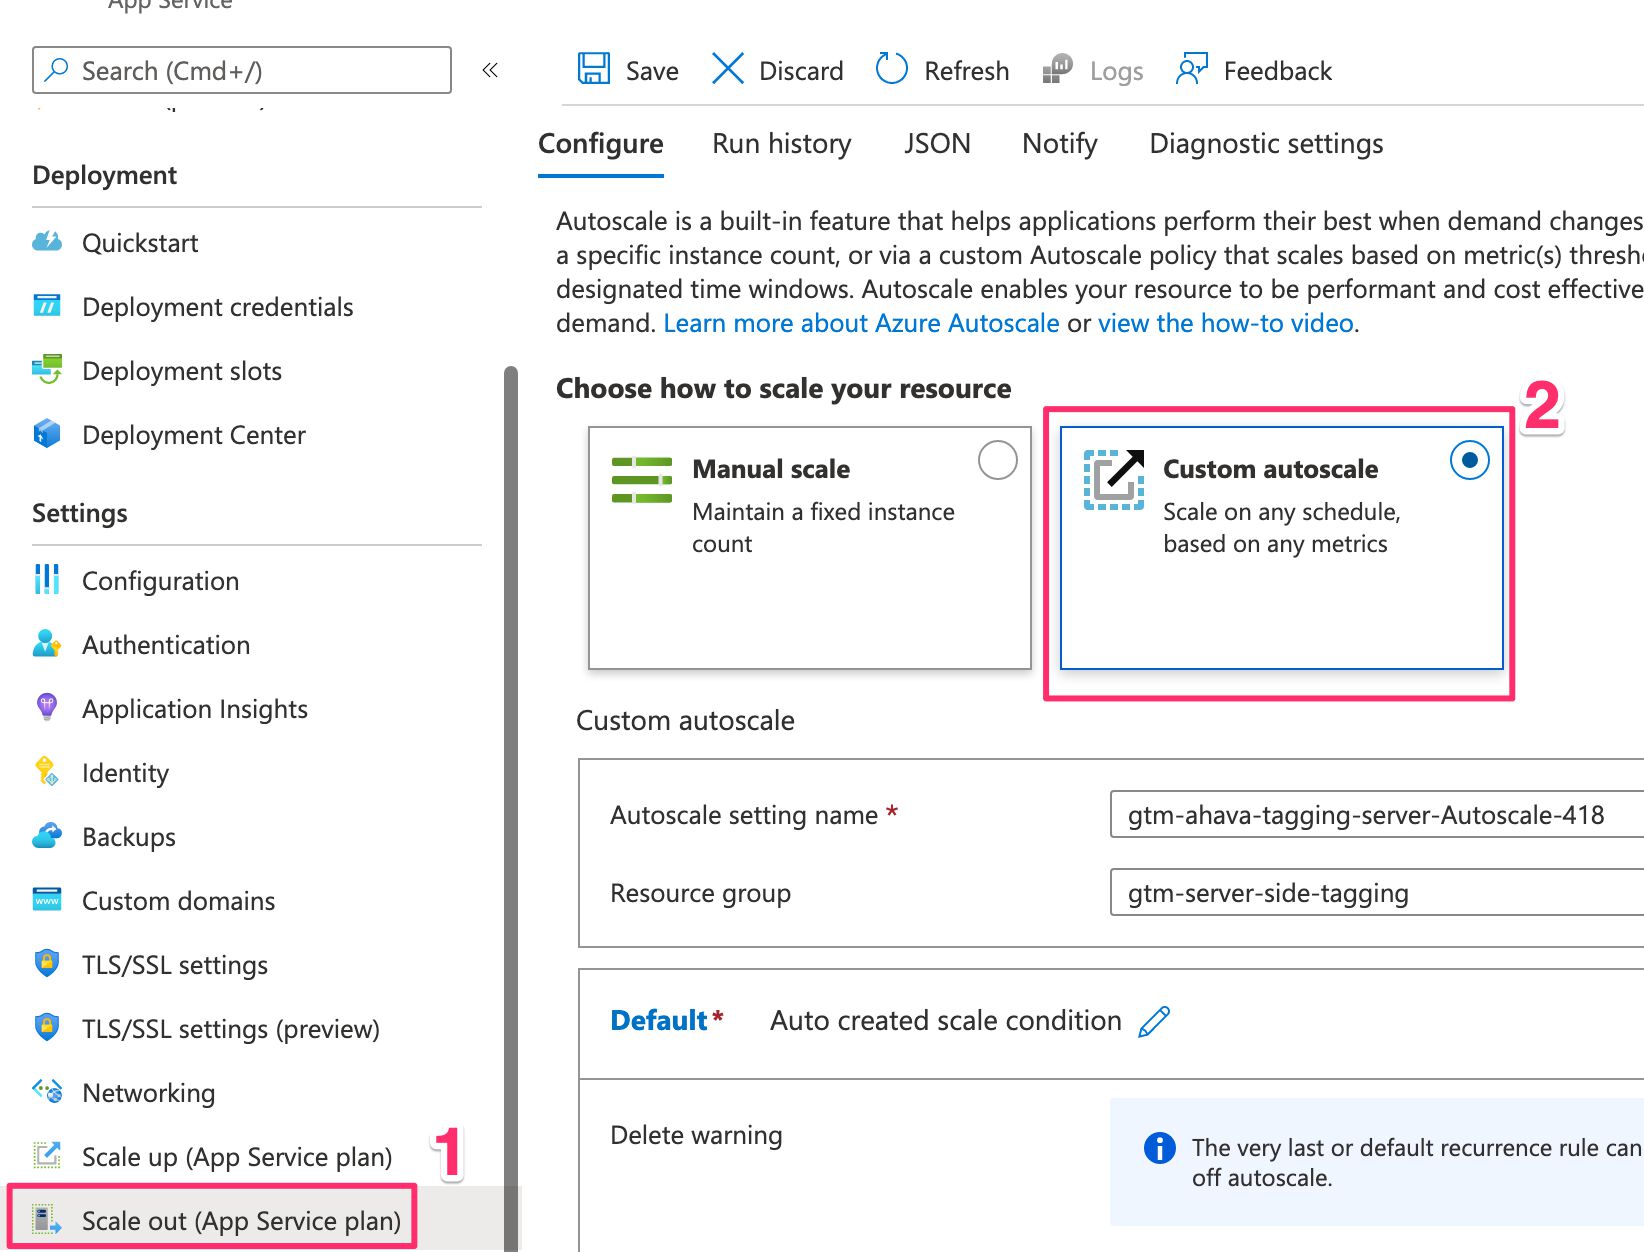
To configure autoscaling, choose Scale out (App Service plan) from the Tagging server navigation.
Autoscaling needs to be done only to the Tagging server. Your Preview server is always going to have minimal utilization, so it does not need the type of power that your Tagging server requires.
Here, choose Custom autoscale to configure autoscaling settings.
You need to add two rules: a Scale Out rule and a Scale In rule. Click + Add a rule to begin.
How you configure these rules is really a matter of experience and preference. You can add more than one Scale Out rule, for example, to account for larger increases in utilization (i.e. larger traffic spikes), adding multiple instances in one go.
I’m just going to use a very simple setup here. When CPU utilization is greater than or equal to 60%, I want to scale out to one additional instance. This is what the configuration looks like:
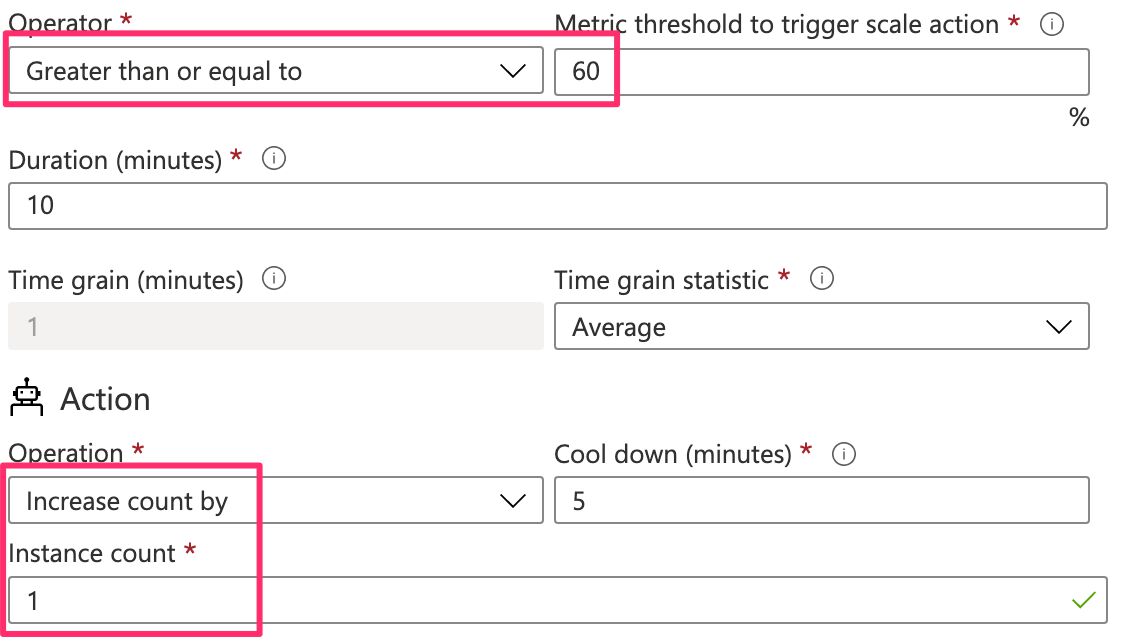
Click Add when ready.
Click + Add a rule to add a second rule.
Here, the rule is the converse of what I added for the Scale Out. This time, if the CPU threshold is below 60%, I want to decrease instance count by 1.
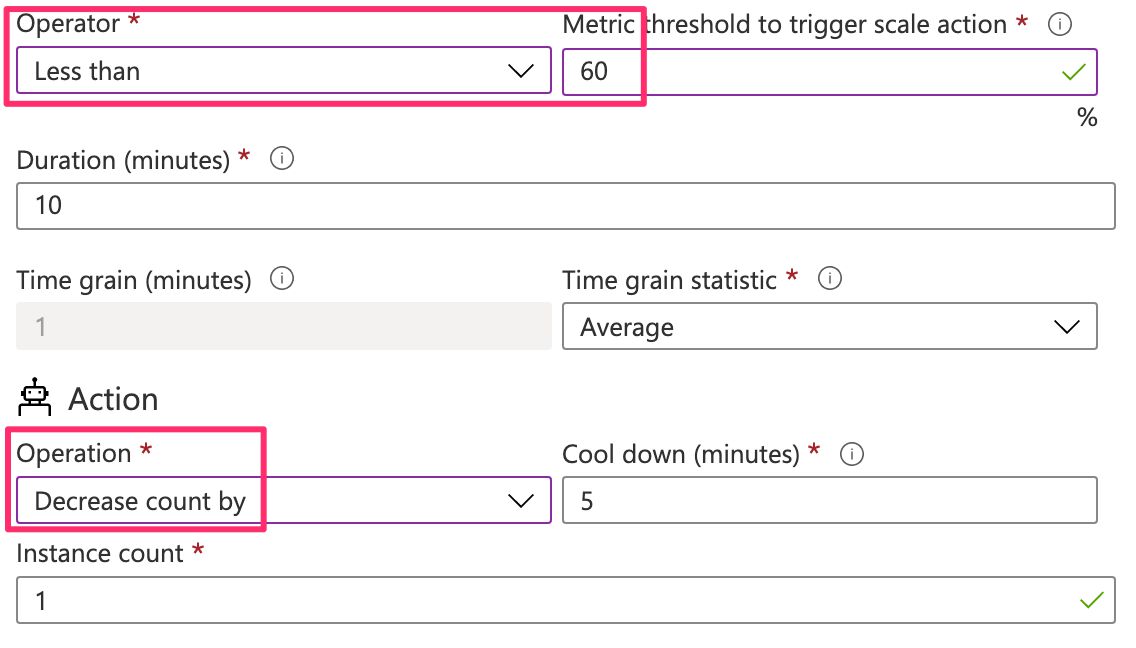
Click Add when ready.
Finally, set the Minimum, Maximum, and Default limits for your instances. The minimum is the lowest your setup will scale in to, the maximum is the highest number of instances to scale out to, and default is what App Service will attempt to scale to if autoscaling doesn’t work, for whatever reason.

Once you’re happy, click Save to save and redeploy.
Be careful with autoscaling! You can easily ramp up a huge bill if you set the thresholds too low or if you’re too cavalier with the default instance limits. It’s a good idea to configure your Subscription with some budgets and cost limits!
If you see a MissingSubscriptionRegistration error when trying to save the settings, you need to browse to your Subscription in the Azure portal, click through to Resource providers, and Register microsoft.insights.

Test the server
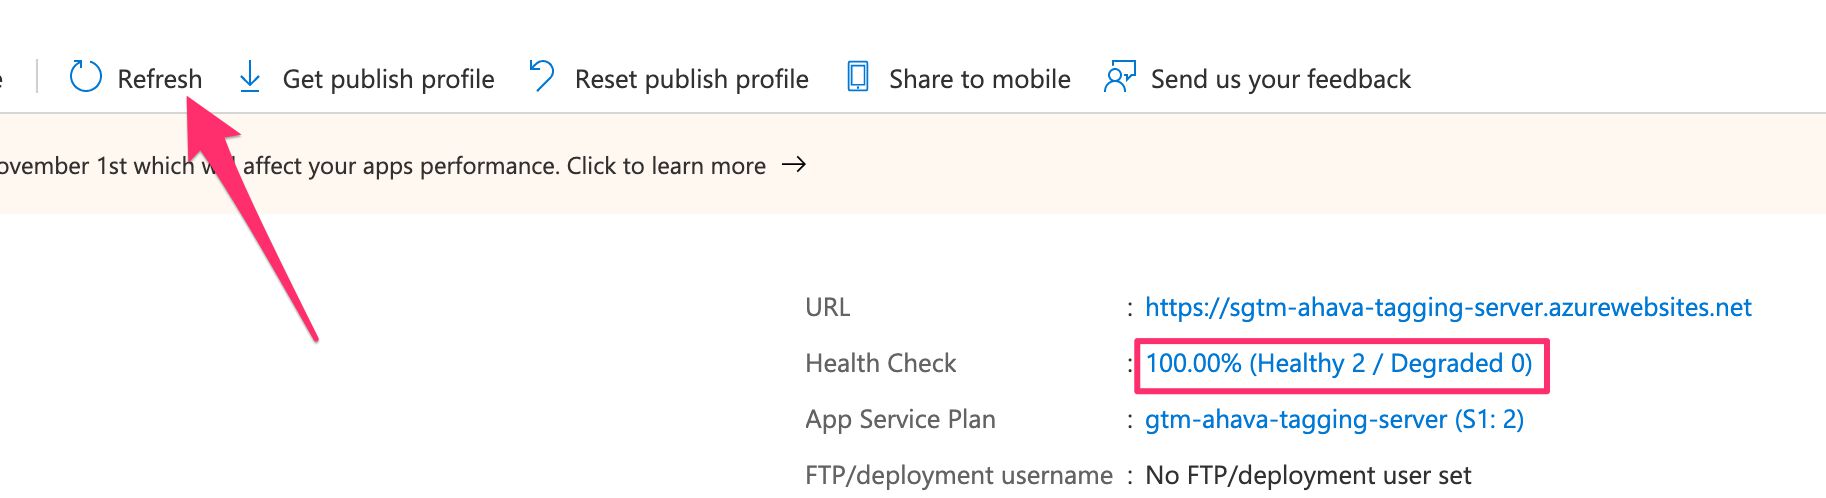
Finally, go to the Overview leaf of the App Service.
Here, click Refresh until you see as many Healthy instances as you configured the minimum for your autoscaling setup.
Next, click the URL in the Overview dashboard to open the Tagging server URL in a new tab. You should see the Not found message again.
And, again, add the /healthy path to the end of the URL and you should see the ok message.
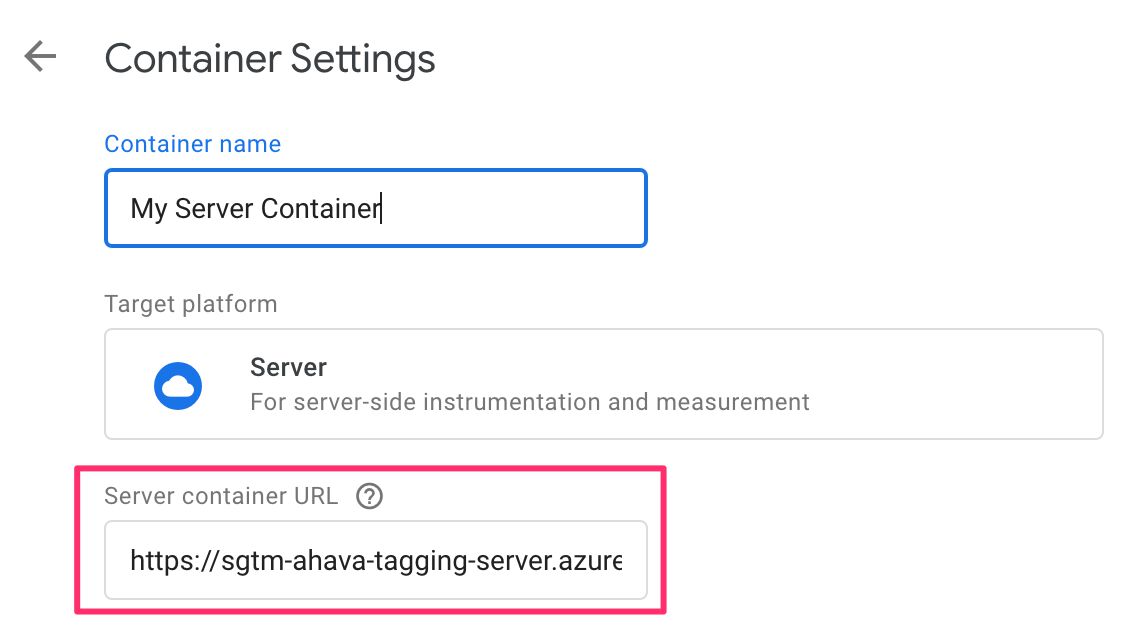
If you want to take testing a step further, you can copy the URL to your Tagging server and add it to your Server container settings in the Google Tag Manager UI, like so:
Click Save to save the settings.
Now, you can click the Preview button in the GTM UI to open a Preview mode window to your server-side tagging environment.
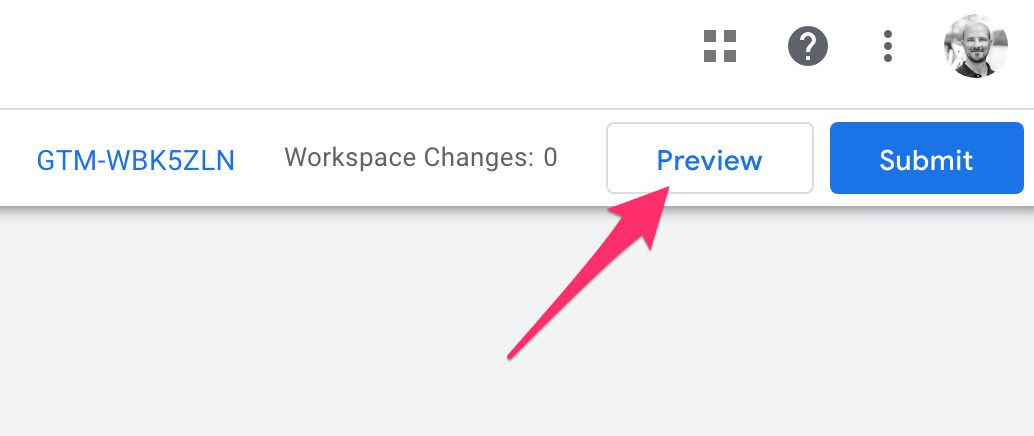
Then, in a new tab, browse to your Tagging server URL again. If you want, you can add a custom path to the request, such as /test. When you browse to that URL, you should see an HTTP Error 400 page.
If you do, then everything is working fine!. A 400 error is returned by your Server container when there are no Clients to claim the request.
If you now open the Preview mode tab, you should see the request for the URL you visited.
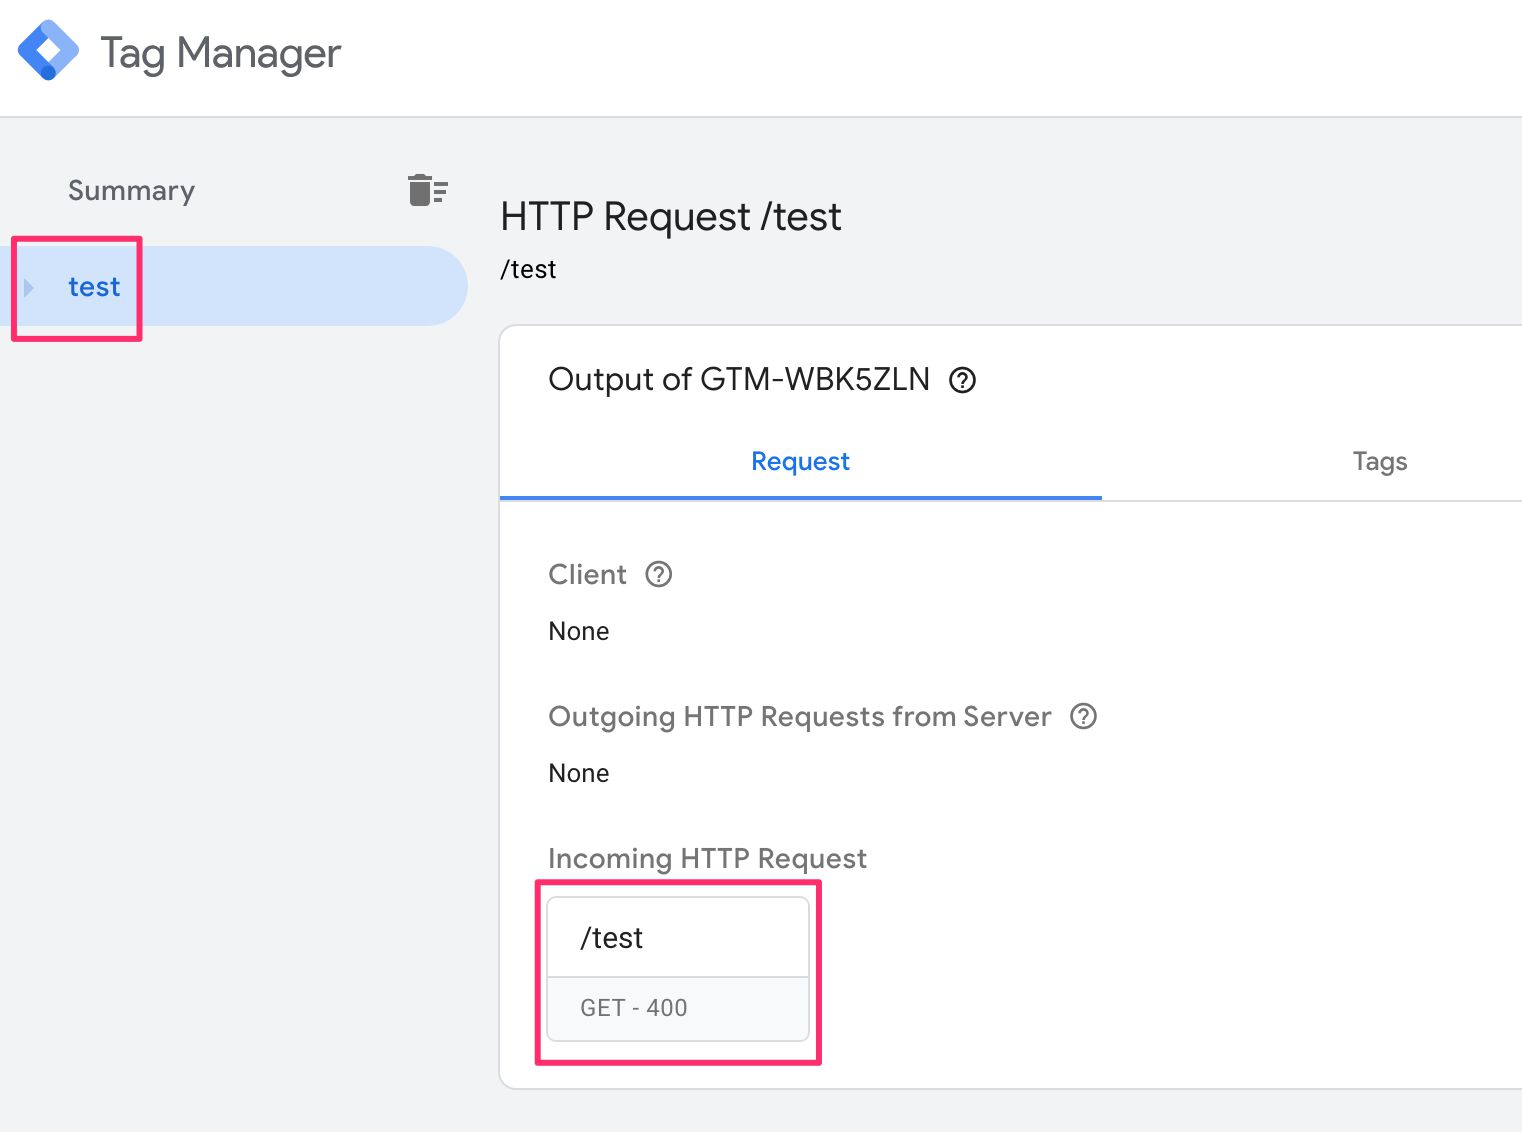
Well done! You now have a fully functioning server-side tagging setup running on Azure.
(Optional) Configure a custom domain
This is where it gets tricky with Azure, unfortunately.
With Amazon AWS and Google Cloud Platform, mapping a custom domain and provisioning a (free) SSL certificate for it is super easy.
With Azure, it’s definitely easy to map a custom domain, and it’s also quite easy to assign a free, managed SSL certificate to it. However, you can only add the managed SSL certificate to a subdomain if that subdomain is mapped with a CNAME DNS record. If the domain is mapped with an A record, you can only assign the managed certificate to an apex domain (i.e. naked domain name).
This is a bummer, because you want to map your server-side GTM endpoint as a subdomain (so not an apex domain), and specifically with A records. Why? Because Safari / WebKit browsers shorten the lifetime of first-party cookies set with HTTP responses from domains mapped with CNAME records!
This is a considerable limitation of first-party data collection, which is why you should always use A records to map the subdomains you’ll use with server-side tagging.
Because of this, I won’t go into the details of how to actually secure the domain name behind HTTPS. There are many options for you:
You can delegate the subdomain name servers to something like Cloudflare, and use Cloudflare’s end-to-end SSL to secure the traffic.
You can purchase an SSL certificate through Azure.
You can use a free service like Let’s Encrypt.
I recommend taking a look at Let’s Encrypt! It’s very easy to apply the LE certificate to your service. Just follow the guide behind the link above and you’ll be set in Azure. The only downside is that the certificate won’t auto-renew, so you’ll need to manually renew it whenever it’s about to expire.
There are many ways to skin the cat, and I leave it up to you to figure out which works best in your environment.
To map the custom domain itself, you need to open your Tagging server App Service again.
Remember, the custom domain only needs to be mapped for the Tagging server – the Preview server can use the
*.azurewebsites.netURL.
Here, choose Custom domains in the navigation.
Next, toggle HTTPS Only on.
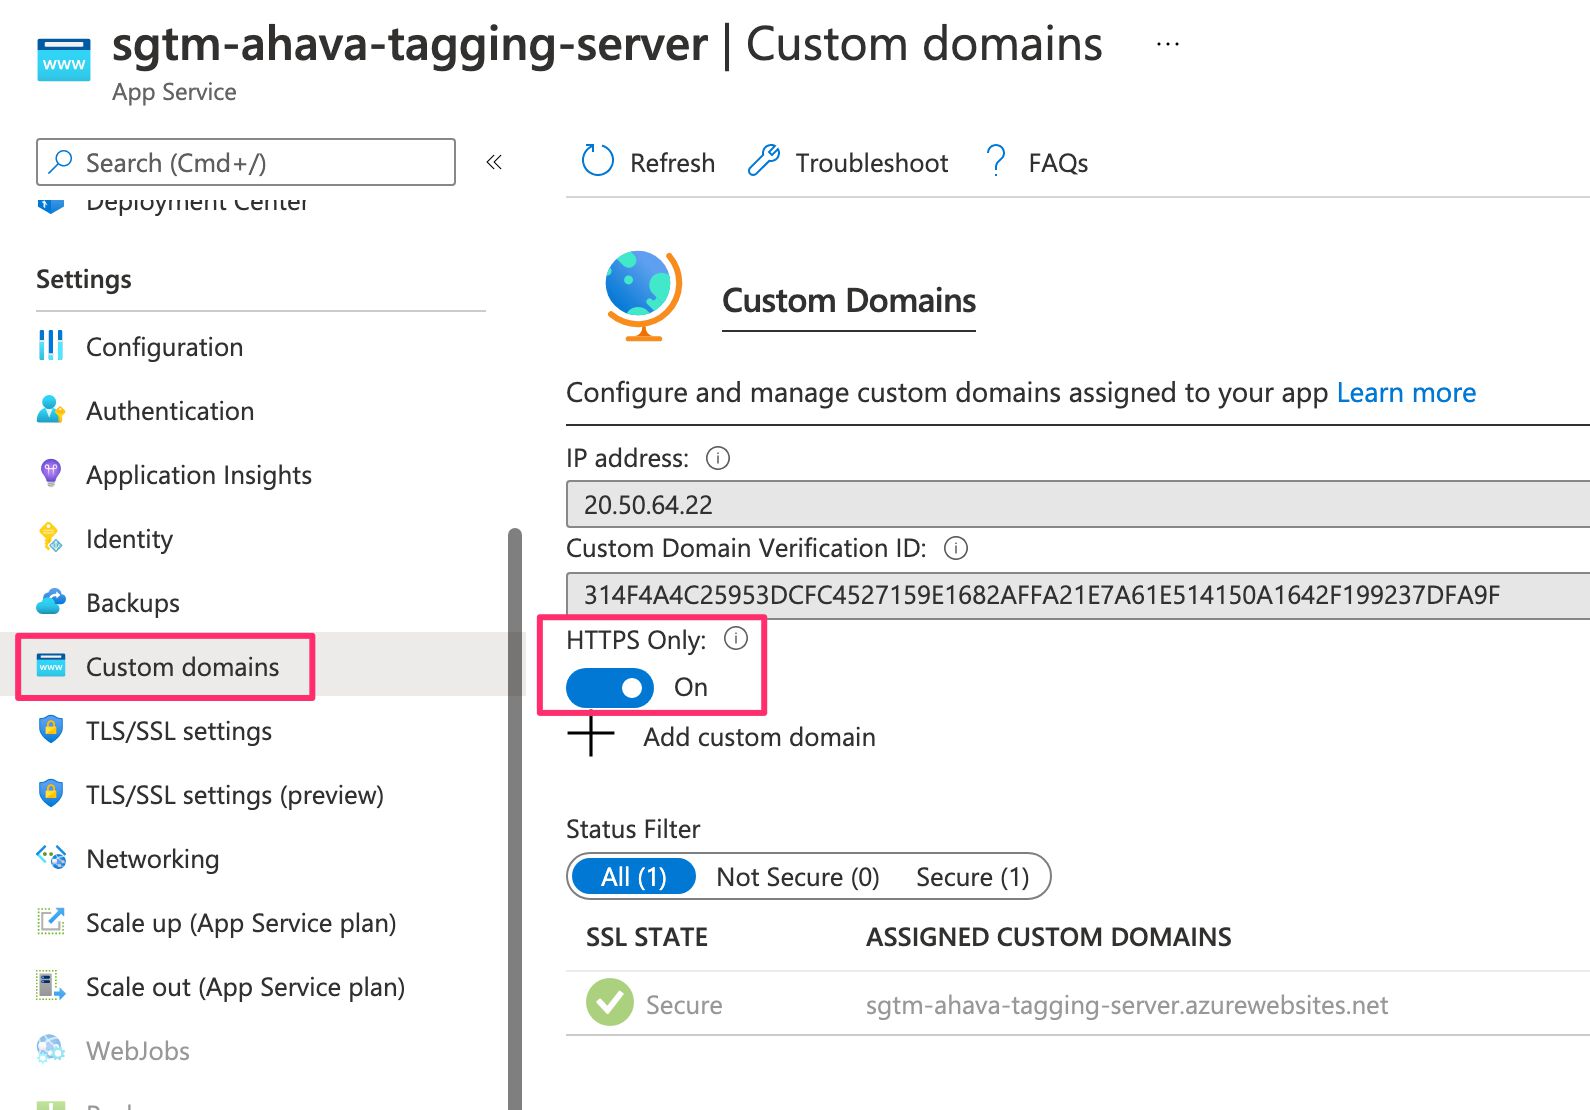
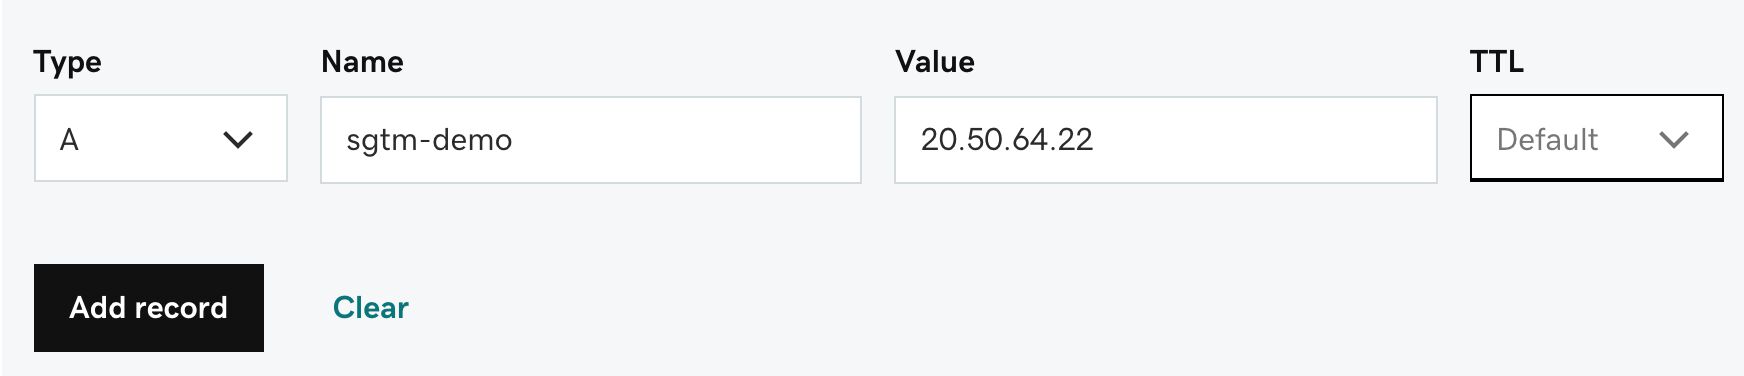
Now, copy the IP address string. In your DNS hosting service, add a new A record for the subdomain you want to map, and make that point to the IP address.
This is what my subdomain mapping looks like in GoDaddy. I’ve chosen sgtm-demo.teamsimmer.com as one of the custom domains I’ll map to this service.
Next, copy the Custom Domain Verification ID from the Azure App Service page. Create a new TXT record with that value, and set the host to your subdomain name prefixed with asuid.. For example, this is what my TXT record looks like:

When done, return to the Azure App Service page and click + Add custom domain. Type the full name of your custom domain. In my case it was sgtm-demo.teamsimmer.com.
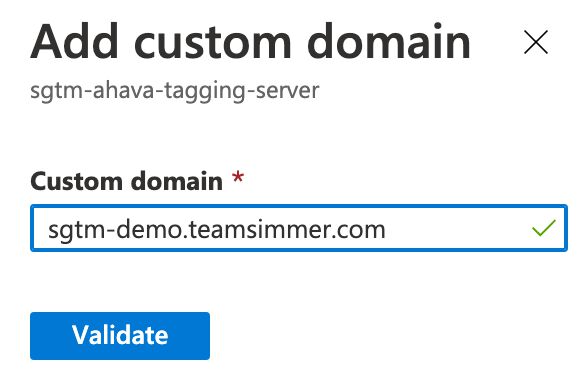
Click Validate, wait for the green checkmarks, and then click Add custom domain.
You might have to wait a while for DNS to propagate, so don’t lose hope if validation doesn’t pass immediately.
Now that you’ve added the custom domain, you’ll need to configure SSL for it. I’ll let you figure out how to do this, following the tips I added at the beginning of this chapter.
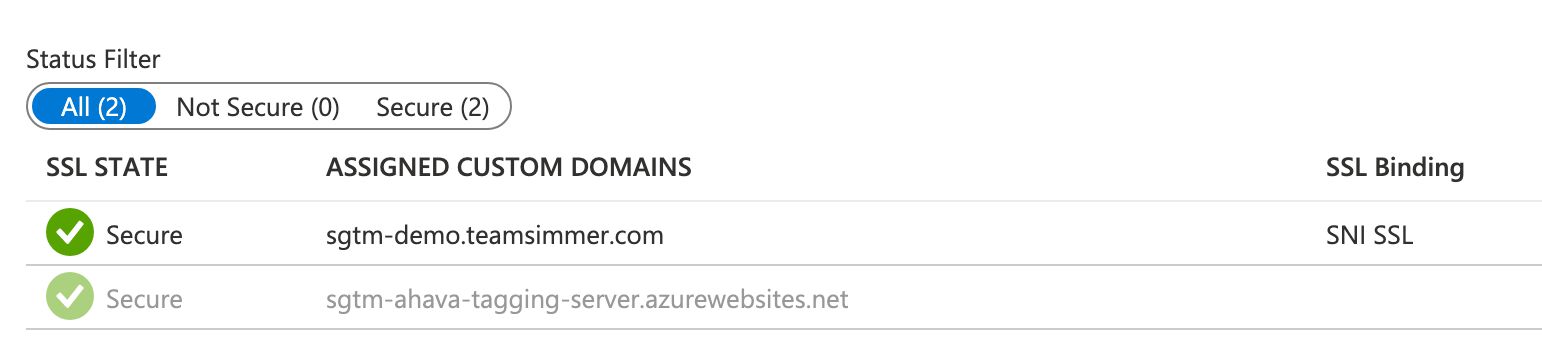
Here’s what the setup looks like after configuring SSL properly. I used Let’s Encrypt to assign a free certificate for the domain.
Once you’ve configured the domain, you can add it to your Google Tag Manager Server container settings as the Server Container URL.
After that, you can communicate with the server-side tagging endpoint using your custom domain!
That’s it – we’re all set.
Summary
I hope the length of this guide didn’t fool you – setting up the server-side tagging environment in Microsoft Azure is a breeze.
I really like working in Azure. It gets far less love than AWS and GCP, for no good reason. The accessibility is almost on par with Google Cloud Platform, the documentation is excellent, and the costs are competitive.
The only downside I could think of in this particular setup was the lack of a managed SSL certificate option for subdomains. However, I imagine it’s on the roadmap, as provisioning the managed certificate for apex domains set with A records was introduced only a short while ago.
With server-side tagging, it’s important to shop around. Setting it up with the default, automatically provisioned Google App Engine service is very easy and very fast, but the lack of customization options and the fixed cost might be a turn-off for some.
I wish someone out there would write an article comparing the realistic costs of different cloud infrastructure options for server-side tagging. It would be interesting to see how different cloud stacks balance between computation and cost in a way that still lets you collect data without too much compromise.
I hope you found this guide useful! Please let me know in the comments if you have any questions.
