#GTMTips: When Click Variables Are Undefined
A surprisingly common question in forums and communities seems to be why the built-in Click variables show up as undefined in Google Tag Manager’s Preview mode, even if you click around the site.
In this article, I’ll walk you through some of the reasons why this might happen.
XThe Simmer Newsletter
Subscribe to the Simmer newsletter to get the latest news and content from Simo Ahava into your email inbox!
Tip 104: What to do when Click variables are undefined
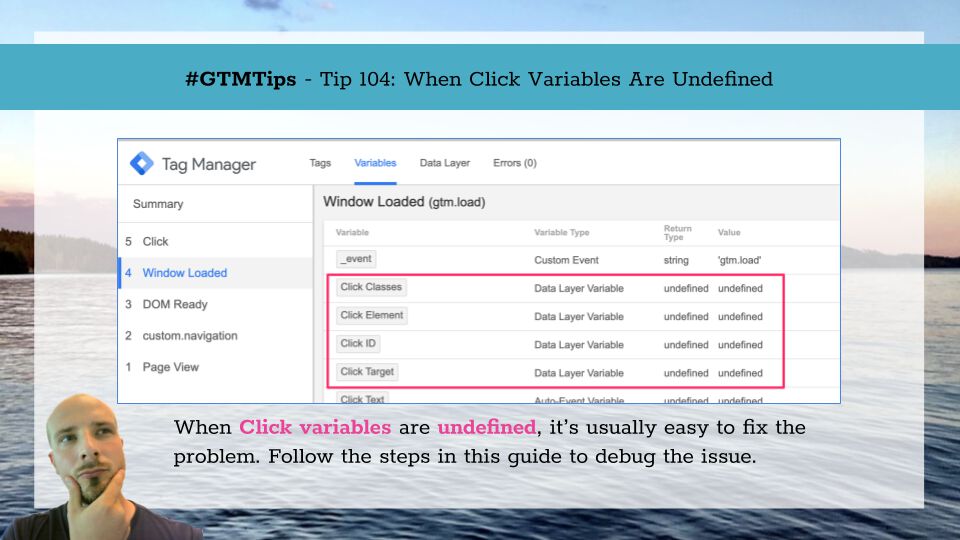
Here’s the situation: you want to create a Click trigger for your tags, but in order to do so, you’d need to see what values the built-in Click variables (e.g. Click Classes, Click ID) get. Thus, it’s a chick-and-the-egg situation - you can’t create the trigger until you know what to track, and you can’t track until you create the trigger.
Well, here’s the thing.
You MUST create a trigger for the Click variables to populate with values.
The variables will not start collecting data until you enable one of the following triggers:
A Click - All Elements trigger - when you want to track clicks on any element.
A Click - Just Links trigger - when you want to track clicks on link elements (
<a href="...">).A Form Submit trigger - when you want to track submissions of a form element.
An Element Visibility trigger - when you to track the visibility or appearance of an HTML element.
Naturally, if you want to track clicks, you’ll need to create either an All Elements or a Just Links trigger, as both track clicks. The only difference is that the latter is more restrictive, since it only tracks clicks on link elements or nested elements within a link node.
So, the first thing to check if Click variables are undefined is whether you’ve remembered to create a Click trigger. Easiest thing to do is create a simple All Elements trigger with no restrictions.
You don’t even have to add it to a tag. Just by creating the trigger will GTM start listening to click events.

Once the trigger is enabled, you can enter Preview mode. At this point, any click on your web page should introduce a Click element into the Preview mode window. By selecting that Click element you should see the variables populate:
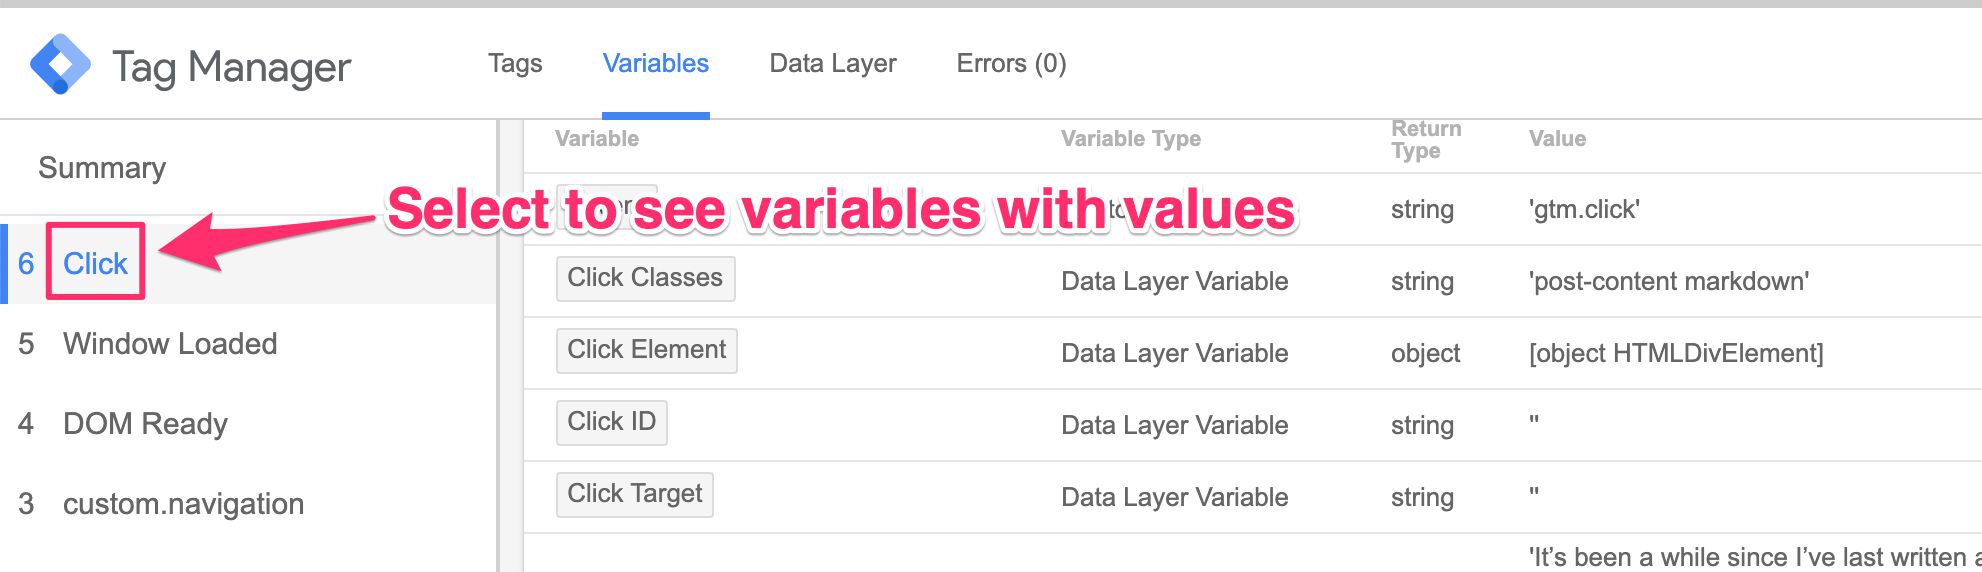
Which brings me to the next tip. If Click variables are undefined, make sure you’ve selected the Click event in the Preview mode message list. GTM Preview mode shows you the values of variables that existed at the time when the selected message was processed.
Always avoid debugging with Summary selected, as that simply shows you the latest values. This is irrelevant information if you want to know what values existed when a tag fired, for example, as you would need to select the trigger event for the tag to know that.
The final thing to check is whether you’ve incorrectly overwritten the dataLayer and thus broken GTM’s triggers.
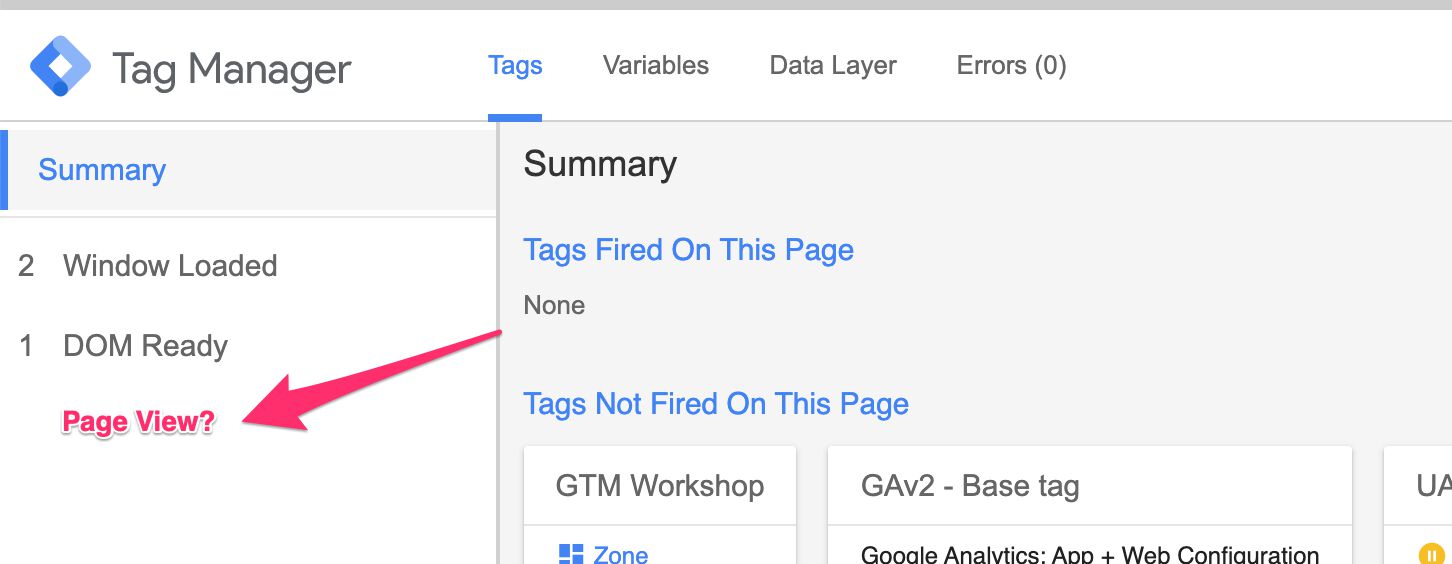
A tell-tale sign is that there’s no “Page View” event in dataLayer, as this is automatically generated by the container snippet and would be overwritten with the dataLayer. However, if GTM’s container manages to load before the overwrite happens, you might still see the Page View event even if it’s absent from the dataLayer. This leaves you with a couple of options to verify if this is the case:
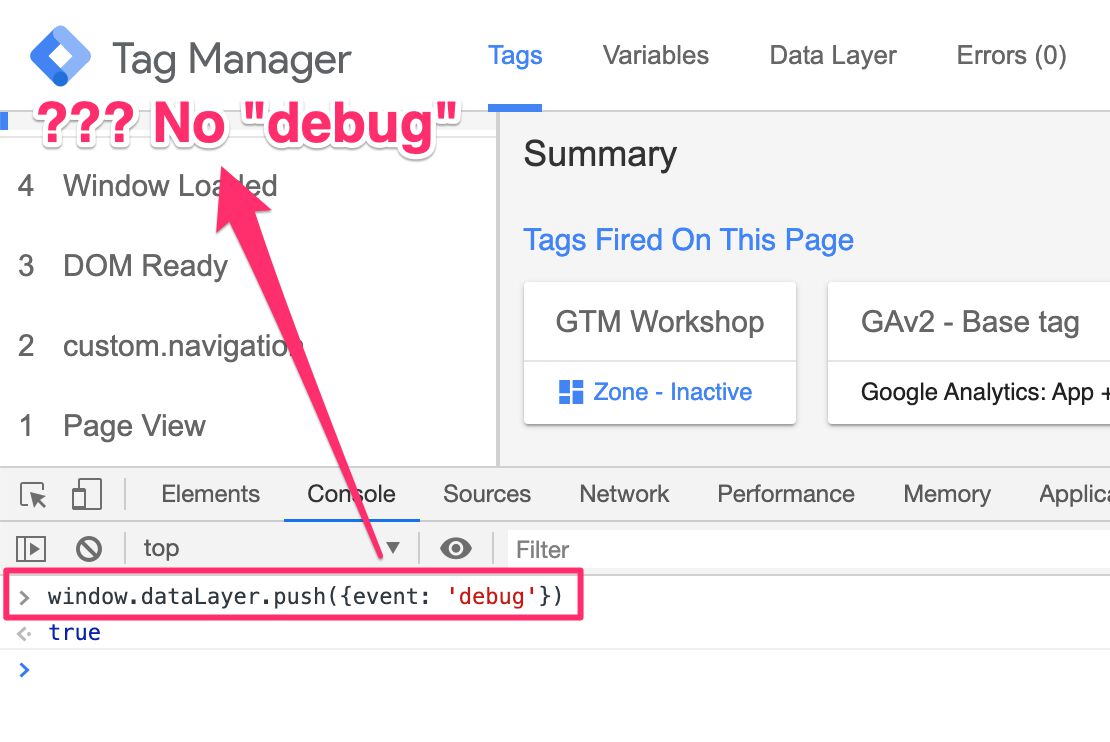
Open the JavaScript Console, and type
window.dataLayerand press enter. The array should be empty or there should be no object withgtm.jsas the value of theeventkey.Open the JavaScript Console, and type
window.dataLayer.push({event: 'debug'})and press enter. IfdataLayeris broken, you will not see an event with the name debug appear in the Preview mode message list.
If this is the case, you need to convert that overwrite into a safer format, mainly a dataLayer.push(). Follow this article for the steps on how to do so.
Summary
If Click variables are undefined, it’s almost always because you neglected to create the necessary trigger(s).
However, there are some edge cases where you or your devs have inadvertently overwritten Google Tag Manager’s dataLayer, which results in GTM being unresponsive to dataLayer.push() commands, including those created by the triggers.
With the steps in this article, you should get your Click variables to populate with useful data in no time!
