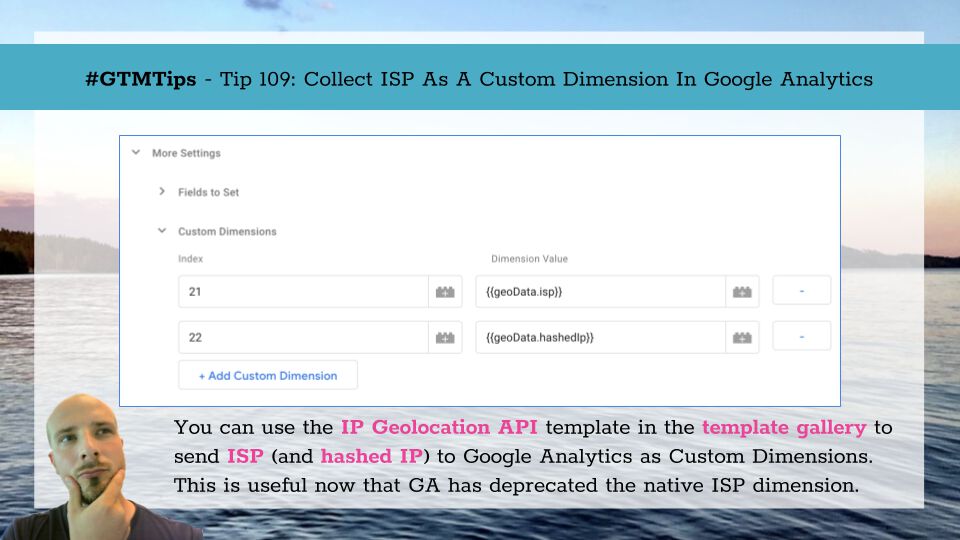
#GTMTips: Collect ISP As A Custom Dimension In Google Analytics
Update 6 April 2020: I updated the template in the gallery to the latest version of the IP Geolocation API SDK, which no longer requires jQuery. Also, the SDK now handles API request caching to browser storage automatically, so the “Enable Session Storage” option was added to the template.
Google Analytics had been foreshadowing the deprecation of the Network Domain and Service Provider custom dimensions since late 2019. On February 4, the plug was finally pulled, and both these dimensions started flatlining to (not set) in Google Analytics reports. For more information about this, see these articles:
- Google Analytics Deprecating ‘Network Domain’ And ‘Service Provider’
- Mourning the Death of “Service Provider” & “Network Domain” in Google Analytics
- Dear Google, Why Oh Why Did You Remove Service Provider and Network Domain from Analytics?
This article is not a post-mortem. I won’t go into speculating why they made this change, nor will I anguish over the loss of these dimensions. Instead, I want to give you a practical way forward: a method with which you can reinstate some of the lost information as early as … today!
We’ll be using Google Tag Manager, my IP Geolocation API template in the template gallery, and you’ll also need a (free) API key from ipgeolocation.io.
XThe Simmer Newsletter
Subscribe to the Simmer newsletter to get the latest news and content from Simo Ahava into your email inbox!
Tip 109: Get your Service Provider data back
As you can see, this solution only reinstates the ISP information - not the Network Domain. This should typically be enough for bot / spam removal, but in case you do want the qualified domain names of the IP addresses, you’ll need to look at other IP APIs out there.
Get the API key
First, you’ll need to visit ipgeolocation.io and get an API key. The free key gives you 30K requests a month (1K maximum per day), which is not a lot, I know. You can upgrade to paid plans to increase the quotas, and you can add some client-side throttling (covered later in this article) to reduce the number of API calls being made.

Configure the template
Once you have the API key, visit the template gallery and fetch the IP Geolocation API custom template.
Then, in your workspace, create a new tag, and choose the IP Geolocation API template as the foundation.
Add your API Key to the respective field. You can leave the other settings at their defaults, but if you want, you can expand Other Settings and check the new Add Hashed IP configuration.
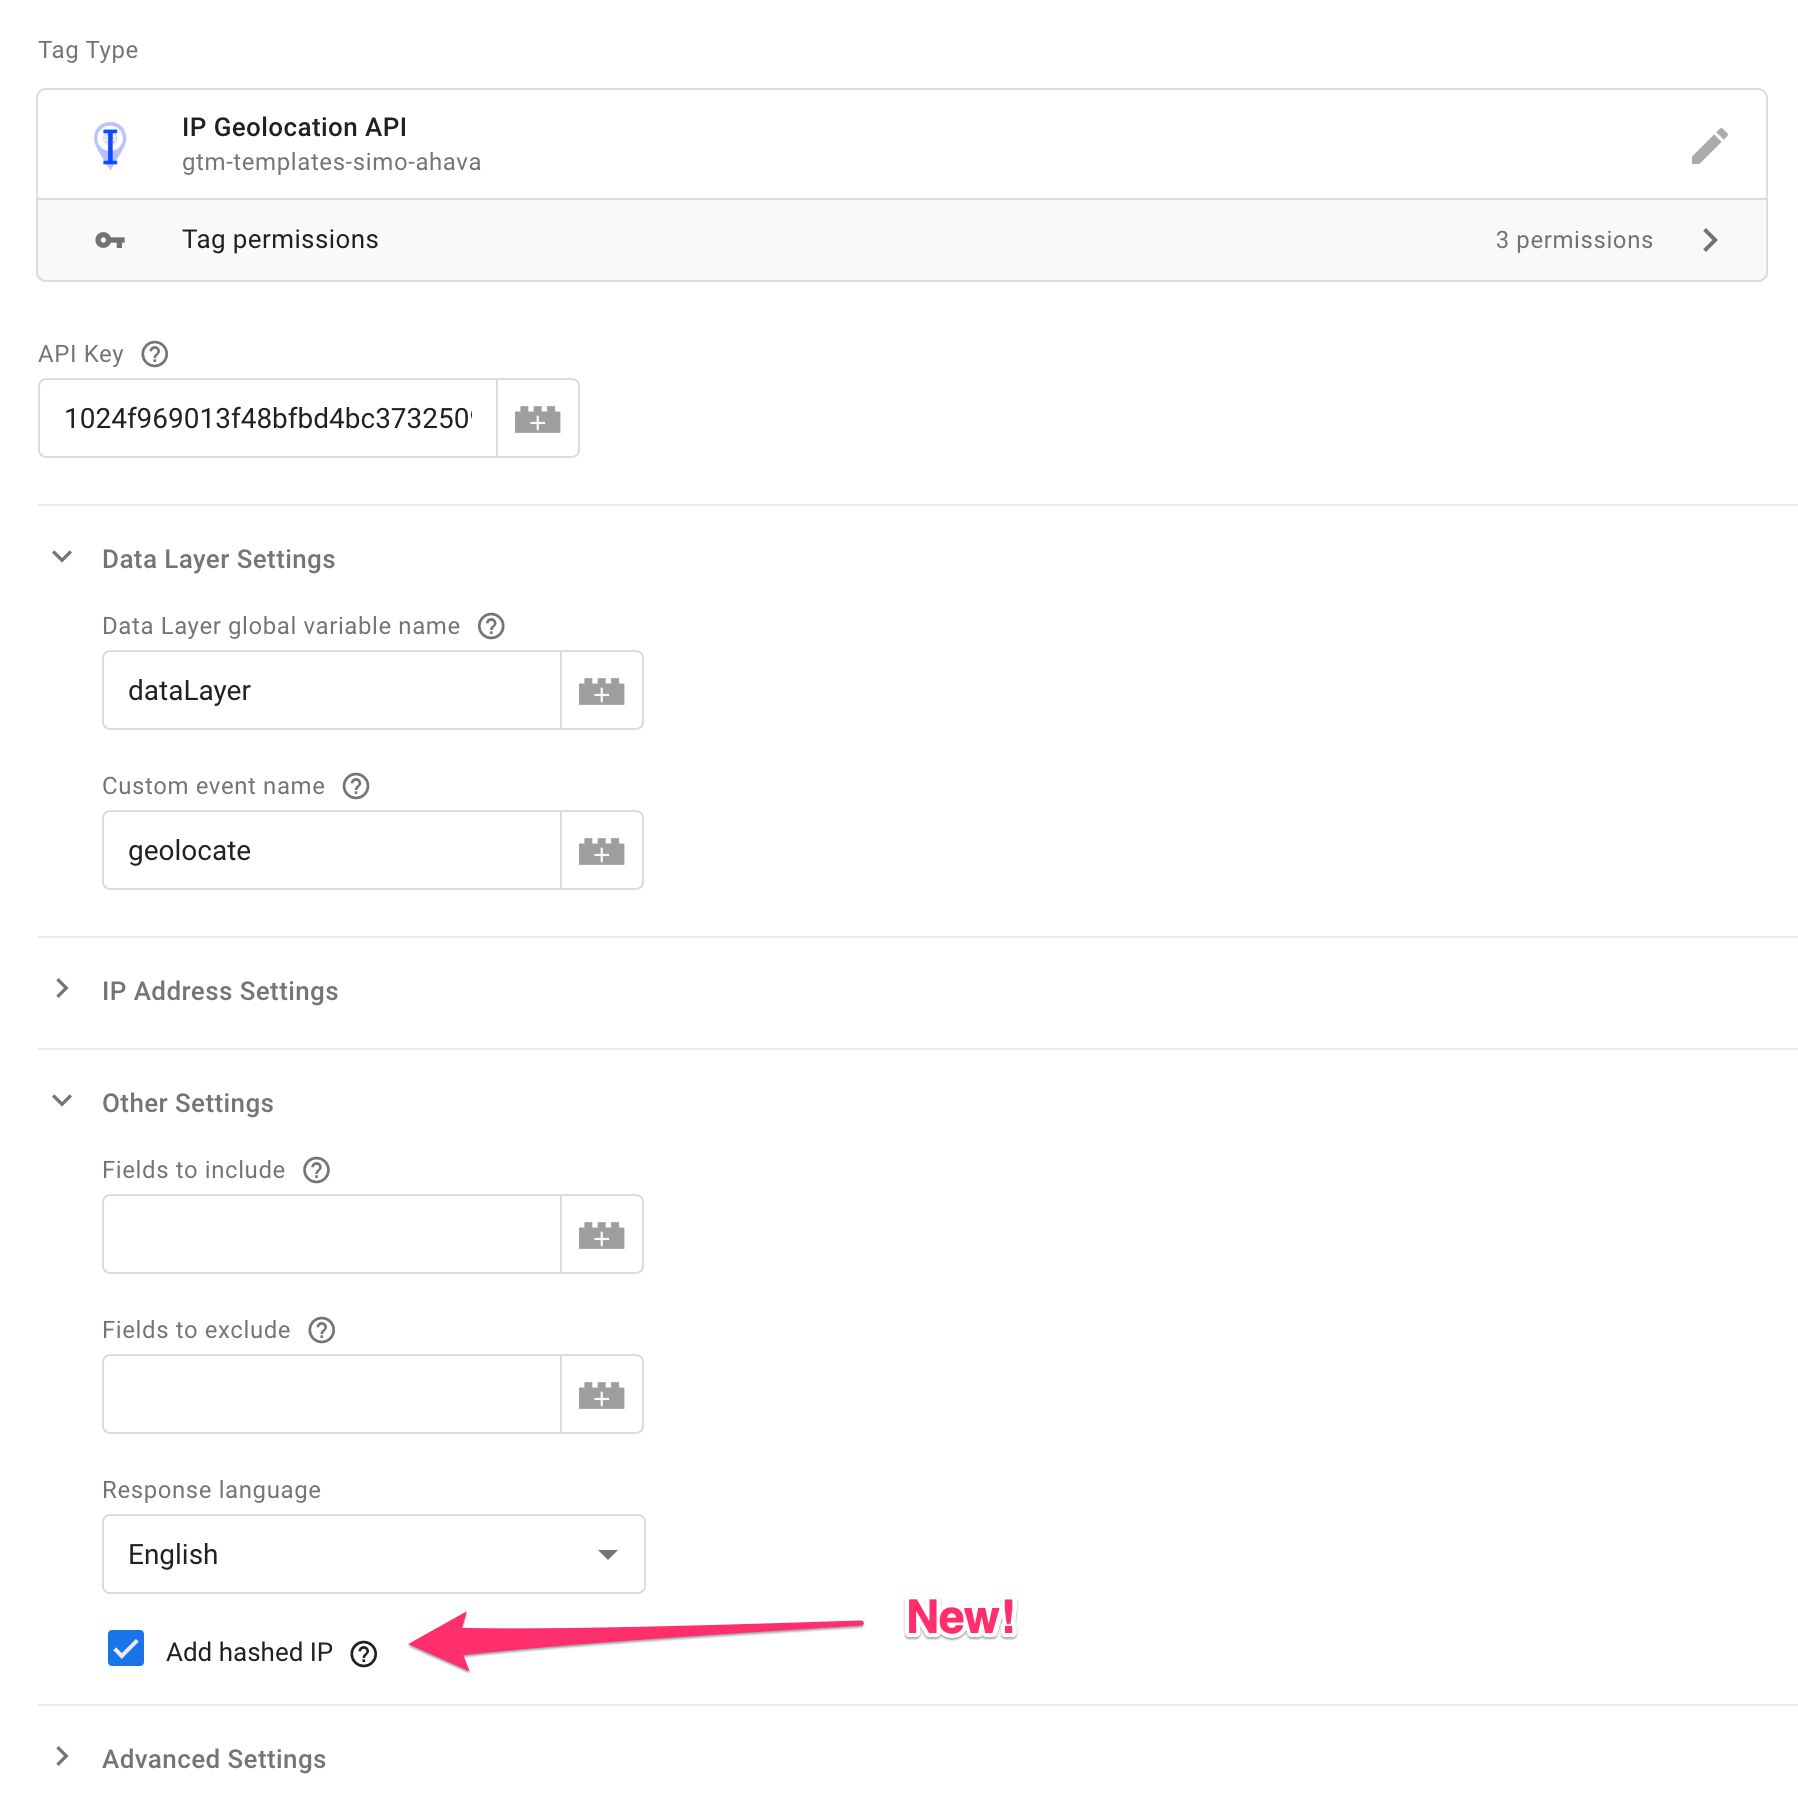
This setting hashes the user’s IP address (using SHA256), and writes it into the dataLayer object with the key geoData.hashedIp. Since it’s hashed and can’t be decrypted, you can send this as a custom dimension to Google Analytics. As it can no longer be reversed to identify the machine the user is using, it won’t be in violation of Google Analytics’ TOS. Naturally, it is still a potential user identifier, so you need to make sure sending it is in compliance with laws governing the passing and processing of such identifiers.
You can set the tag to fire on the All Pages trigger.
Create the custom dimensions
Once the tag is in place, you can create the custom dimensions in Google Analytics. Whether you use session scope or user scope is up to you. The first gives you some flexibility for tracking / blocking internal traffic, and the second might be more useful for identifying bots.

Create the Event tag, trigger, and variables
Finally, you need to create the Event tag, the trigger to fire it with, and any Data Layer variables you want to send.
The IP information is written into a dataLayer object that looks roughly like this:
{
event: 'geolocate',
geoData: {
ip: '123.123.123.123',
hashedIp: '9iCCGWzjVQPV74KJa3iiS9RKiof6m7y/8aSD9WyT0mw=',
isp: 'My ISP Org',
...
}
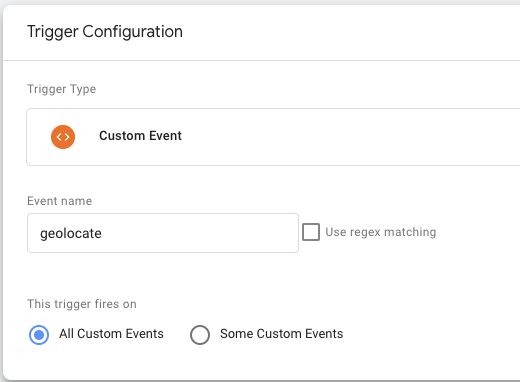
}To fire your tag, create a new Custom Event trigger:
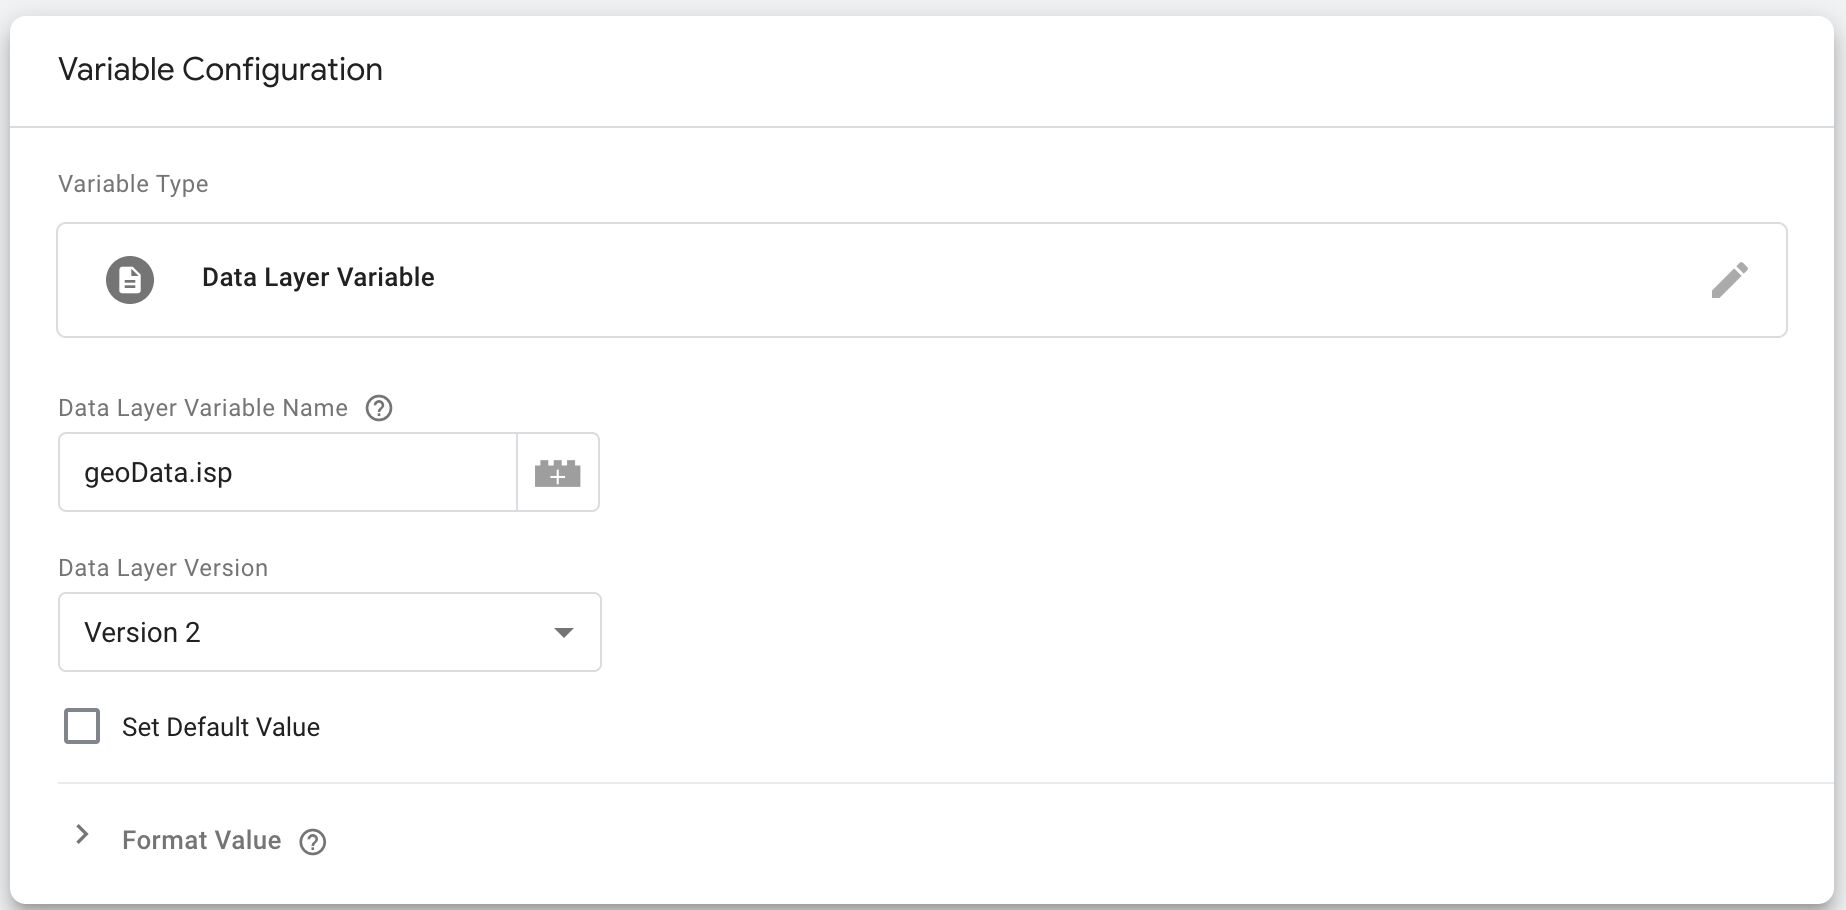
You can then create Data Layer variables for the isp and hashedIp fields (and any other fields you might want to utilize from the API response object).
Here’s an example of what the Data Layer variable for the ISP information looks like:
Finally, you need an Event tag to send the information to Google Analytics. It could look like this:

Key things are naturally the custom dimensions, but also setting the Non-Interaction Hit field to True.
Make sure the tag fires on the Custom Event trigger you just created.
Testing the setup
To test the setup, use the GTM/GA Debug extension.
Load the Preview container version in your browser, with the extension active, and then check that a hit is sent to Google Analytics with all the information you included in it.
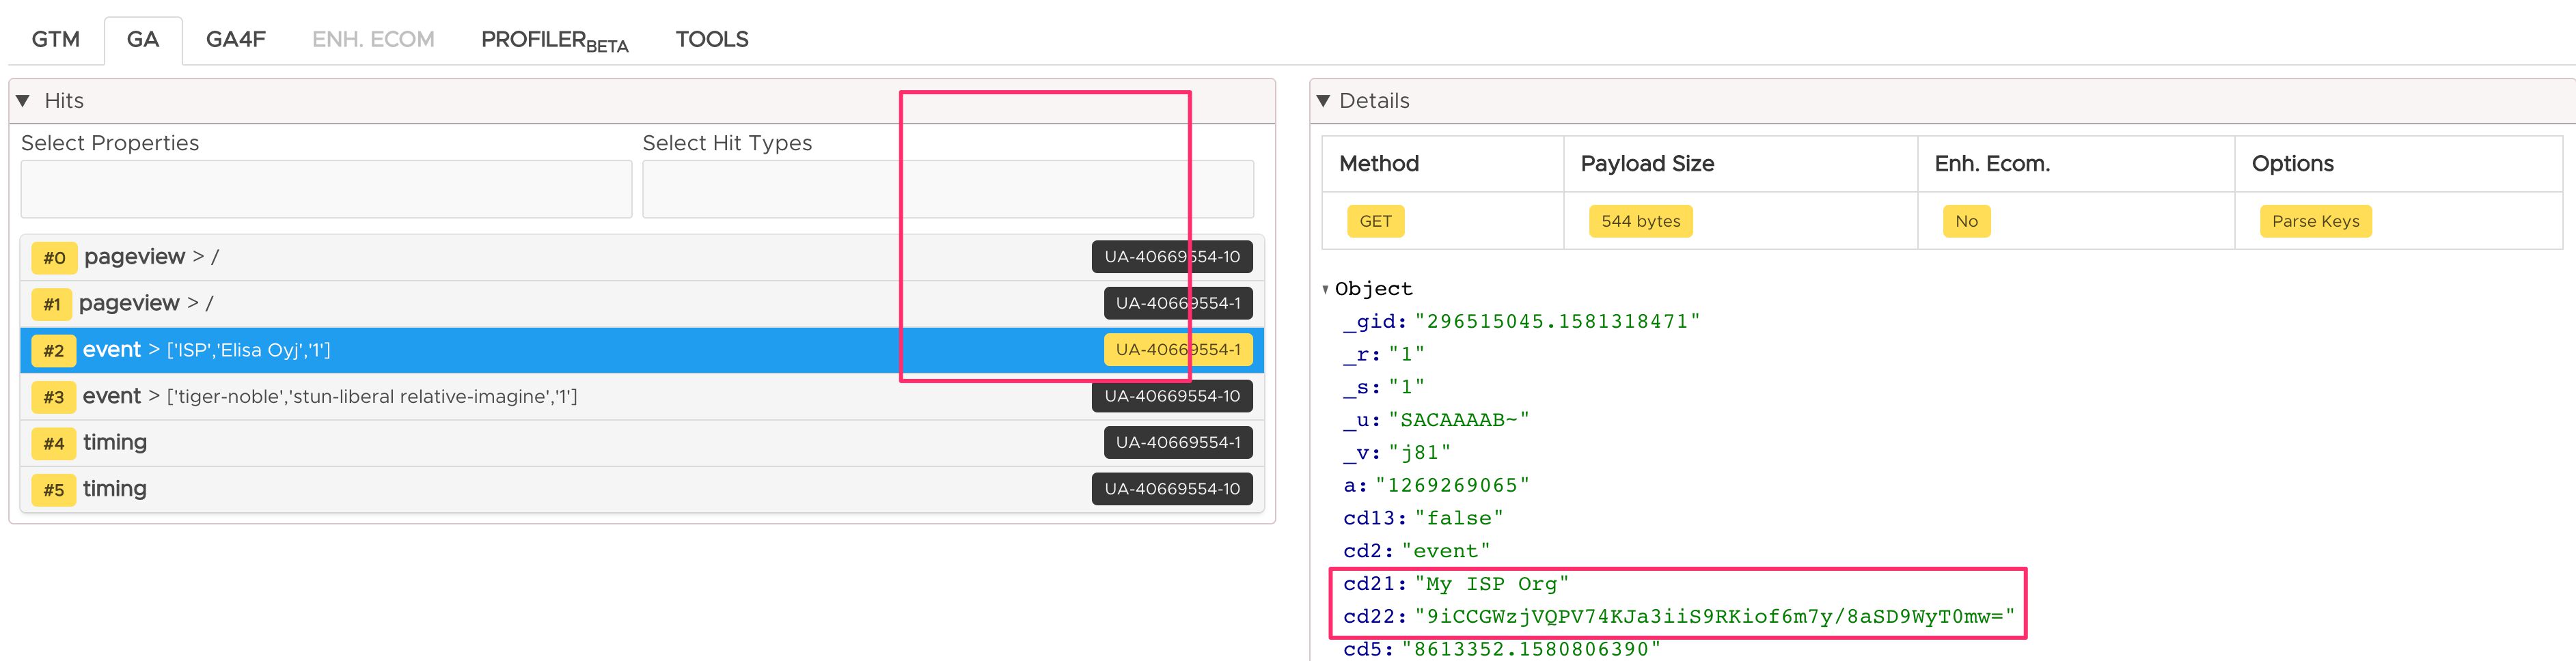
Remember to check your Google Analytics data in a few hours (you might need to wait even longer if it’s a new custom dimension) to make sure the data is being populated correctly.
Throttling the API requests
Remember that in the free version of the API you only have 1000 requests per day? That’s definitely not a lot. So you can throttle the requests to make sure they only fire once per session, or even once per user.
For this, you need browser cookies or some other form of browser storage.
The session cookie is something you can manipulate with customTask. In fact, I’ve written a solution for updating a session cookie with every Google Analytics hit.
Once you have the customTask in place, you’ll need to modify the trigger on the IP Geolocation API tag to only fire if the cookie does not exist (i.e. there’s no active session). Instead of an All Pages trigger, you’ll need a new Page View trigger. Also, you’ll need a 1st Party Cookie variable as instructed in the guide. The final trigger should look something like this:
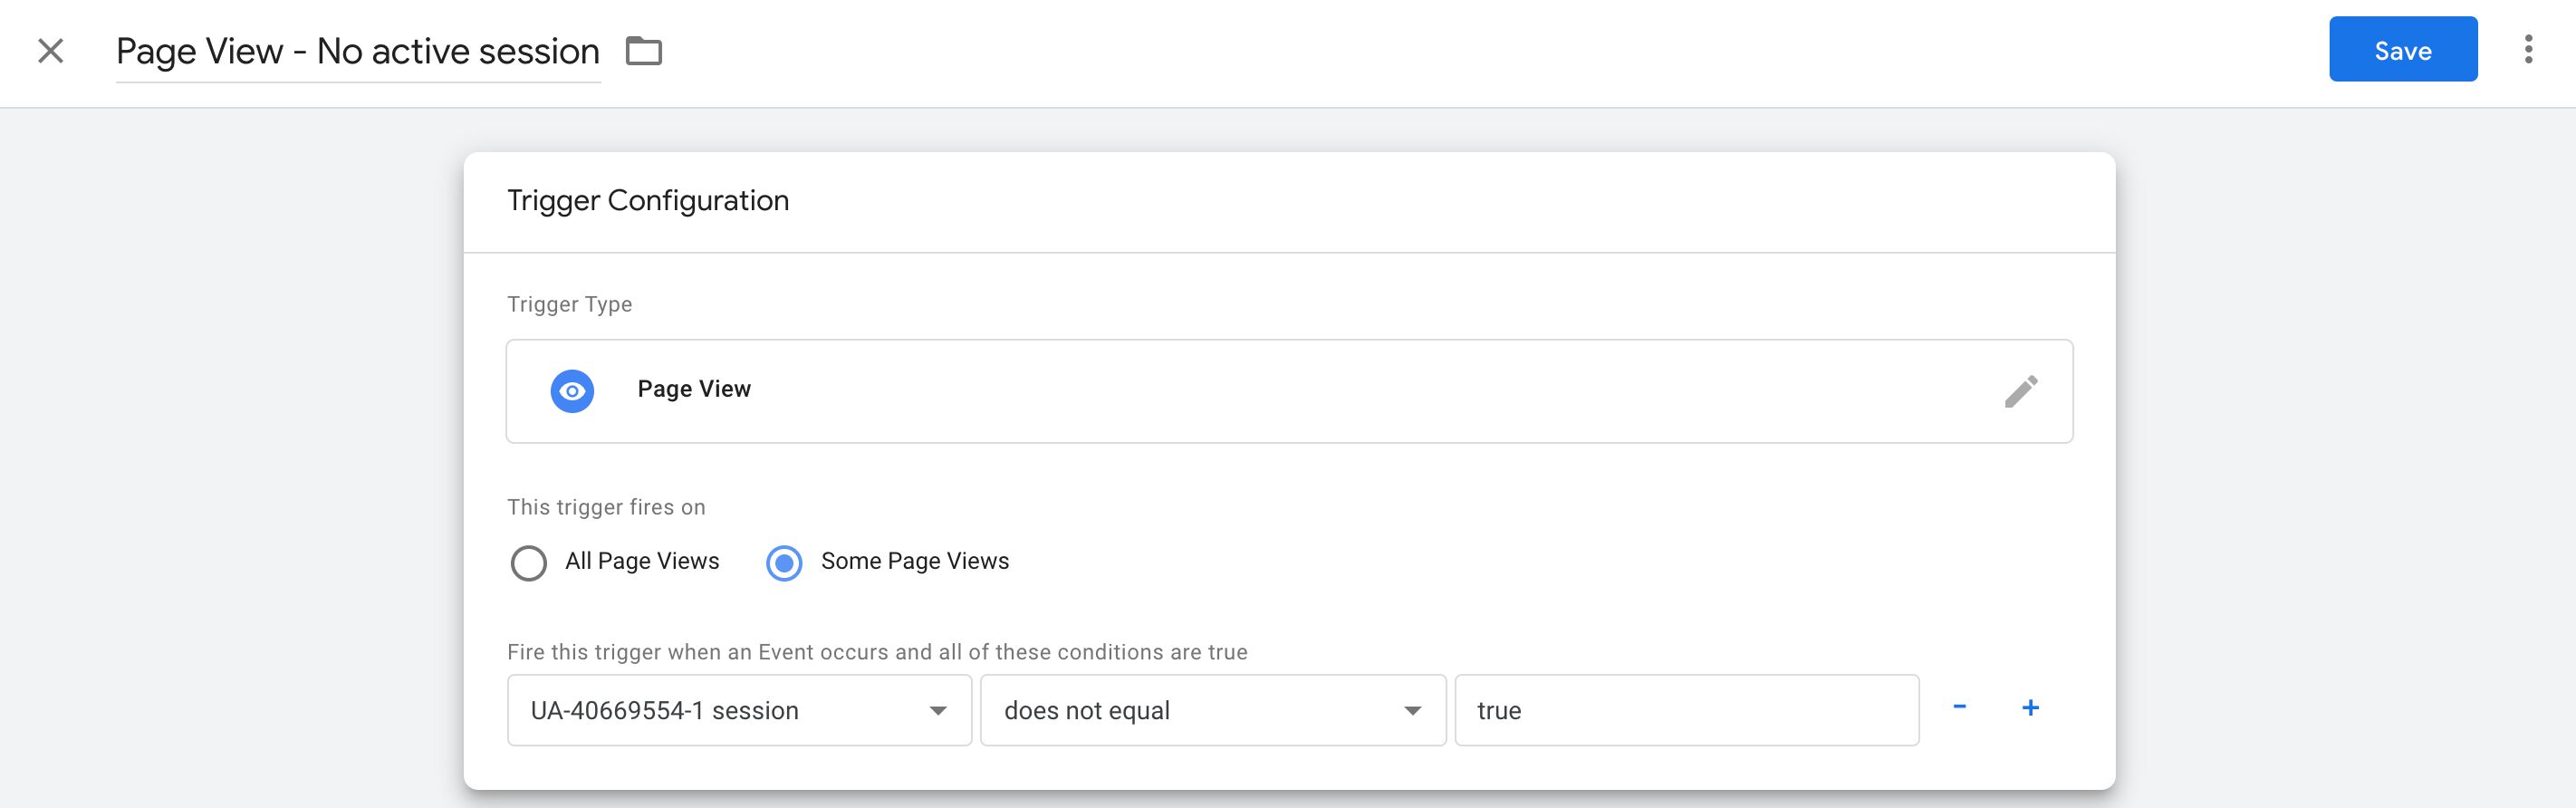
Using this trigger on the IP Geolocation API tag, you’ll restrict the API request to only happen once every 30 minutes of GA inactivity. That should keep the number of requests down nicely.
You can also throttle per user, by creating a cookie after the API request has completed (e.g. in a new custom template or a Custom HTML tag), and then using the existence of this cookie to prevent the API tag from firing again.
I would personally recommend to throttle only per session, as ISPs can change as the user moves around, and scoping the ISP to the user might block actual, valid traffic as well.
Summary
In this article, we’ve learned how to repurpose a gallery template to return some of the data we’ve lost as Google deprecated the Service Provider and Network Domain dimensions.
In addition to that, we go the additional bonus of collecting the hashed IP address of the user. This can be used to further filter out bots, as you can identify hashed IP addresses belonging to bots and add them to a blacklist either in your Google Tag Manager triggers, or in Google Analytics’ filters.
The downside of the IP Geolocation API is that it doesn’t expose the Network Domain dimension. For this, you’ll need some other API and some other solution. I’m sure other authors will be quick to introduce solutions similar to mine, which you can then check out and implement if they seem better for your use cases.
There’s an upside to using an API solution of your own rather than relying on Google’s reverse lookups - you have more transparency, more options, and more methods to comply with laws and regulations that govern the parsing of user identifiers, personal data, and IP address lookups.
I hope you found this useful! Please let me know in the comments if you have suggestions for improving the setup, or if you didn’t understand something - I’m here to help.
