#GTMTips: Useful GTM For iOS Tips
A while ago I wrote a blog post about how to install Google Tag Manager for iOS using the Swift programming language (you can read the article here). I’ve been doing a lot of work with Swift lately, and I’m more and more convinced that GTM is actually a very powerful utility for running in your iOS app instead of the Google Analytics SDK.
Why? Because it abstracts a lot of the nitty-gritty you’d otherwise need to explicitly manage in your GA installation. Also, by using the TAGDataLayer interface, you’re abstracting stuff yourself, not forced to adopt any specific syntax or semantic structure in your tracking. Instead, you’ll be leveraging generic key-value pairs and an object structure, which you’re probably already familiar with if you’ve worked with GTM for the web.
In any case, here’s a bunch of tips I’ve discovered while working with the SDK. Some of them might be quite evident, but they’re useful nevertheless. Also, I’ve learned that nothing is 100% self-evident in the world of GTM.
XThe Simmer Newsletter
Subscribe to the Simmer newsletter to get the latest news and content from Simo Ahava into your email inbox!
Tip 35: Bunch of GTM4iOS tips!
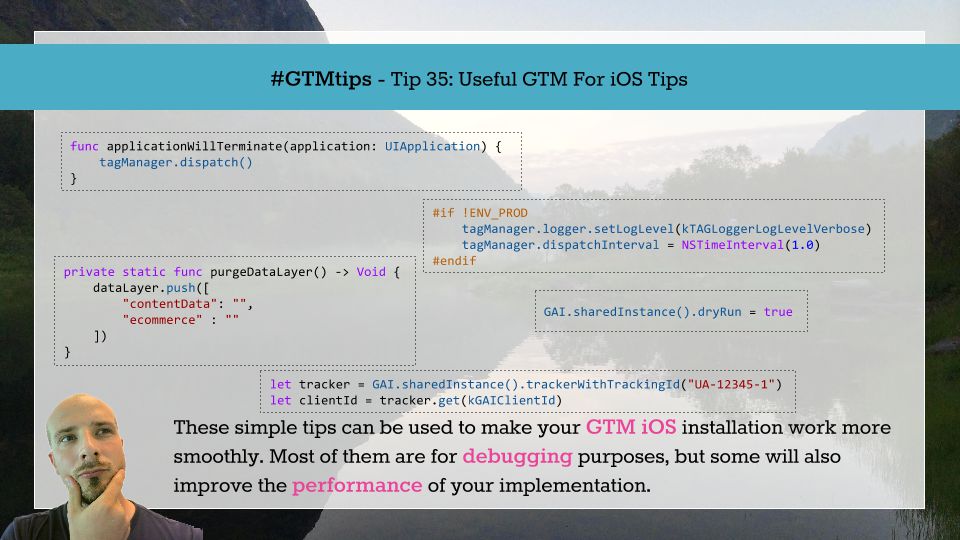
The tips are:
Dispatch the Tag Manager / GA queue when the application is entering background / terminating
Log verbosely and set dispatch interval to 1 second only when debugging
Purge
dataLayerin between pushesUse the
dryRunof theGAI.sharedInstance()to avoid sending data to GAGet the Google Analytics Client ID from the tracker instance
Switch IDFA on in your Tags
1. Dispatch the Tag Manager / GA queue when the application is entering background / terminating
One of the rather ugly default features of the Google Analytics and Google Tag Manager SDKs is that they have a 120 second batch interval. It makes a lot of sense when the app is running, as it preserves battery et cetera, but it’s nasty when the app is in the background. Basically, it forces the app to “wake up” after 120 seconds of down time, just for the queue to dispatch.
In AppDelegate, you have a bunch of useful functions, which you can use to run commands when the app is ready to do something. Also, the TAGManager implementation has the method dispatch(), which lets you send all the hits that are currently in the dispatch queue. So, by combining these two, you can empty the queue whenever the app is about to enter the background or terminate!
func applicationDidEnterBackground(application: UIApplication) {
    tagManager.dispatch()
}

func applicationWillTerminate(application: UIApplication) {
    tagManager.dispatch()
}
2. Log verbosely and set dispatch interval to 1 second only when debugging
If you’ve set preprocessor macros (you should!), you can execute code only when in a certain environment, such as QA, staging, or production.
GTM also provides verbose logging, and you can set the dispatch interval of the request queue (see the previous tip) manually. Now, combine all these in a bowl, stir well, and you’ll get some really powerful debugging tools.
#if !ENV_PROD
    tagManager.logger.setLogLevel(kTAGLoggerLogLevelVerbose)
    tagManager.dispatchInterval = NSTimeInterval(1.0)
#endif
The first command sets the logging level to verbose, and the second one sets the dispatch interval to just one second. Both commands are only executed if the environment is not ENV_PROD, thus covering ENV_QA, ENV_TEST, ENV_DEBUG etc. These are, of course, just examples, and your setup probably uses some other names.
You can utilize the #if DEBUG further in the containerAvailable callback, which is invoked when a container is first opened. Now, if you’re debugging the GTM implementation, it’s possible you’re also updating the container in Google Tag Manager as well, and you might want to see changes immediately rather than having to wait the 12 hours for the container to go stale. So, modify the callback accordingly:
func containerAvailable(container: TAGContainer) -> Void {
    dispatch_async(dispatch_get_main_queue(), {
        self.container = container;
        #if !ENV_PROD
            container.refresh()
        #endif
    });
}
See that container.refresh() there? That fetches a container over the network every single time, as long as you’re not in an environment named ENV_PROD.
3. Purge dataLayer in between pushes
In my Analytics.swift module (see this article for more information), I call the following function just after dataLayer.push() where content or hit-scoped custom dimensions are passed. To keep things consistent, I’ve created a dataLayer syntax, where all content data is stored under the key contentData, and all eCommerce data is stored under the key ecommerce. I have other collections as well, such as metaData and userData, but these I want to persist, so the purge is not called after they are used.
private static func purgeDataLayer() -> Void {
    dataLayer.push([
        "contentData": "",
        "ecommerce" : ""
    ])
}
Yes, pushing blank strings is a clumsy way to purge the structure but it works. Basically, every time after content data and ecommerce data have been pushed into dataLayer and subsequently processed by GTM, I call purgeDataLayer() to ensure that this hit-scoped information does not persist.
4. Use the dryRun of the GAI.sharedInstance() to avoid sending data to GA
I’m actually not sure why you’d want to do this, since you can just send your debug hits to a secondary Google Analytics property. But if you do want to avoid sending any data to Google Analytics, and just look at the verbose logs to see if things are working, you can set this flag in the Google Analytics tracker instance.
Yes, I’m aware this isn’t GTM-specific, but it works with GTM-created trackers as well!
GAI.sharedInstance().dryRun = trueA simple tip, no doubt.
5. Get the Google Analytics Client ID from the tracker instance
Again, this is more Google Analytics than Google Tag Manager, but it works in the latter as well. All trackers created via the GA or GTM SDKs have the same Client ID, which persists until you clear all settings and content in the app.
To get the Client ID, run the following commands:
let tracker = GAI.sharedInstance().trackerWithTrackingId("UA-12345-1")
let clientId = tracker.get(kGAIClientId)
Now clientId has the GA Client ID, and you can do whatever you wish with it. In other words, you can actually use the string “UA-12345-1” if you wish, since it would have the same Client ID as the actual tracker (with the real Universal Analytics property ID).
6. Switch IDFA on in your Tags
This is a very simple tip, as there’s really almost no customization required. All you need to make sure is that the following Pod is loaded in your Podfile:
pod 'GoogleIDFASupport'
This loads the IDFA library, and you won’t need to do anything else in your Swift app. The only other thing you’ll need to do is switch on the Enable Advertising ID Features in your GTM Tags.
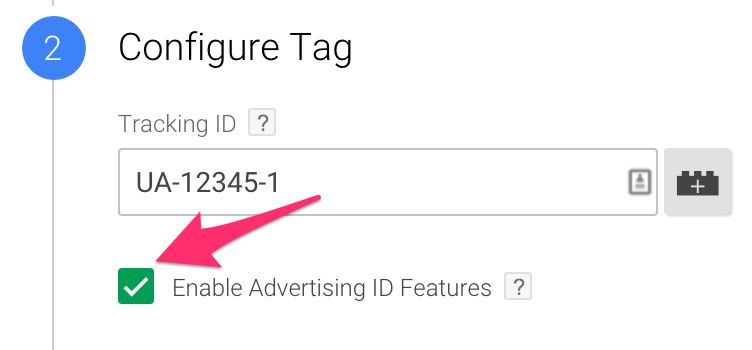
Now your app will be sending the &idfa; parameter with your device’s IDFA identifier, and you can set on your demographics reports and your iTunes install campaign tracking and whatnot via GA.
Summary
That’s it for this group of tips! I have lots more to share around Google Tag Manager for iOS, but I can’t extinguish my entire tip collection in one single post.
I hope you found these useful! Do you have other tricks up your sleeve?
