#GTMTips: Embed Facebook Messenger Chat With Google Tag Manager
A while ago, I published a #GTMTips article, where I showed how you can add HTML elements to the page programmatically using Google Tag Manager. This is relevant because GTM’s validators prevent you from adding custom parameters to HTML elements that are injected directly via the Custom HTML tag. To circumvent this validation, you need to create the element programmatically, before appending it to the document.
A while ago, Matteo Gamba asked me a question related to the Facebook Customer Chat Plugin. This plugin lets you add the Messenger chat of your own Facebook application directly to the website. It’s pretty cool, but the problem is that you are instructed to embed the plugin using custom HTML attributes, and these will not pass validation.
So here I am, responding to the suggestion to write a dedicated guide for the Facebook chat plugin.
XThe Simmer Newsletter
Subscribe to the Simmer newsletter to get the latest news and content from Simo Ahava into your email inbox!
Tip 75: Embed the Facebook Messenger chat plugin using Google Tag Manager
First of all head on over to the official Facebook Custom Chat Plugin instructions, and do everything instructed until you reach Step 2 of the setup steps part of the guide.
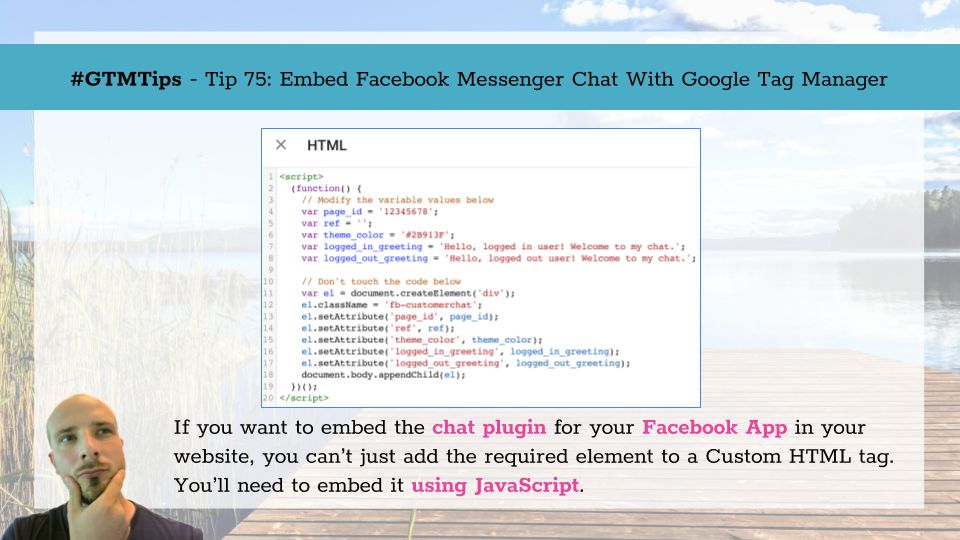
At this point, you are instructed to add a specific <div> to the page. So what you’ll need to do is create a new Custom HTML tag in Google Tag Manager, with the following code within:
<script>
  (function() {
    // Modify the variable values below
    var page_id = '12345678';
    var ref = '';
    var theme_color = '#2B913F';
    var logged_in_greeting = 'Hello, logged in user! Welcome to my chat.';
    var logged_out_greeting = 'Hello, logged out user! Welcome to my chat.';

    // Don't touch the code below
    var el = document.createElement('div');
    el.className = 'fb-customerchat';
    el.setAttribute('page_id', page_id);
    if (ref.length) { el.setAttribute('ref', ref); }
    el.setAttribute('theme_color', theme_color);
    el.setAttribute('logged_in_greeting', logged_in_greeting);
    el.setAttribute('logged_out_greeting', logged_out_greeting);
    document.body.appendChild(el);
  })();
</script>
Change the five variable values in lines 4-8 of the code. If you don’t have a custom webhook accepting requests from postbacks and referrals, you can leave the string empty.
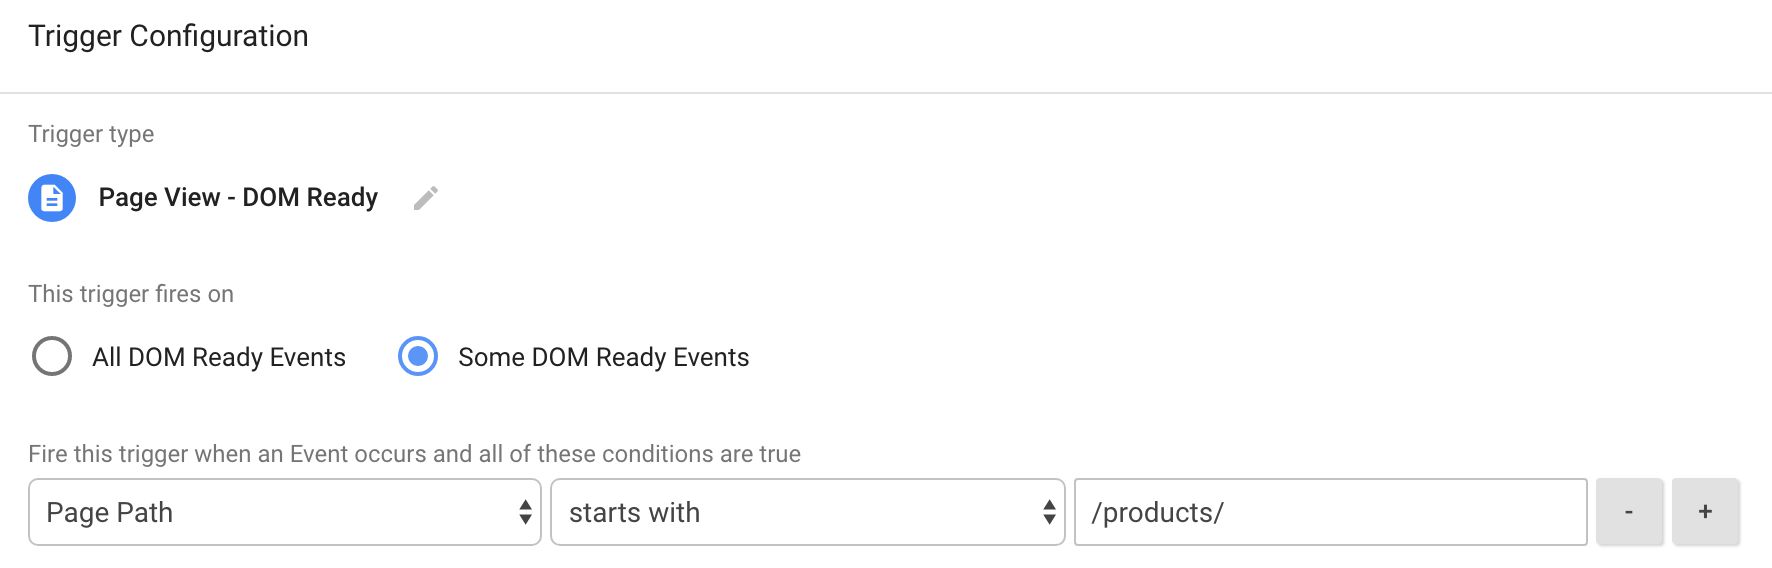
Create a new DOM Ready trigger for this Custom HTML tag. The trigger should be delimited to only firing on pages where you want to see the chat plugin.
And that should do it! The code builds the required <div> element programmatically, using the variables you configured in lines 4-8 to populate the parameters.
