iOS Quickstart With Google Analytics For Firebase And Google Tag Manager
A while ago, I published an article on how to build an Android application, and bundle it with Firebase. The purpose of that article, and the one you are reading now, is to slowly introduce the world of mobile app development and Firebase, given the latter is getting more and more traction as Google’s go-to analytics platform.
After finishing work on the Android guide, I immediately started working on its counterpart for iOS, and that’s the one you’re reading now.

The process is essentially the same. We’ll develop the application using Mac’s own integrated development environment (Xcode), and the steps to create and integrate Firebase and Google Tag Manager deviate only very little from Android.
I’ve also created a video you can watch if you prefer.
Table of Contents
The Simmer Newsletter
Subscribe to the Simmer newsletter to get the latest news and content from Simo Ahava into your email inbox!
What you’ll build
We’ll build an iOS application using the Swift programming language. The application will be built with Xcode, so you’ll need to use a Mac computer for this as there’s no native support for Xcode on other platforms.
Next, we’ll create a Firebase project, and connect it to a Google Analytics account. After doing this, your application will automatically collect some events.
We’ll add a simple select_content event, which will be logged in Google Analytics for Firebase.
Finally, we’ll create a Google Tag Manager container, and have it listen for the select_content event, and then duplicate its content to a Universal Analytics endpoint.
The application we’ll create will be hideous and feature-bare. Creating a flashy app is not the point here. I want to show you how easy it is to get started, and you can use even this simplest of applications to play around with Firebase in order to learn how it works.
Step 1: Create a project in Xcode
Let’s get started!
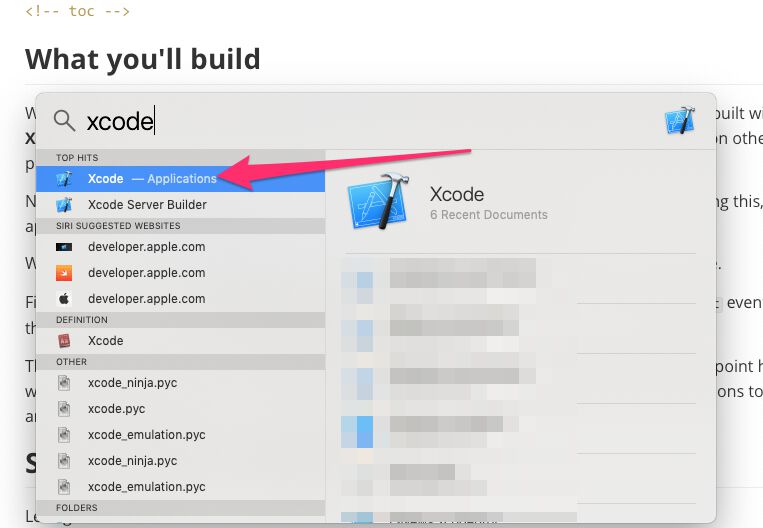
Go to the Applications folder of your Mac and launch Xcode.
Click on File -> New -> Project to create a new Xcode project.
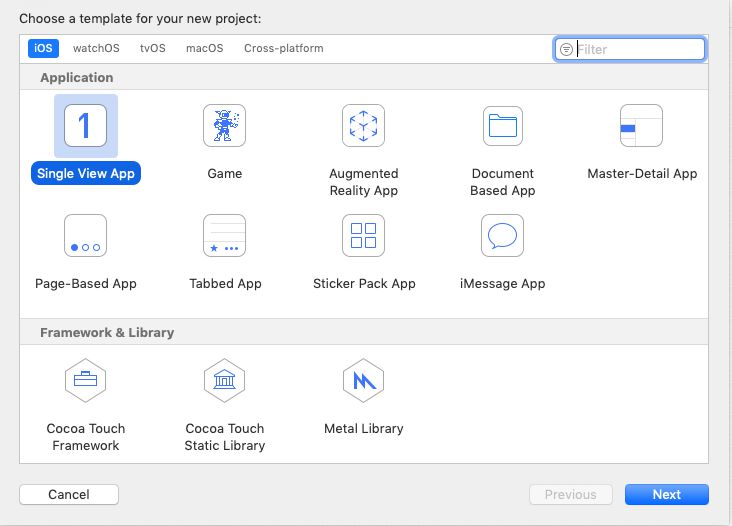
Choose the Single View App as the template, and click Next.
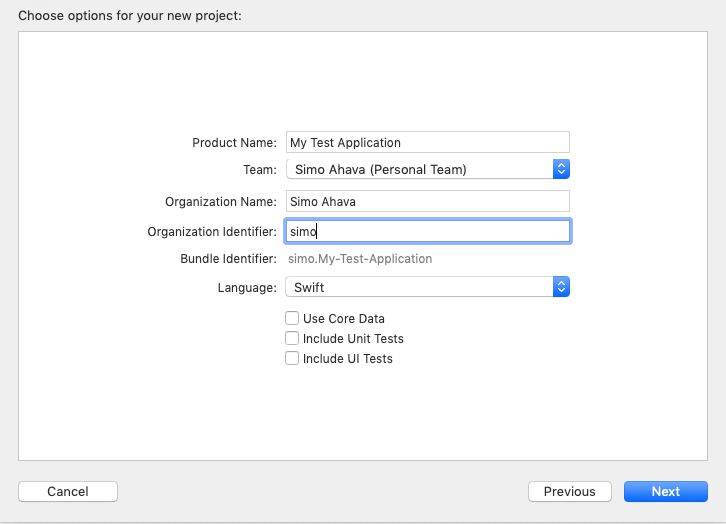
In the next screen, give the product a name such as My Test Application. If you want to run the application on a physical device, choose yourself from the Team drop-down. If the Team dropdown doesn’t show your name (as configured on your Apple ID), follow the options to create a personal team with your Apple ID.
Note! You only have to do this if you want to run the application on your physical device. We’ll be using a simulator in the examples so you can ignore the Team drop-down as well.
You can give a custom Organization Identifier, as that makes it easier to remember your bundle identifier (which you’ll need when creating the Firebase project).
Make sure Swift is selected as the language, and when ready click Next.
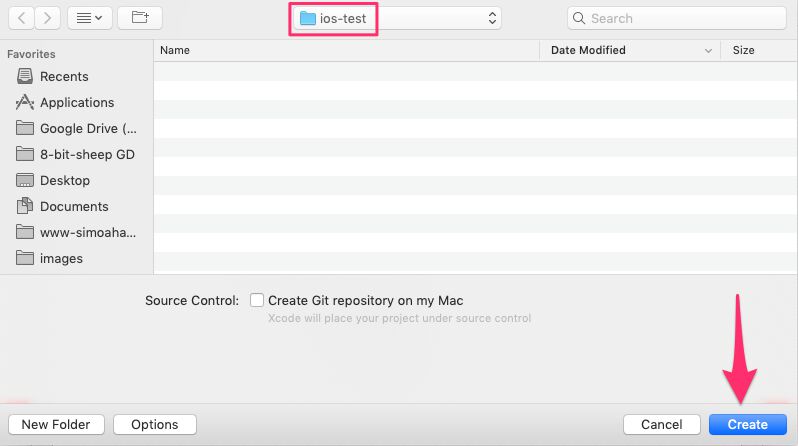
Finally, navigate to the directory where you want to create the project in. In my example, it’s a directory named ios-test.
Click Create when done.
Xcode will now proceed to create your project. Once done, it will open the project’s general settings and show you the project structure in the left.
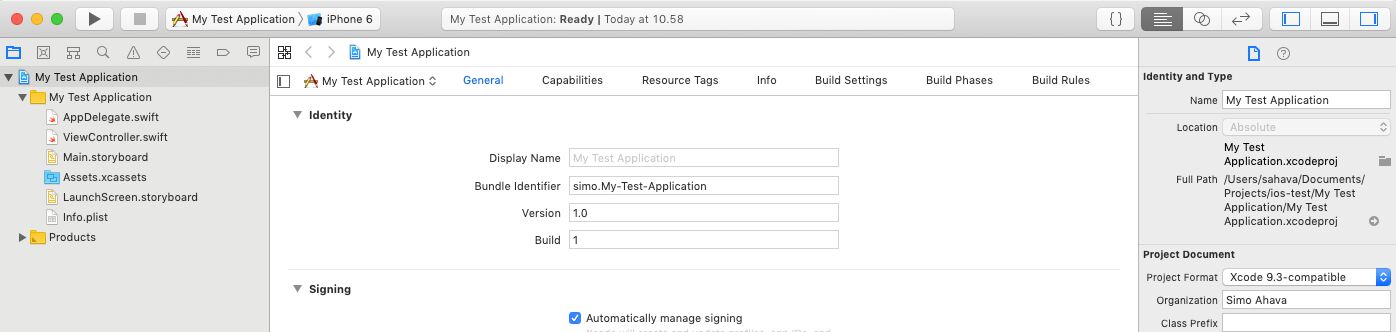
Before we run our app for the first time, let’s add some heart to it. Click Main.storyboard to open the visual editor for the application’s user interface.
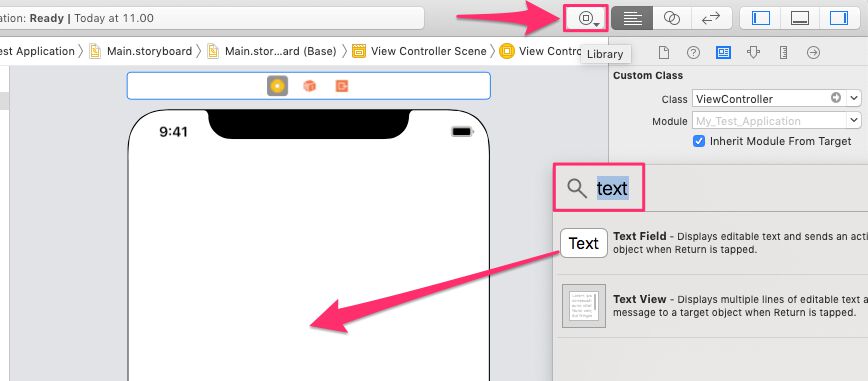
Click the Object Library icon in the top bar of Xcode, and type text in the search bar that appears. Drag-and-drop the Text Field item into the middle of the view.
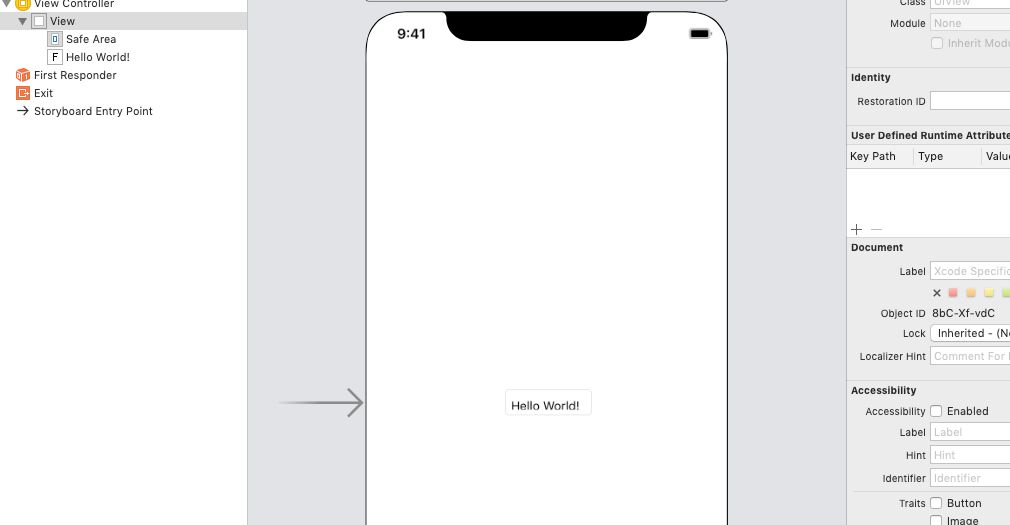
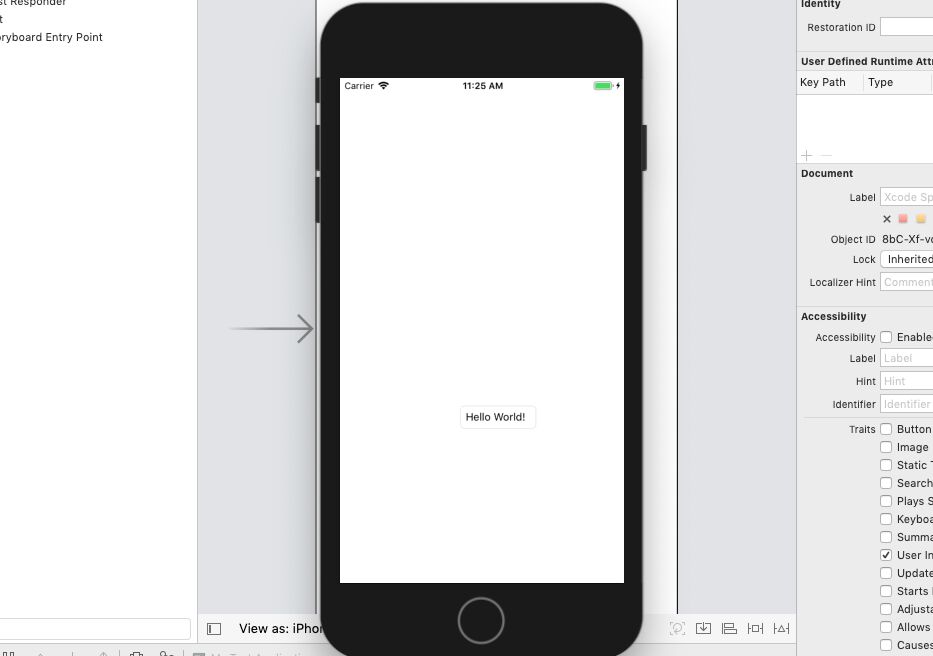
Double-click the Text Field in the view, and type in Hello World!. You can reposition the field if you wish - though it won’t make it any prettier. This is what it should look like:
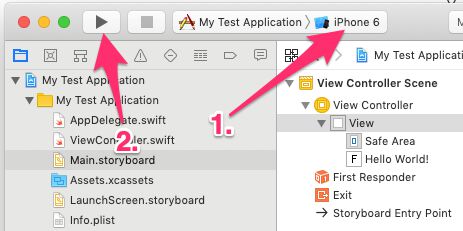
Now that we’ve created a beautiful user interface, we can run the application. Choose a phone model, e.g. iPhone 6 from the device menu, and click the Play button to build the application and run the simulator.
It’s going to take a while for the application to start, but once it does, you’ll be able to see it in the emulator window (it’s a different application that starts so remember to switch to it).
Congratulations! You’ve built the iOS application we’ll use as the testbed in this article. In the next step, we’ll configure Firebase!
Step 2: Create a Firebase project
Here, I’ll recommend you follow the exact same steps as in the Android article. Open this link in a new browser tab to learn how to create the Firebase project. Once the project is created, switch back to this article.
Step 3: Deploy Firebase SDK in application
Once you have the project created, you’ll need to integrate it into your iOS application.
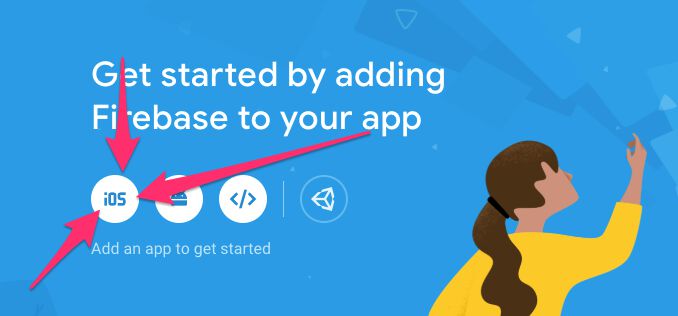
Click the iOS icon in the middle of the Project Overview dashboard.
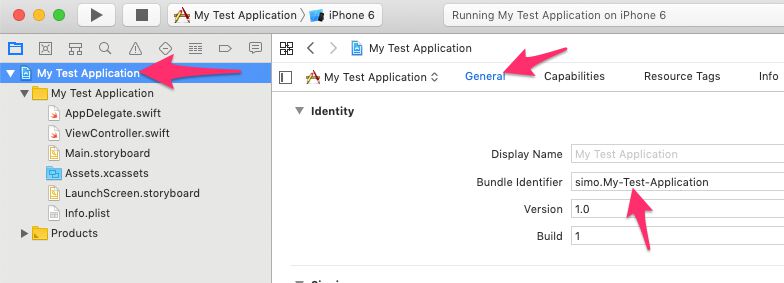
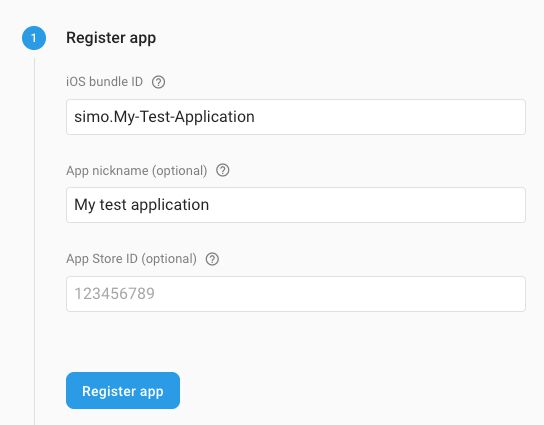
In the iOS bundle ID field, copy-paste the Bundle identifier you can find in Xcode by first selecting your project, and then looking in the Identity section of the General tab of your project settings.
Give the app a nickname such as My iOS App if you wish, and then click Register app.
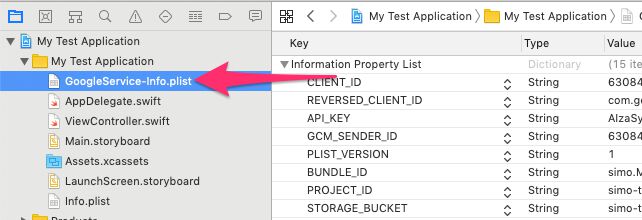
In the next screen, download the GoogleService-Info.plist file, and then drag-and-drop it to the project directory in Xcode (the yellow folder). You should see a screen like this, so make sure to check all the options as in the example.
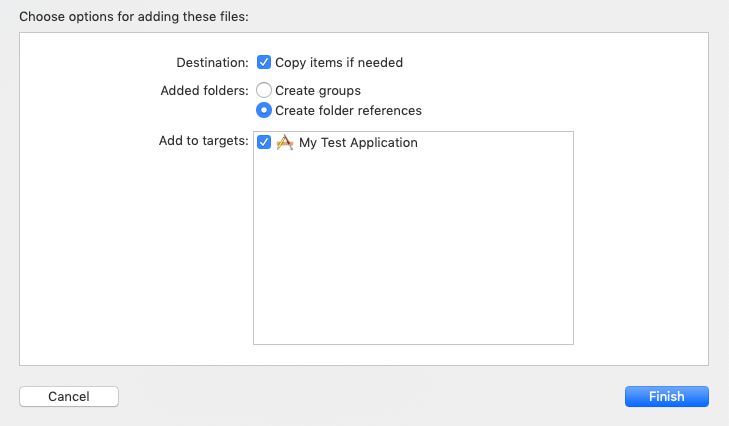
You should end up with the file within the project directory.
In the web browser, click Next when done.
Now you need to add the Firebase SDK to your project. To do that, you need to initialize a Podfile to manage your application’s dependencies.
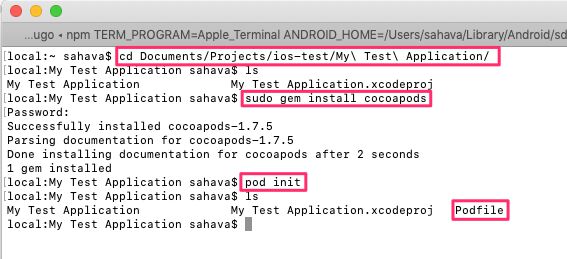
Open the Terminal application, and browse to your project root, i.e. the directory which has the My Project Name.xcodeproj file. In this directory, type this and hit enter:
sudo gem install cocoapodsIt’s a super-user command, so you’ll need to input your admin password. This installs the latest version of Cocoapods, the dependency manager for iOS.
Once done, type this and hit enter:
pod initIf you now list the contents of the directory with ls, you should see a new Podfile listed among the files and folders.
Open the Podfile in a plain text editor. You can open it in Mac’s TextEdit by typing open Podfile in the console while in the directory with the Podfile.
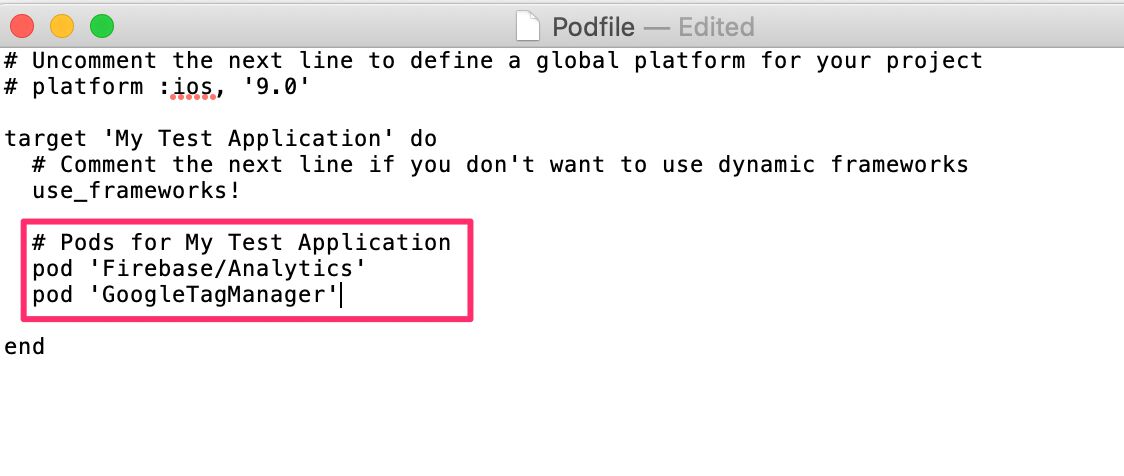
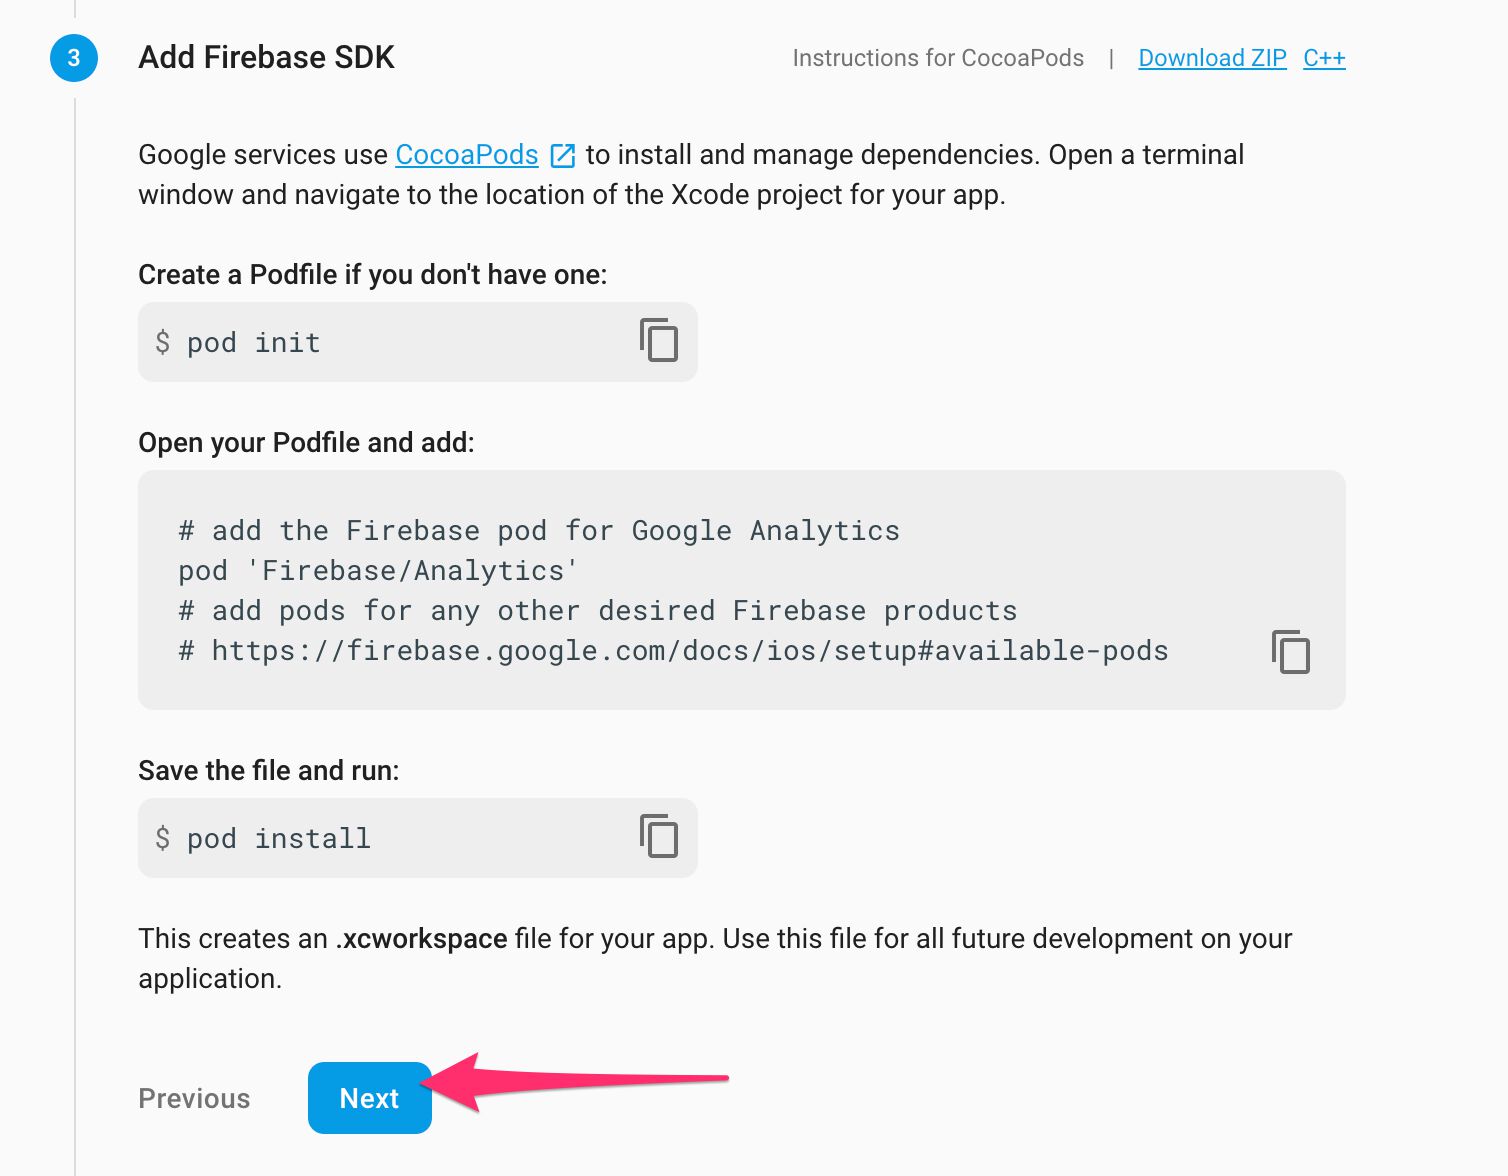
Under the # Pods for <my project>, add the following two lines:
pod 'Firebase/Analytics'
pod 'GoogleTagManager'
This is what it should look like:
Once done, save the file and close it.
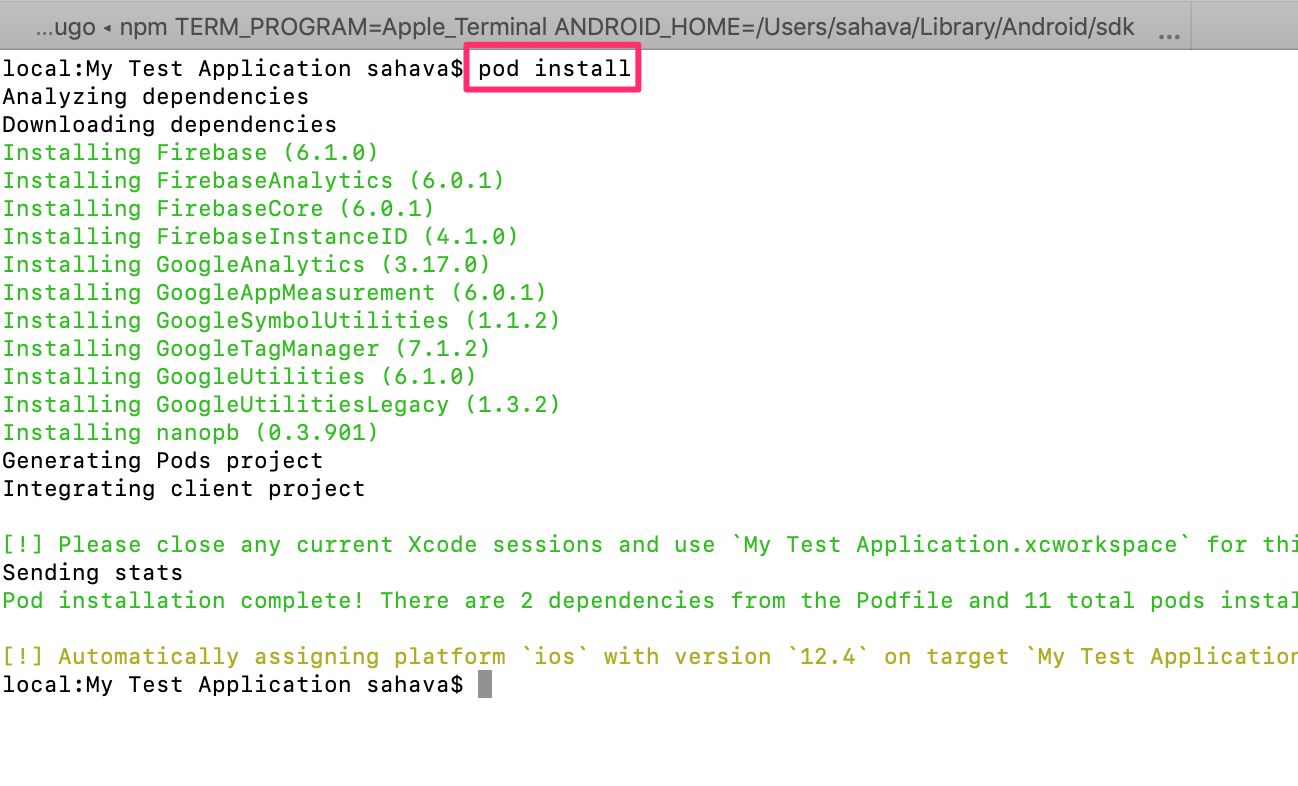
Now, in the Terminal, while in the same directory as the Podfile, type the following command and press Enter.
pod installYou should see a bunch of dependencies being installed, including Firebase and Google Analytics / Tag Manager modules.
You should now see a new file in this directory, named Your Project.xcworkspace. From now on, you’ll need to use this instead of the Your Project.xcodeproj file when working on the project in Xcode. The workspace bundles the Pods you downloaded together with your project, and lets you build an application that includes all the modules you have indicated as dependencies.
So go ahead and close Xcode and the iOS simulator, and then re-open Xcode by opening the Your Project.xcworkspace file.
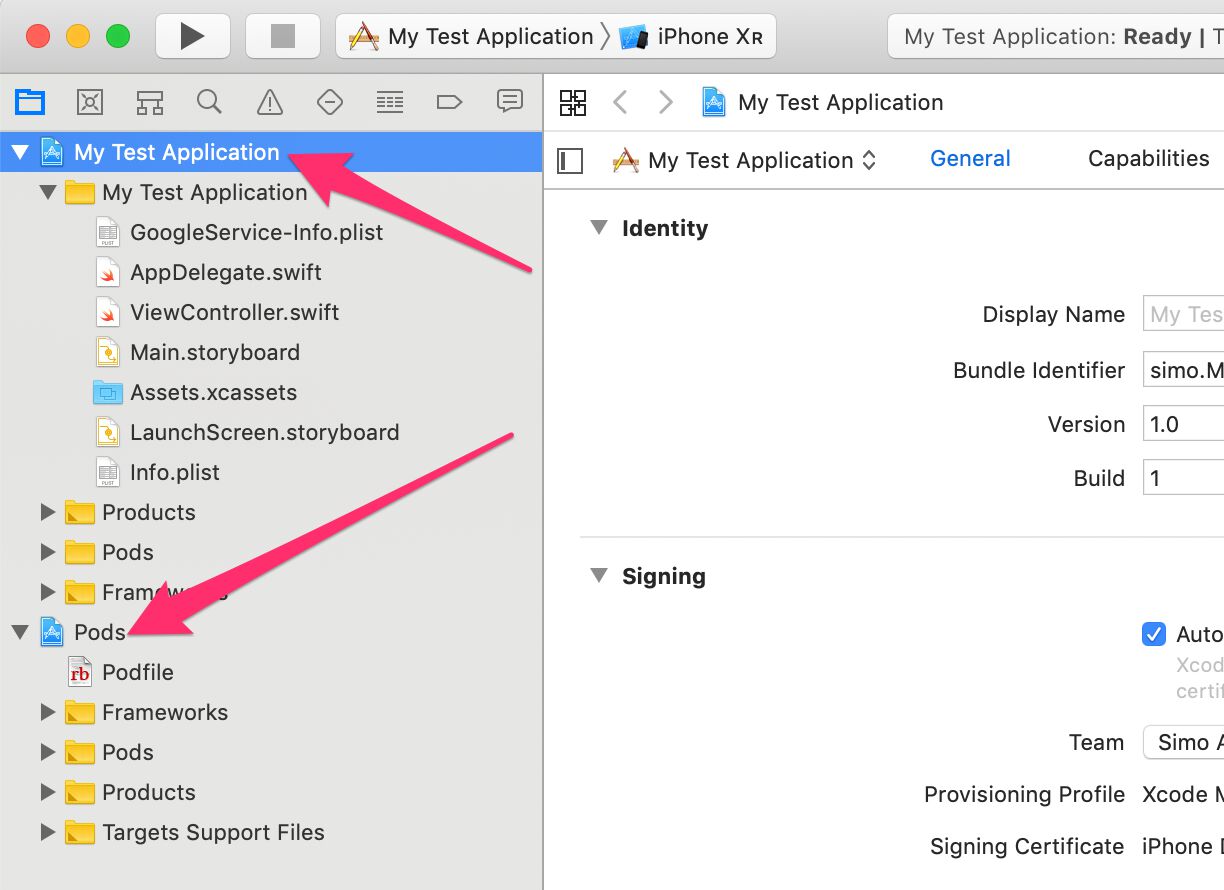
If everything works as it should, you’ll now see both your project root and the Pods group in the project navigator.
Now, go back to the web browser with your Firebase SDK setup. As you’ve now added the SDK as a dependency, click the Next button.
The next step is to initialize the SDK in your application. Open Xcode, and then click the AppDelegate.swift class file to open it for editing.
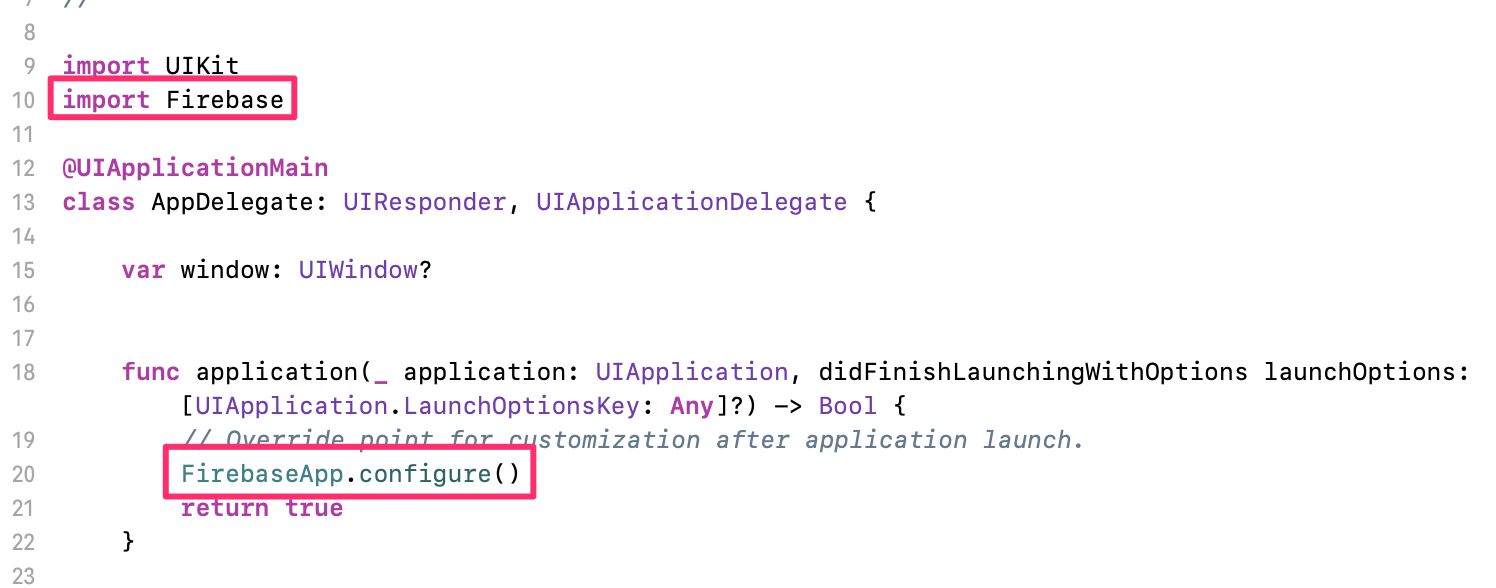
Here, right after the import UIKit statement, add the following line:
import FirebaseThis imports the Firebase set of modules. To initialize the Firebase SDK, add the following line of code into the application method, just before the return true statement:
FirebaseApp.configure()This is what your AppDelegate.swift should look like after the changes.
Next thing to do is to save your changes and run the application in a simulator. So pick a phone model from the drop-down and then click the Play button again.
The application itself won’t show anything has changed, but you might see some new, Firebase-related items in the Xcode logs.
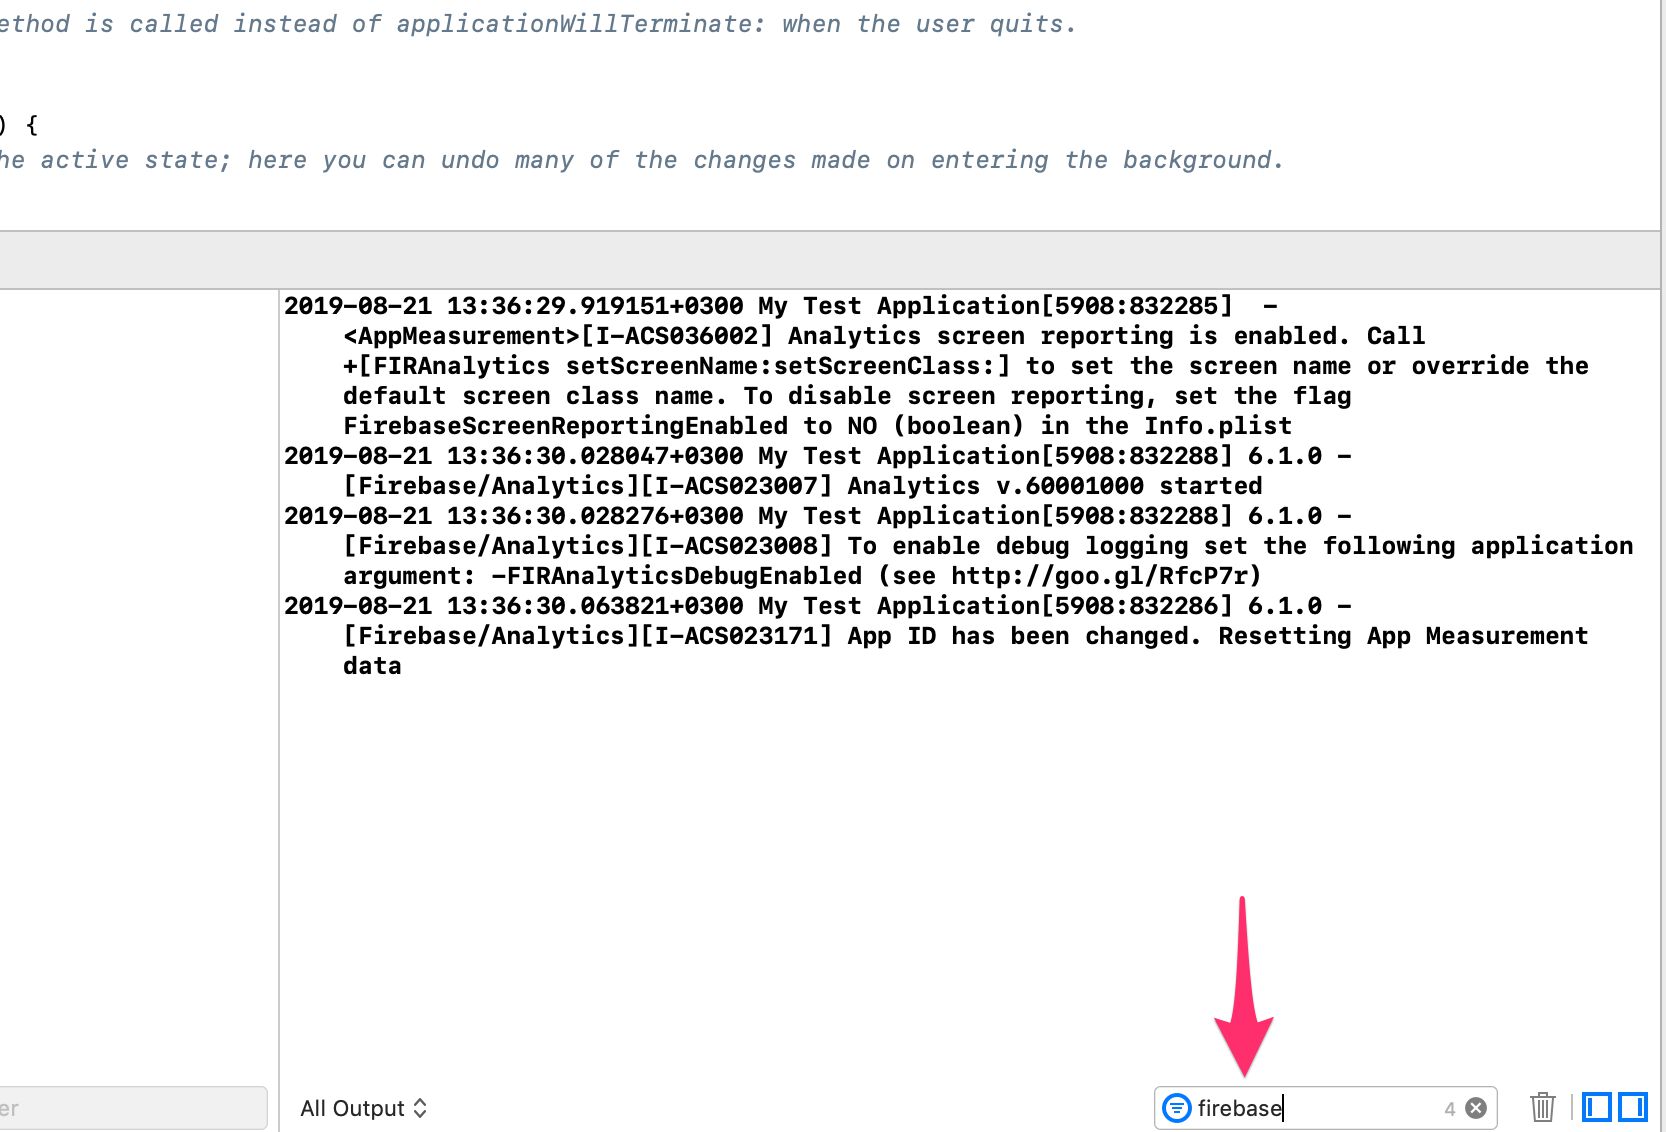
Note! You can also filter for
GoogleTagManagerto see evidence that the GTM dependency has loaded. However, since you don’t (yet) have a container added to the project, the only log will be a simple entry telling you that no container was found.
Once you’ve run the app and verified that Firebase is initialized, go back to the web browser to finish the SDK setup.
From the Add initialization code step, click Next to proceed to verification.
Now, if you’ve run your app in Xcode on a computer with internet access, this final step should shortly show a green checkmark to confirm you’ve initialized the Firebase SDK.
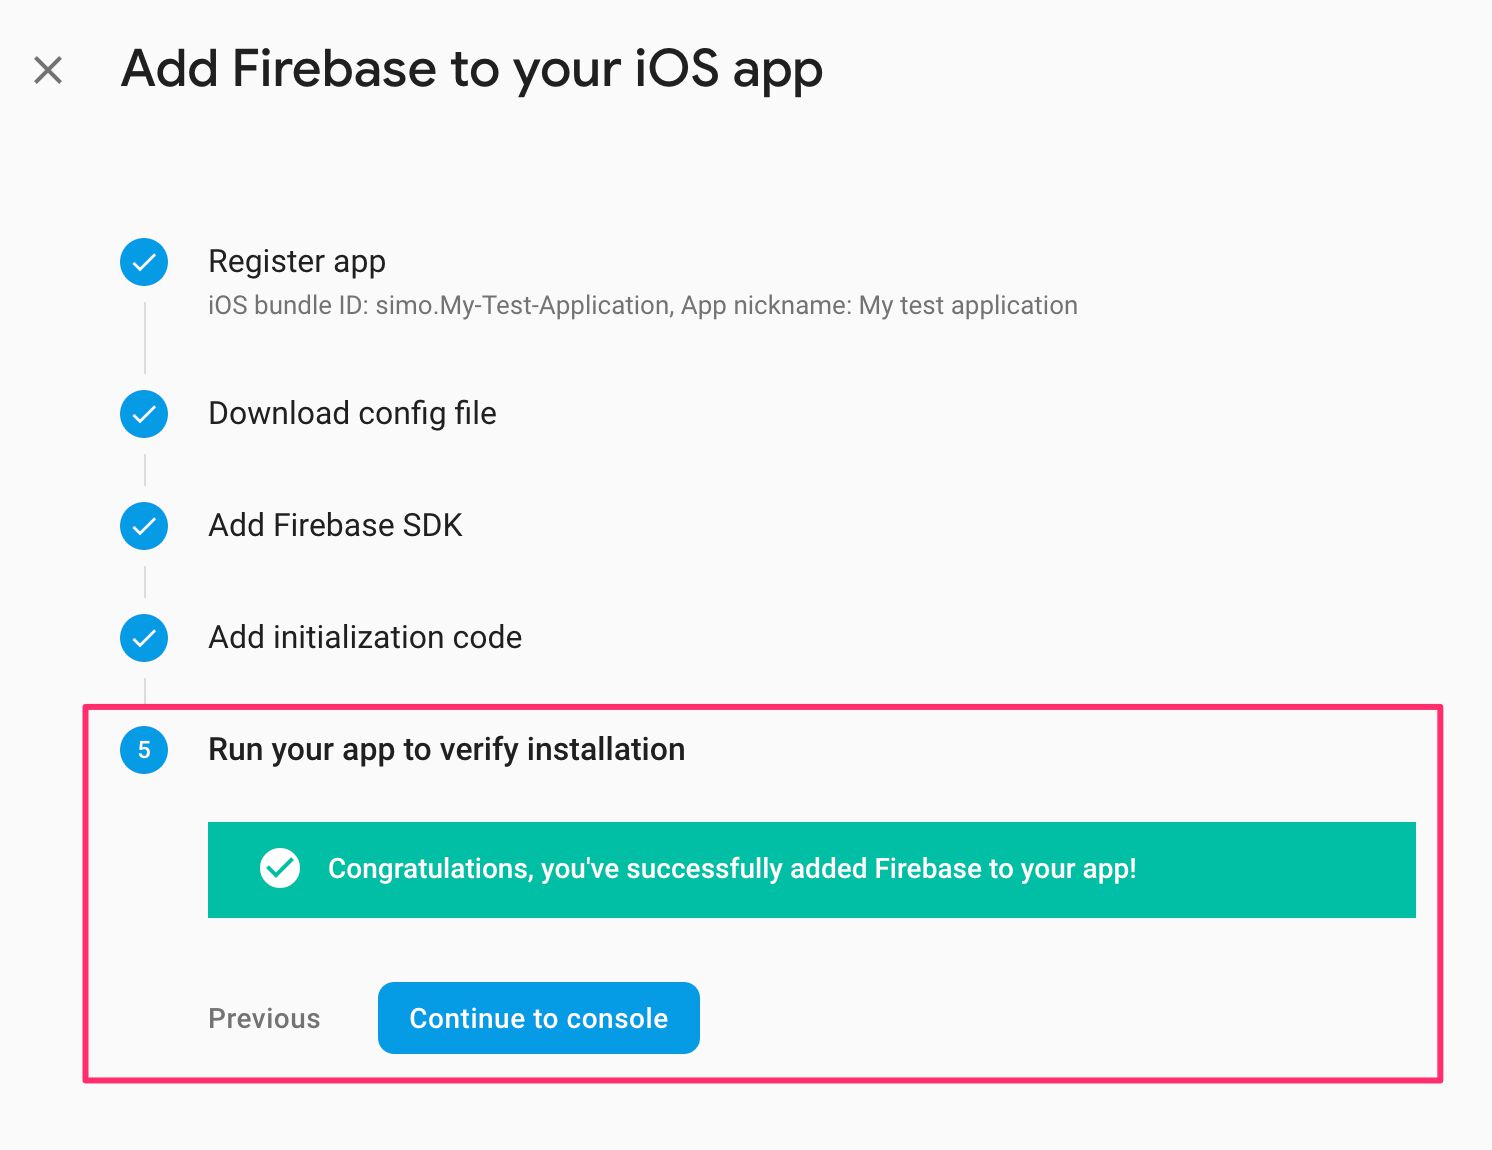
Nice work! Click Continue to console to finish the setup.
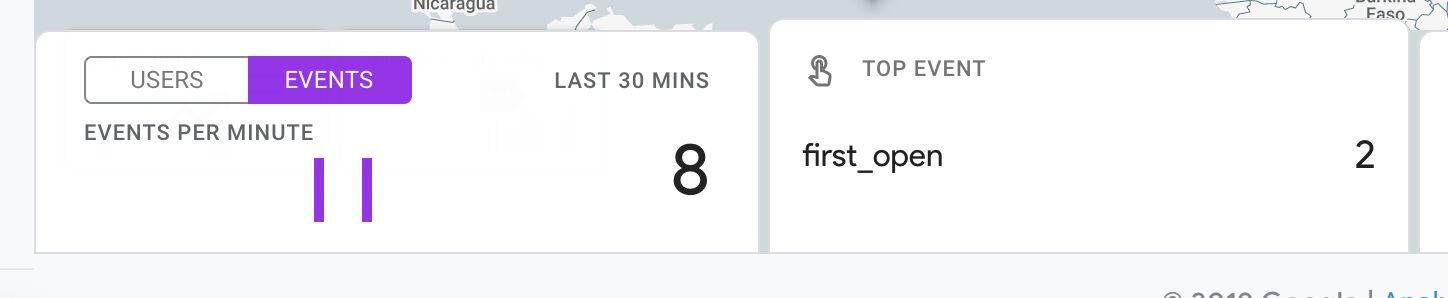
You now have a working Firebase installation running in your app. You can now actually visit Google Analytics, browser to your Firebase App + Web property for this project, and see your data in the StreamView report within.
However, let’s not get ahead of ourselves. In the next chapter we’ll add some Firebase event logging to the application!
Step 4: Add basic analytics to the application
Now, let’s add a simple Firebase event to our application.
Open the ViewController.swift class. This class controls the view (d’oh) where you added the “Hello World!” text to.
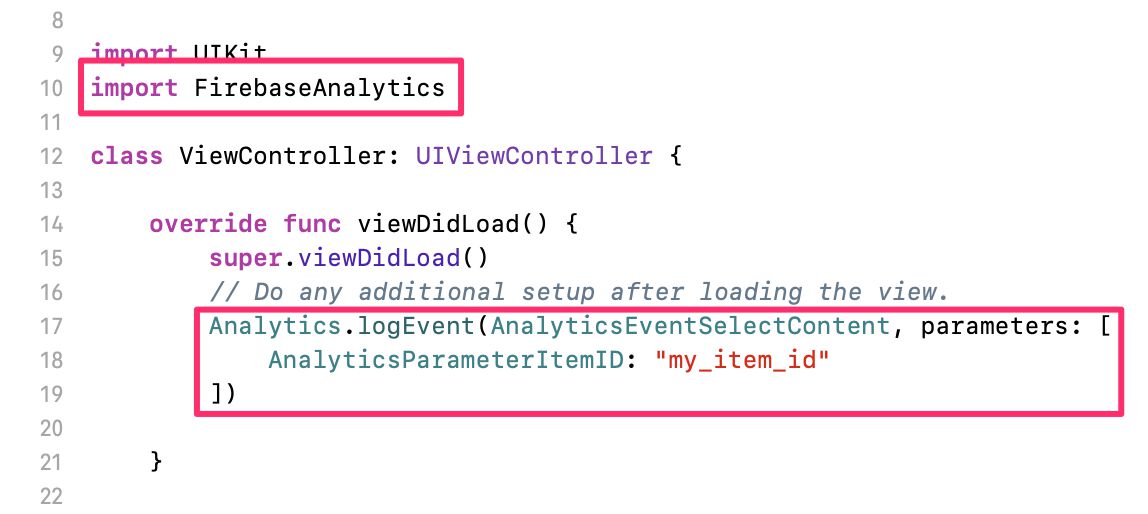
In this class, load the relevant Firebase dependency with the following import command added to the beginning of the file:
import FirebaseAnalyticsNext, at the end of the viewDidLoad() function, add the following lines of code:
Analytics.logEvent(AnalyticsEventSelectContent, parameters: [
    AnalyticsParameterItemID: "my_item_id"
])
When you want to send events to Firebase Analytics, you use the Analytics singleton and its logEvent() method.
This method takes two arguments: the event name and a list of key-value pairs in a parameters list.
For the event name, you can provide a custom name such as "my_custom_event", or you can utilize the standard events suggested by Firebase by accessing them through the AnalyticsEvent.* enumerated namespace.
For the key-value pairs in parameters, you can again use a custom key name such as "my_custom_key", or you can use the suggested parameter names by accessing them through the AnalyticsParameter.* enum.
We are using the AnalyticsEventSelectContent enum, which returns select_content at runtime, and we are using the AnalyticsParameterItemID key, which returns item_id at runtime.
Here’s what the modified ViewController.swift should look like:
Step 5: Debug and verify everything works
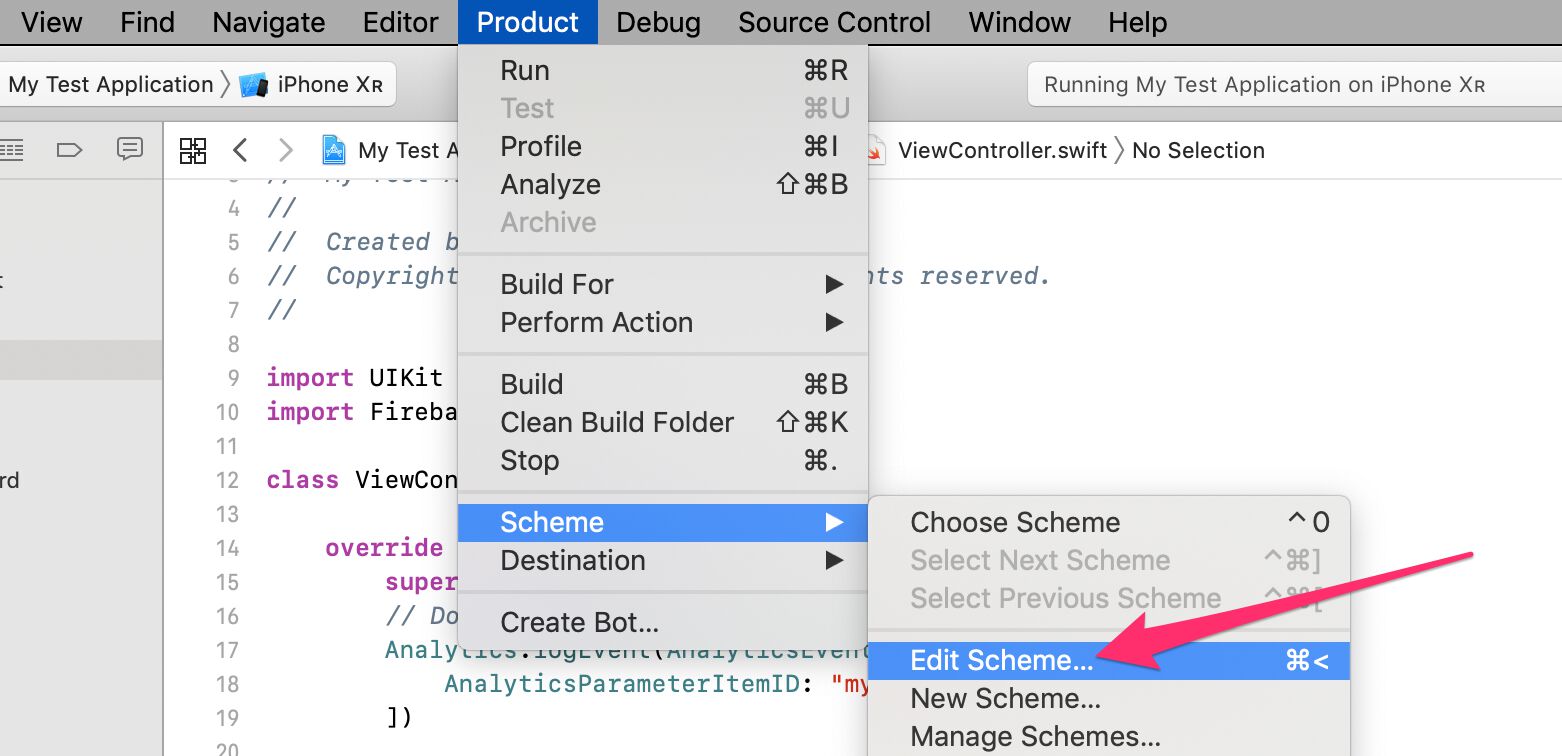
Before you run the app again, you’ll need to add some verbose logging to the console. Choose Product -> Scheme -> Edit scheme from the menu bar.
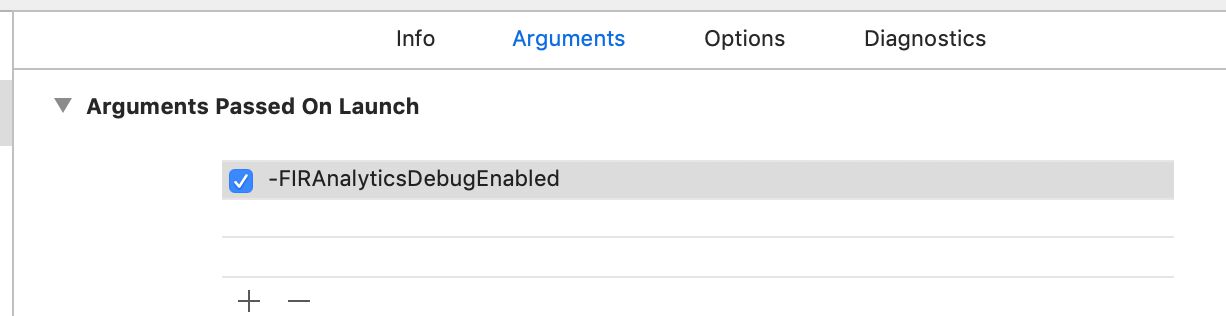
In the Arguments Passed On Launch, click the plus (+) symbol to add a new argument, and name it -FIRAnalyticsDebugEnabled. This is what it should look like:
Now, run the app again. In the console logs, you should find the select_content event by either scrolling to it or filtering for the event name.

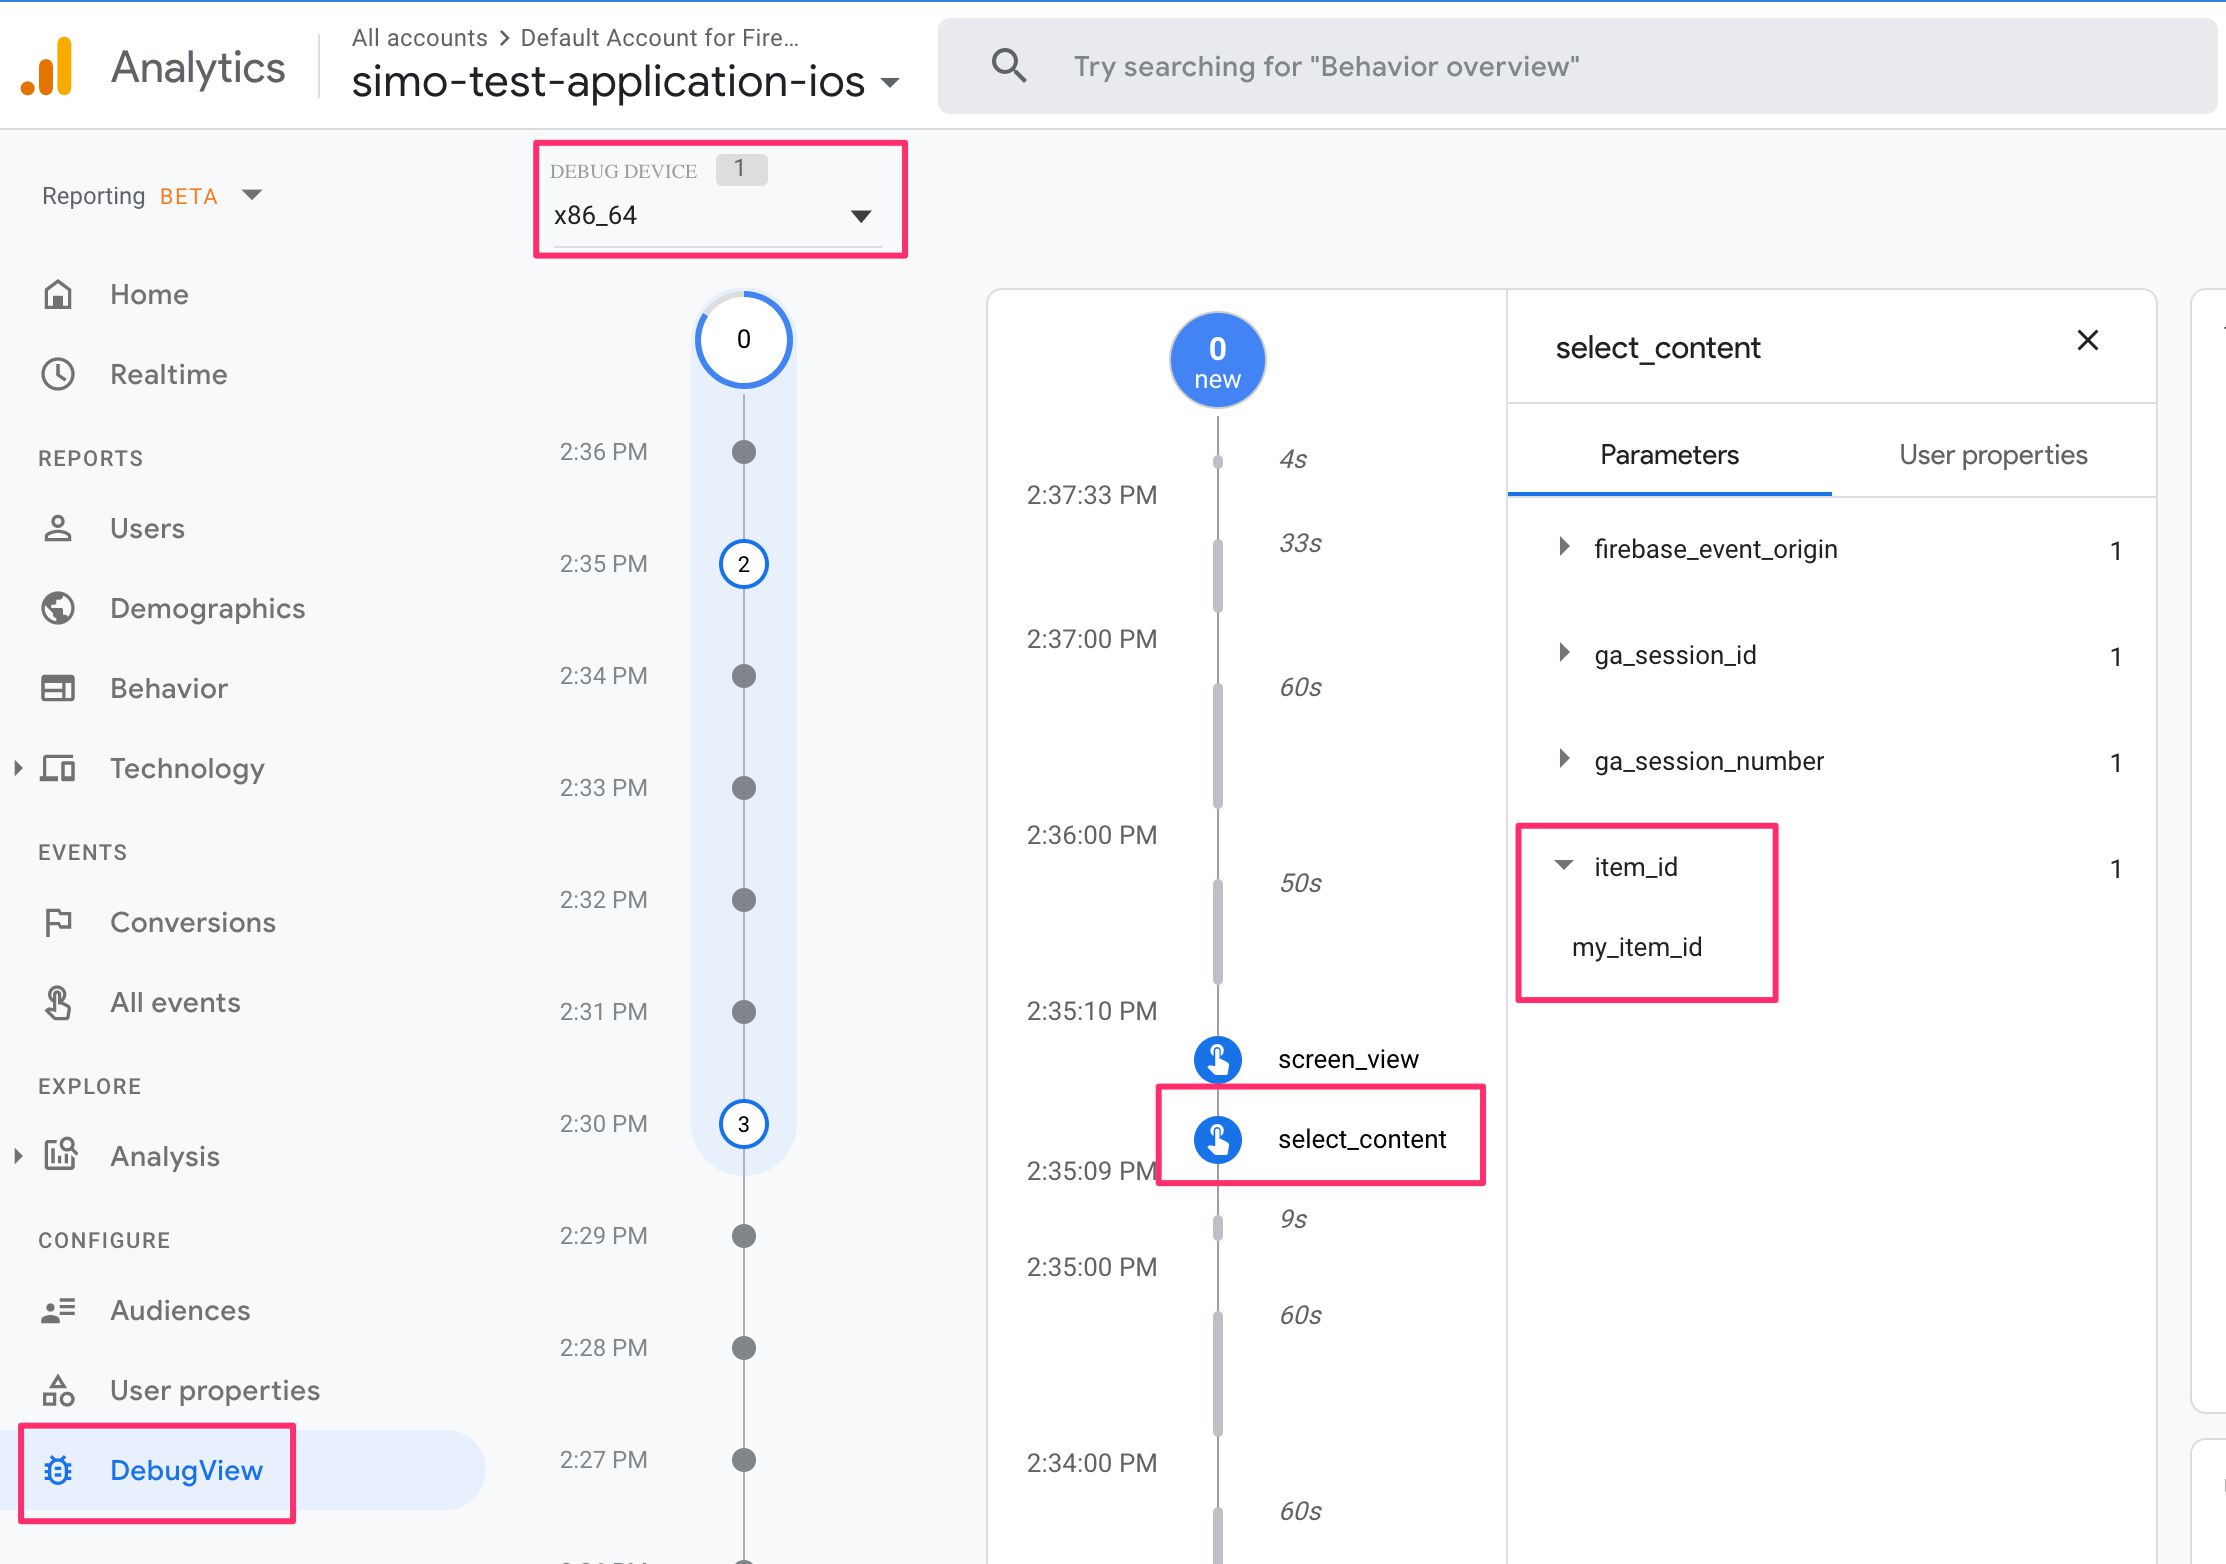
You can now also visit your Google Analytics reporting view for the App + Web property created for this project, and scroll to the DebugView report. This will automatically include all devices for which the -FIRAnalyticsDebugEnabled flag has been set. You should find your device (maybe with an odd name, though) in the Debug Devices list, and you should see a stream of events in the DebugView, together with the new select_content event you just created.
Before we’re done, let’s fork this Firebase Analytics hit using Google Tag Manager, and send the copy to a Universal Analytics endpoint!
Step 6: Create and download a Google Tag Manager container
First, make sure you have a valid Universal Analytics endpoint. You need to create a Web property with a Mobile App view. The latter is what collects hits sent from your application.
Once you have the tracking ID (UA-XXXXX-Y) at hand, you can head on over to https://tagmanager.google.com/ to create your new iOS container.
In Google Tag Manager, create a new container in one of your accounts, or create a new GTM account first.
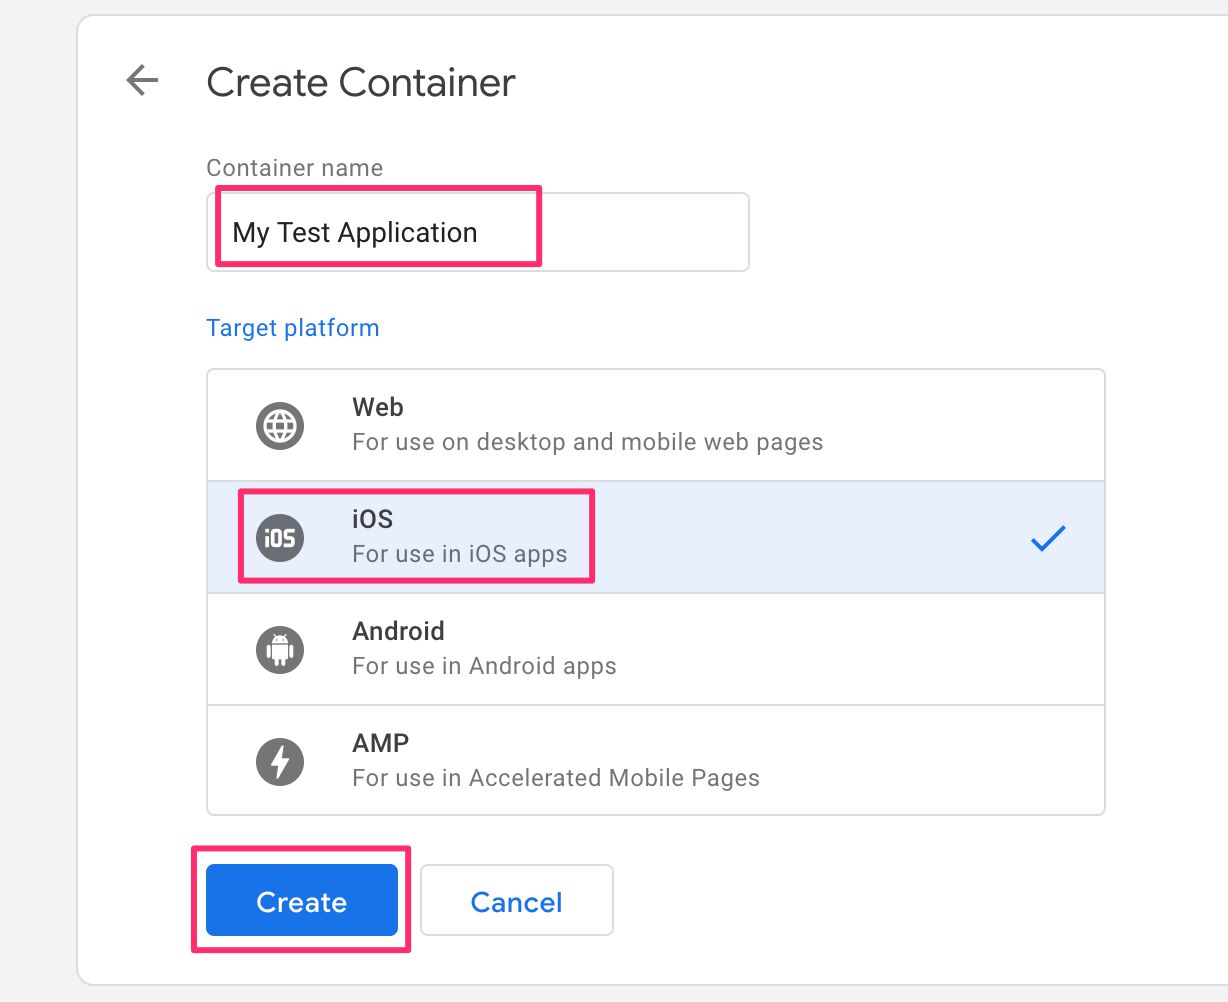
Give the container a name, e.g. My Test Application, and choose iOS as the type. Click Create when ready.
Click New Tag to create a new tag. Choose Google Analytics: Universal Analytics as the tag type.
Select Event from the Track Type list.
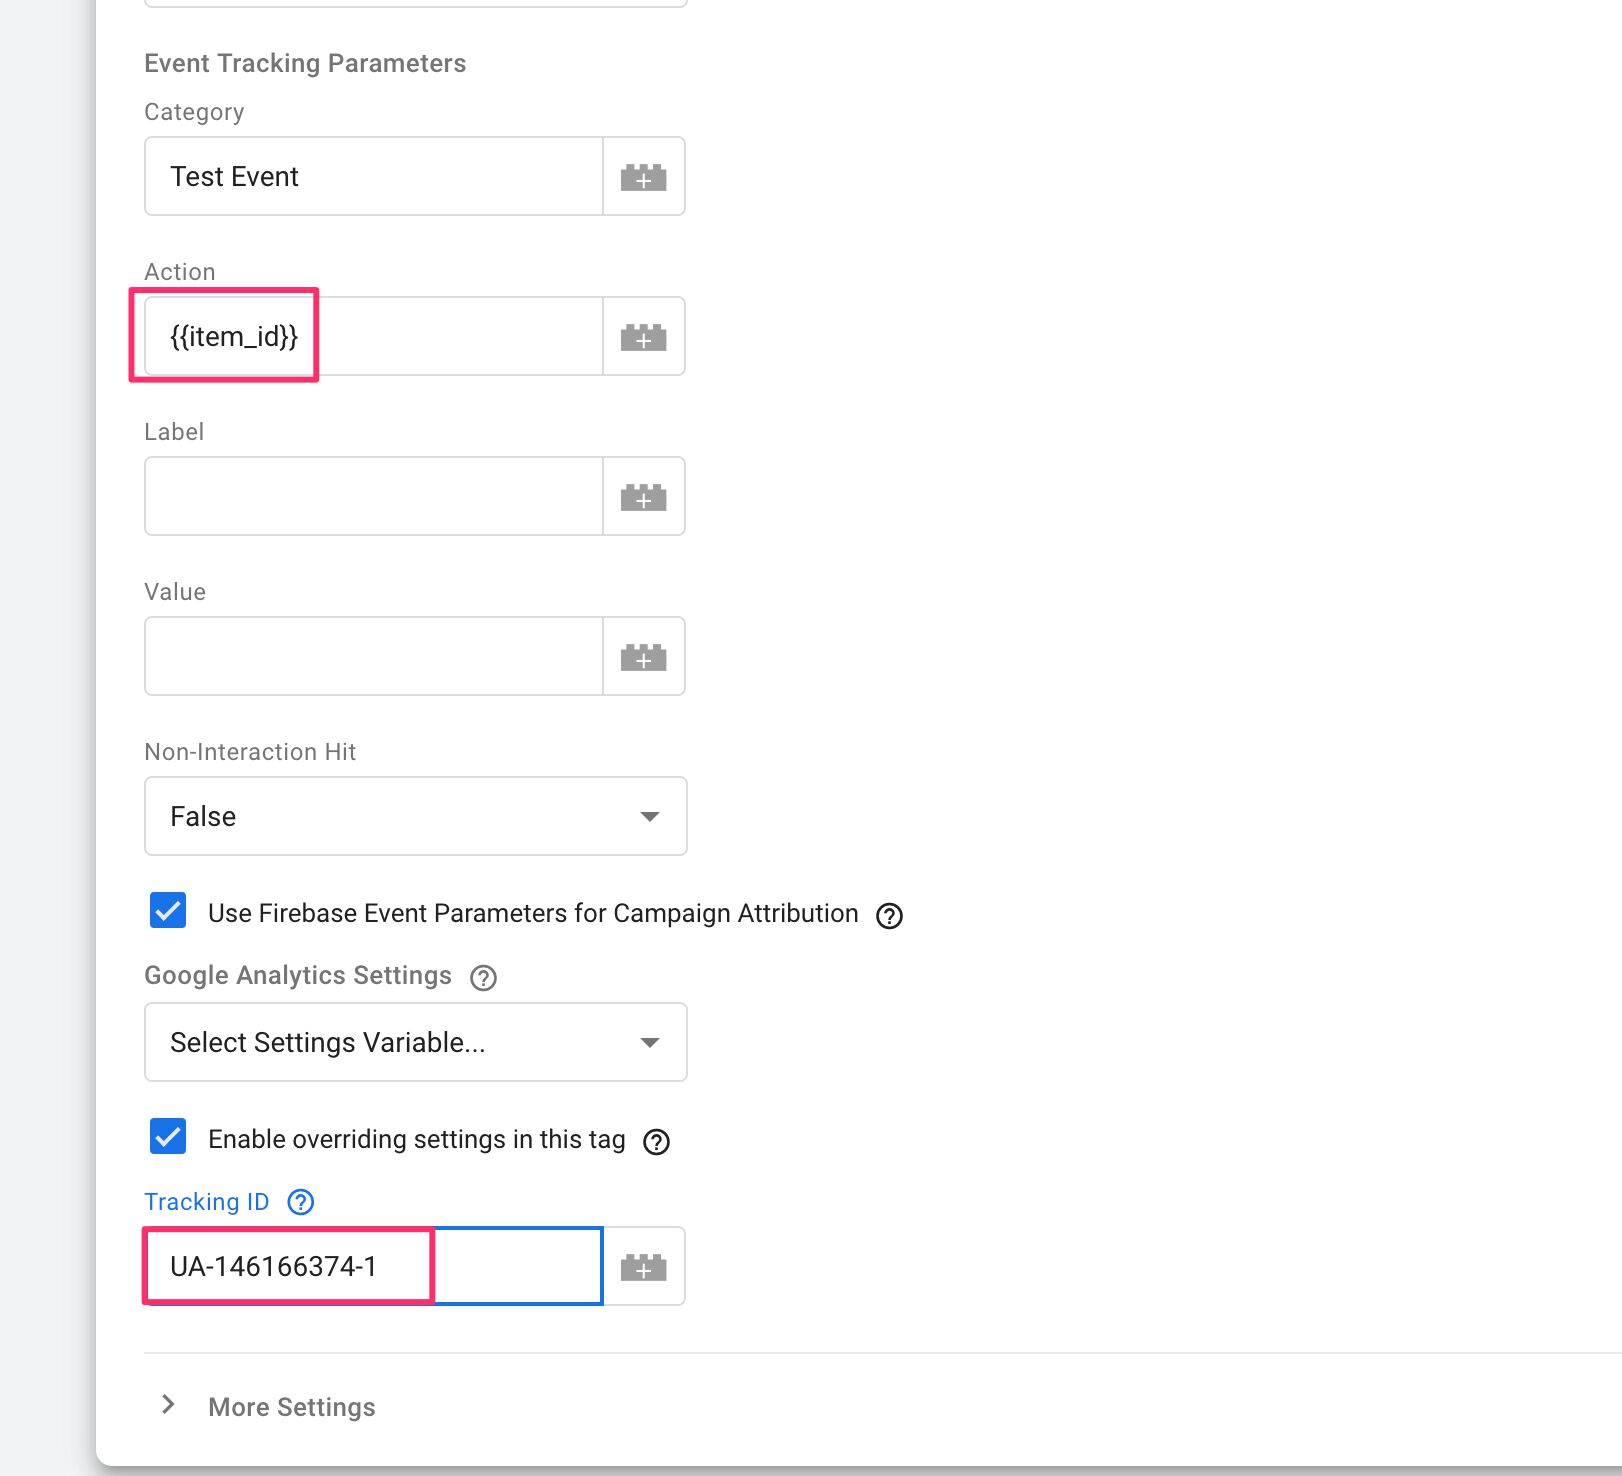
Add something to the Category field, e.g. Test Event.
In the Action field, start typing {{ and then choose New Variable from the list.

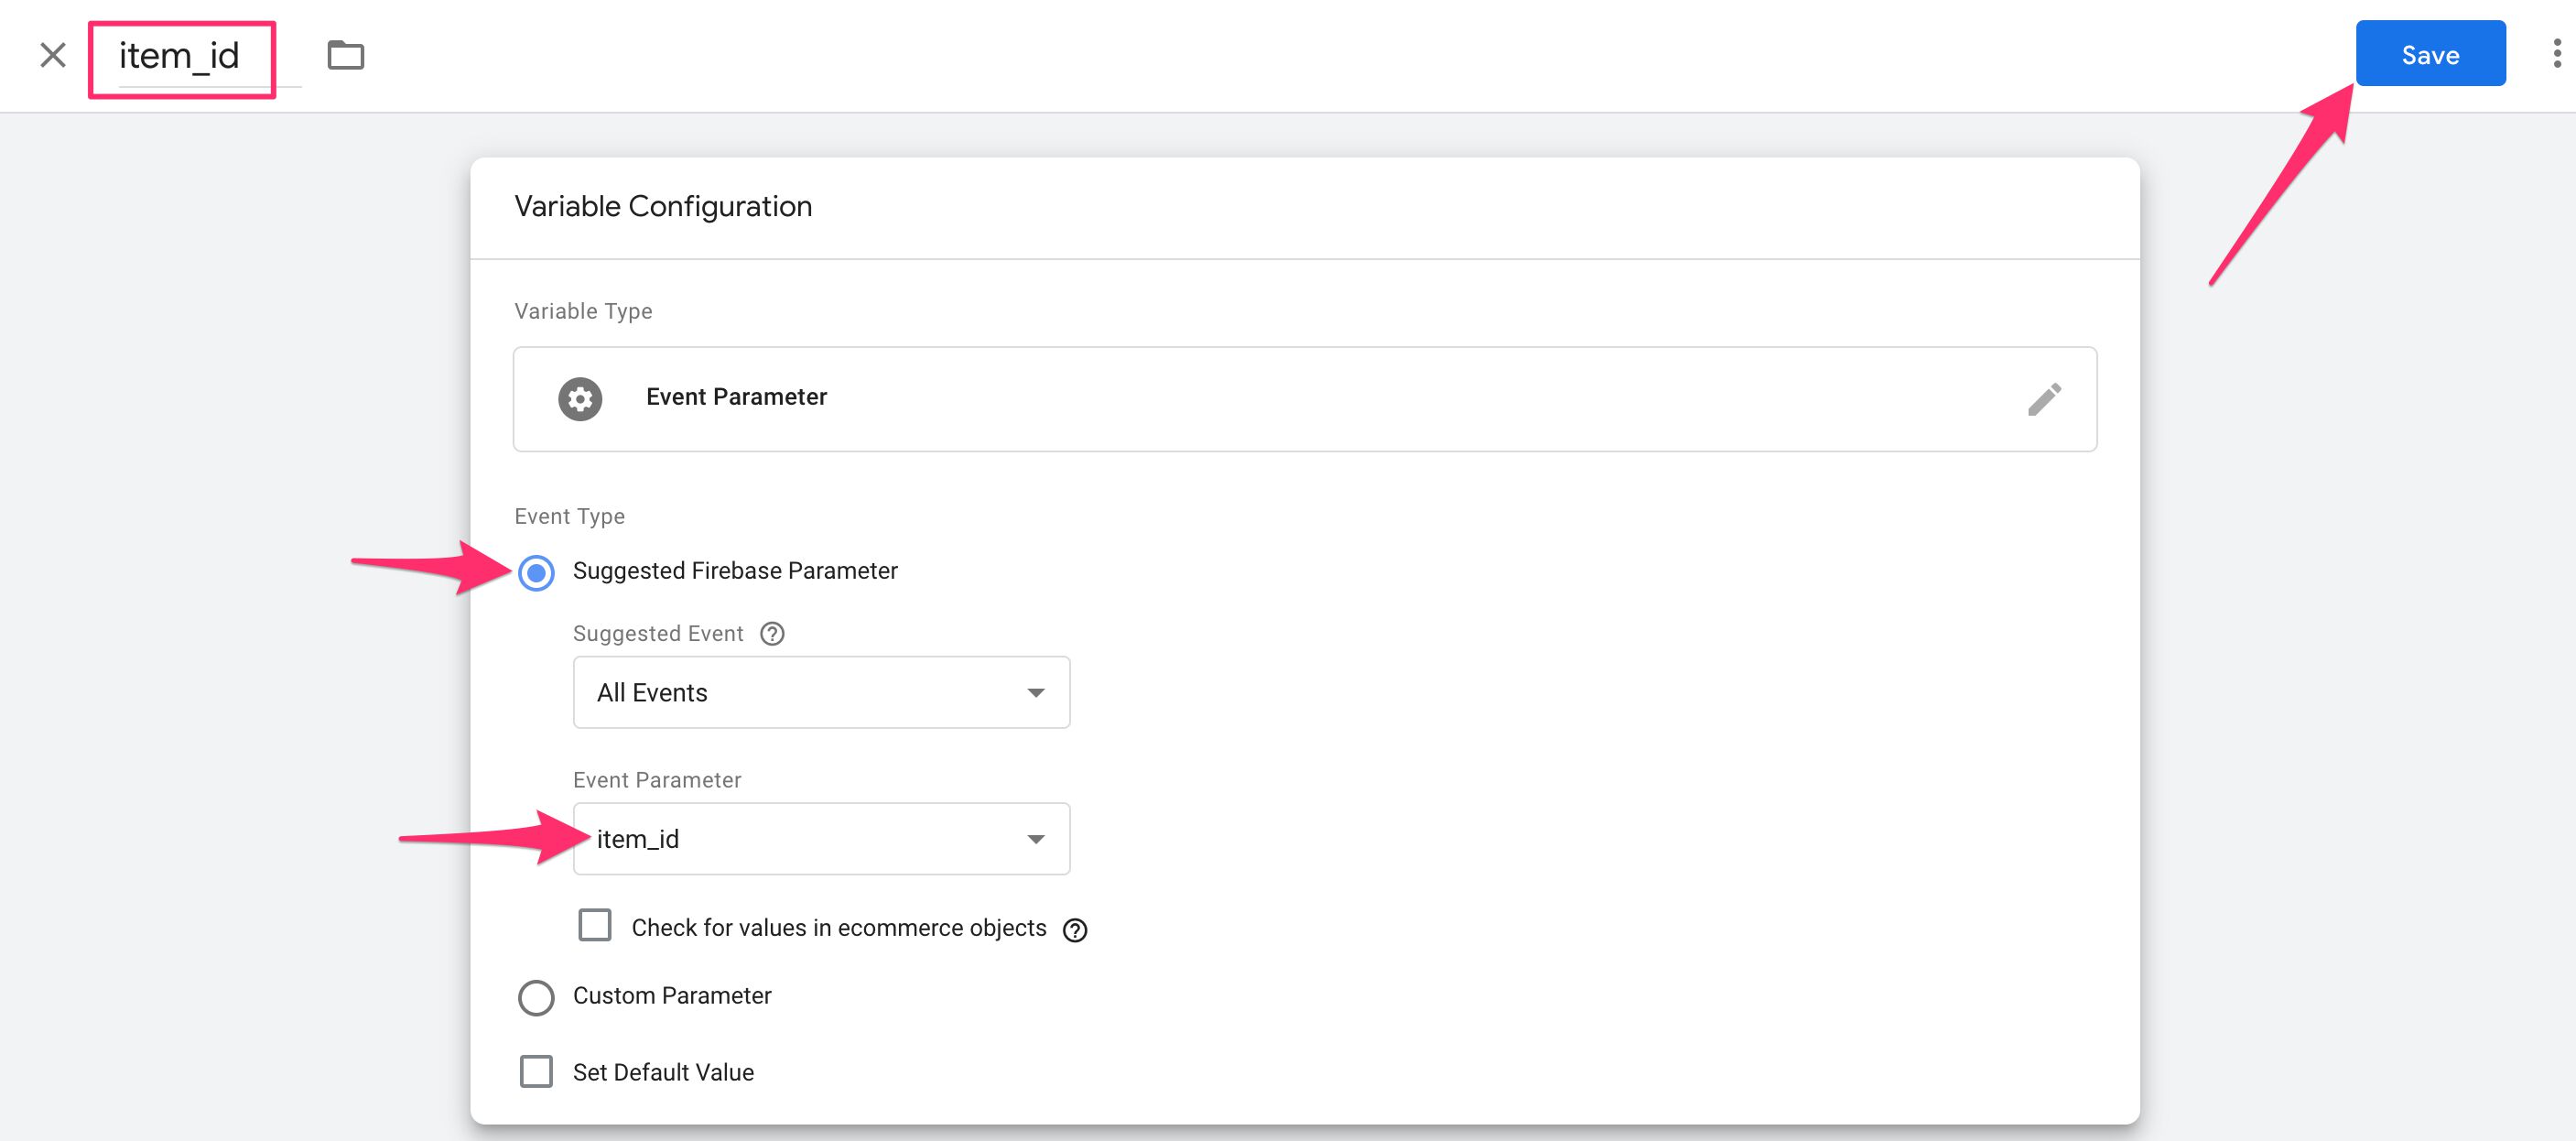
Choose Event Parameter as the variable type.
Keep Suggested Firebase Parameter checked, and choose item_id from the Event Parameter list.
Give the variable a name, e.g. {{item_id}} and then click Save.
Back in the tag, check Enable overriding settings in this tag, and add the Google Analytics tracking code for the web property that will be receiving these hits (UA-XXXXXX-Y).
Finally, click the Triggering panel to add a new trigger.
Click the blue plus (+) sign in the top right corner to create a new trigger.
Choose Custom as the trigger type.
Check Some Events under the This trigger fires on heading.
Set the condition to:
Event Name equals select_content
Give the trigger a name (e.g. select_content), and when happy with it, click Save.

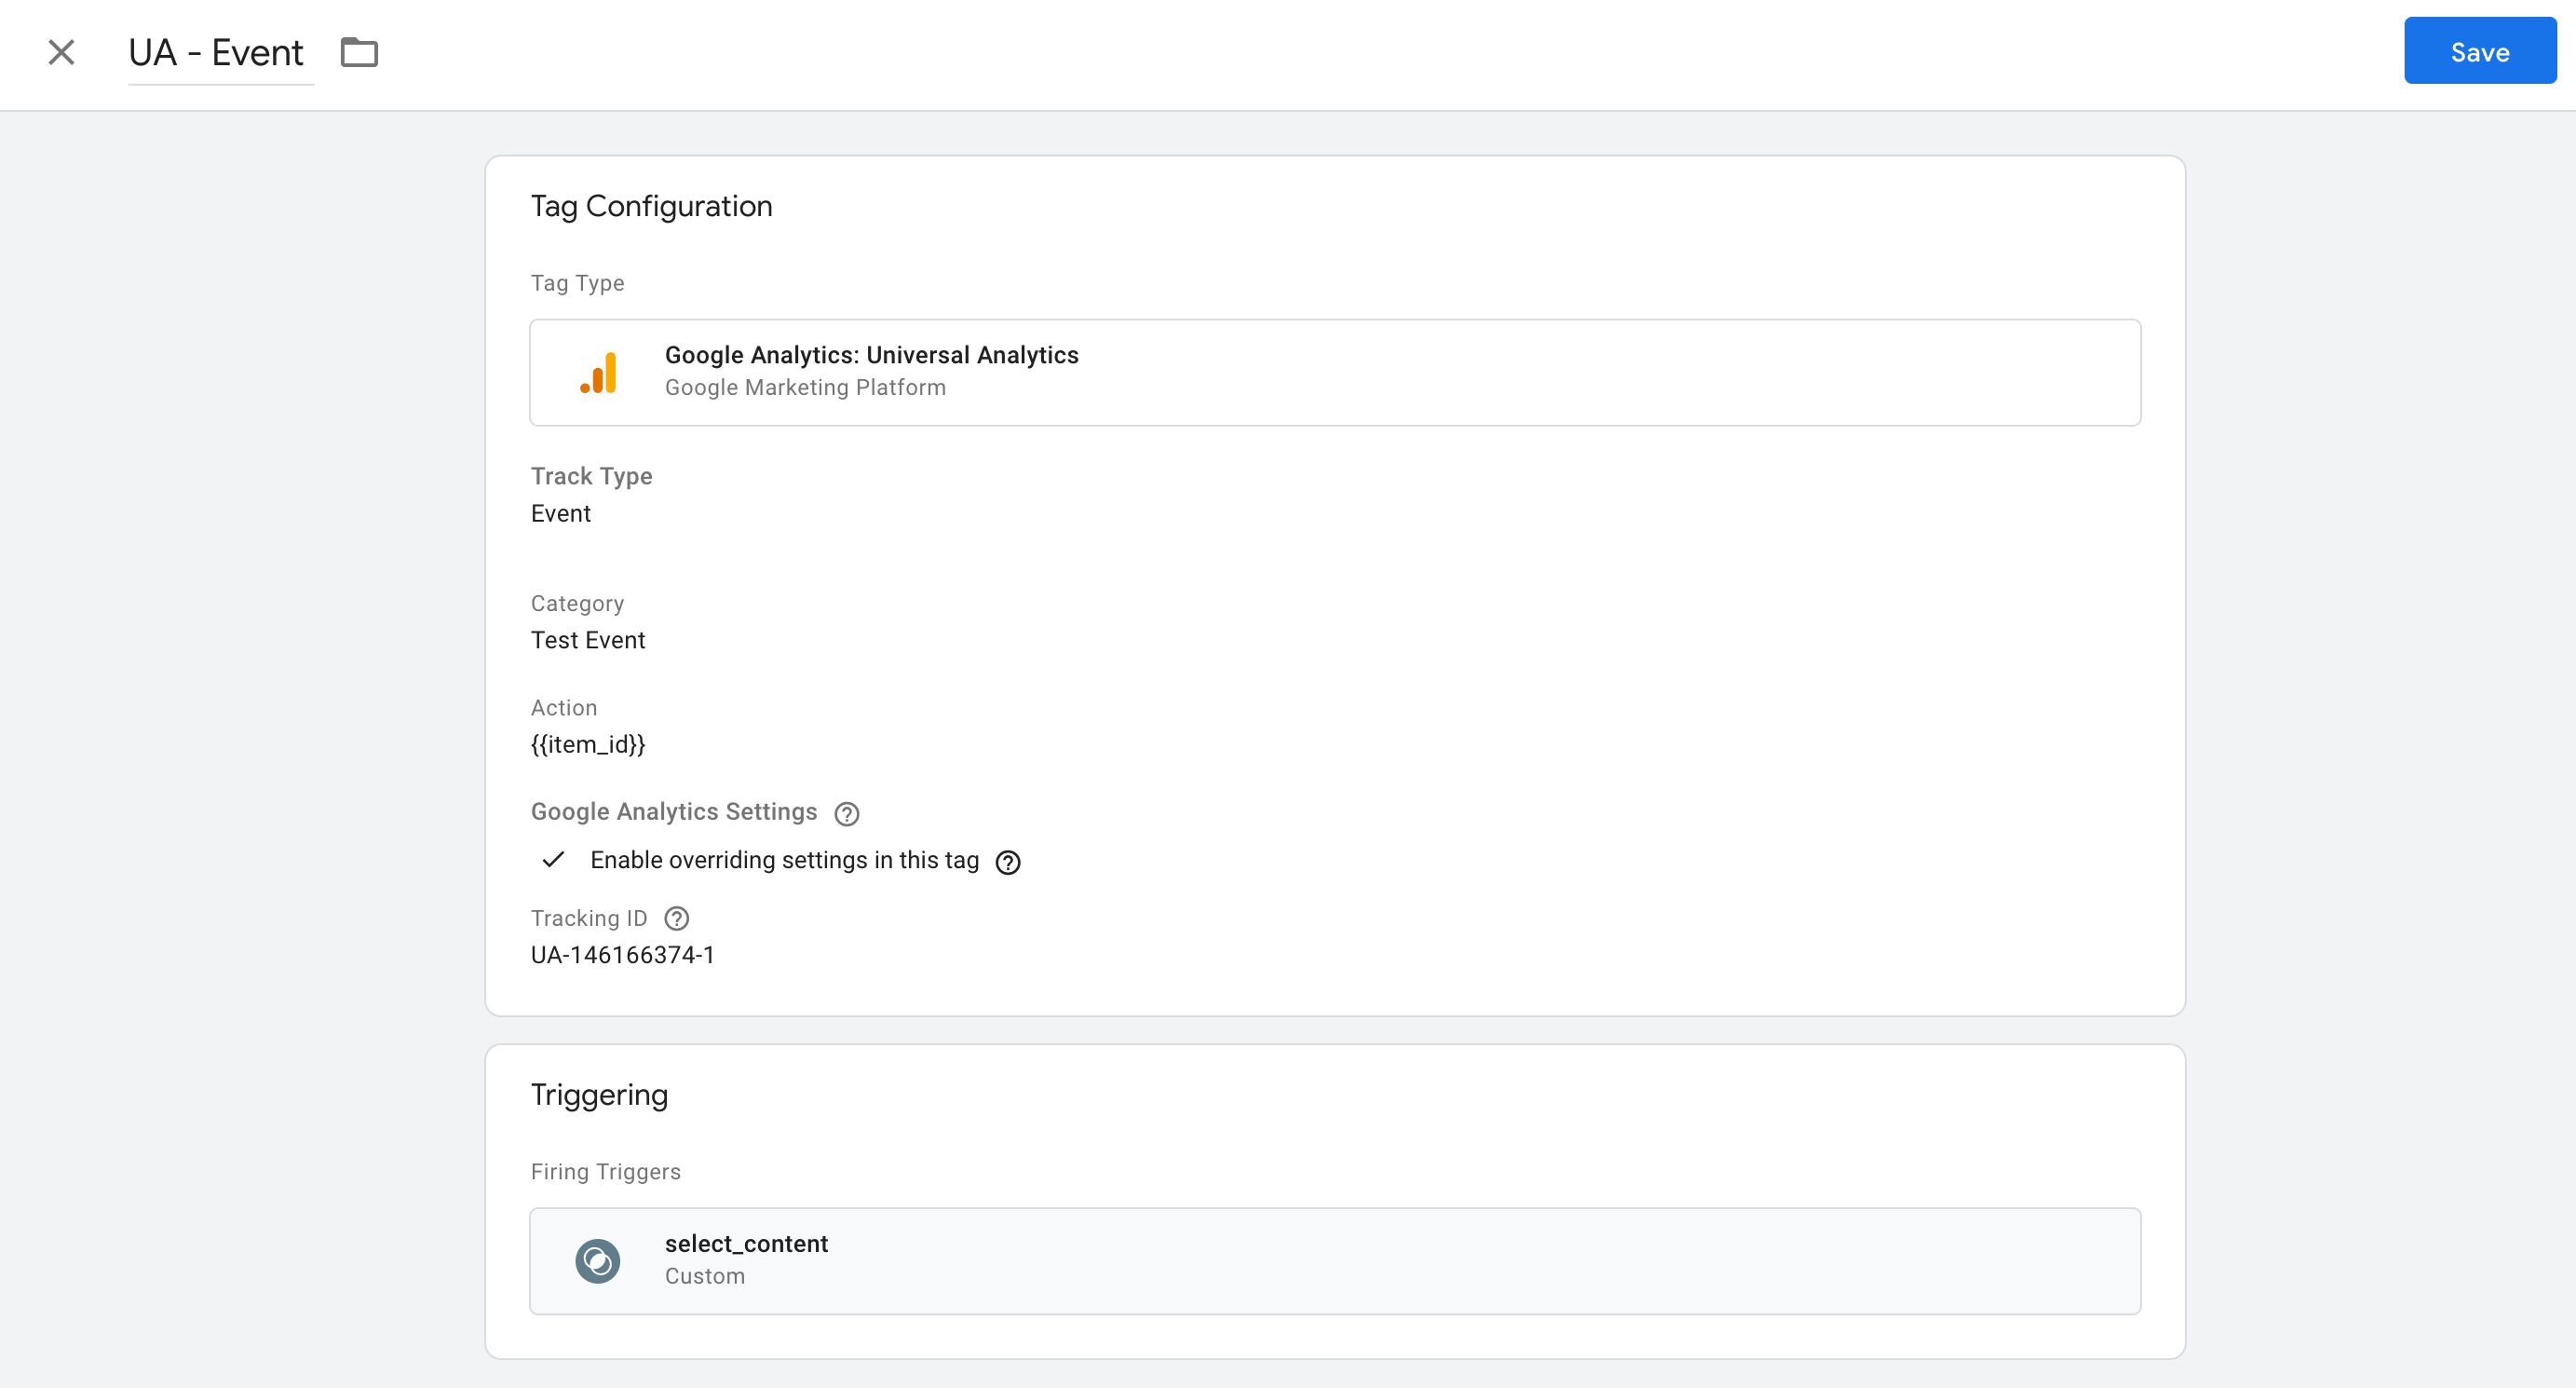
Double-check to make sure your tag looks like the one below, and then click Save to return to the Google Tag Manager dashboard.
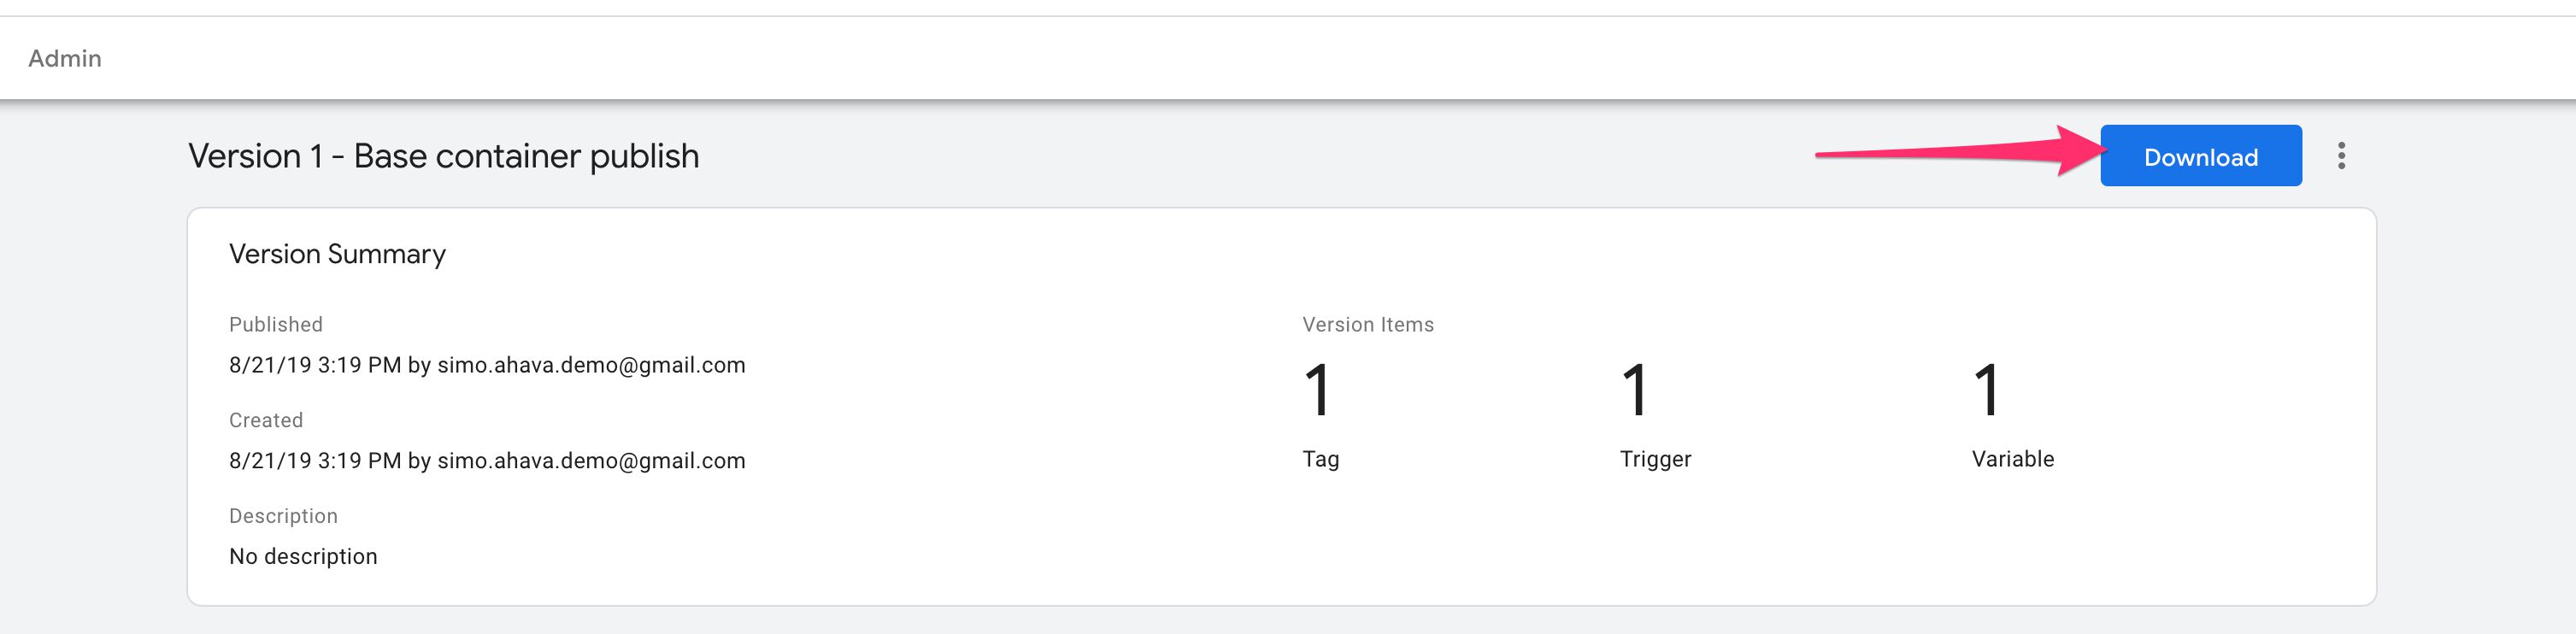
At this point, you are ready to publish the container, so click Submit in the top right corner, and then Publish in the overlay that opens.
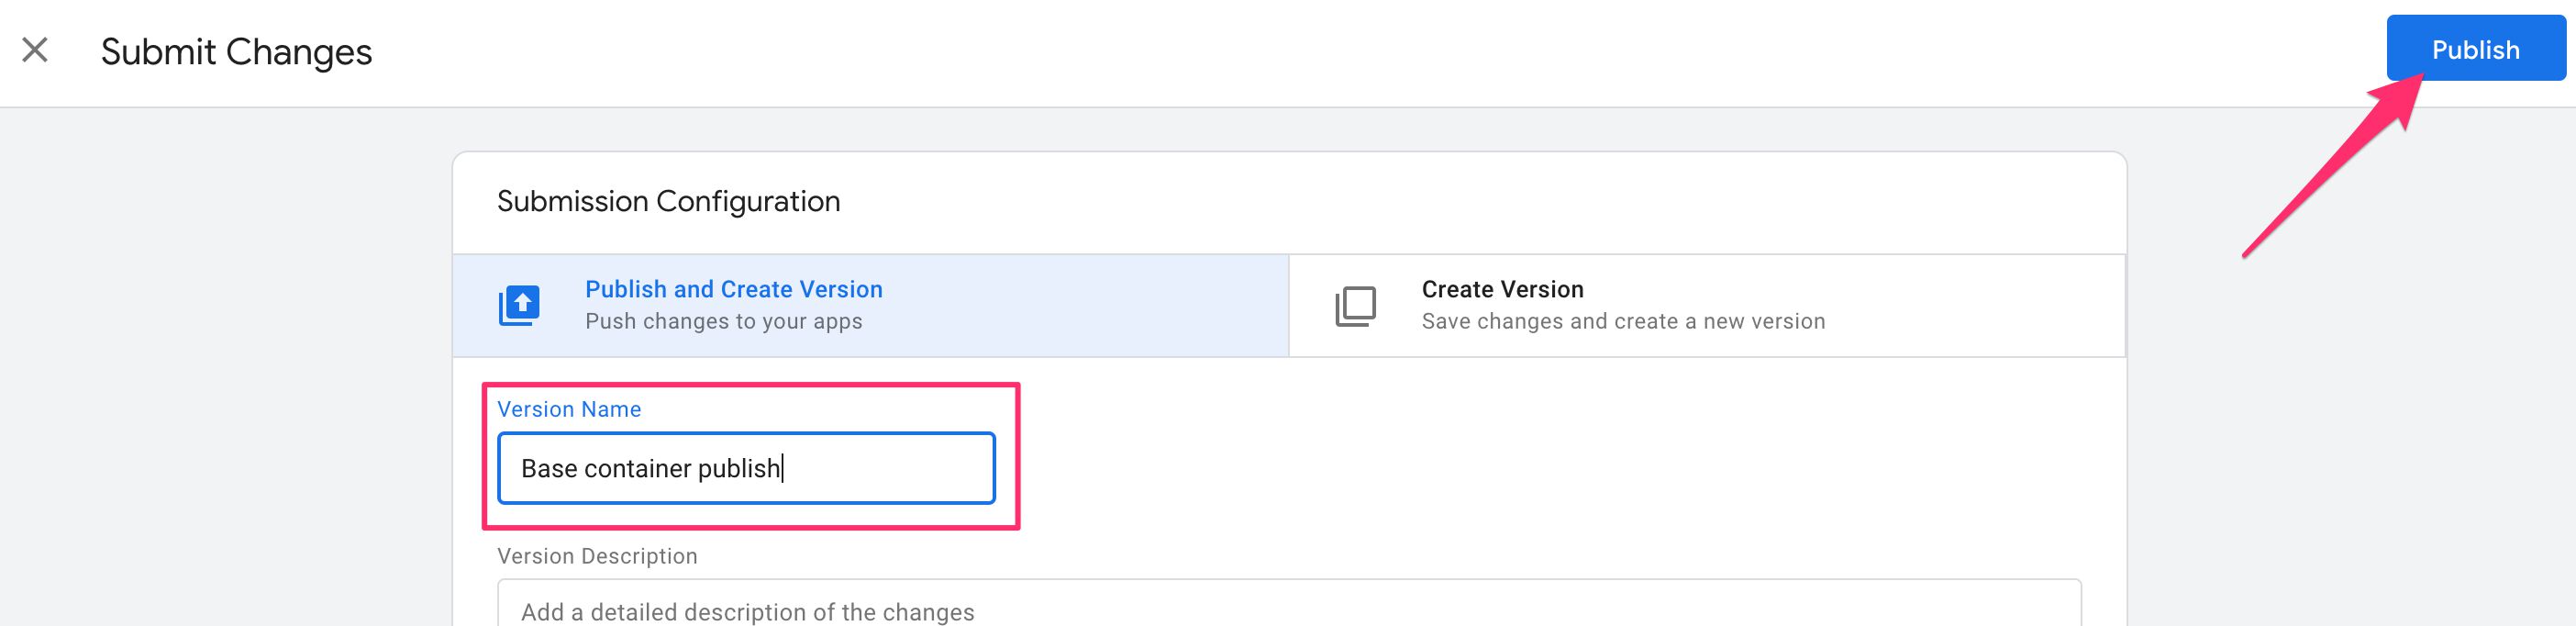
Once the container has been published, you should see a version overview of the published version. Click the Download button in this screen to download the container JSON file.
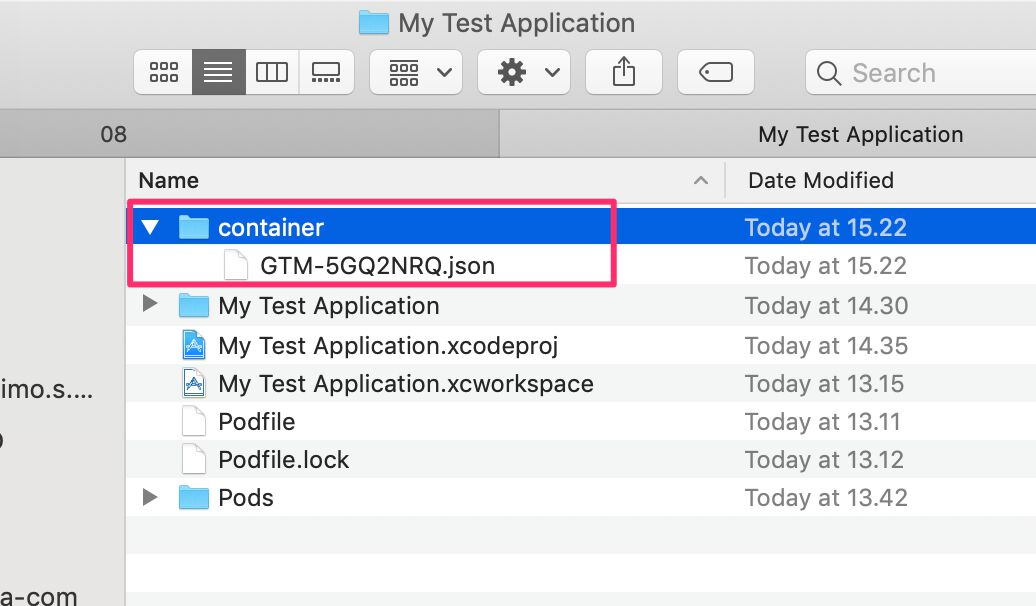
Now, create a new folder named container in the root of your project (the directory with the .xcodeproj and .xcworkspace files as well as the Podfile). Move the container JSON into this directory.
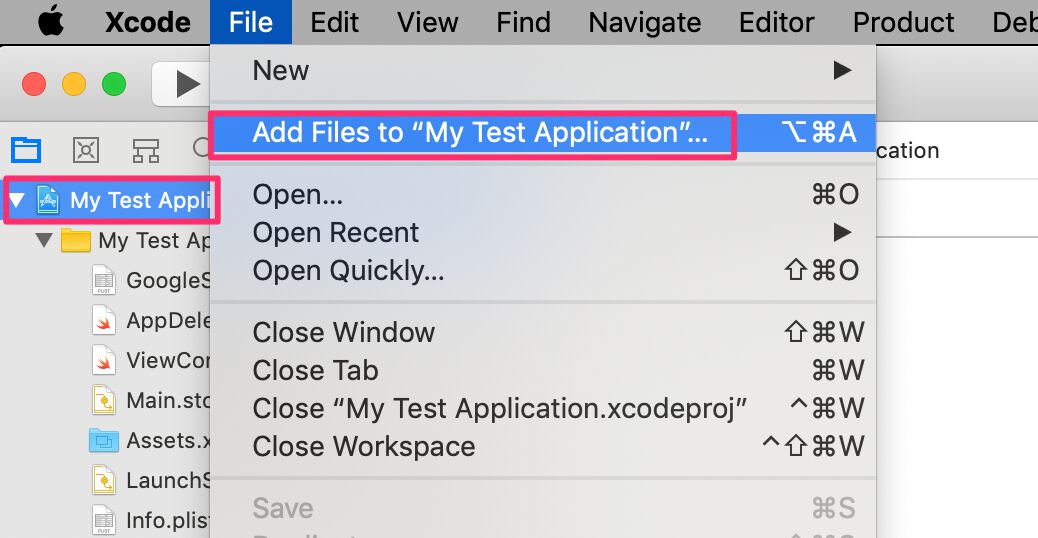
Next, open Xcode. With your project root selected in the navigator, choose File –> Add files to Your Project.
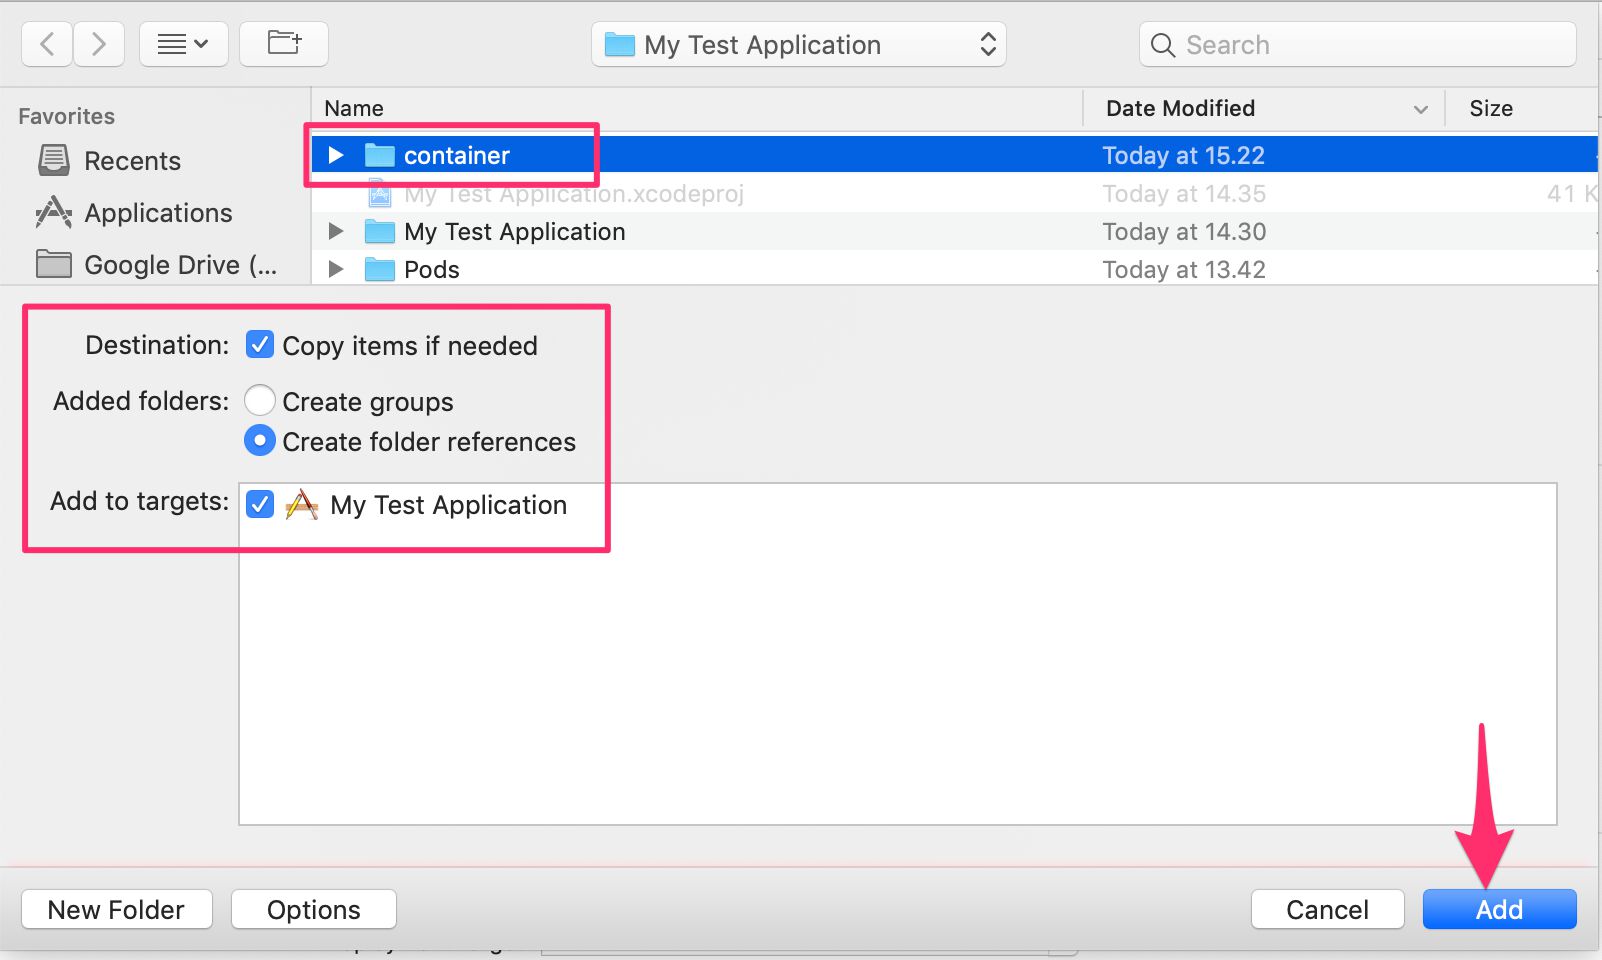
Find and select the container folder from your project root directory, and make sure the other options are checked as in the screenshot below. Click Add when ready.
Once ready, you can run your application, and it should load the default container you just added to the application, and then shortly after fetch the most recent container version over the network.
Note! It’s always a good idea to keep as fresh a container version as the default container stored with the application itself. Thus if there’s network lag impacting the fetch of a more recent container version, the fallback (the default container) would be as up-to-date as possible.
To be sure, you’ll need to debug the setup a little.
Step 7: Debug and test that Universal Analytics receives the hits
Xcode’s logs are a bit of a mess. However, if you’re not averse to scroll-and-search, you can find what you’re looking for. You can also type in text in the filter field to parse the logs, but it only returns matching rows and is not thus very helpful.
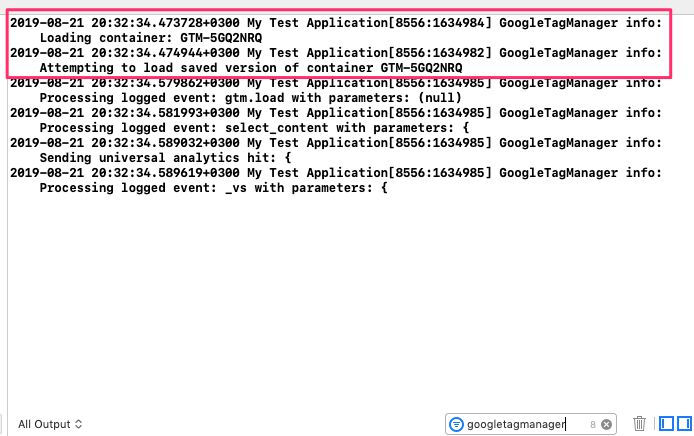
However, we can quickly see that Google Tag Manager found our container and was able to load it in the application,
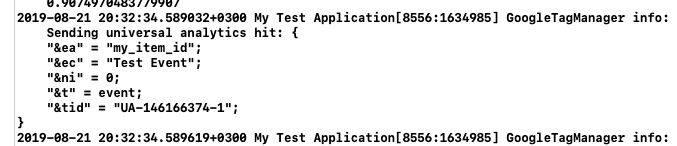
In addition to that, by scrolling down we can see that a Universal Analytics hit was dispatched via Google Tag Manager, using the parameters we set for the select_content event.
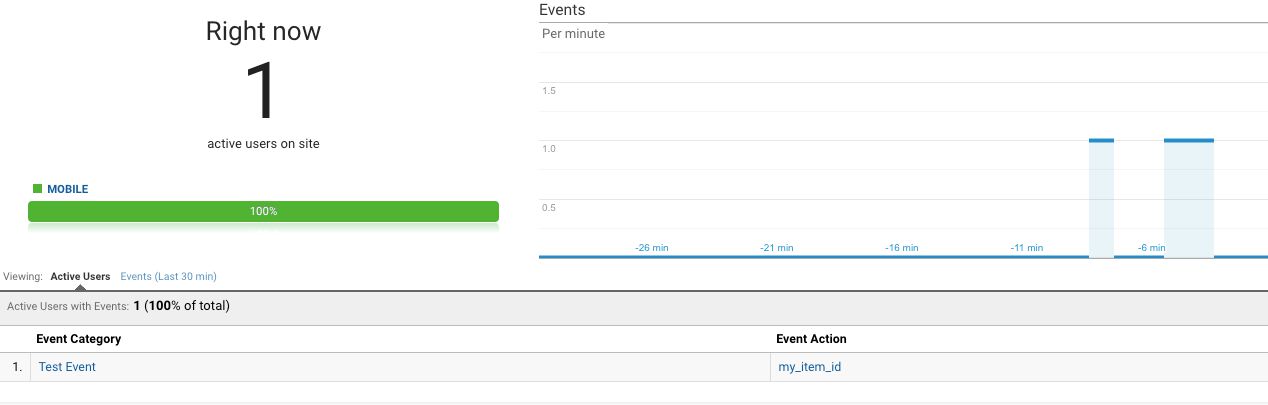
Finally, we can check the Real Time report of our mobile app view to confirm data is flowing in:
Debugging a mobile application is notoriously difficult. If you want to do it seriously, you might want to use a tool like Charles proxy, which creates a log stream of all the network requests dispatched by your mobile application. You don’t even need source code access to make it work!
Summary
As with my Android guide, this article should really be an introduction to iOS development, and not a full-blown tutorial.
The purpose is to give you the tools and confidence to start working with mobile app development. Understanding the capabilities and limitations of Firebase is fundamental to being able to fluently work with the ecosystem.
Working with mobile application development is far removed from web development. For starters, the IDEs, SDKs, and programming languages at your disposal are far more restrictive than the wild west that is the web browser.
Kotlin and Swift do not let you do all the crazy stuff you can do with JavaScript, and there are also restrictions what types of shenanigans can be executed at runtime (so no Custom HTML tags in mobile app containers).
Nevertheless, iOS development has its charms, and Xcode can be a great ally in the times when it’s not a complete pain in the butt.
The beauty of mobile application development is how quickly you can get started. You don’t need anything extravagant - just a machine capable of handling the virtual devices, some good tutorials, and a solid system such as Firebase picking up some of the slack.
As always, I’m looking forward to your feedback in the comments! I’m sure I’ll revisit Firebase many times in upcoming articles.
