Community Template Gallery For Google Tag Manager - Introduction And Tips For Use
Since the introduction of custom templates in May 2019, the community (myself included) has been anxiously waiting for some official solution for curating and distributing templates created by the community.
Now, finally, we have it. It’s called the Community Template Gallery! Read Google’s announcement in this blog post.
I’m not going to go over the basics in this article, since Google’s own documentation stands fine on its own feet. However, I do want to discuss some of the ways in which you can streamline updating and sharing those lovely templates you’ve created.
Table of Contents
Don’t forget that there are other sources for templates as well, namely:
- GTM Templates - open-source template library for community templates (see here) for more information.
- GoogleTagManagerTemplates - GitHub repository for community templates.
The Simmer Newsletter
Subscribe to the Simmer newsletter to get the latest news and content from Simo Ahava into your email inbox!
What is the Community Template Gallery?
The Community Template Gallery is Google Tag Manager’s own, integrated library for uploading and distributing templates across users, accounts, and containers.
Anybody in the community can submit a template to the gallery, and thus get their work in the reach of all Google Tag Manager users around the world.
NOTE! Not all templates will be published. Your template must follow the style guide, and if there’s a template with similar functionality already in the gallery, your template might not get published.
Templates can be added to a container by clicking the Search gallery button next to the Tag Templates and Variable Templates listings in the Templates section of the container.

This opens an overlay where you can do string searches for the template you’d like to add to your container.
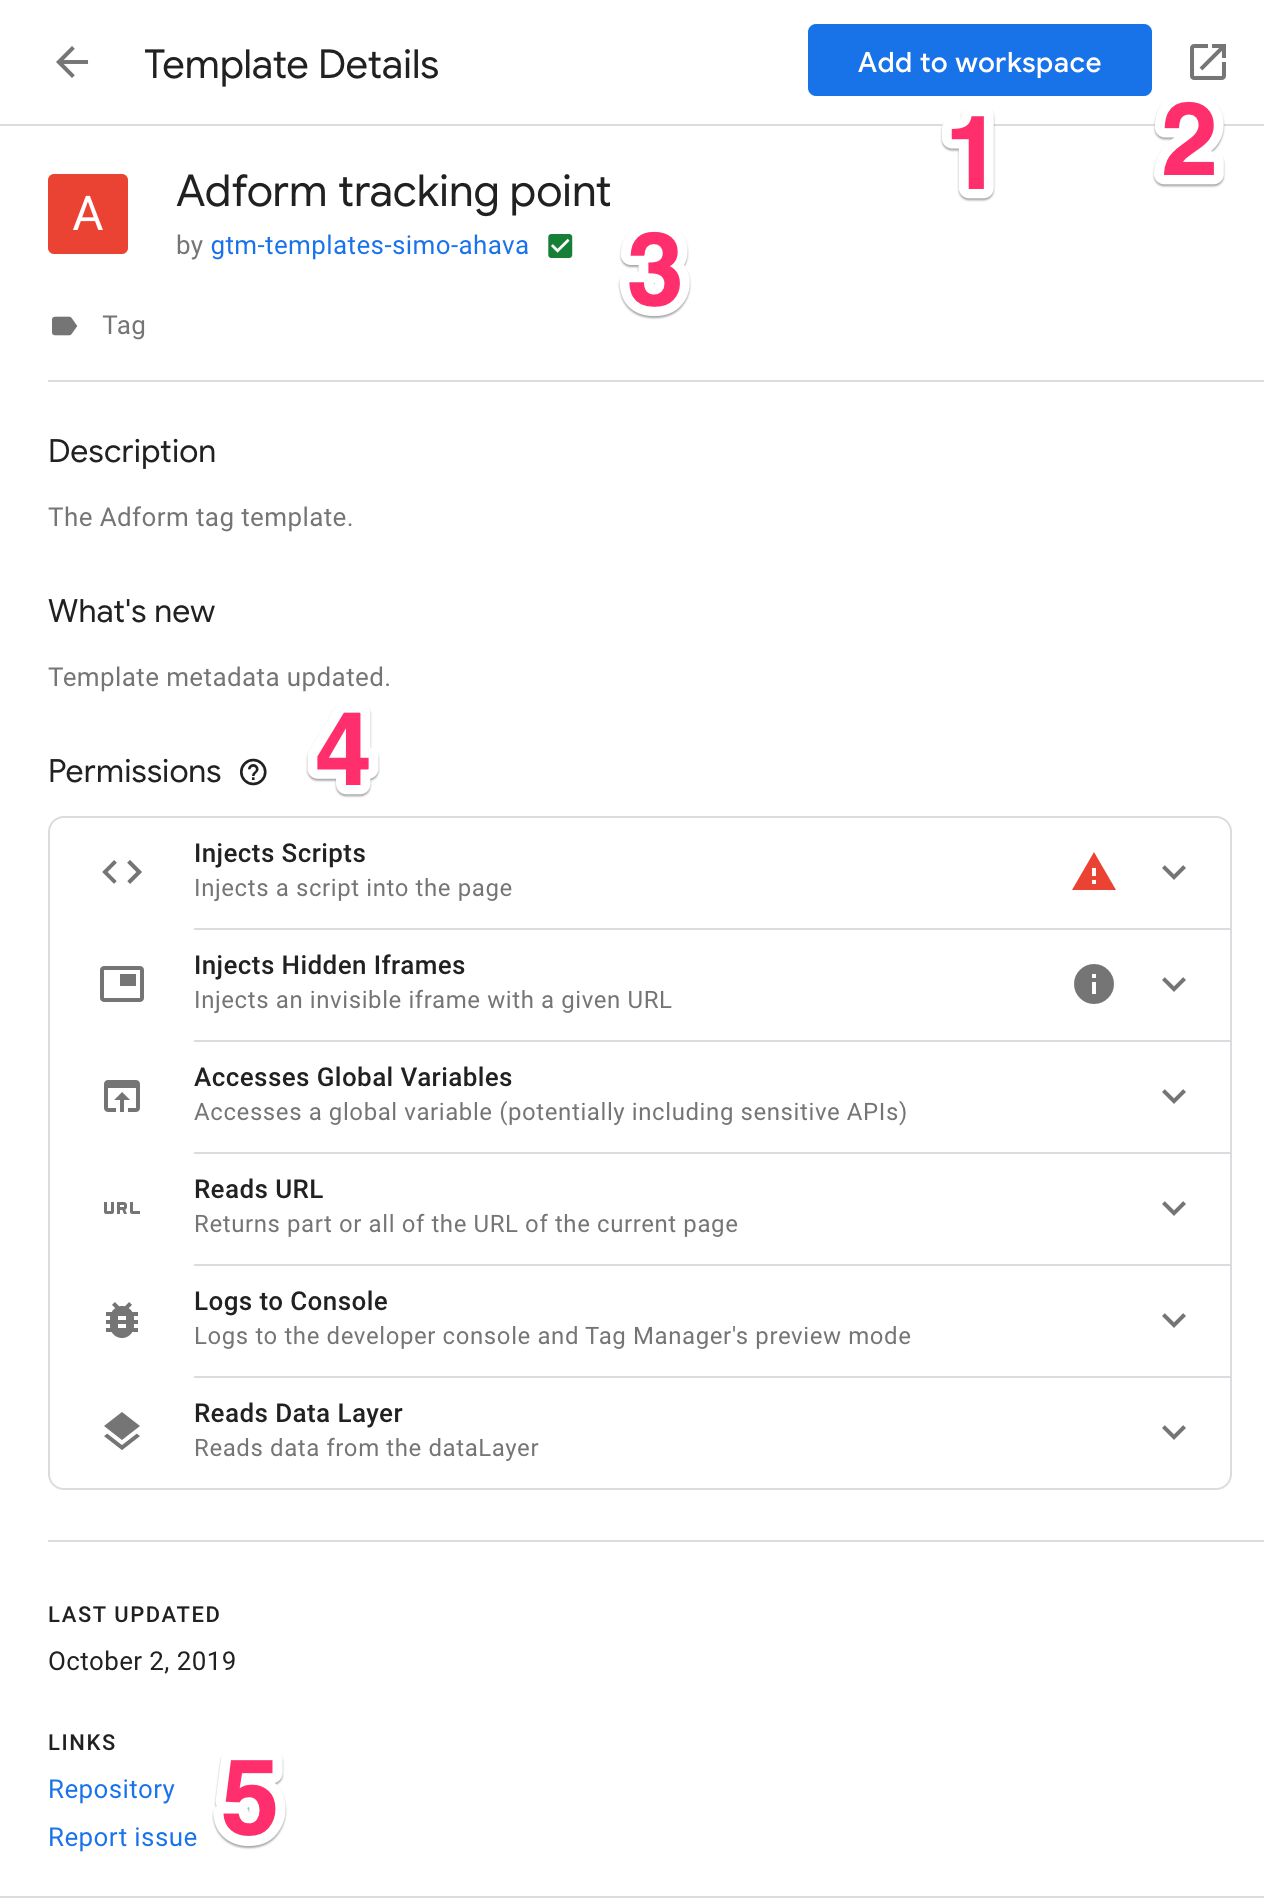
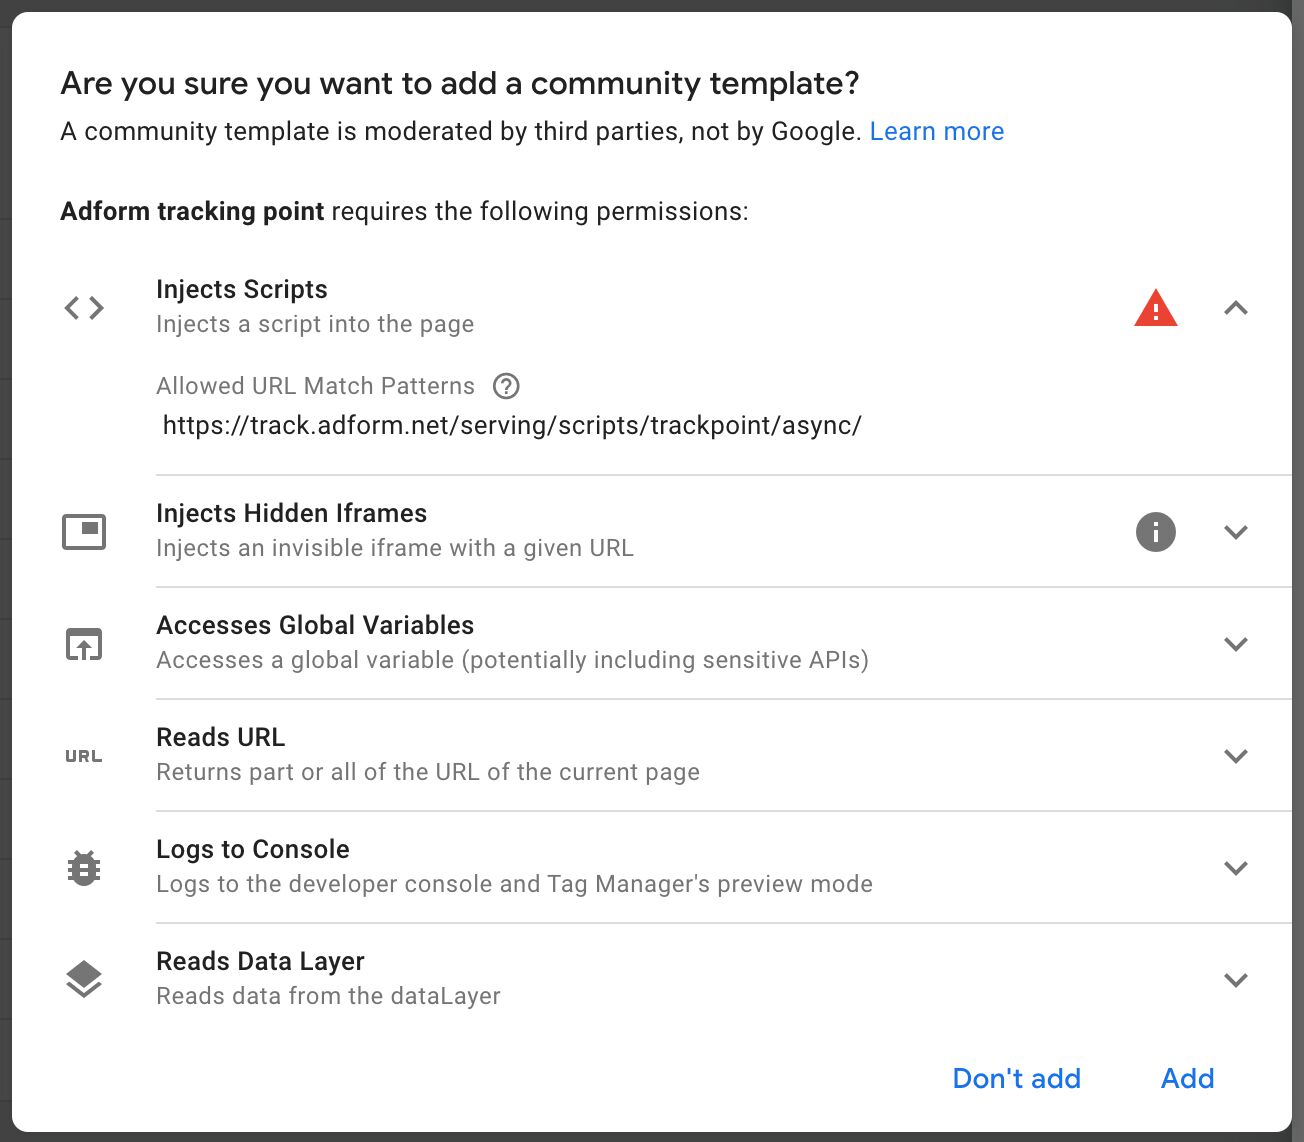
The template overlay lets you add the template to the workspace by clicking the respective button (1). Here, you can take a final look at the permissions before choosing to add the template to the current workspace.
The little arrow link in the corner opens the template page in the gallery itself (2).
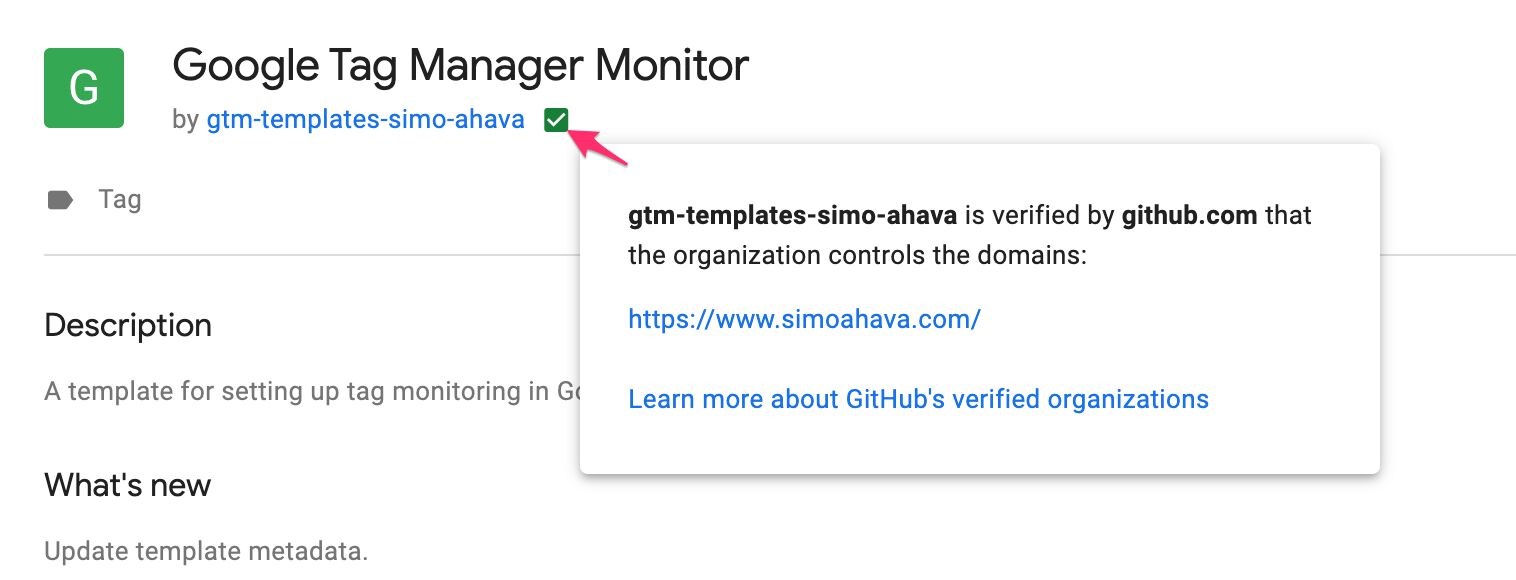
You can click the author name to access their GitHub profile (3). The green checkmark indicates that this organization has been verified in GitHub.
The permissions overview is important, as it will let you evaluate what types of permissions the template might require (4). The red danger and the grey warning icons alert you that the template will load potentially hazardous code, and you should only add the template if you trust the author.
There are direct links to the template repository in GitHub, and to the issues section of the repository (5).
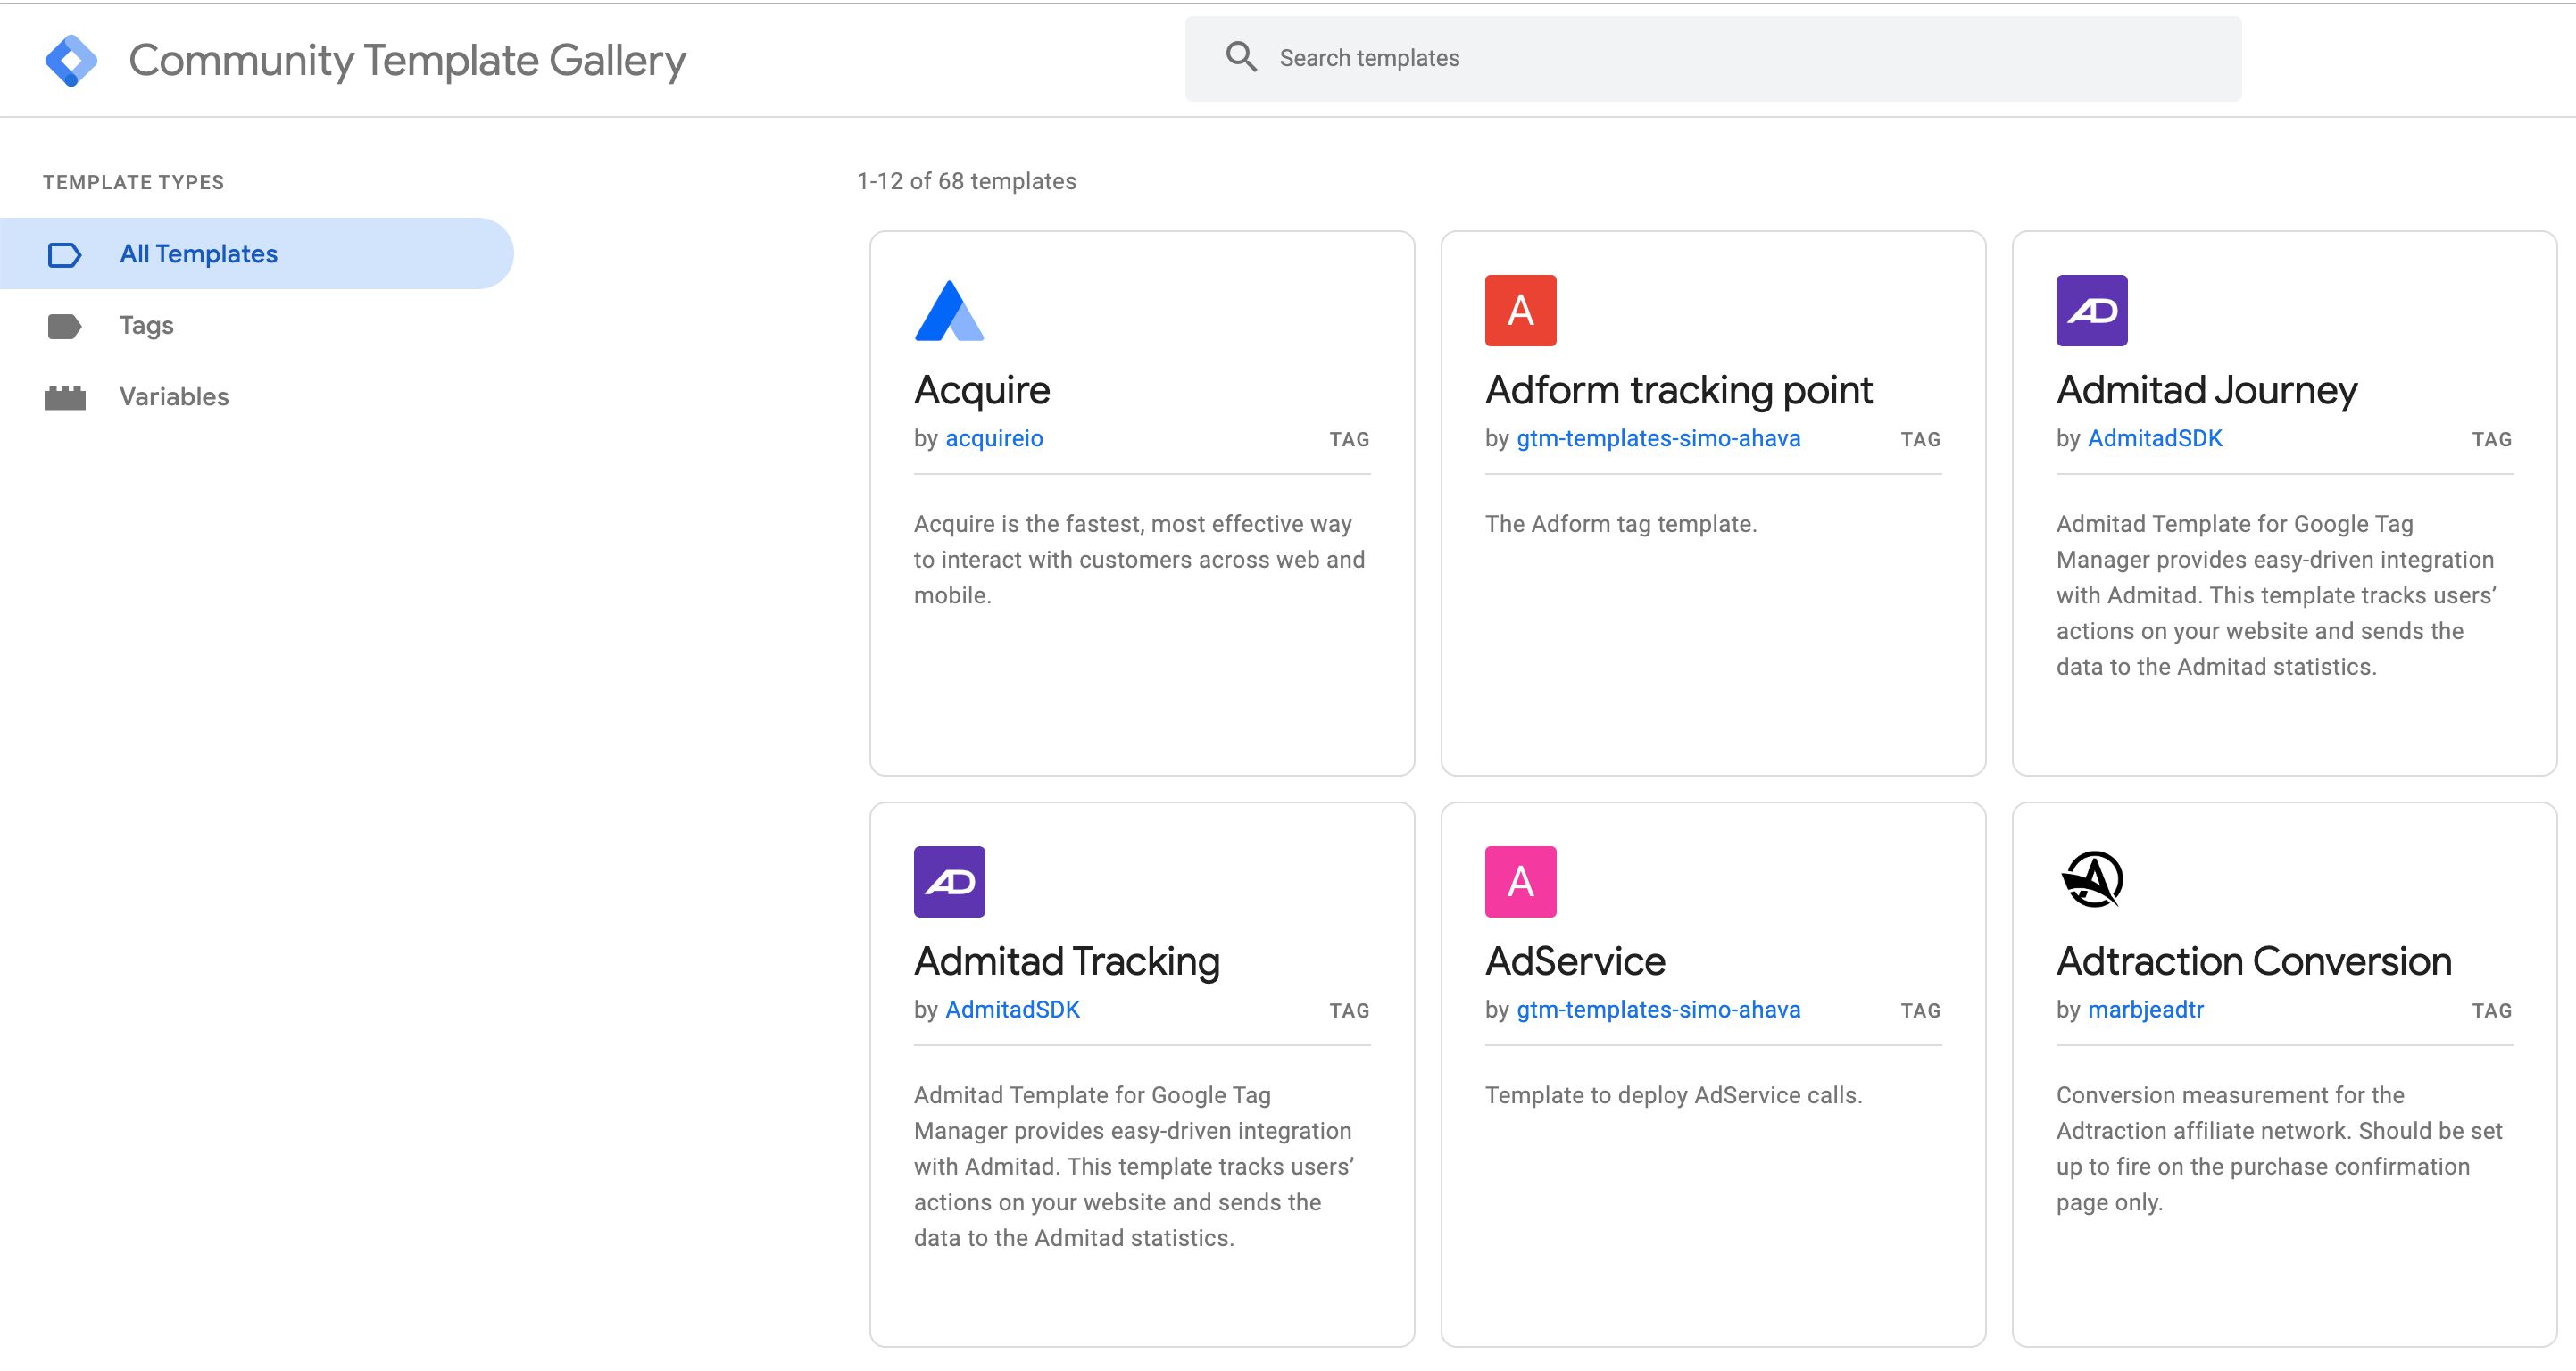
You can also visit the Community Template Gallery directly at the URL https://tagmanager.google.com/gallery/. It has all the same features as the overlay.
GitHub
As you might have noticed above, to submit a template you need to create a GitHub repository for it.
GitHub is a community for managing and sharing code. It’s used to manage and coordinate projects running on the Git version-control system.
GitHub is free to use, although there is a paid tier as well, which gives you benefits such as the ability to create private repositories.
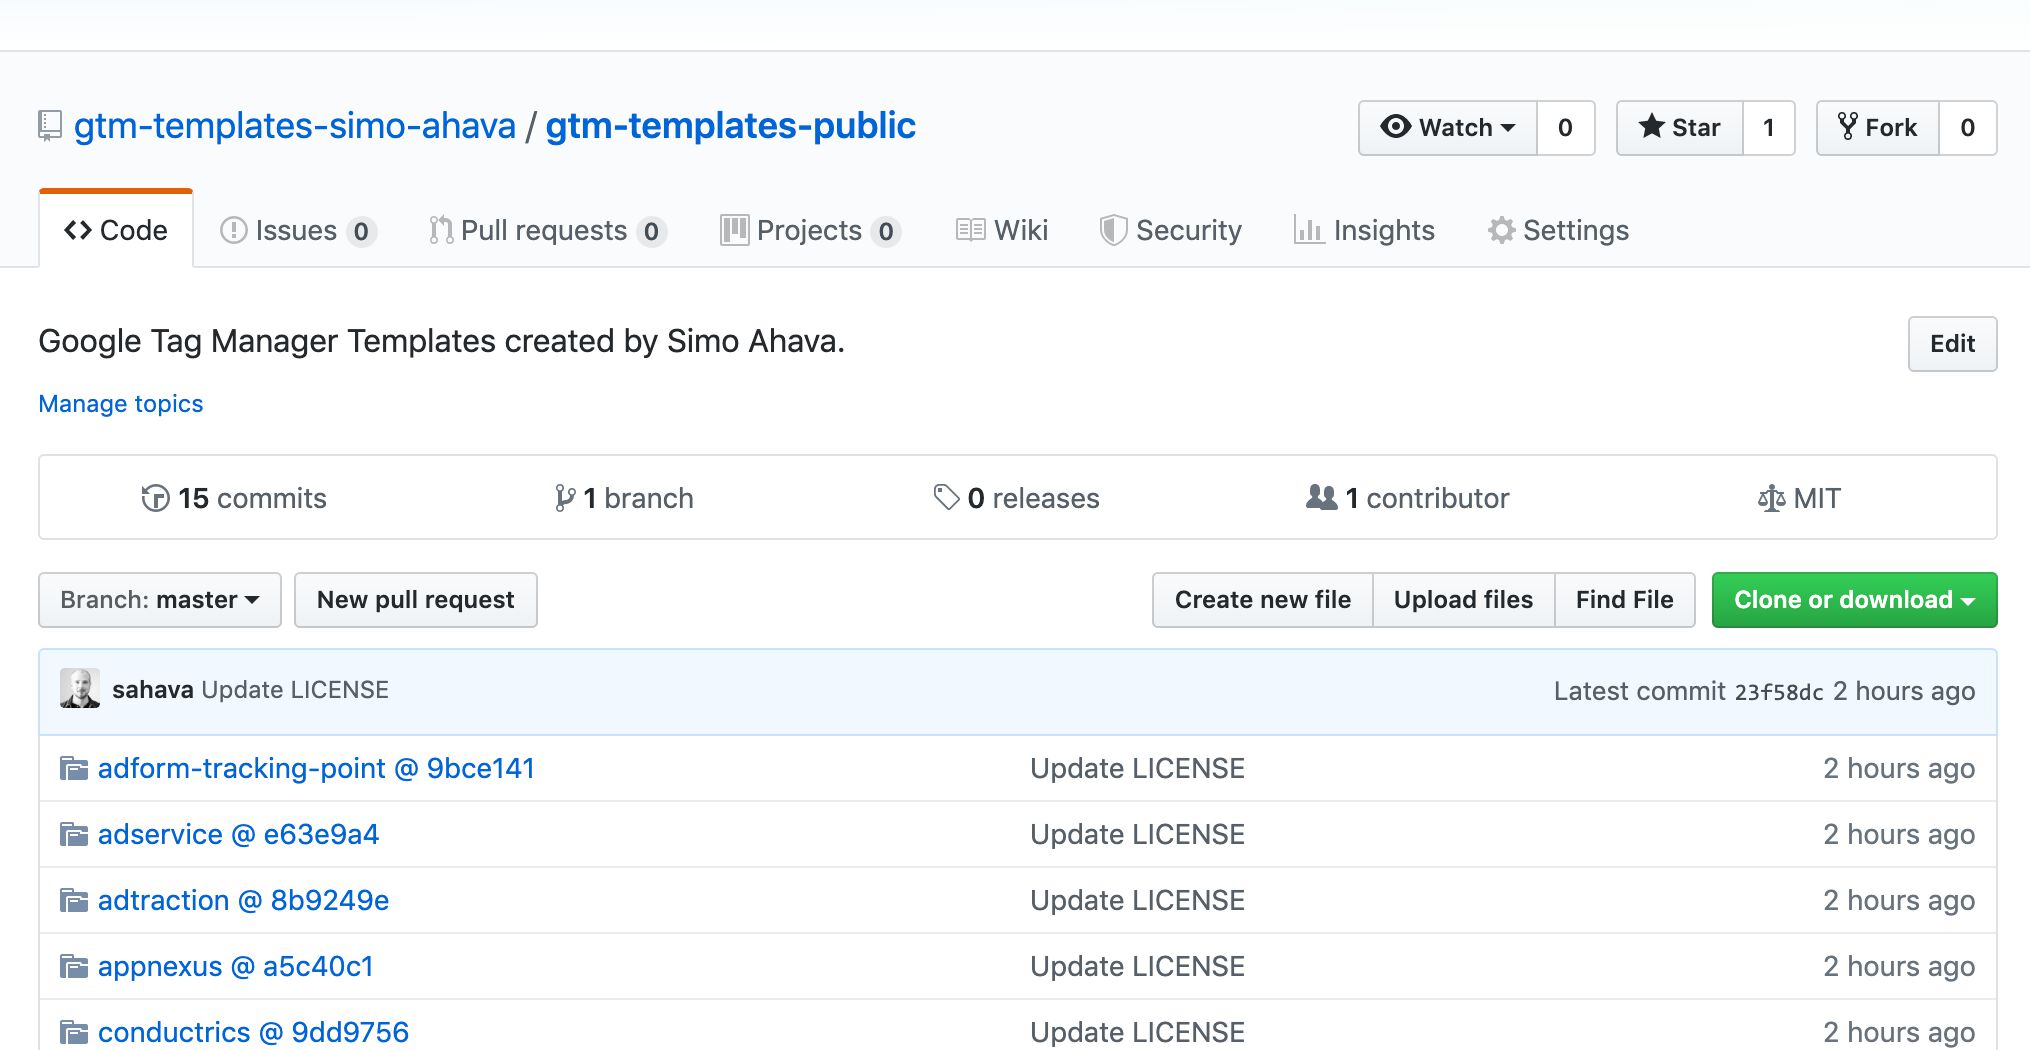
For the purposes of the Community Template Gallery, each template requires its own public repository in GitHub. This might cause some overhead for users who submit lots of templates, but it makes it easier for Google Tag Manager to parse the correct template every time, to manage metadata, and to have the Issues feature (basically bug and feature tracking) be devoid of ambiguities, as there is only one template to which the issues relate.
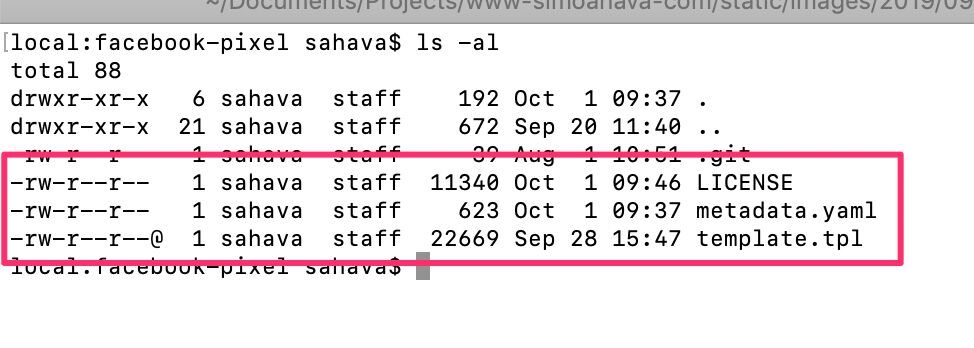
To be a valid template for the gallery, the repository requires the following three files in the root:
| File | Description |
|---|---|
| template.tpl | You get this when you export a template from Google Tag Manager. NOTE! It must be named template.tpl. All other names will break the upload. |
| metadata.yaml | Template metadata, where you can provide things like links to the documentation and, importantly, the changelog of commits where you’ve made changes to the template and want to update them to the template users. |
| LICENSE | LICENSE text file that uses the Apache 2.0. |
These three files must be in the repository root or you will not be able to upload the template to the Community Template Gallery.
The repository can have other files as well (such as a README), but these three are mandatory.
Easiest way to get started is to create a public repository, and then use the file upload option to add files to the repository.
Once you’re comfortable with GitHub, I recommend installing the git command line tools and working from your terminal.
template.tpl
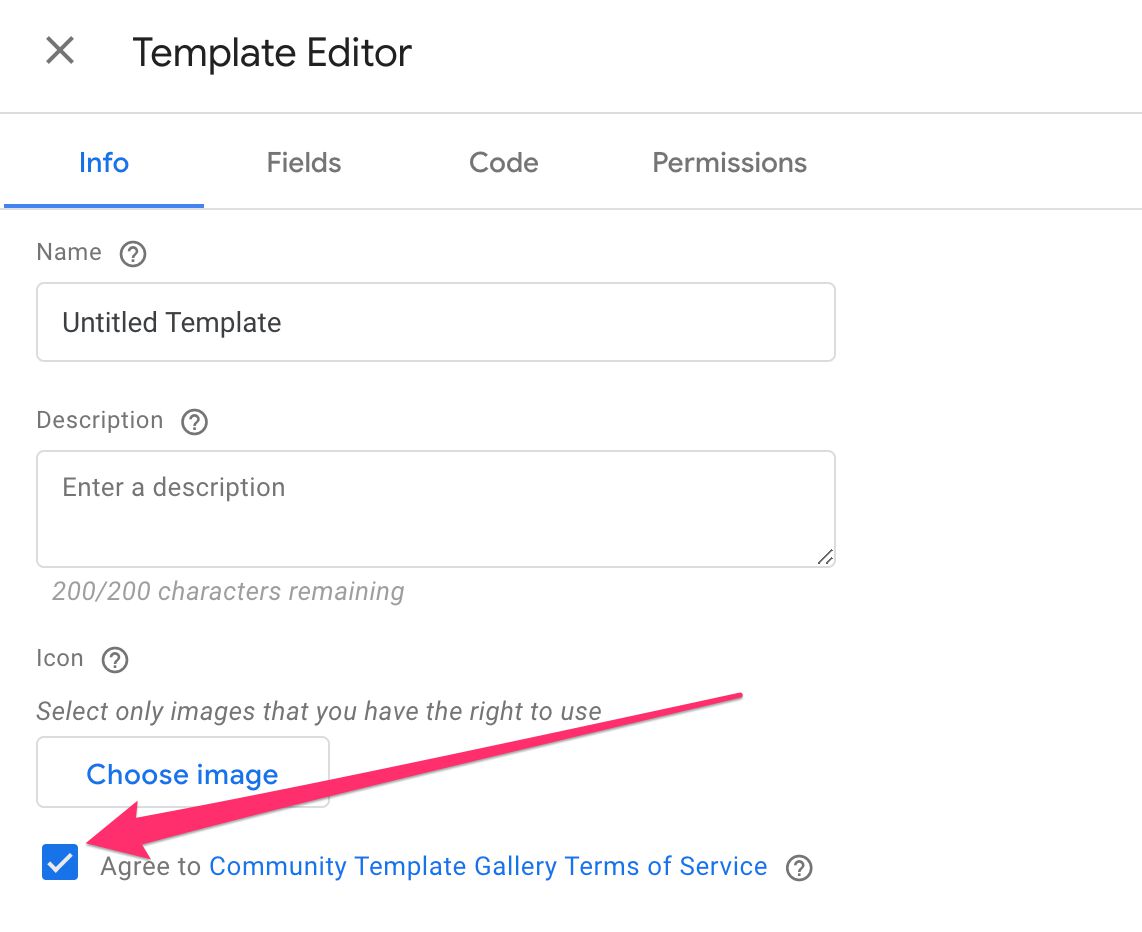
For the template file to be accepted into the gallery, you must check the box named “Agree to Community Template Gallery Terms of Service” available in the Info tab of the template editor.
You’ll also need to manually edit the template.tpl file (I’m sure this will be replaced by a UI functionality soon) to add categories to it. Categories will be used to categorize (d’oh) templates in the gallery UI.
{
  "displayName": "My template",
  "categories": ["AFFILIATE_MARKETING", "ADVERTISING"],
  // etc...
}
Read more about the available categories here.
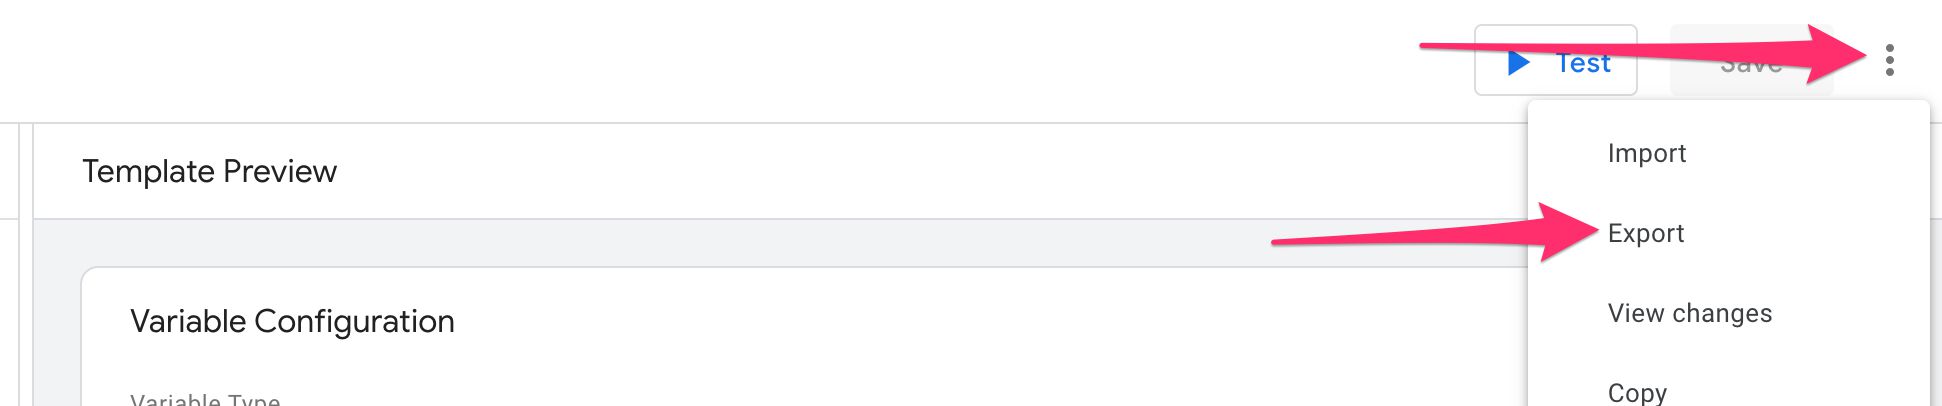
Other than that, there’s not much to say about the template file. You’ll need to export the file from GTM and make sure it’s renamed to template.tpl before uploading it to your GitHub repository.
metadata.yaml
The metadata file is provided in the YAML format (short for YAML Ain’t Markup Language). The only requirement is that it has the versions key populated with the hashes of all the commits you want to include as version changes in the template gallery entry.
Here’s a sample metadata.yaml file:
homepage: "https://www.simoahava.com/"
documentation: "https://www.simoahava.com/analytics/create-facebook-pixel-custom-tag-template/"
versions:
  # Latest version
  - sha: d7bad4f7a6e39c72dbc72afc7773d7fb8fdc358c
    changeNotes: Update template metadata.
  # Older versions
  - sha: ff7bf31a0777e22a370d6371607022fe2a6d1b7c
    changeNotes: |2
      Add support for "consent" command.
      Add support for using a variable to populate object properties.
  - sha: e1206f9c677fe67348c6678c4669952cb0c0b97b
    changeNotes: Initial release.
Use the homepage key to indicate the website home page URL for the template, and use the documentation key to indicate where documentation can be found.
The versions key is where you nest all the commits to the template.tpl file that you want to consider as new versions of the template.
Each version comprises of two keys. The first key, sha, is mandatory, and corresponds to the commit hash for the commit where you made the final changes to the template.tpl file. The second key, changeNotes, is optional, and is the place where you add details about what was changed.
The versions should be listed so that the newest version is the first entry, and the older versions are listed after this from newest to oldest.
You can follow my example and use the comment # Latest version to visually separate the older versions (listed after the # Older versions comment).
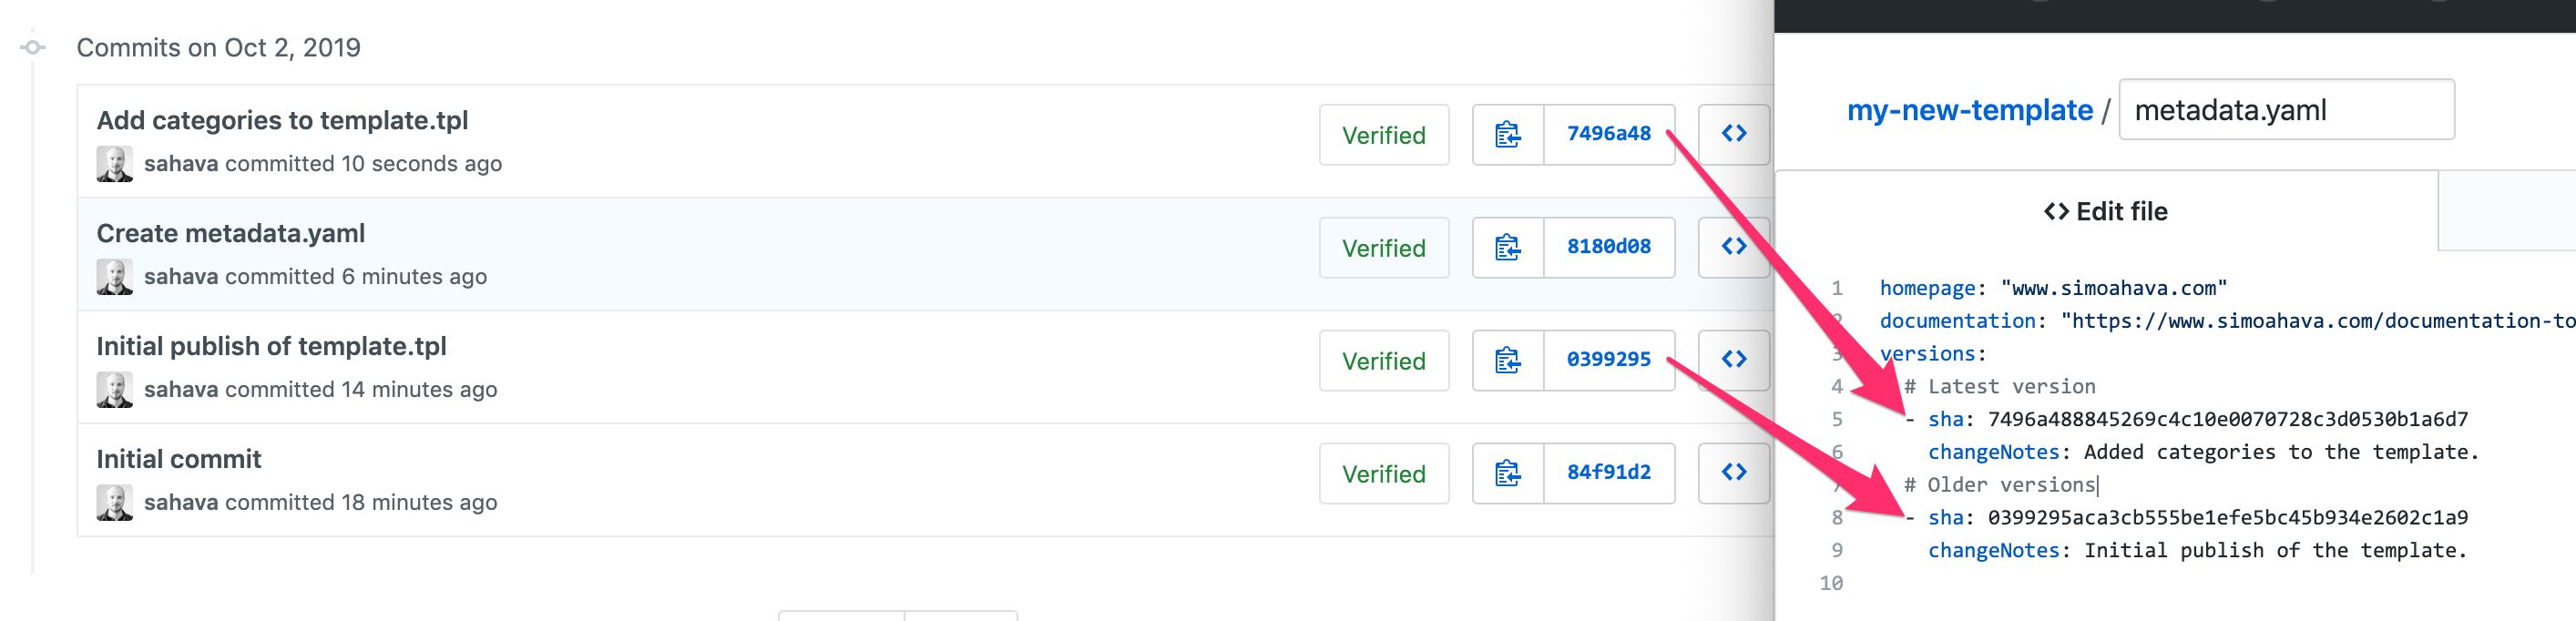
So how do you find this sha hash? Well, whenever you make a commit to GitHub, the commit will receive a hash that will uniquely identify the commit.
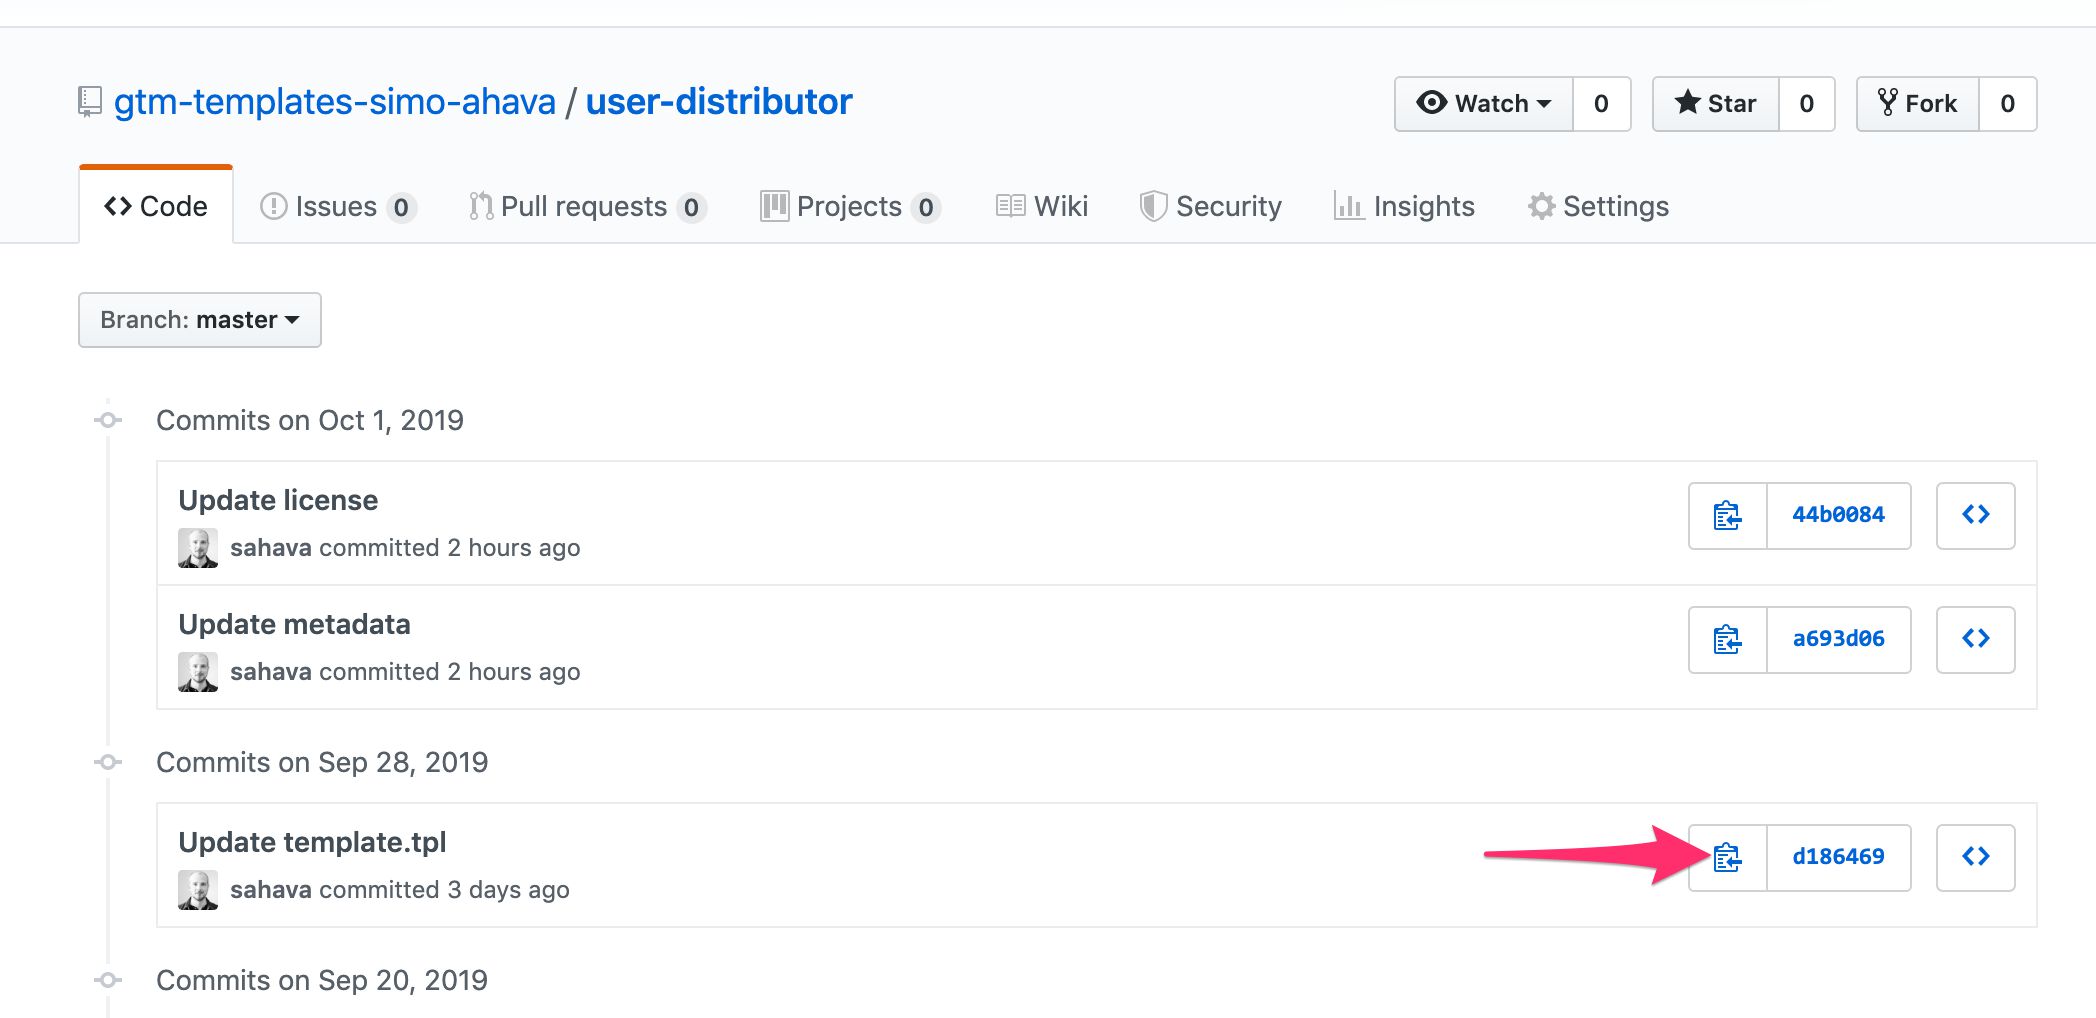
Thus, whenever you make a commit that includes changes to template.tpl, and you consider this commit to be important enough to warrant a new version of the template, you need to browse to the commits of your GitHub repository, find the commit in question, and copy its hash.
Easiest way to find the commits is to take your GitHub repo URL and add /commits/ to the end, e.g. https://www.github.com/gtm-templates-simo-ahava/user-distributor/commits/.
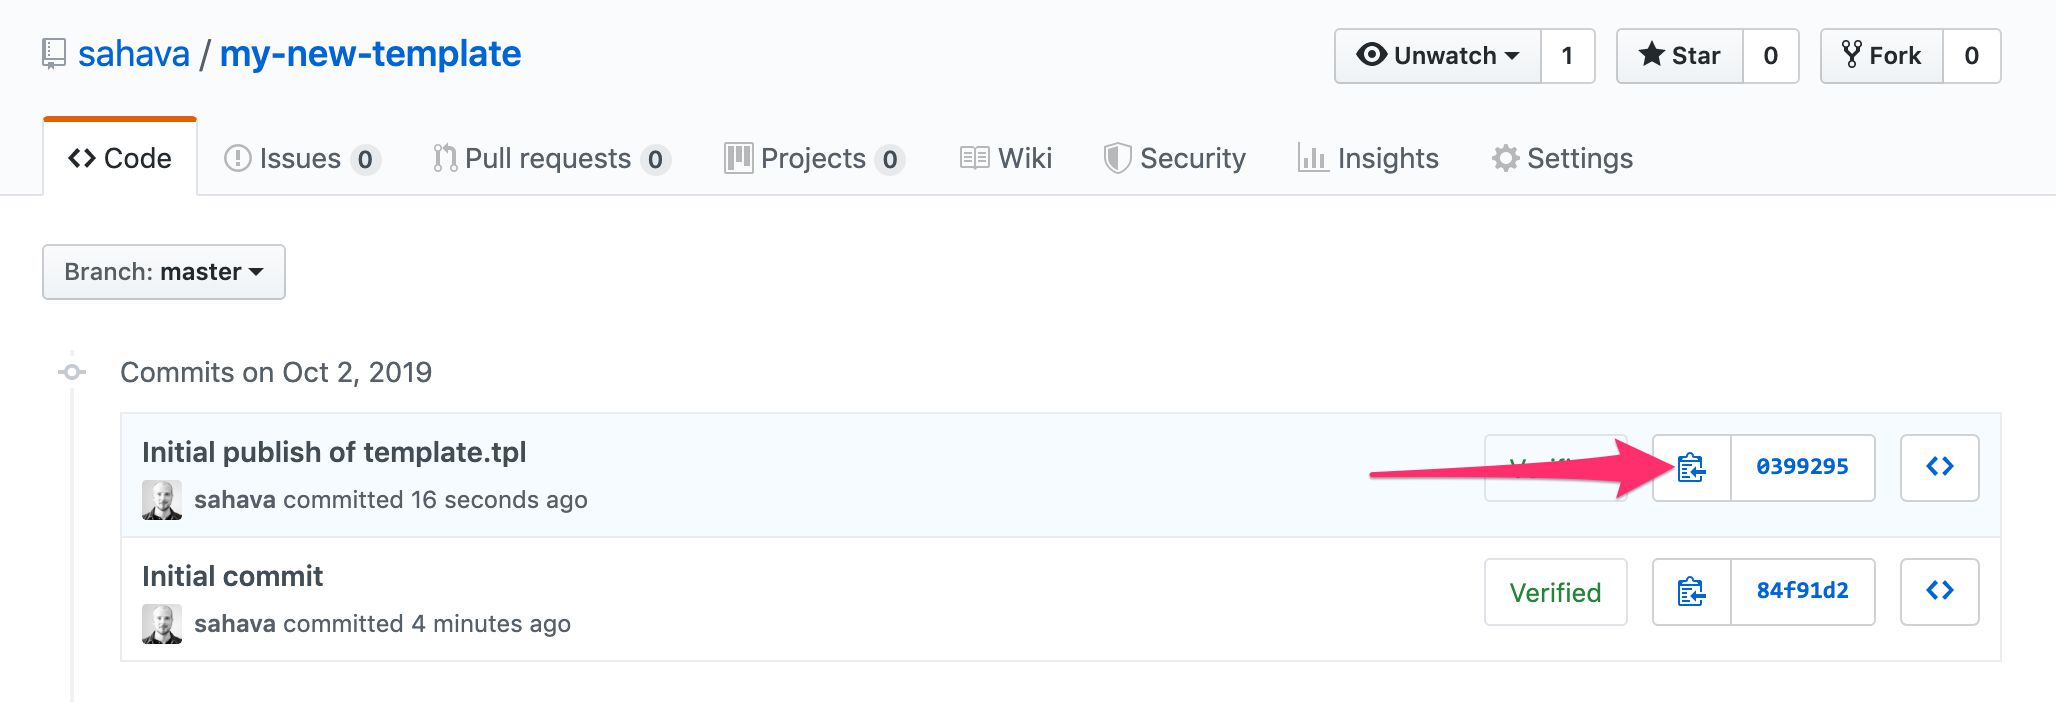
Then, find the commit whose hash you want, and click the clipboard button to copy the hash to the clipboard.
Finally, add a new item under versions in the metadata.yaml with the hash under the sha key and any change notes under the changeNotes property. You can specify multi-line notes with the pipe symbol |2 as in the example in the beginning of this chapter.
Note! You don’t have to add every single commit to template.tpl as a new version. You might do incremental updates first, and then when you’re ready with a version update, you copy the hash of the last commit, as it would include all the previous commits as well.
At its bare minimum, the metadata.yaml file just needs the sha keys, so this would also work:
versions:
  - sha: abcd12345
  - sha: bcde23456
  - sha: cdef34567
The purpose of versioning the templates like this is that in time, the gallery will introduce features that allow uses who have imported the templates to be notified of changes to the template sources. For this to work, the template author must add versioning information to the metadata file.
LICENSE
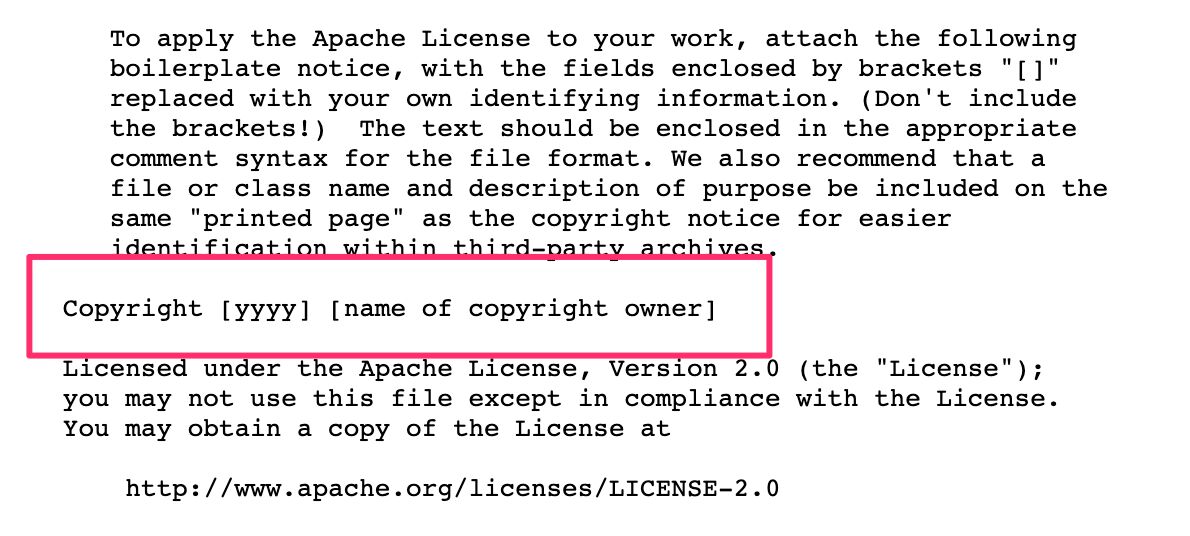
You can find the Apache 2.0 license text here: https://www.apache.org/licenses/LICENSE-2.0.txt. Save it as LICENSE in your repository, and make sure you edit the copyright text at the end.
GitHub tip #1: Add new template to the gallery
When you want to add a new template to the gallery, this is (roughly) the process you would follow.
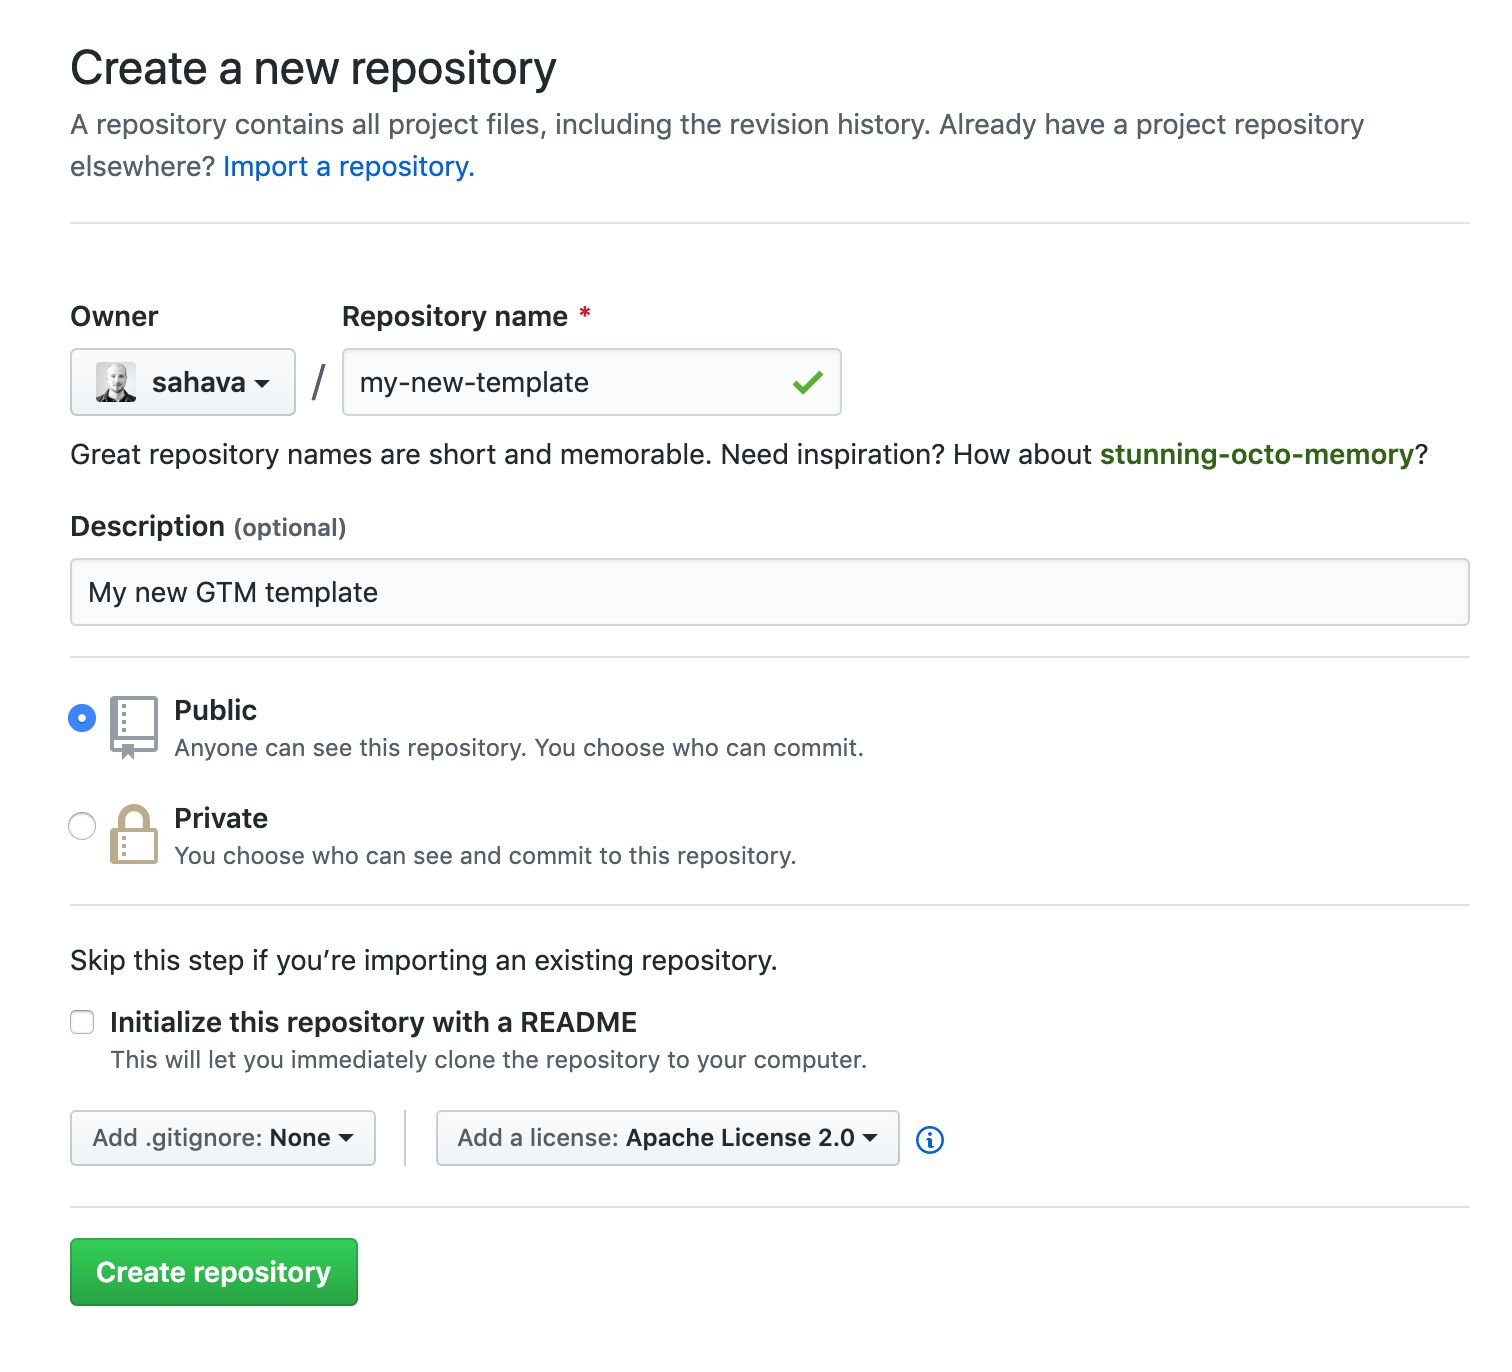
STEP 1: Create a new repository in GitHub. Make sure it’s Public and that it has the Apache 2.0 license added. If you’re creating templates under an organization, make sure the repository is created in the correct place.
STEP 2: Create the template in Google Tag Manager. Make sure you’ve checked the box for the Community Gallery Terms of Service in the Info tab. Export the template as a template.tpl file.
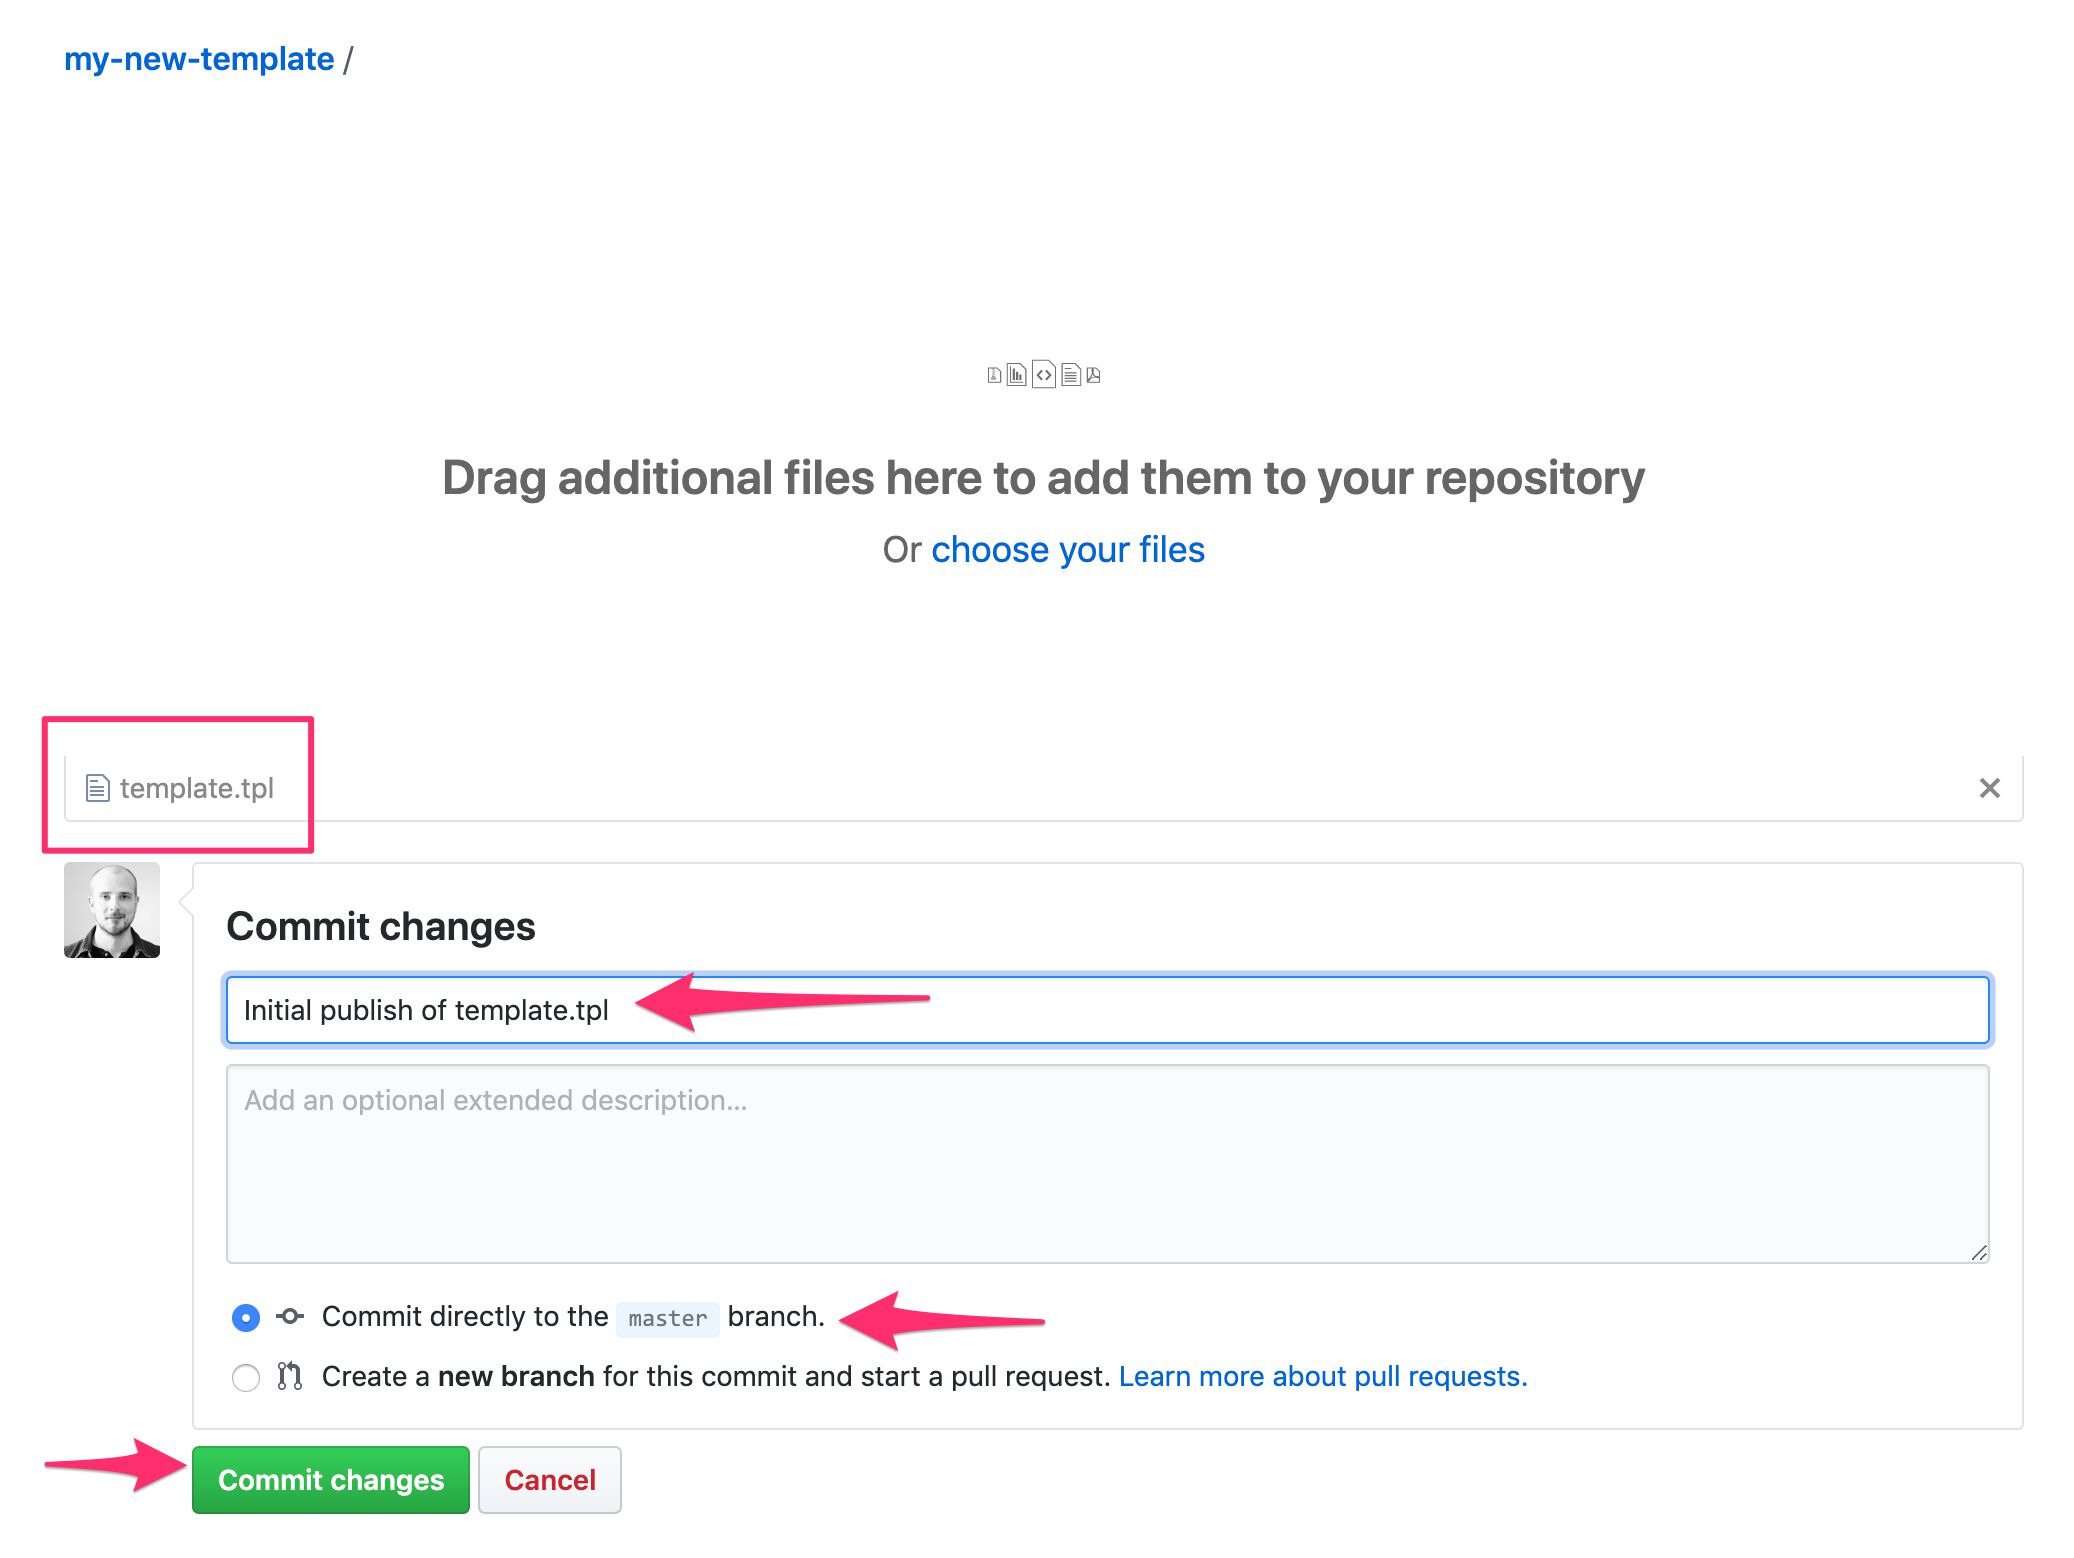
STEP 3: In the GitHub repo, choose Upload files to upload your template file into GitHub. Commit the change with a clear commit name, e.g. “Initial publish of template.tpl”. Commit directly to the master branch.
STEP 4: Visit the /commits/ page of the repo, and copy the commit hash of the latest commit to the clipboard.
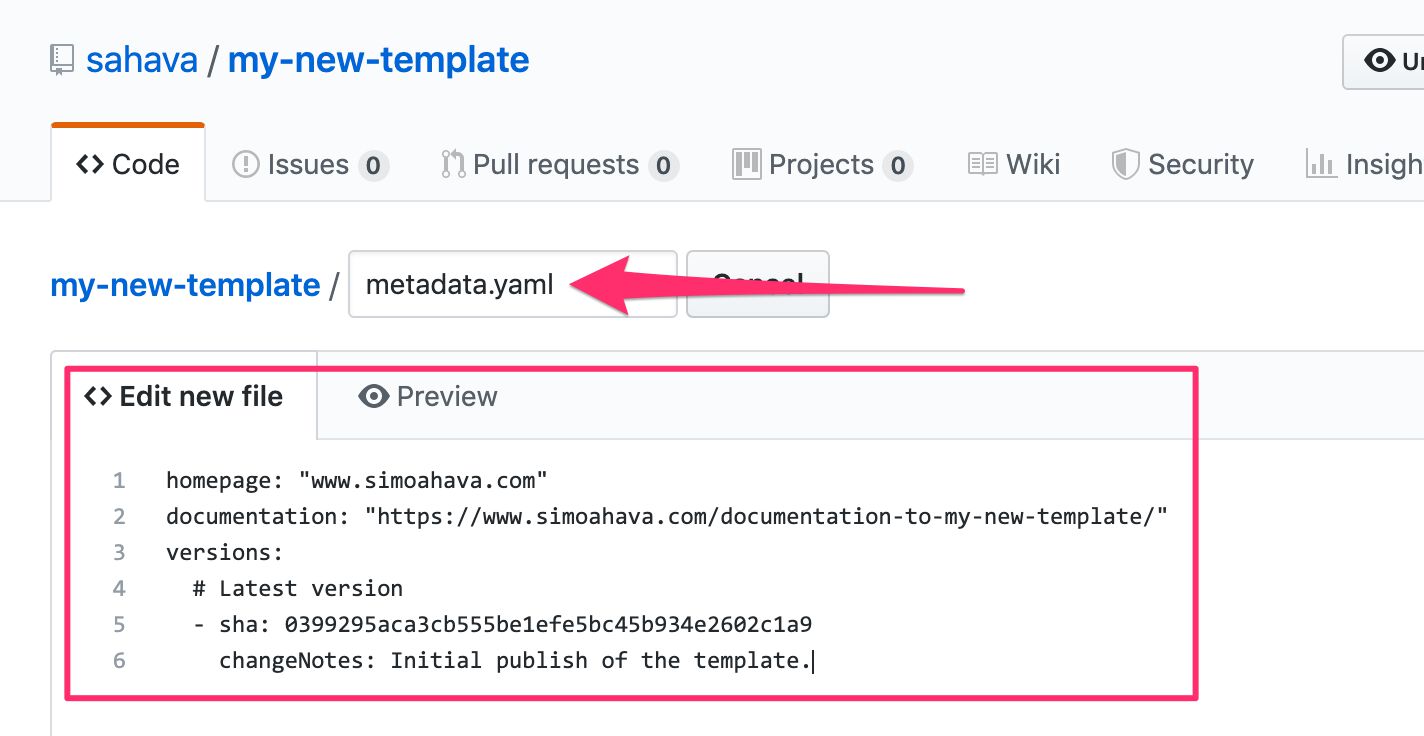
STEP 5: Back in the repo root, click Create new file. Name the file metadata.yaml. The contents need to be at least the following:
versions:
  - sha: paste_commit_hash_here
You might as well add the homepage and documentation keys while you’re at it.
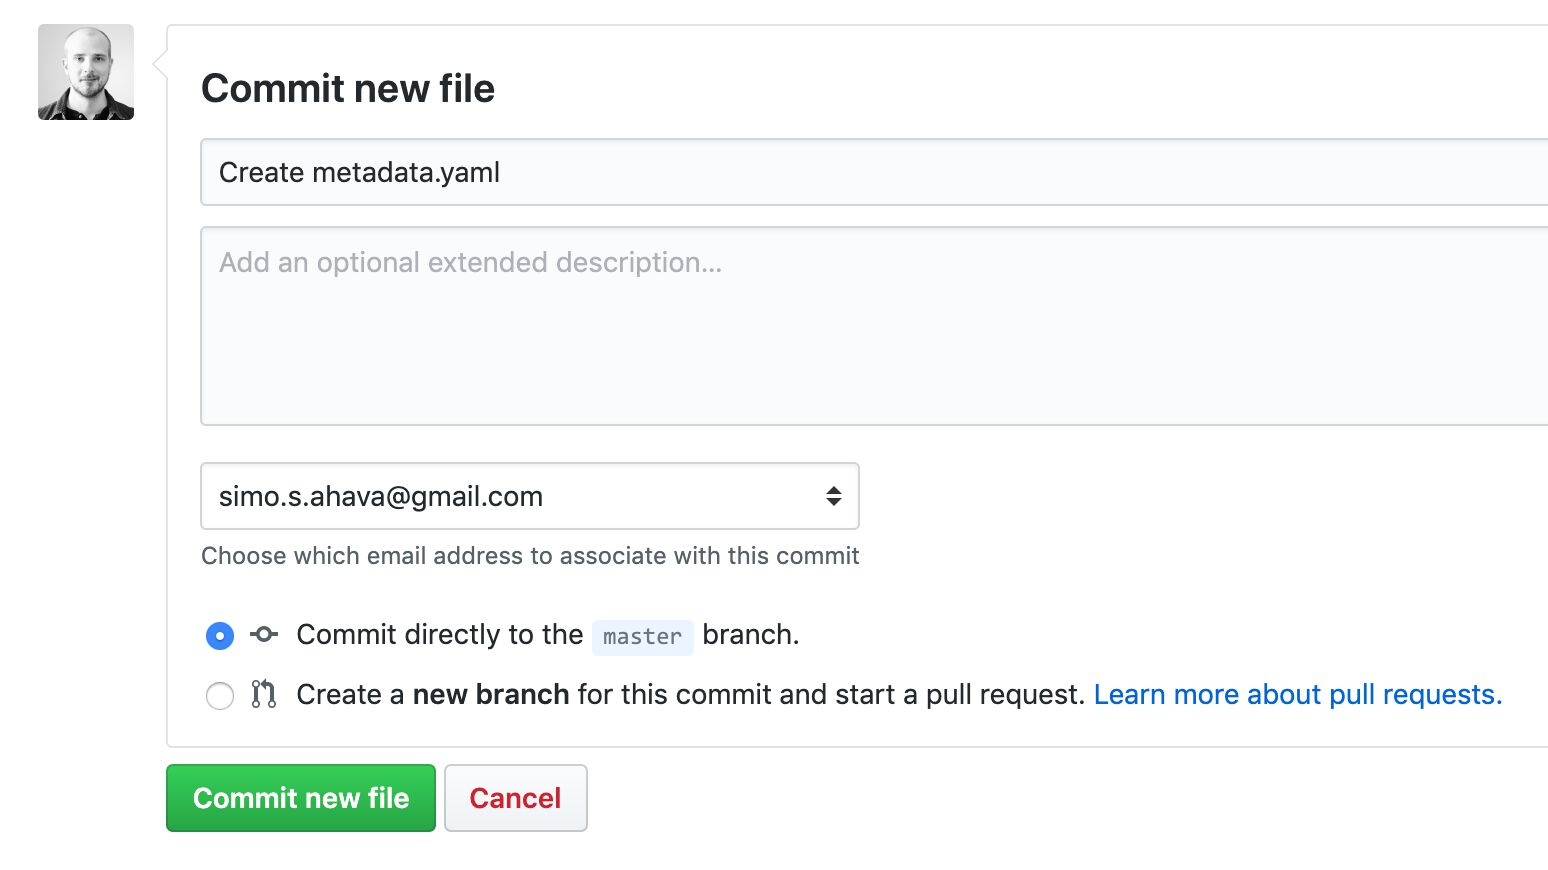
Make sure you commit the new file directly to the master branch.
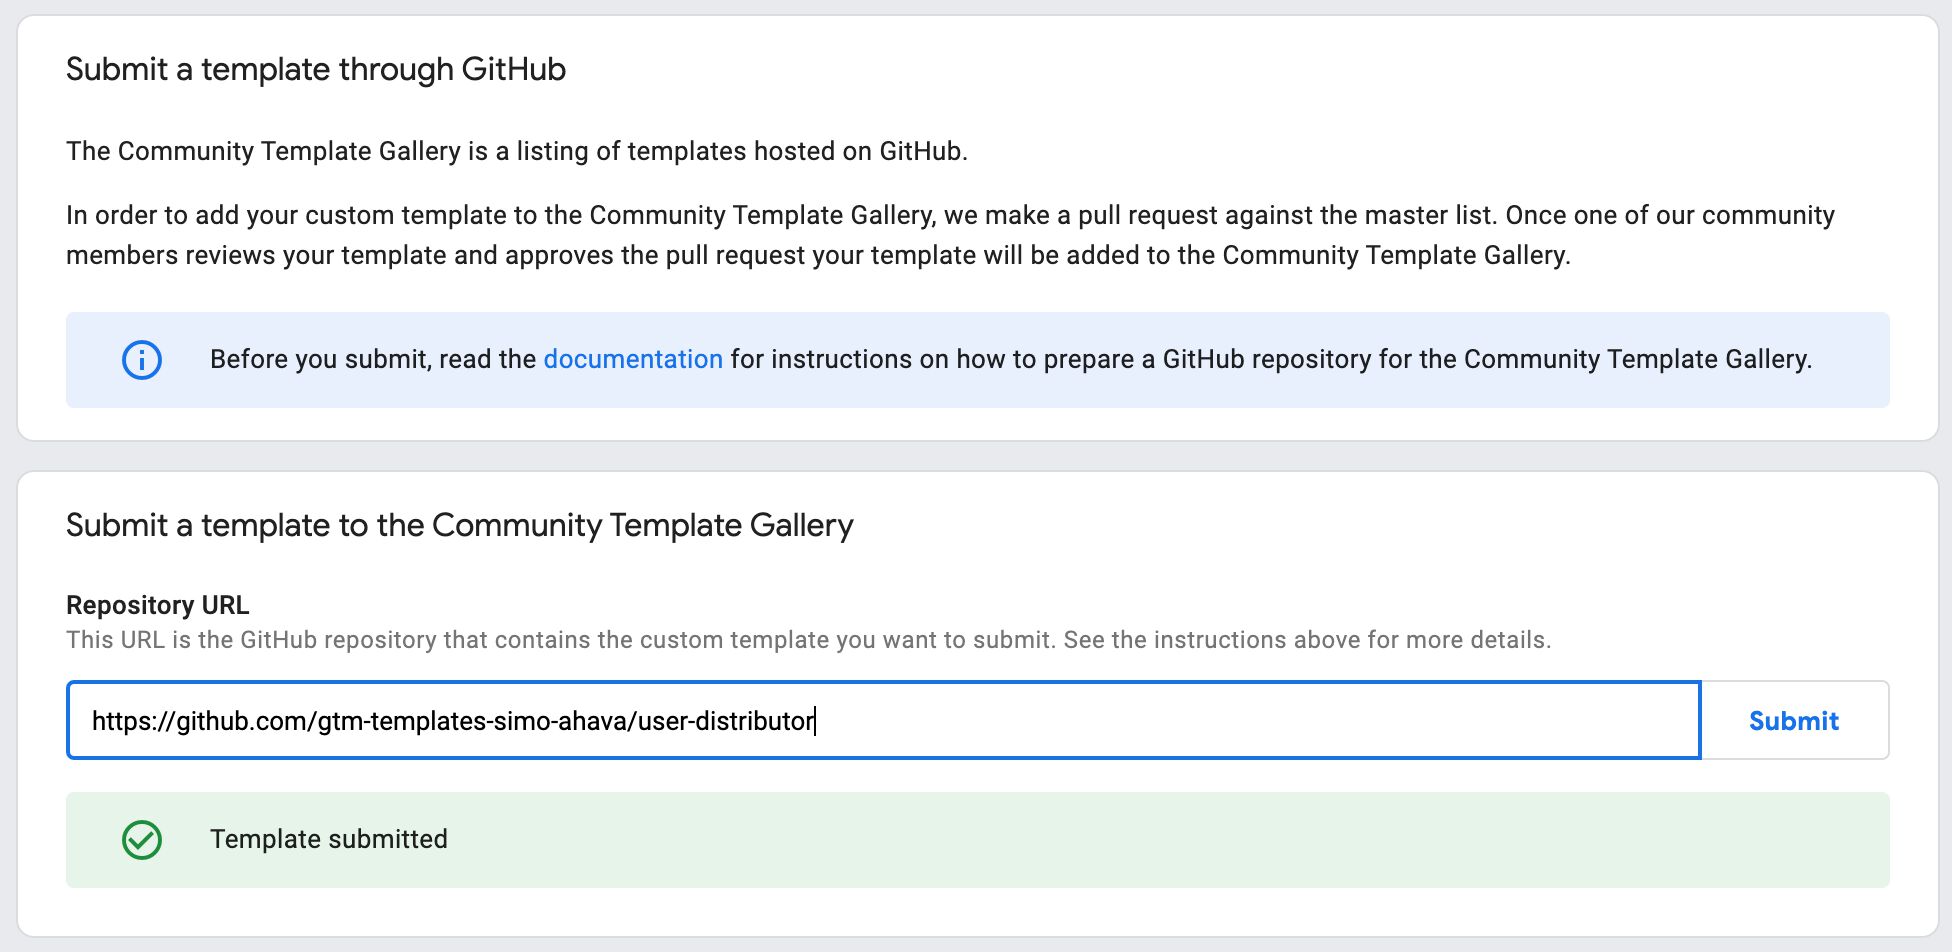
STEP 6: Head over to the gallery submission form. Add the URL to the repo root in the URL field, and hit Submit. If all validates OK, you should get a response that the template has been submitted. If there was a problem, there error message will tell you where the validation failed.
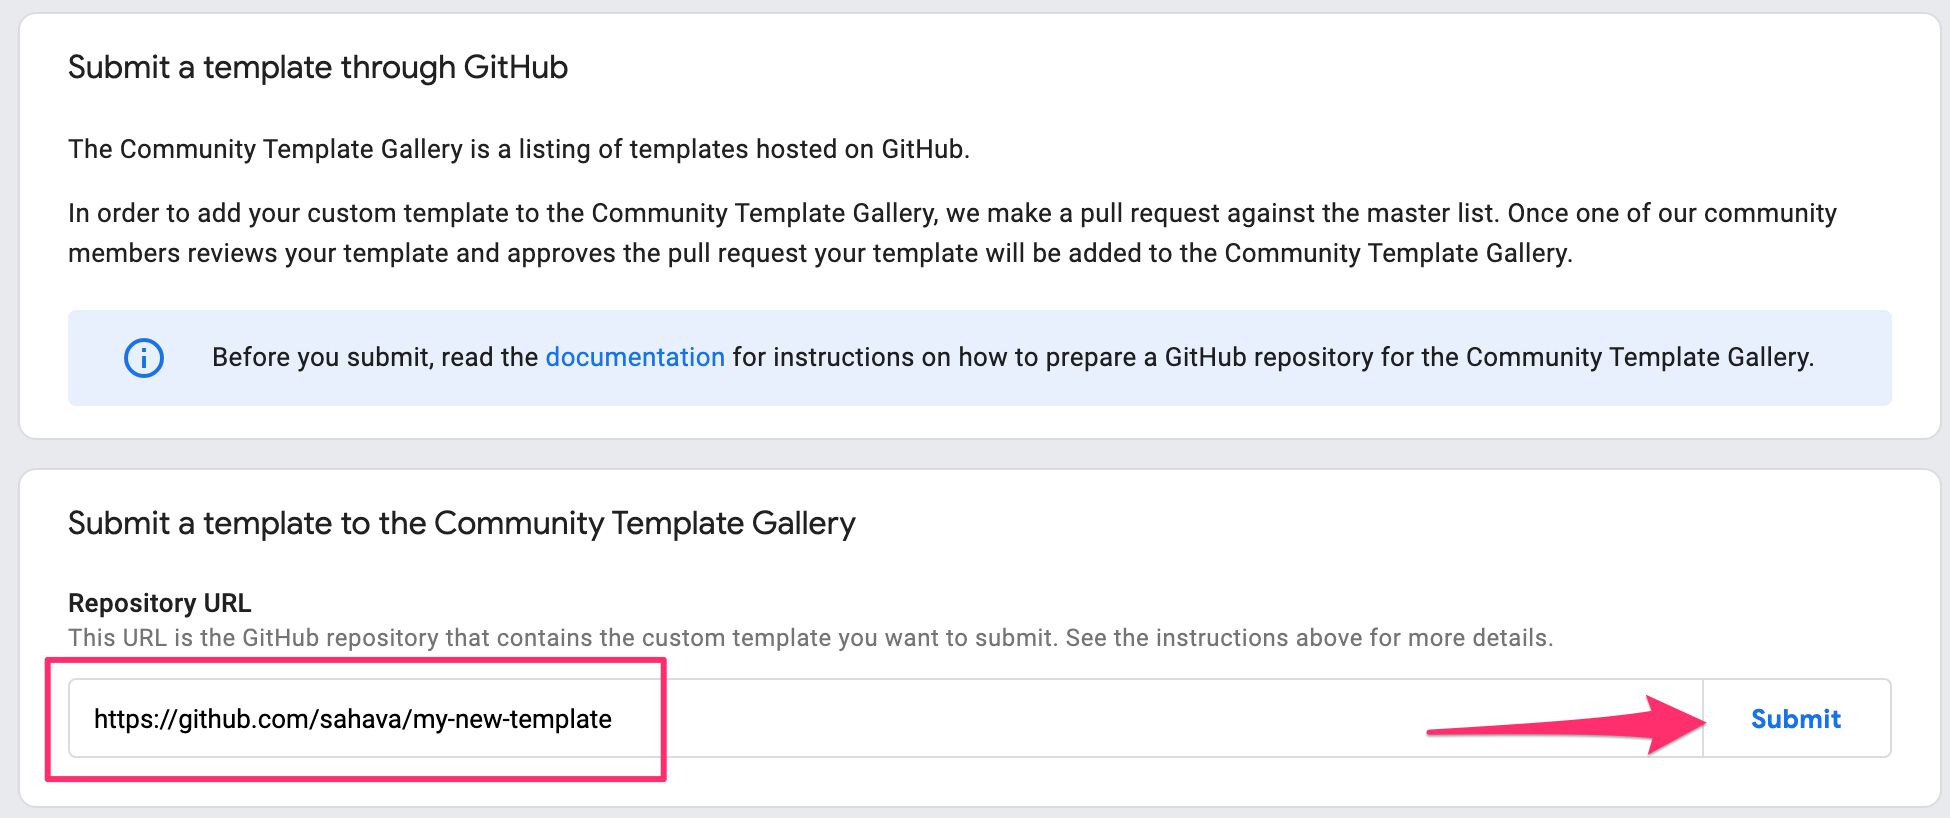
That’s it! Your template should appear in the gallery after it goes through some further validation.
NOTE! Just a reminder that not all templates will be published. Your template must follow the style guide, and if there’s a template with similar functionality already in the gallery, your template might not get published.
Finally, it might make sense to clone the repo to your local machine just so that you can use the git command line tools instead.
GitHub tip #2: Update the template
Once the template has been submitted to the gallery, you update it by committing changes to the template.tpl file.
Once you’ve got a commit of the template.tpl file merged with master that you want to submit to the Community Template Gallery as a new version of the template, you need to copy its commit hash, and add it as a new entry in the metadata.yaml file. It needs to become the new first entry under the versions key.
Once you’ve updated the metadata.yaml file, you need to commit that and make sure your changes are merged with the master branch.
Then you’ll just need to wait for the gallery to pull in your latest changes, validate them, and update the template listing in the gallery with the changes.
The key thing here is the process:
- Make incremental changes to template.tpl.
- Once happy and ready to create a new version of the template in the gallery, commit the final version of template.tpl, merge it to
master, and copy the commit hash. - Edit metadata.yaml and add this commit hash as the newest version of the template.
- Commit the changes to metadata.yaml and make sure it’s merged to
master. - Wait.
GitHub tip #3: Set up an organization and submodules
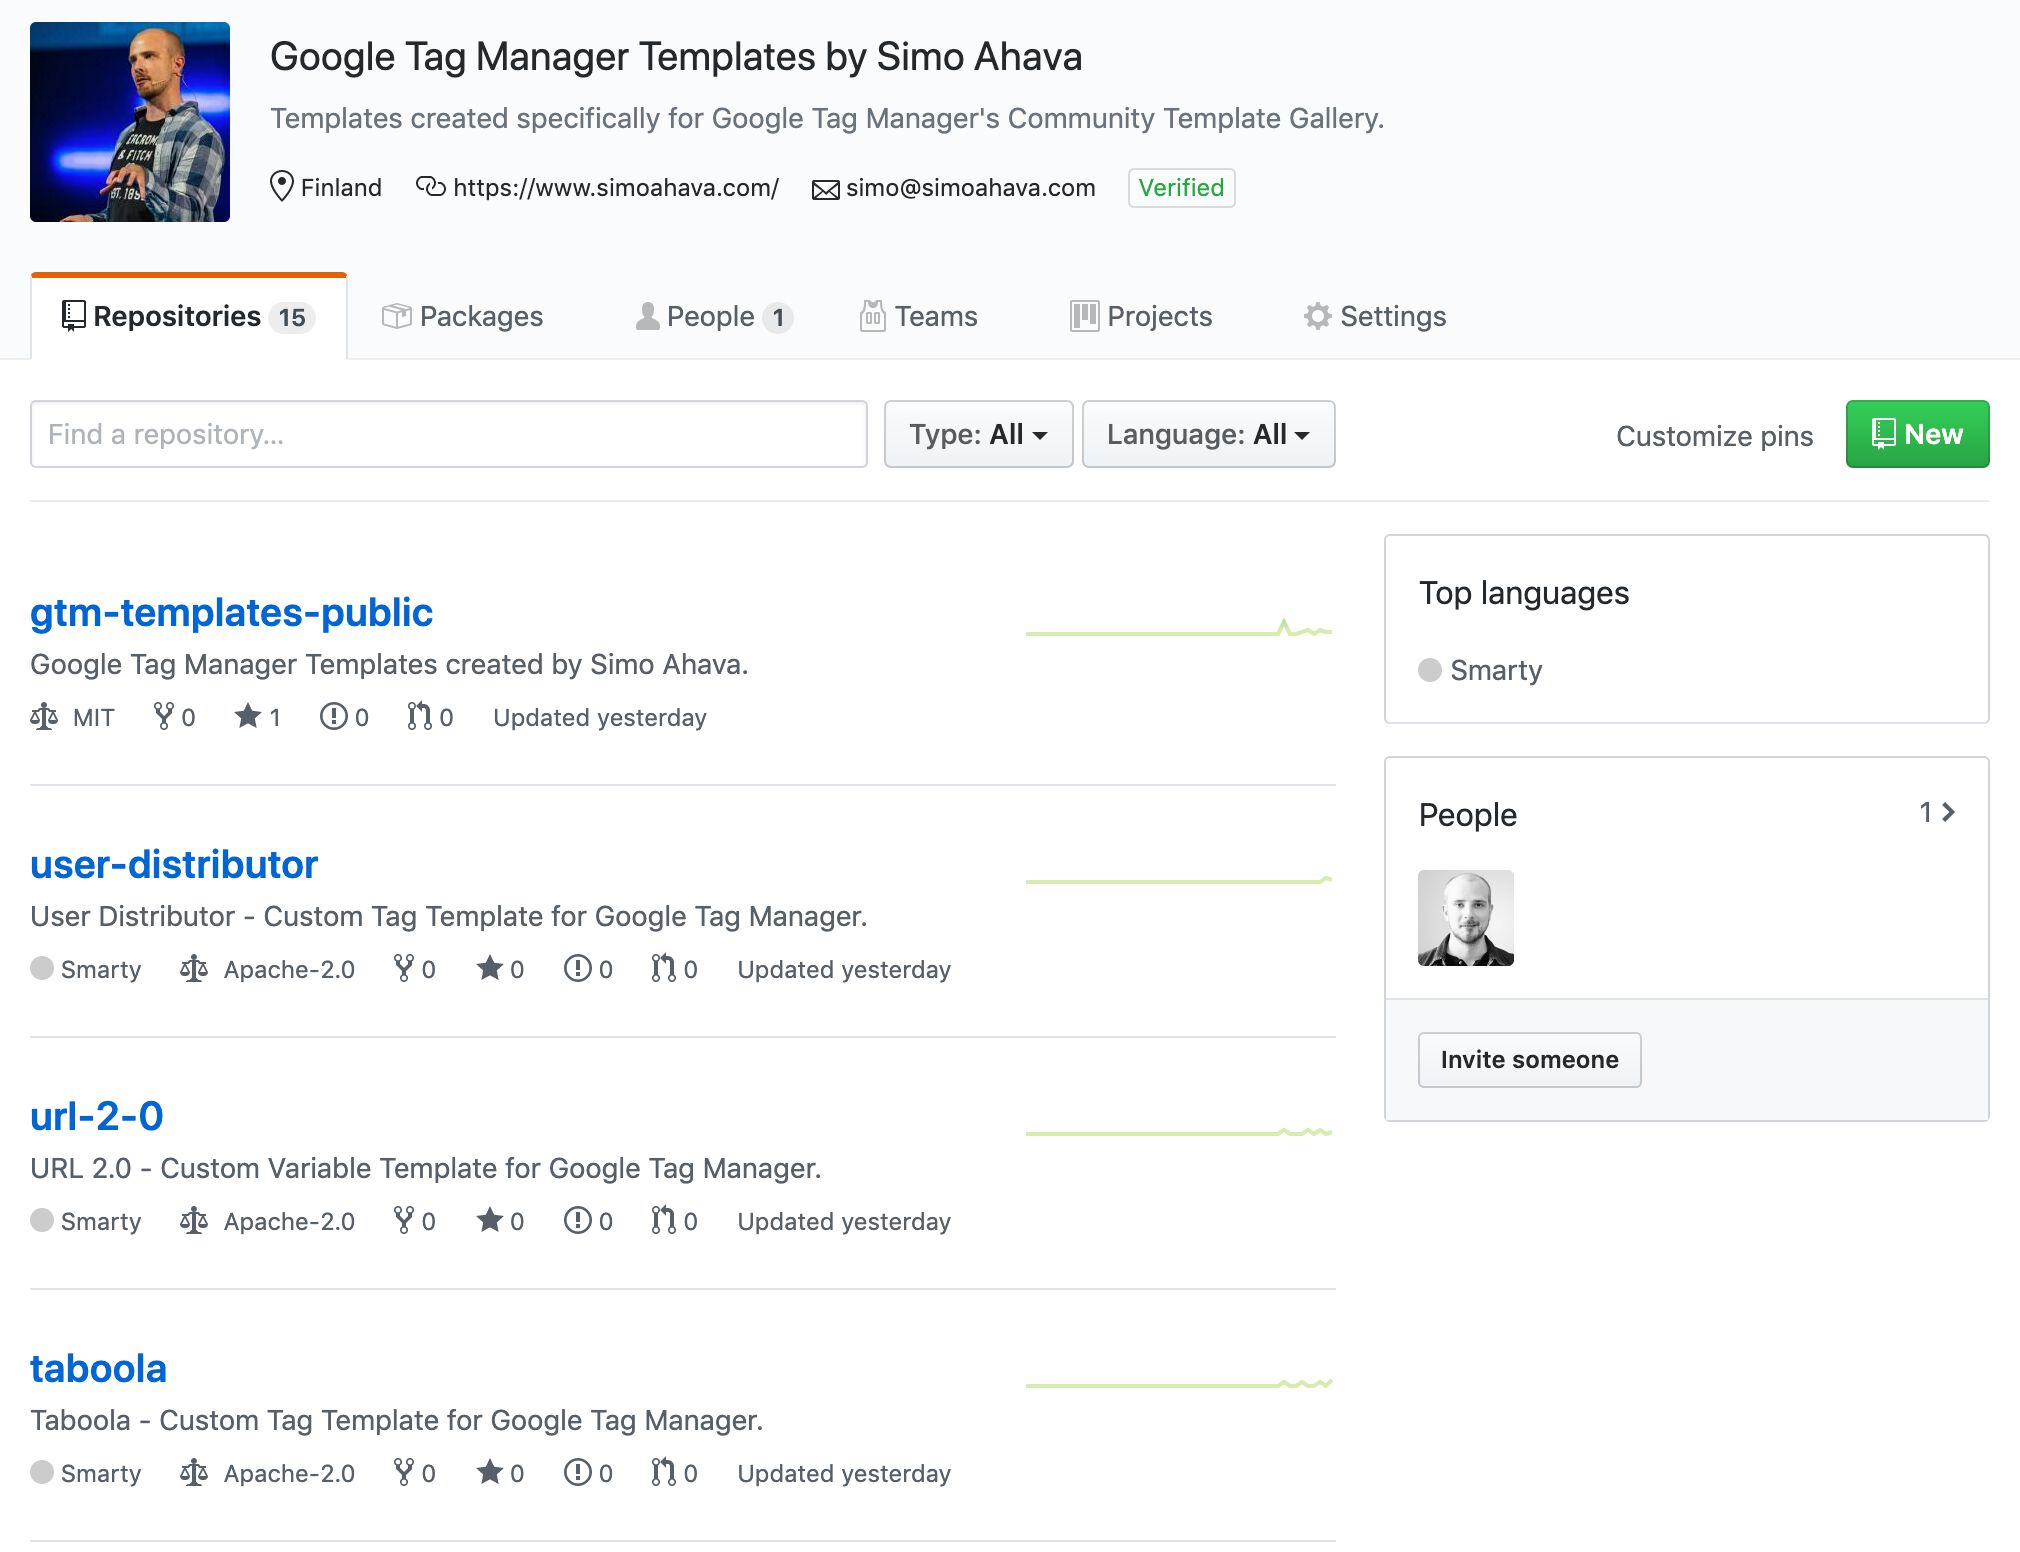
If you’re providing a lot of templates, it might make sense to logically order them in GitHub as an organization. After creating an organization, any public templates you want to upload would be created as repositories within this organization, giving you a single point of origin for managing your templates.
Another benefit of creating an organization is that you can verify the organization (by showing GitHub that you own the domains referenced in the organization profile), and as a consequence get the green checkmark to show next to your organization name in the gallery listing.
Here’s what my template organization looks like:
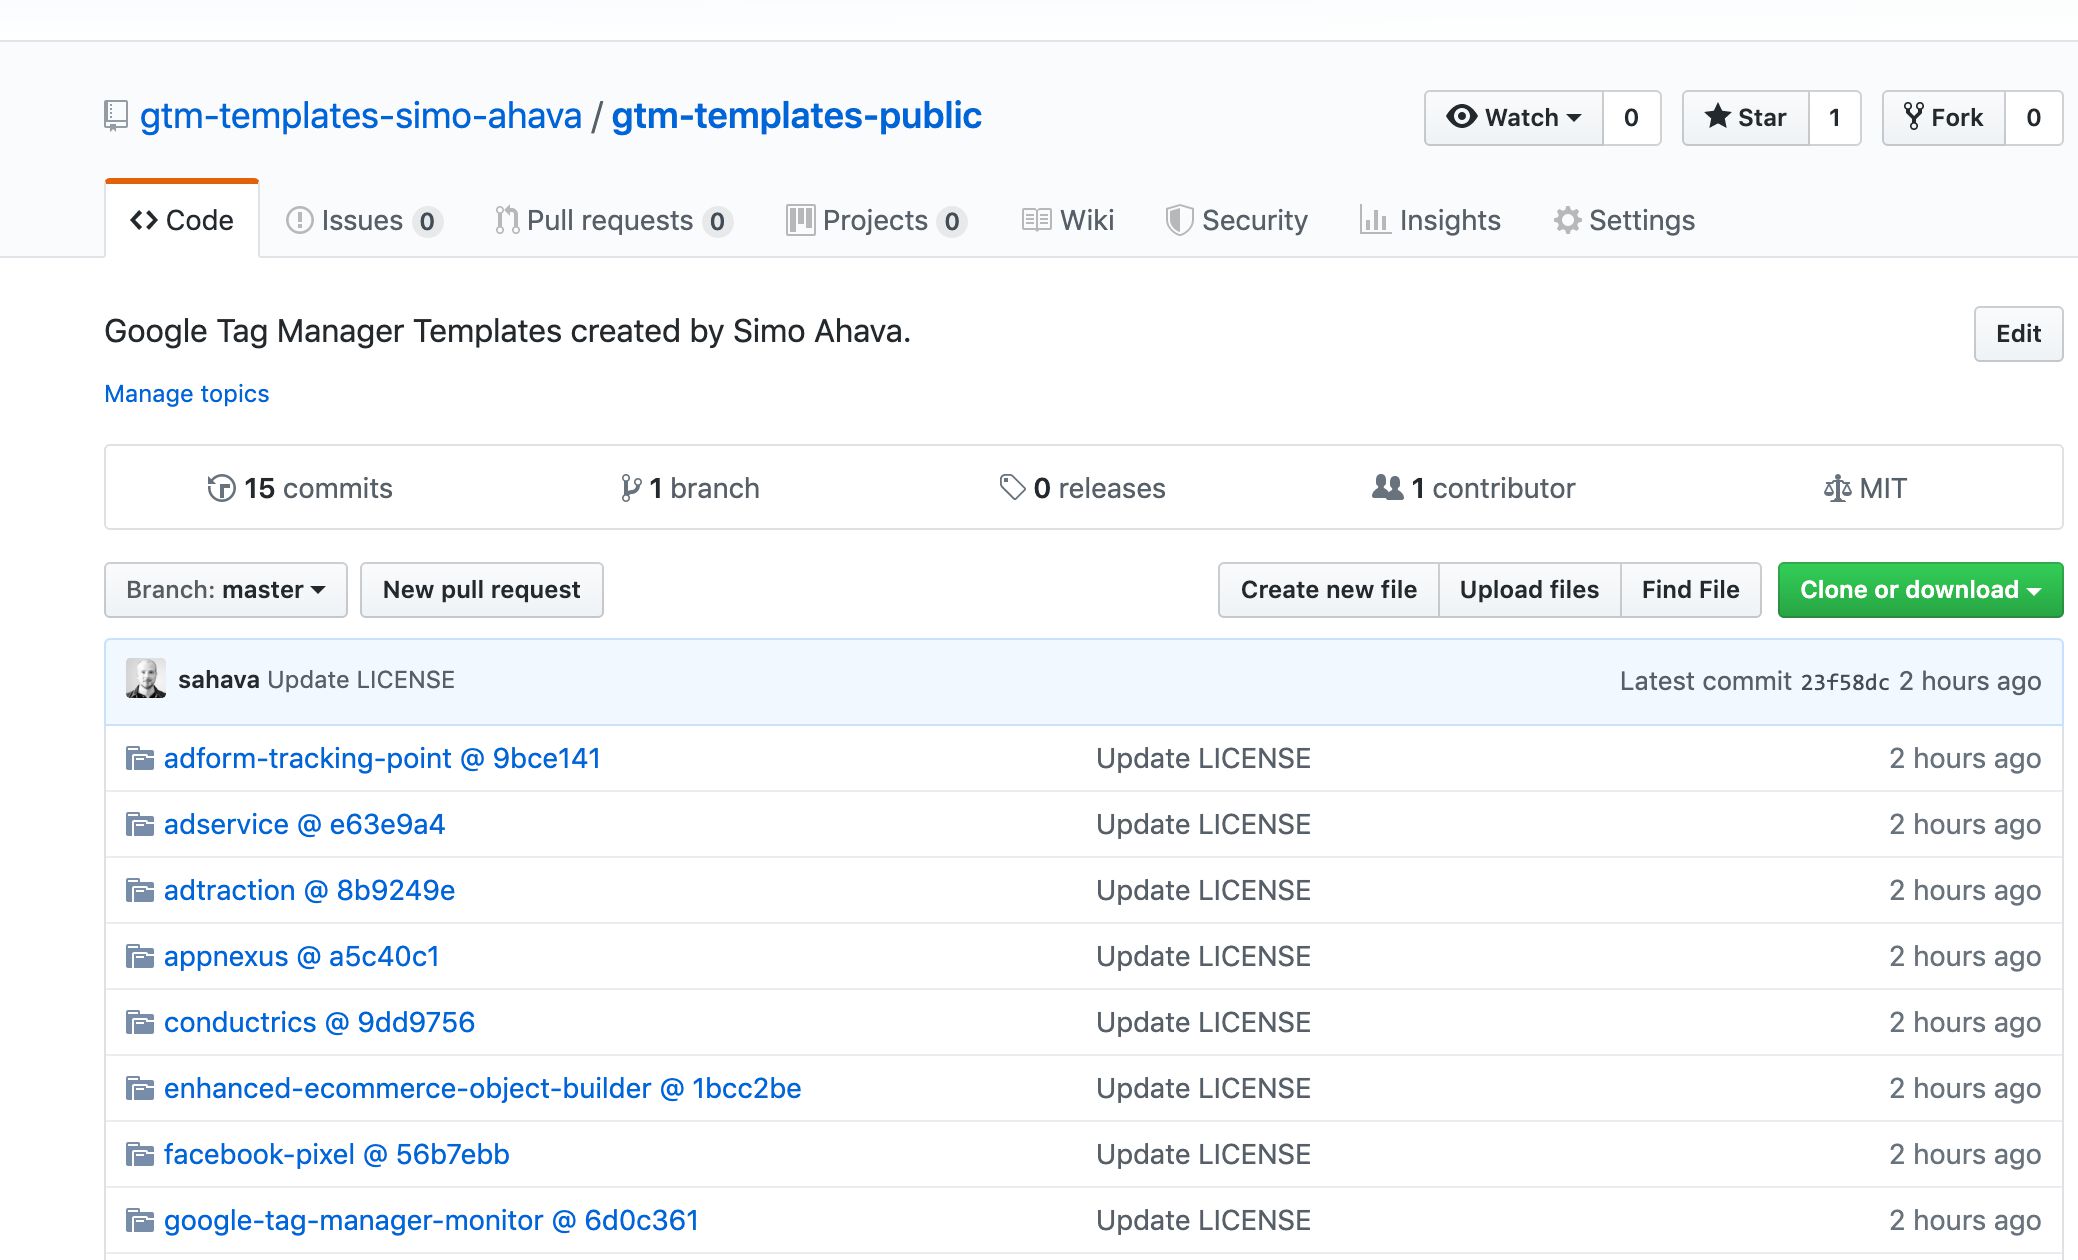
Another thing you might want to do is create a new “roll-up” repository, to which you add all the template repositories as submodules. This is, again, a way to logically manage your templates. The use case is similar to organizations, so if you’re already grouping the templates together with an organization, using submodules might not be at all useful. Nevertheless, here’s what my “roll-up” repository looks like. See how each template repo has its own folder within? Those are submodules.
These are just quality-of-life things, and definitely not required to get set up with the template gallery.
Summary
The Community Template Gallery is finally here! We now have a way to distribute the templates we’ve worked on - how exciting.
Don’t be turned off by the seemingly complex way of managing your custom templates via GitHub. First of all, if you’ve managed to create a template and add all the required metadata, chances are you’re already proficient with GitHub and should find it trivial (if somewhat time-consuming) to operate.
And even if GitHub is a new thing for you, take this as an excellent lesson in version control. As your files are directly used by Google Tag Manager, being able to discretely annotate each version is really important.
Similarly, being able to curate community-submitted issues on a template-by-template and commit-by-commit basis is useful not just for template gallery but for you as well.
I’m sure our community will rise up to the occasion and write little tools that will make it even easier to update the templates (a command-line tool to copy the hash from the most recent commit and add it as a new entry in the metadata.yaml? Any takers? Ping me - I’ve got ideas).
Time will tell how popular the gallery will be, but I have a hunch it will be the main way for brands to distribute their script snippets in the near future. I see no reason why a vendor should offer a block of custom code to be copy-pasted into a Custom HTML tag anymore, especially after the introduction of the template gallery. Nor do I see any reason for them to share their templates only on their own site, when they can get the additional brand visibility by offering the templates via the gallery.
In any case, custom templates continue firmly at the top position of my “most important and most inspiring Google Tag Manager feature of the recent years” list, and the Community Template Gallery is an excellent, complementary feature to support the template suite of features.
What do you think about the Community Template Gallery? Do you have ideas for improvement? Let your voice be heard in the comments!
