
Run Server-side Google Tag Manager On Localhost
Server-side Google Tag Manager is essentially a server application (running on Node.js), which Google has helpfully composed into a Docker image.
Docker, on the other hand, is an environment for creating, sharing, and running applications, right from the Docker platform itself.
In short, it’s a way to package an entire application and its execution environment, so that anyone (or any environment) can deploy a Docker container and instantly get the application up and running.
When you deploy server-side Google Tag Manager in Google Cloud Platform (the default, recommended way), for example, what you are actually doing is deploying the application via Docker on a Cloud Run instance.
Well, this article shows you how you can deploy server-side Google Tag Manager on your local computer, so that it sends requests and responds to them over localhost.
 Running on Docker Desktop
Running on localhost has its uses. It lets you test a complete server-side Google Tag Manager deployment without having to worry about where it’s hosted, as it’s running solely on your own computer. It’s a great way to get everything running correctly before moving to a production environment.
The solution is based on the datalayer-relay project developed by my colleague Justus Hämäläinen. While the focus of this article is on getting the server-side tagging environment up and running, we’ll walk through the Data Layer relay technology, too, as it’s a great technical demo of how to optimize data dispatch for server-side Google Tag Manager.
Read on!
Table of Contents
The Simmer Newsletter
Subscribe to the Simmer newsletter to get the latest news and content from Simo Ahava into your email inbox!
Install server-side Google Tag Manager on your local machine
What you’ll need
This article utilizes Docker Desktop, a handy user interface for interacting with Docker. It installs all the necessary components automatically.
The Docker Personal plan is free to use and comes with everything you need to run the solution locally. Follow this link, download Docker Desktop, and start it up.
If you want to avoid a persistent resource hog, open Docker Desktop settings, and in the General tab, uncheck Start Docker Desktop when you sign in to your computer.
If you prefer to use a CLI for running Docker, just make sure you have both docker and docker-compose up and running. If you follow this route, you should already know how to run containers, so I won’t include a CLI guide in this article (you can always check Justus’ documentation in the repo).
You’ll also need to clone the GitHub repository. Browse to the repository and clone it to your local machine using whatever method you prefer.
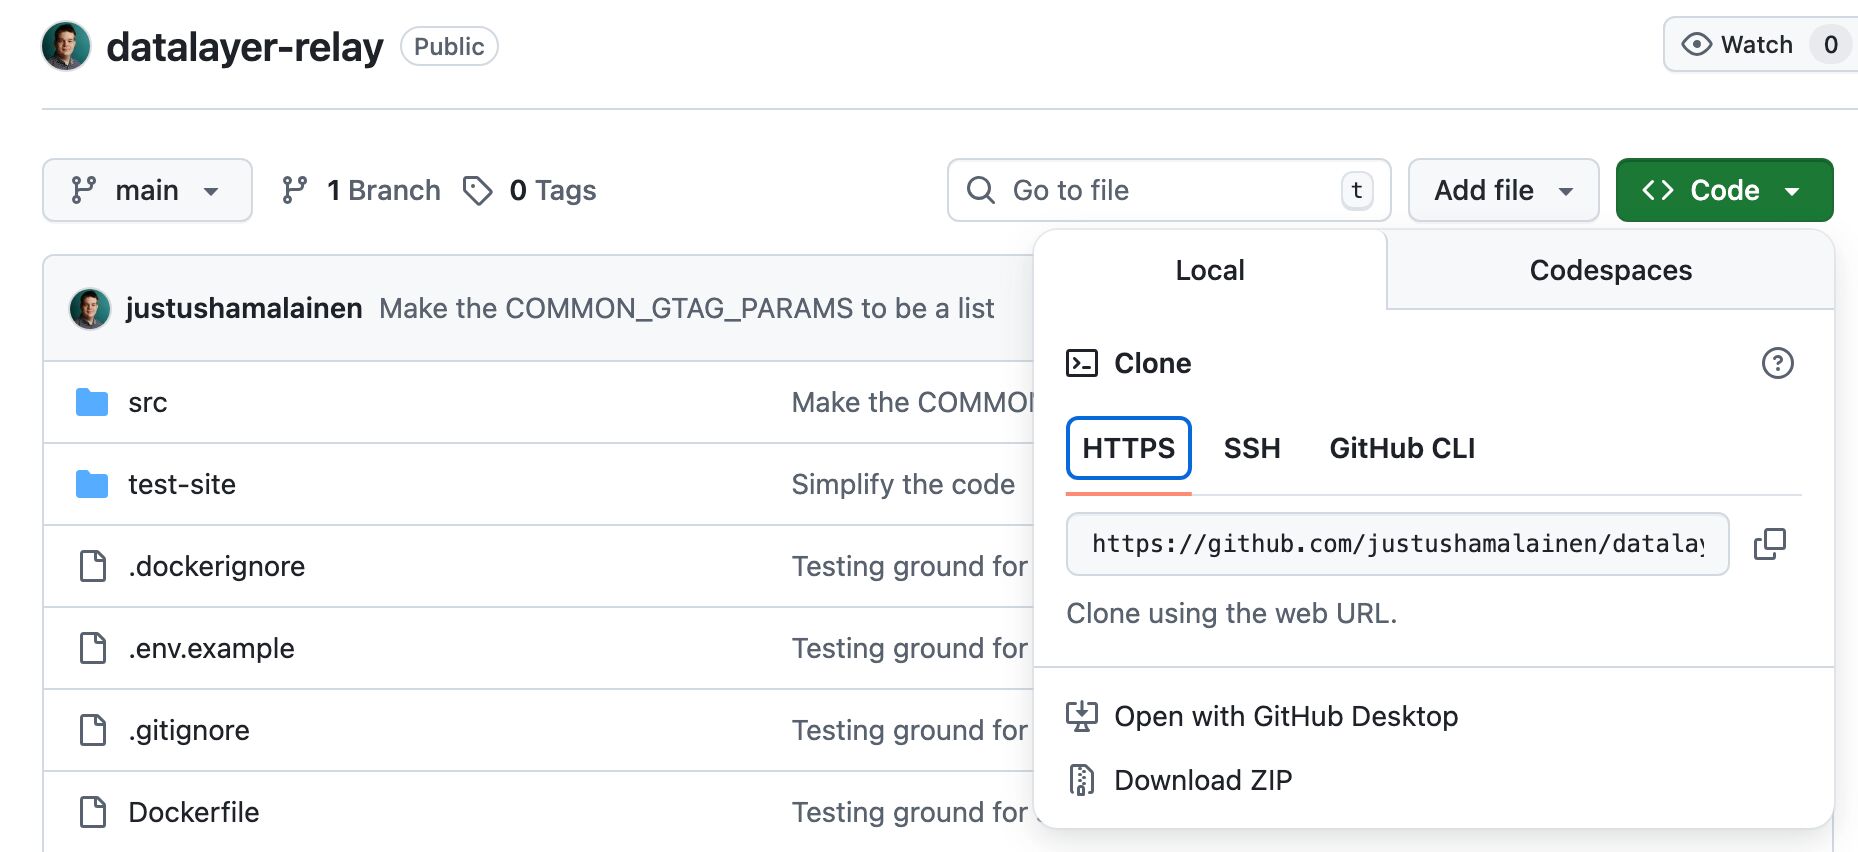
Once you have the repository cloned and Docker up and running, we can move on to configuring the deployment and actually running it.
Configure the environment
The first thing you’ll need to do is configure some environment variables.
First, in your terminal, copy the .env.example file into .env:
# Copy the example environment file
$ cp .env.example .env

# Edit with your actual values
$ nano .env
You can use whatever editor you’re comfortable with (I’m an Emacs guy).
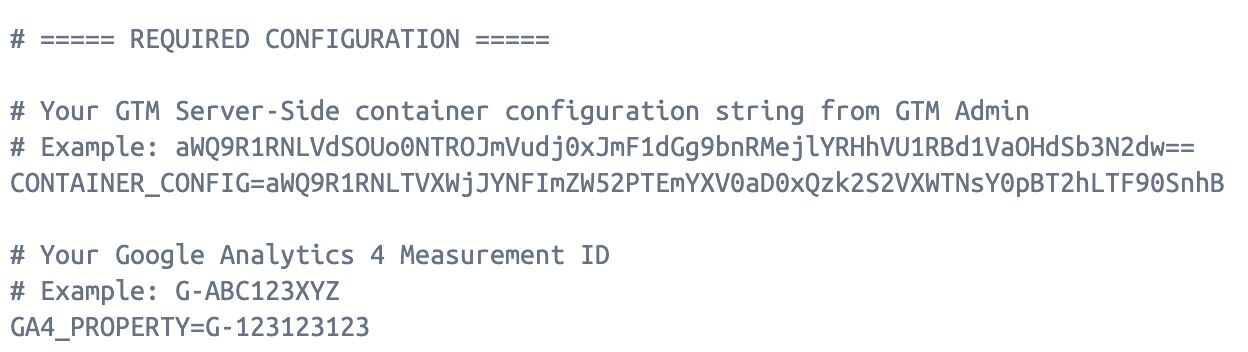
Next, set the container configuration string and the GA4 Measurement ID in the .env file.
# Get this from GTM Admin > Container Settings
CONTAINER_CONFIG=your_container_config_here

# Your GA4 Measurement ID (e.g., G-ABC123XYZ)
GA4_PROPERTY=G-ABC123XYZ
Once you’ve made the changes, save the .env file. Here’s what my configuration looks like:
Now that you have the environment prepared, it’s time to build the container image and run the stack.
Build the image and run the server
The easiest way to build the image is to open the terminal in Docker Desktop first:

The Docker Terminal is just like your own local terminal application, but it comes equipped with all the CLI tools we need to build the container image and run everything.
The cool thing is that you only need to run this step once. After the image is built, you can use the Docker Desktop UI for everything else.
Once the terminal is fired up, browse to the project folder on your local filesystem. There, run the command:
$ docker-compose up -d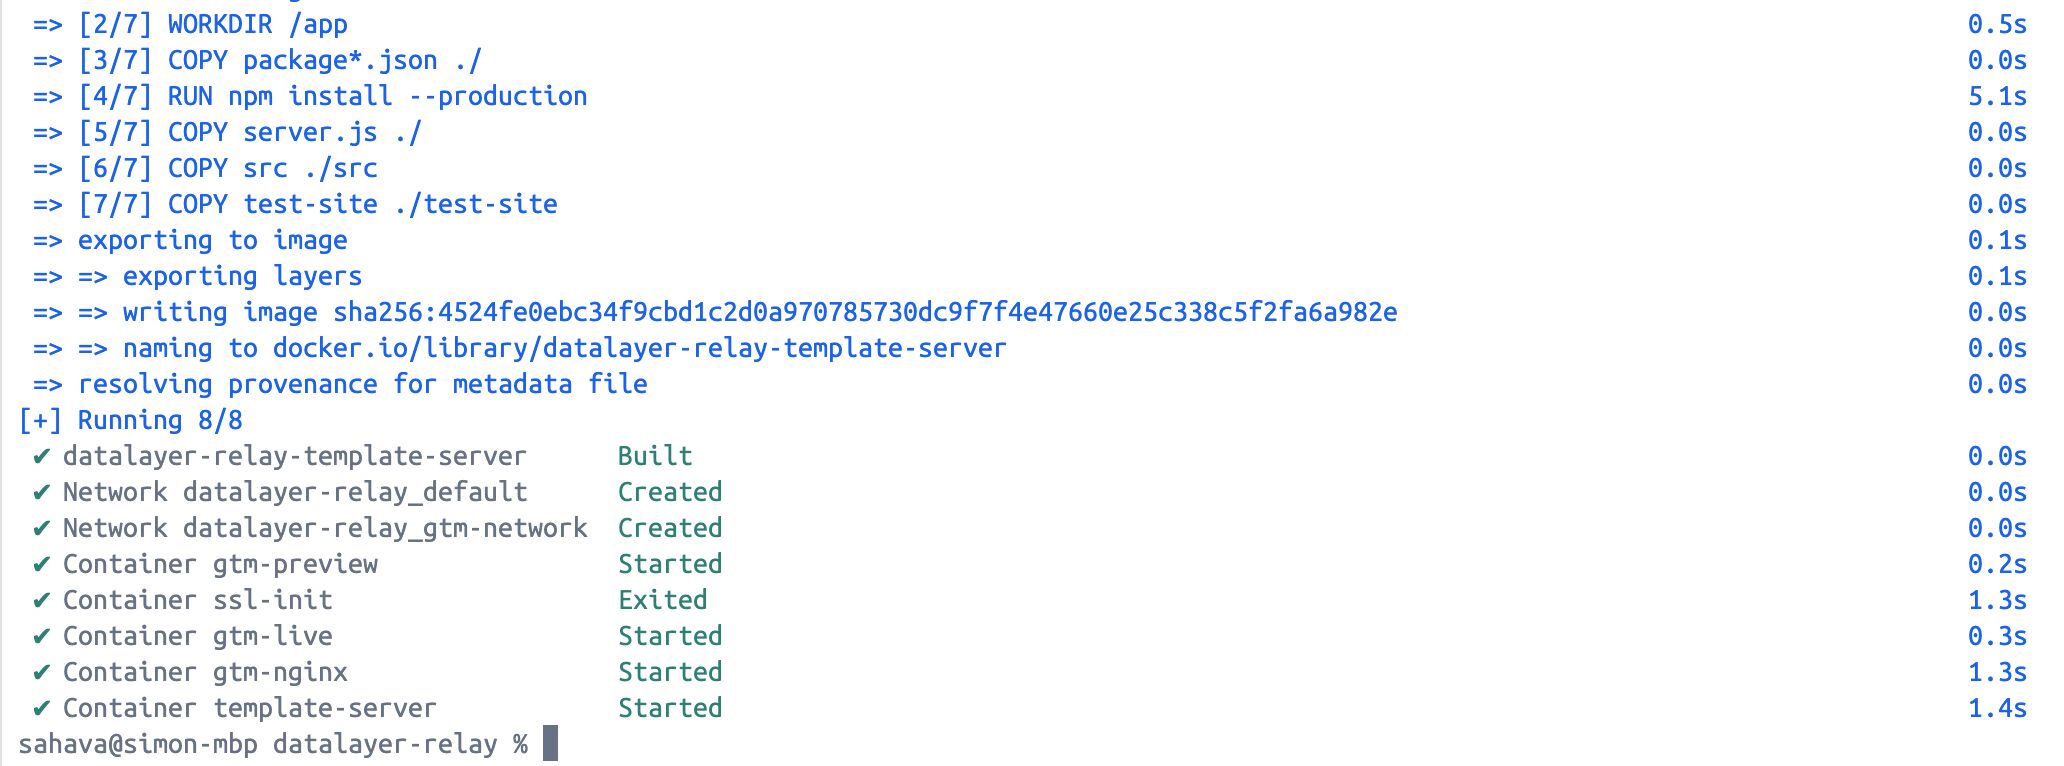
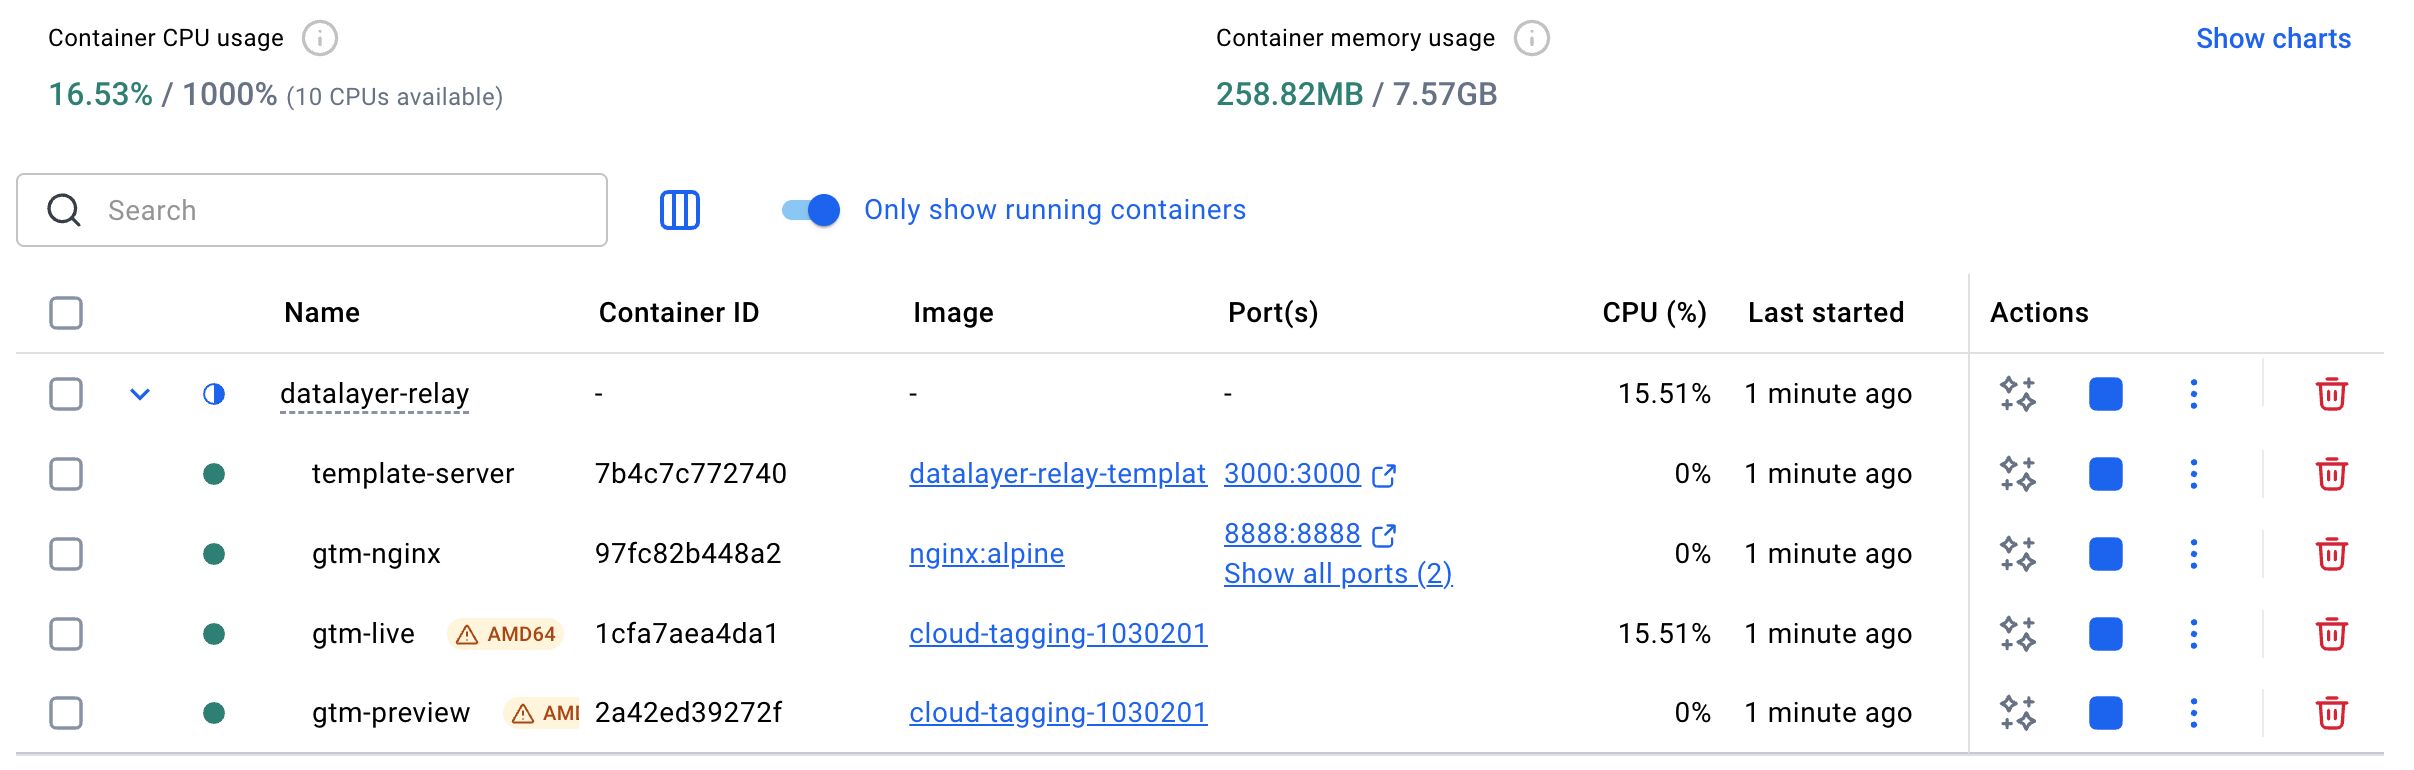
When the build steps are complete, you can open the Containers tab in Docker Desktop, and you should see datalayer-relay running.
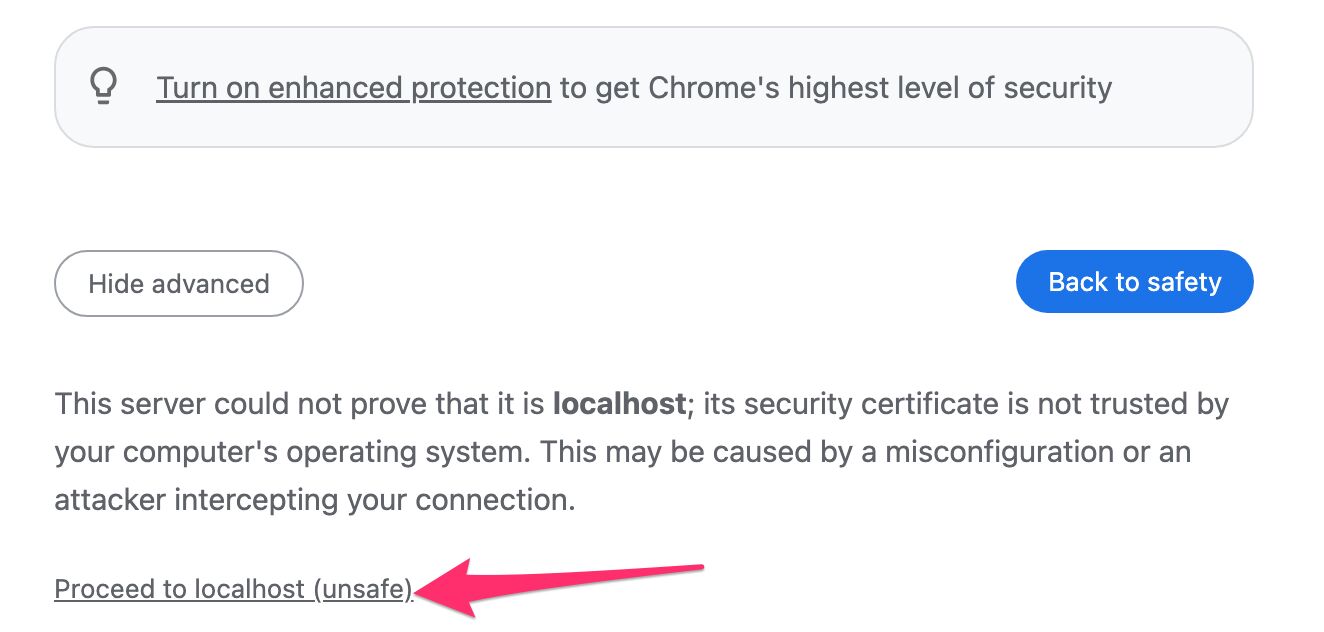
By default, the tagging server runs on https://localhost:8888 and the preview server on https://localhost:8889. Yes, both are behind SSL. The application automatically issues SSL certificates, but as they’re patched for localhost you might need to click through security warnings when you actually visit those URLs.
A quick check to see if everything works is to open a web browser and browse to both https://localhost:8888/healthy and https://localhost:8889/healthy. Both URLs should show the text ok as the content.
Open a preview window
Now that the servers are running, you can enter Preview mode.
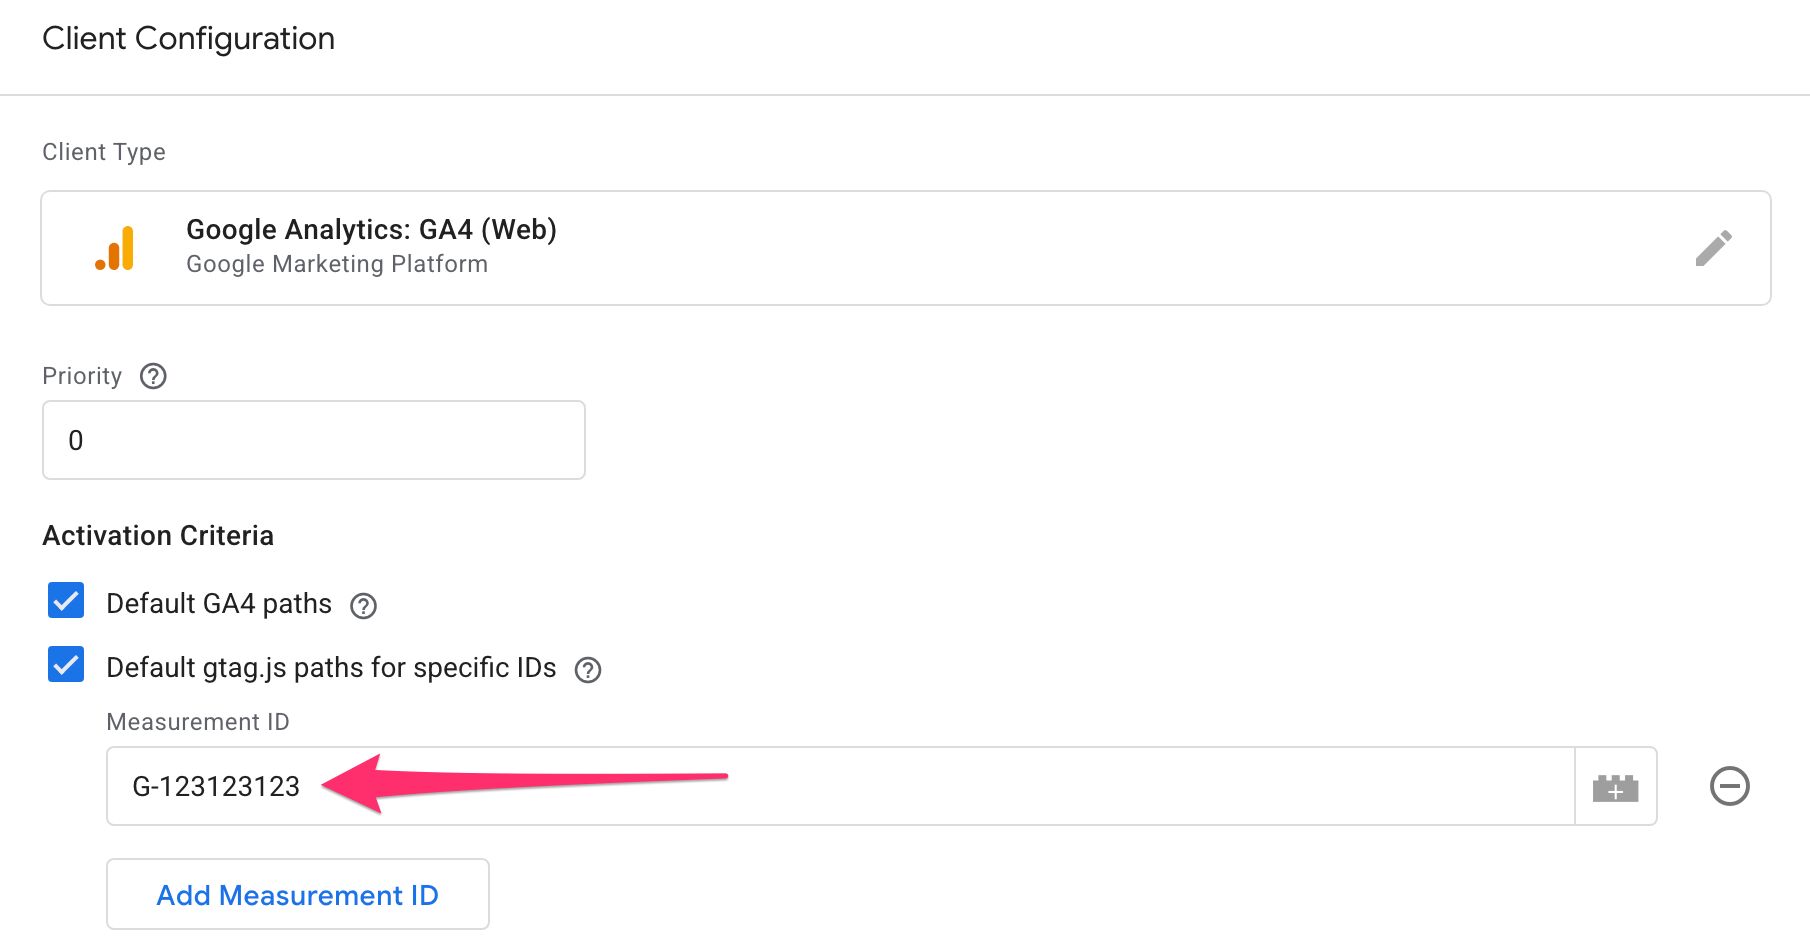
In a web browser, browse to your SGTM container and edit Admin -> Container Settings:

Save the changes, then go to your GTM Workspace and click the Preview Picker button.

Next, choose the localhost URL and then hit Preview. You should see Tag Assistant open in a new tab, with https://localhost:8888 as the host. Remember, you might need to click through browser security prompts as the SSL certificate doesn’t have proper authority.
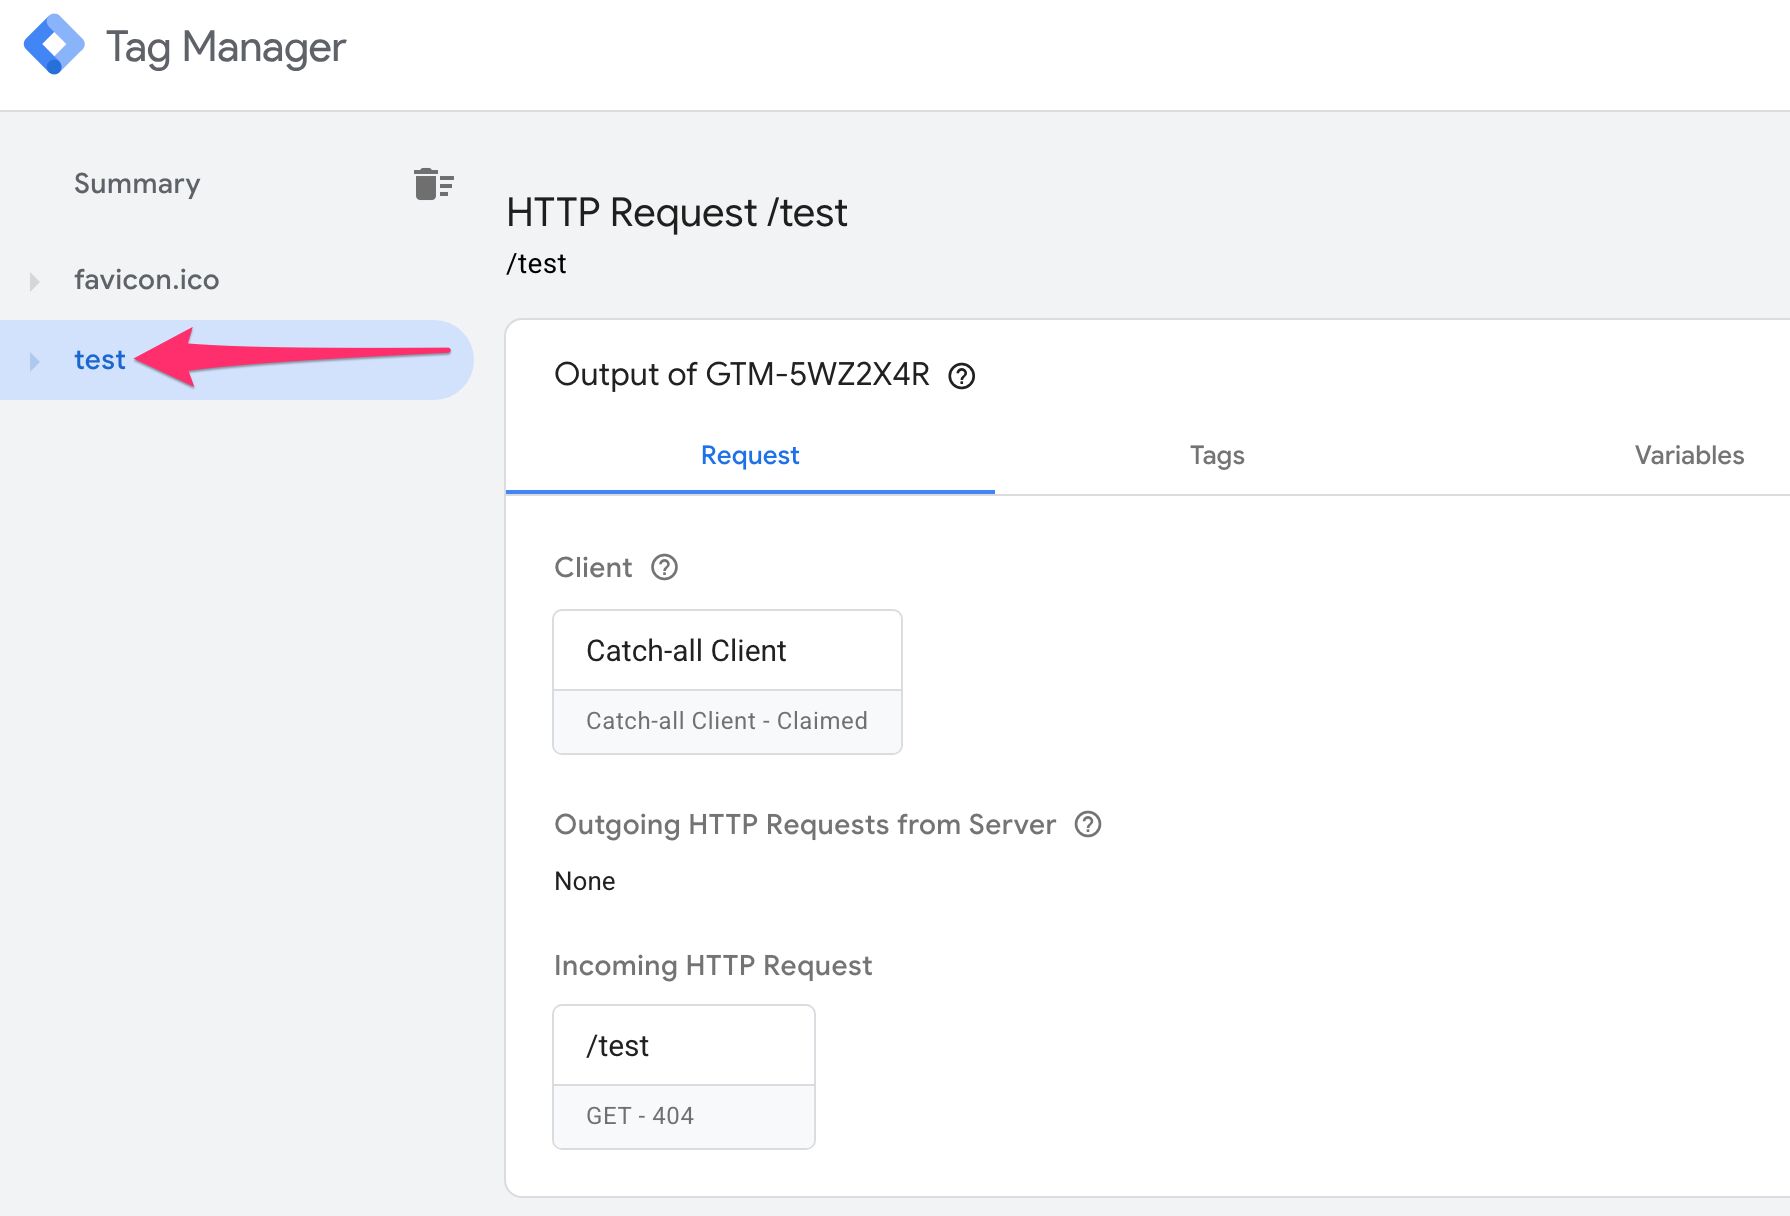
Now you can open a new tab and send a test request, for example by browsing to https://localhost:8888/test. If all works correctly, you’ll see the test path appear in Tag Assistant.
Congratulations! You now have server-side Google Tag Manager running locally.
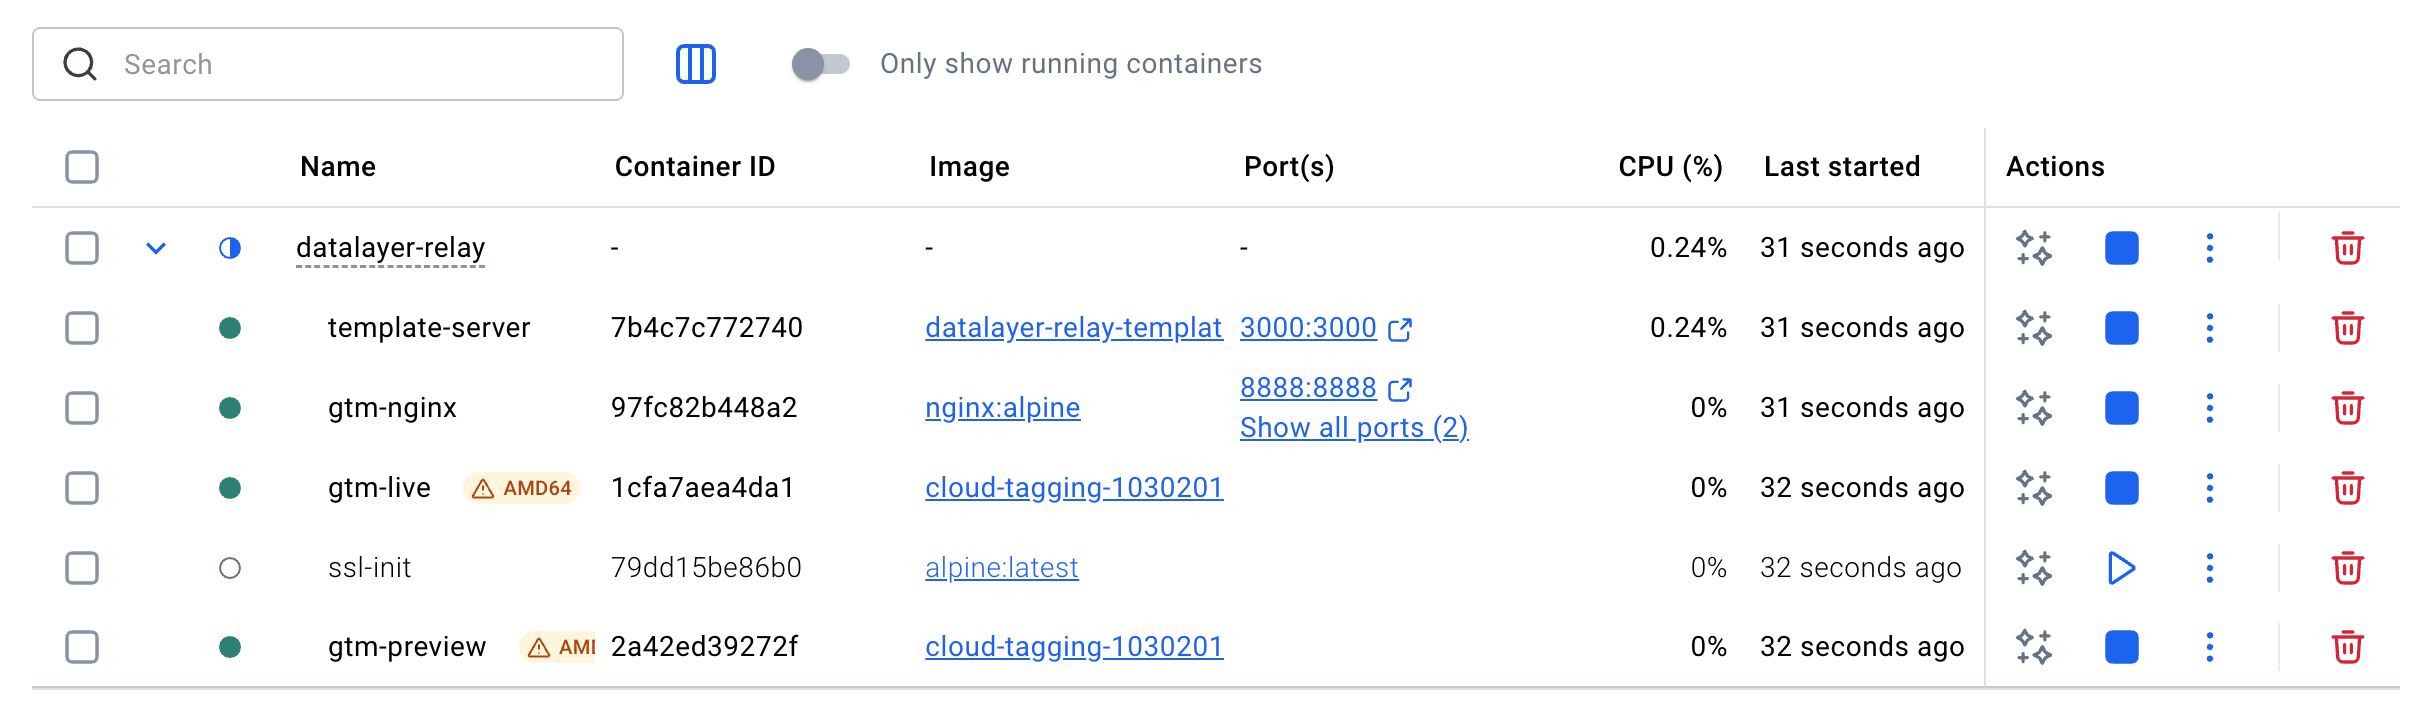
To stop / restart the server, all you need to do is go to Docker Desktop, and hit the stop / play button next to the datalayer-relay container stack:

Caveat
Because the server is running on a port (https://localhost:8888), you won’t be able to use the server_container_url setting in your Google Tag Manager tags or in your gtag configuration.
This is due to server_container_url stripping the port from the host before the event request is sent. Interestingly, you can load the gtag.js library with the config command:
gtag('config', 'G-123123123', {server_container_url: 'https://localhost:8888'})
While this does work, any event request that follows will fail because it tries to send the request to https://localhost/.
I’ve reported this as a bug to Google. In the meantime, there is a workaround to use transport_url instead. It’s outdated tech at this point, and it does mean that not all server-side features are available, but just for event dispatch it works fine.
I’ve also suggested to Justus that the nginx reverse proxy could be configured to map a subdomain such as https://testing.your.website to the localhost address, so that you could mock requests to a custom subdomain without having to make any actual DNS changes. This would solve all problems because then you could configure your tags to use https://testing.your.website (or whatever domain you like) as the server_container_url endpoint.
How to use DataLayer Relay
As if building the localhost Google Tag Manager server wasn’t enough, Justus wrapped everything in a utility called DataLayer Relay (read the documentation here).
Once the Docker container is running, you can check the template website at http://localhost:3000 (That’s http, not https!):
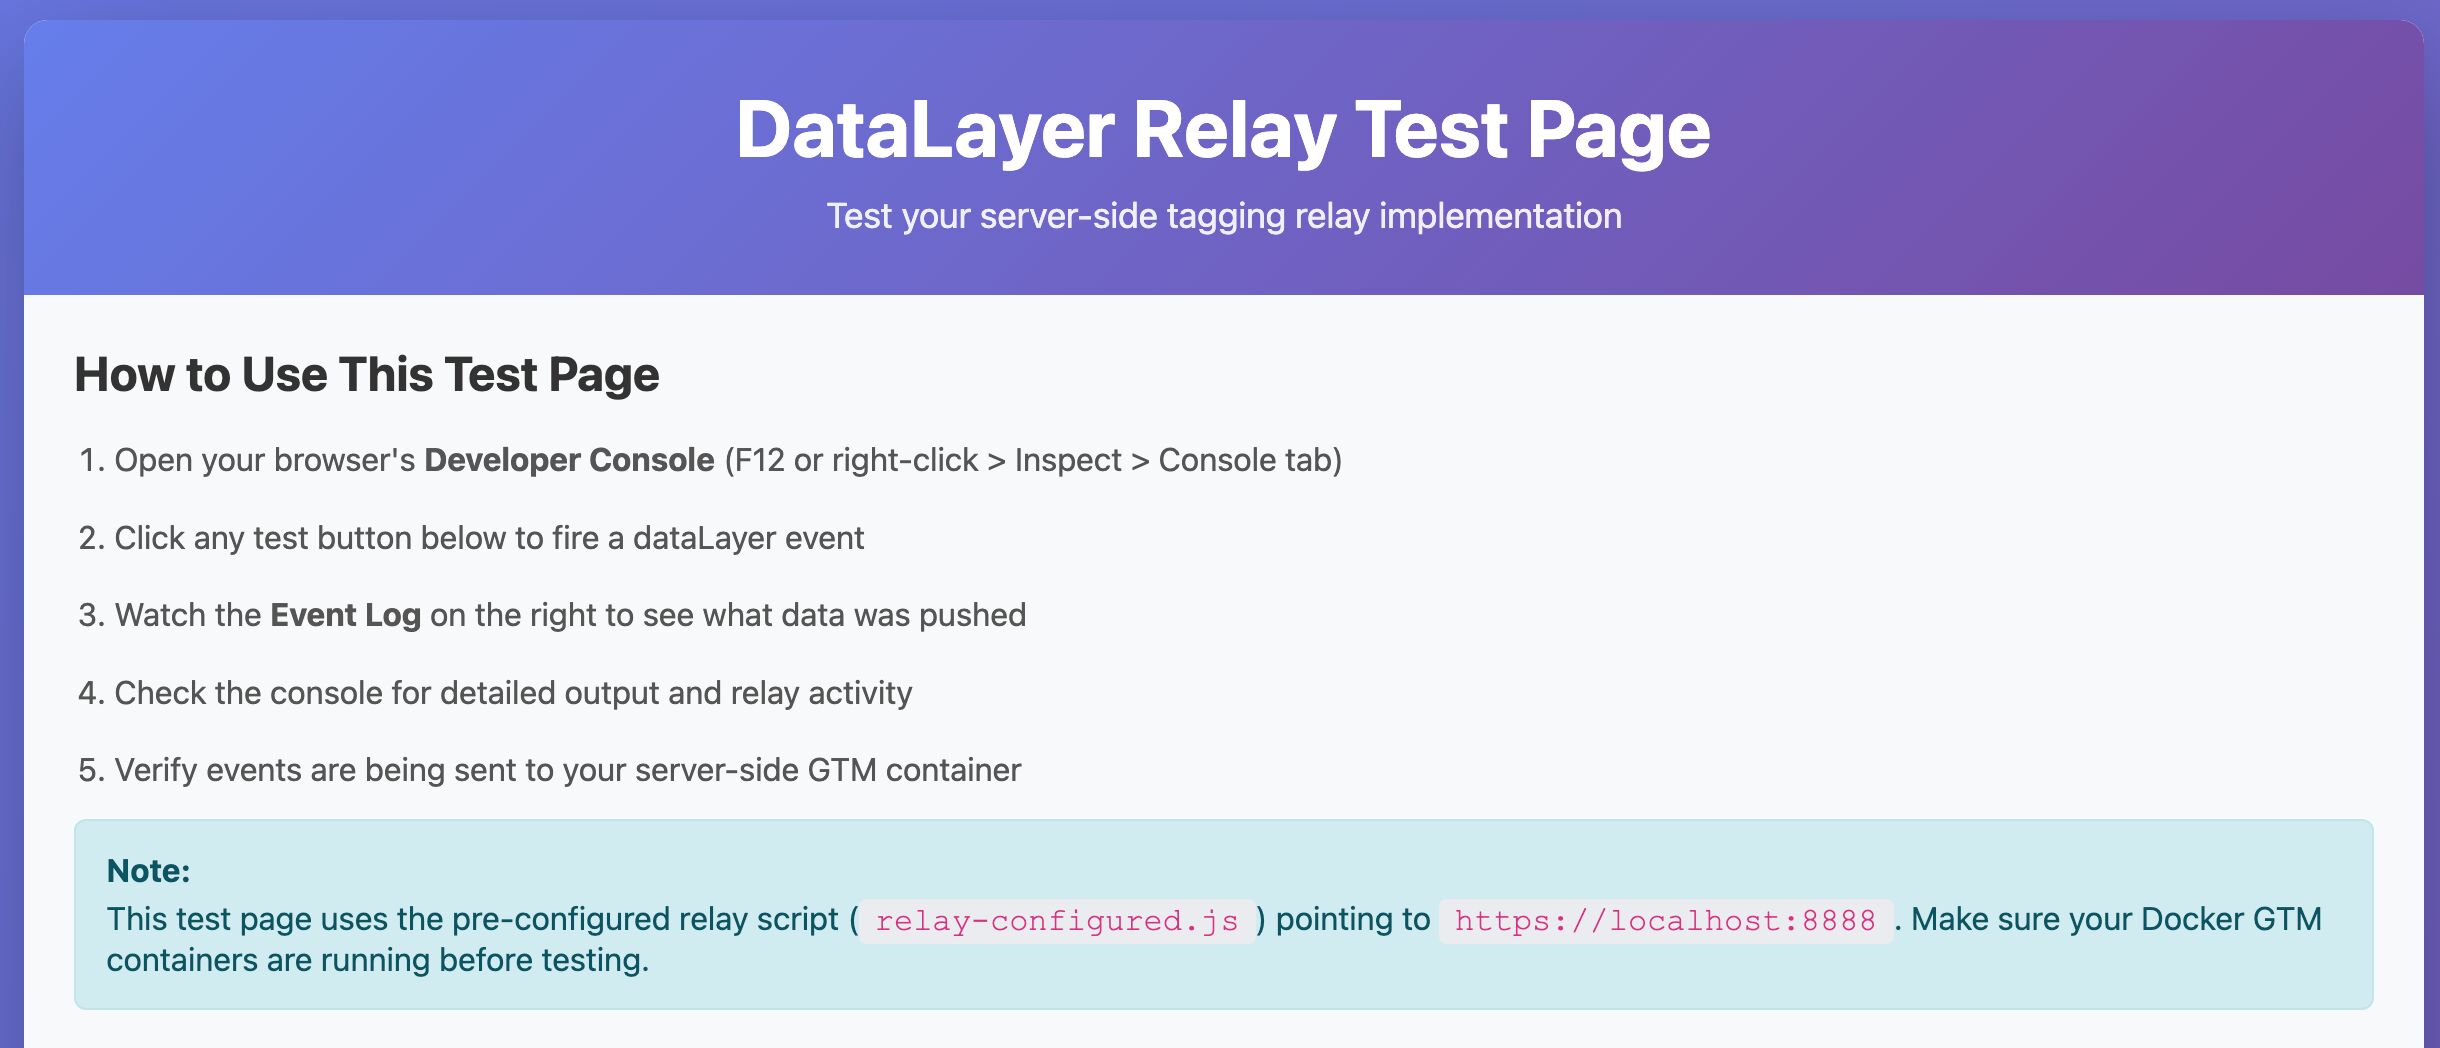
The purpose of DataLayer Relay is to automatically collect any and all dataLayer event objects into server-side GTM, using the GA4 data stream to dispatch them.
It’s a solution that relies entirely on a well-oiled dataLayer configuration.
It uses the GA4_PROPERTY and SERVER_CONTAINER_URL configuration entries in the .env file to build the requests. To generate the data stream, it uses a vanilla gtag.js installation, which means that you do not need to load a client-side Google Tag Manager container on the page. The gtag.js library is loaded from the server-side Google Tag Manager container, so make sure you edit the GA4 Client to allow library loads from the GA4 ID you added to the configuration.
You can click the buttons on the page to see what is pushed to dataLayer and what is ultimately transported to server-side GTM.
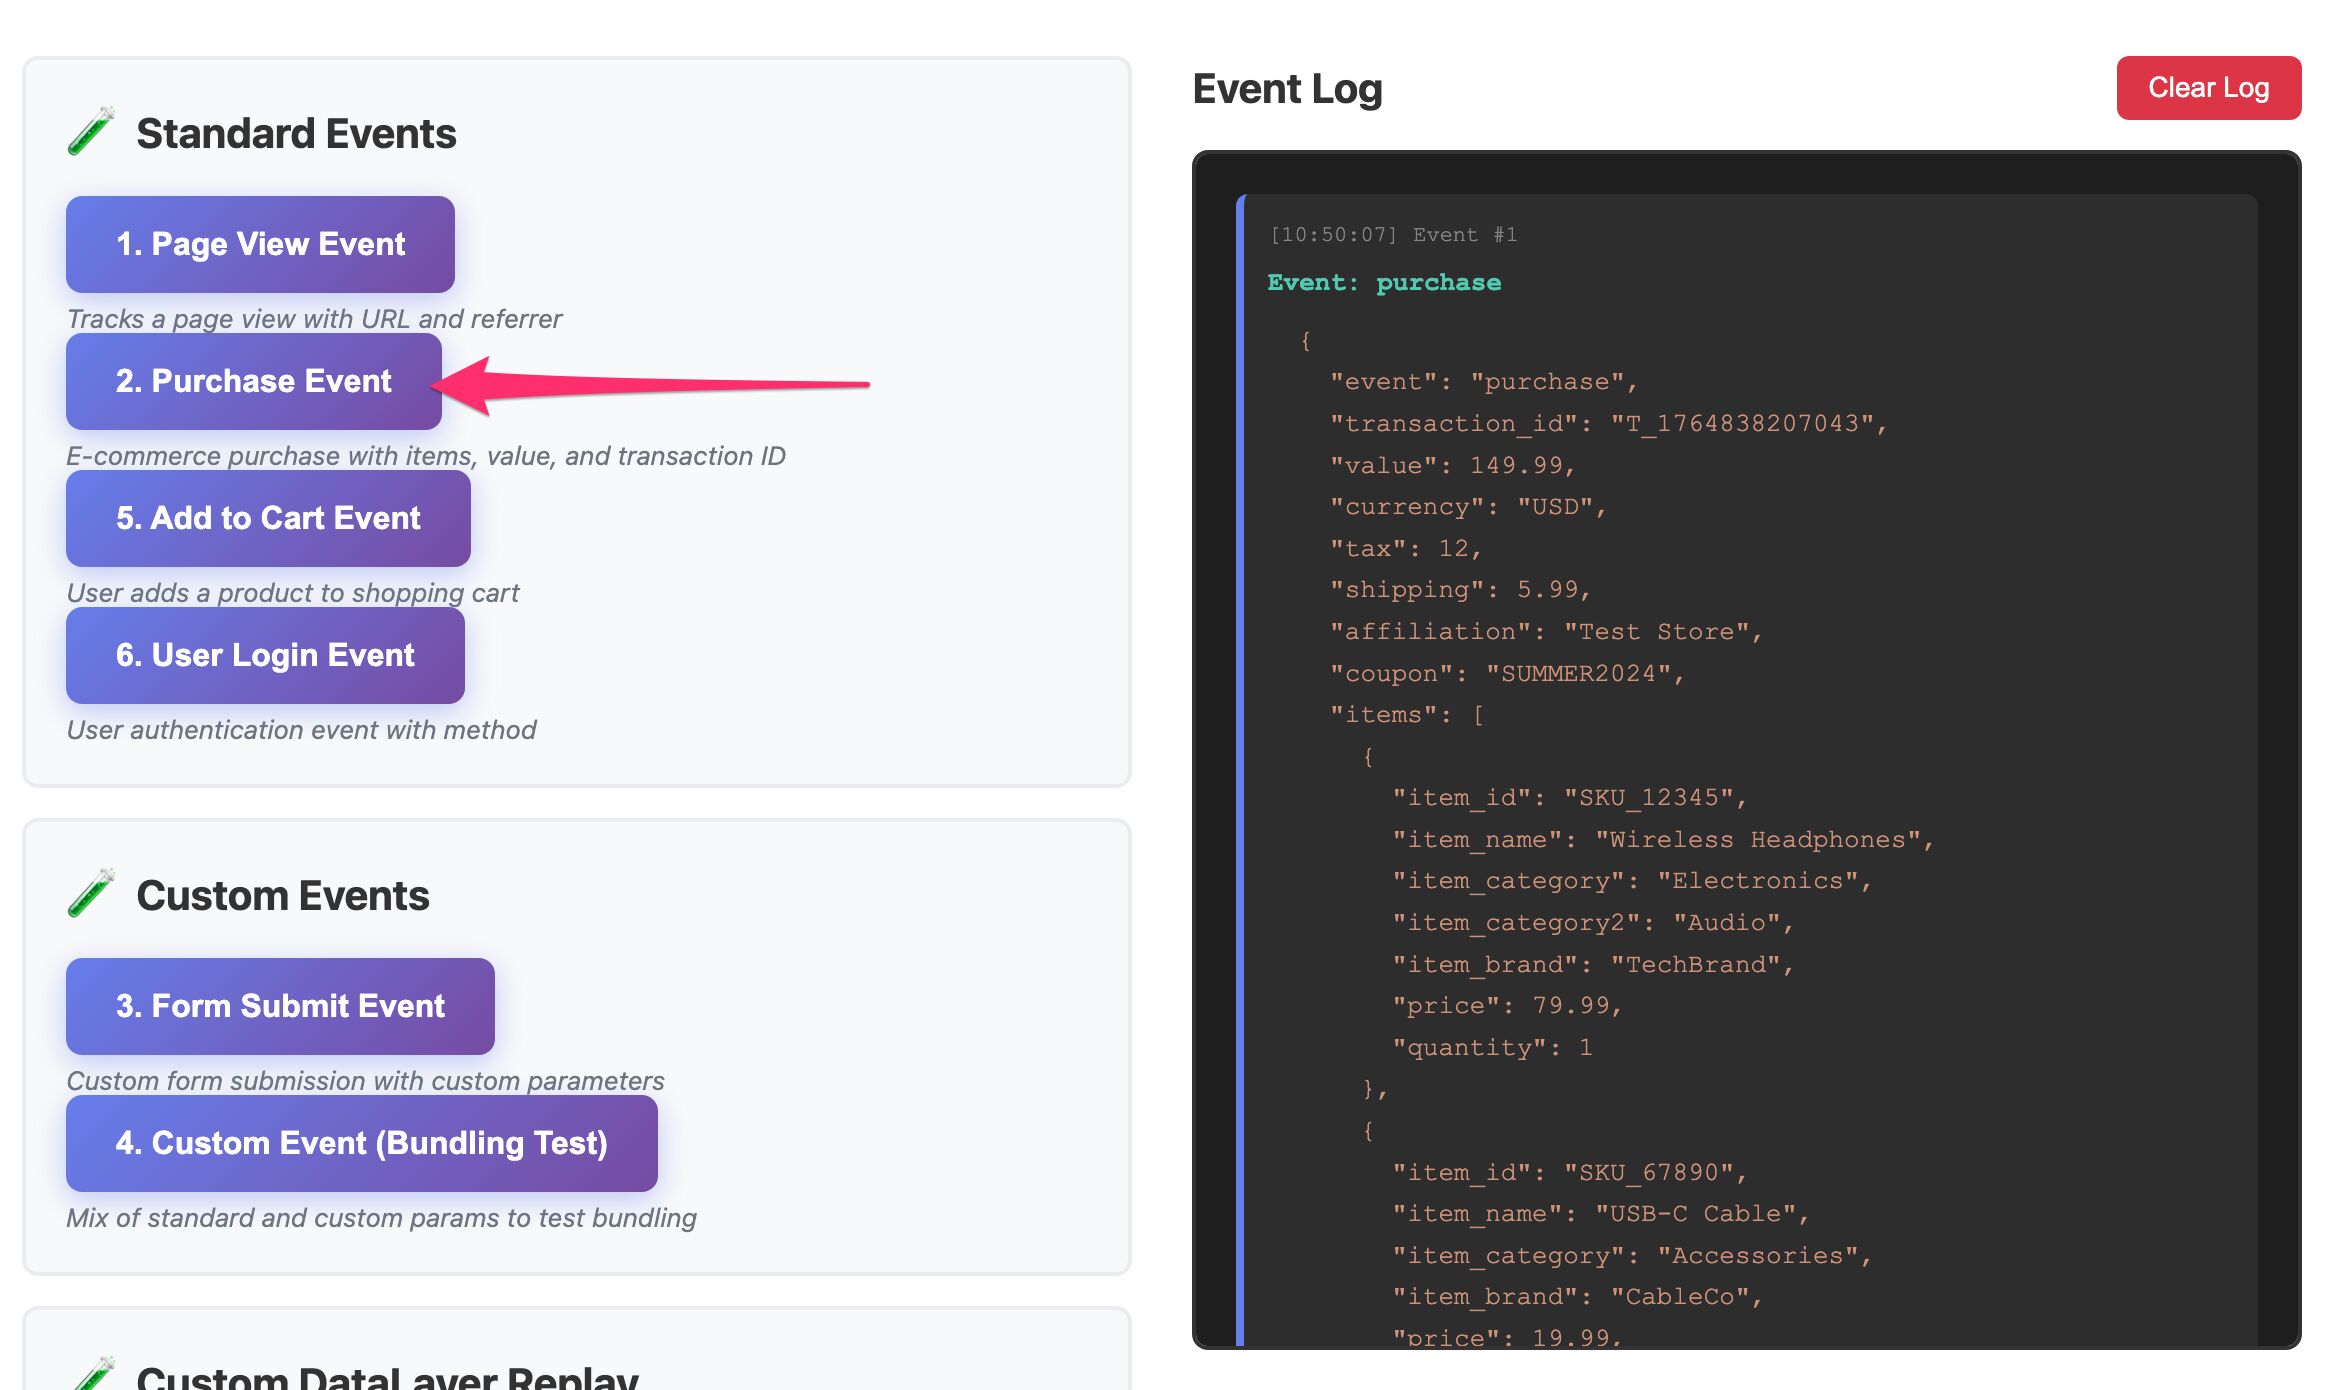
You can verify the result in server-side Google Tag Manager Preview mode:

The relay has some neat ideas, such as persistent fields, which lets you configure certain event parameters so that they automatically persist in all gtag() calls that are done during that page load.
Consult the documentation to see all the cool things you can do with DataLayer Relay.
In my view, this can be a very handy tool for sites and/or developers who don’t want to run a client-side Google Tag Manager web container instance and who are confident that their dataLayer configuration is comprehensive enough to not require any customizations through client-side tag management.
This does place the burden of deployment on the server-side Google Tag Manager container, and depending on what kinds of marketing data streams you want to manage, it might lead to a complex mess of transformations, triggers, and customizations.
Summary
While the solution itself is called datalayer-relay, the substance here is in running server-side Google Tag Manager locally.
Investing in an entry-level cloud stack or hosting provider is one option, but if you want to build your server-side tagging configuration locally at your own pace, without having to worry about hosting costs, a local instance makes a lot of sense.
If you follow the steps of this guide and consult Justus’ documentation, setting up the local instance should be very easy. It’s also a great way to get your feet wet with local Docker development!
Do make sure you check out the DataLayer Relay solution, too, as it comes packaged with this setup. Browse to http://localhost:3000 and see how dataLayer events can be directly transported to server-side Google Tag Manager for distributing to your marketing vendor partners.
Let me know in the comments if you have any questions!
