Automated Tests For Google Tag Manager's dataLayer
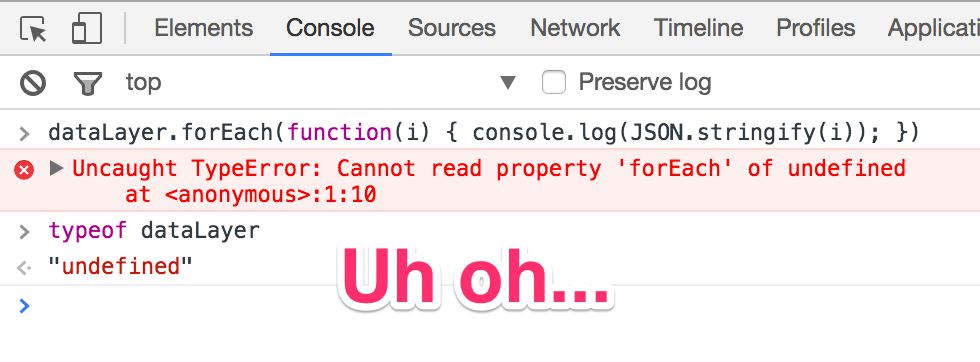
One of the biggest fears I have as a Google Tag Manager user is a broken release of the website (or app) on which I have deployed GTM. Far too often, lack of proper communication practices within an organization lead to a release being pushed out without thoroughly testing how this release impacts any existing tracking solutions.
Luckily there are ways to mitigate this. The most significant and impactful precautions you can take are all about process:
-
Be active in the daily development team work.
-
Introduce “analytics” as an item in the definition of done of each release.
-
Educate the developers on what Data Layer is and how a proper GTM deployment hinges on a stable Data Layer.
In addition to these, there are technical measures you can employ to further eliminate the risk of things breaking down when a new release is pushed into the wild.
Unit tests should be used to test the code itself, verifying that a given input always produces an expected output. When testing dataLayer, this is especially important for any objects you write into the page template, as they are mostly code-driven and do not depend on user input.
However, if you only ran unit tests it would be difficult to cover the variety of things that can happen in the web browser. That’s where functional tests come into play, and those will be the focus of this article.
With functional tests, you are actually running tests on a “real” implementation of the website. Typically this means having a version of the site running on localhost or a staging environment, and then using a “virtual” browser, typically deployed via a framework such as Selenium, to perform the actual test steps.
To save you time and trouble, I have written an open-source, self-contained functional test suite for Google Tag Manager’s dataLayer called, imaginatively, gtm-datalayer-test.
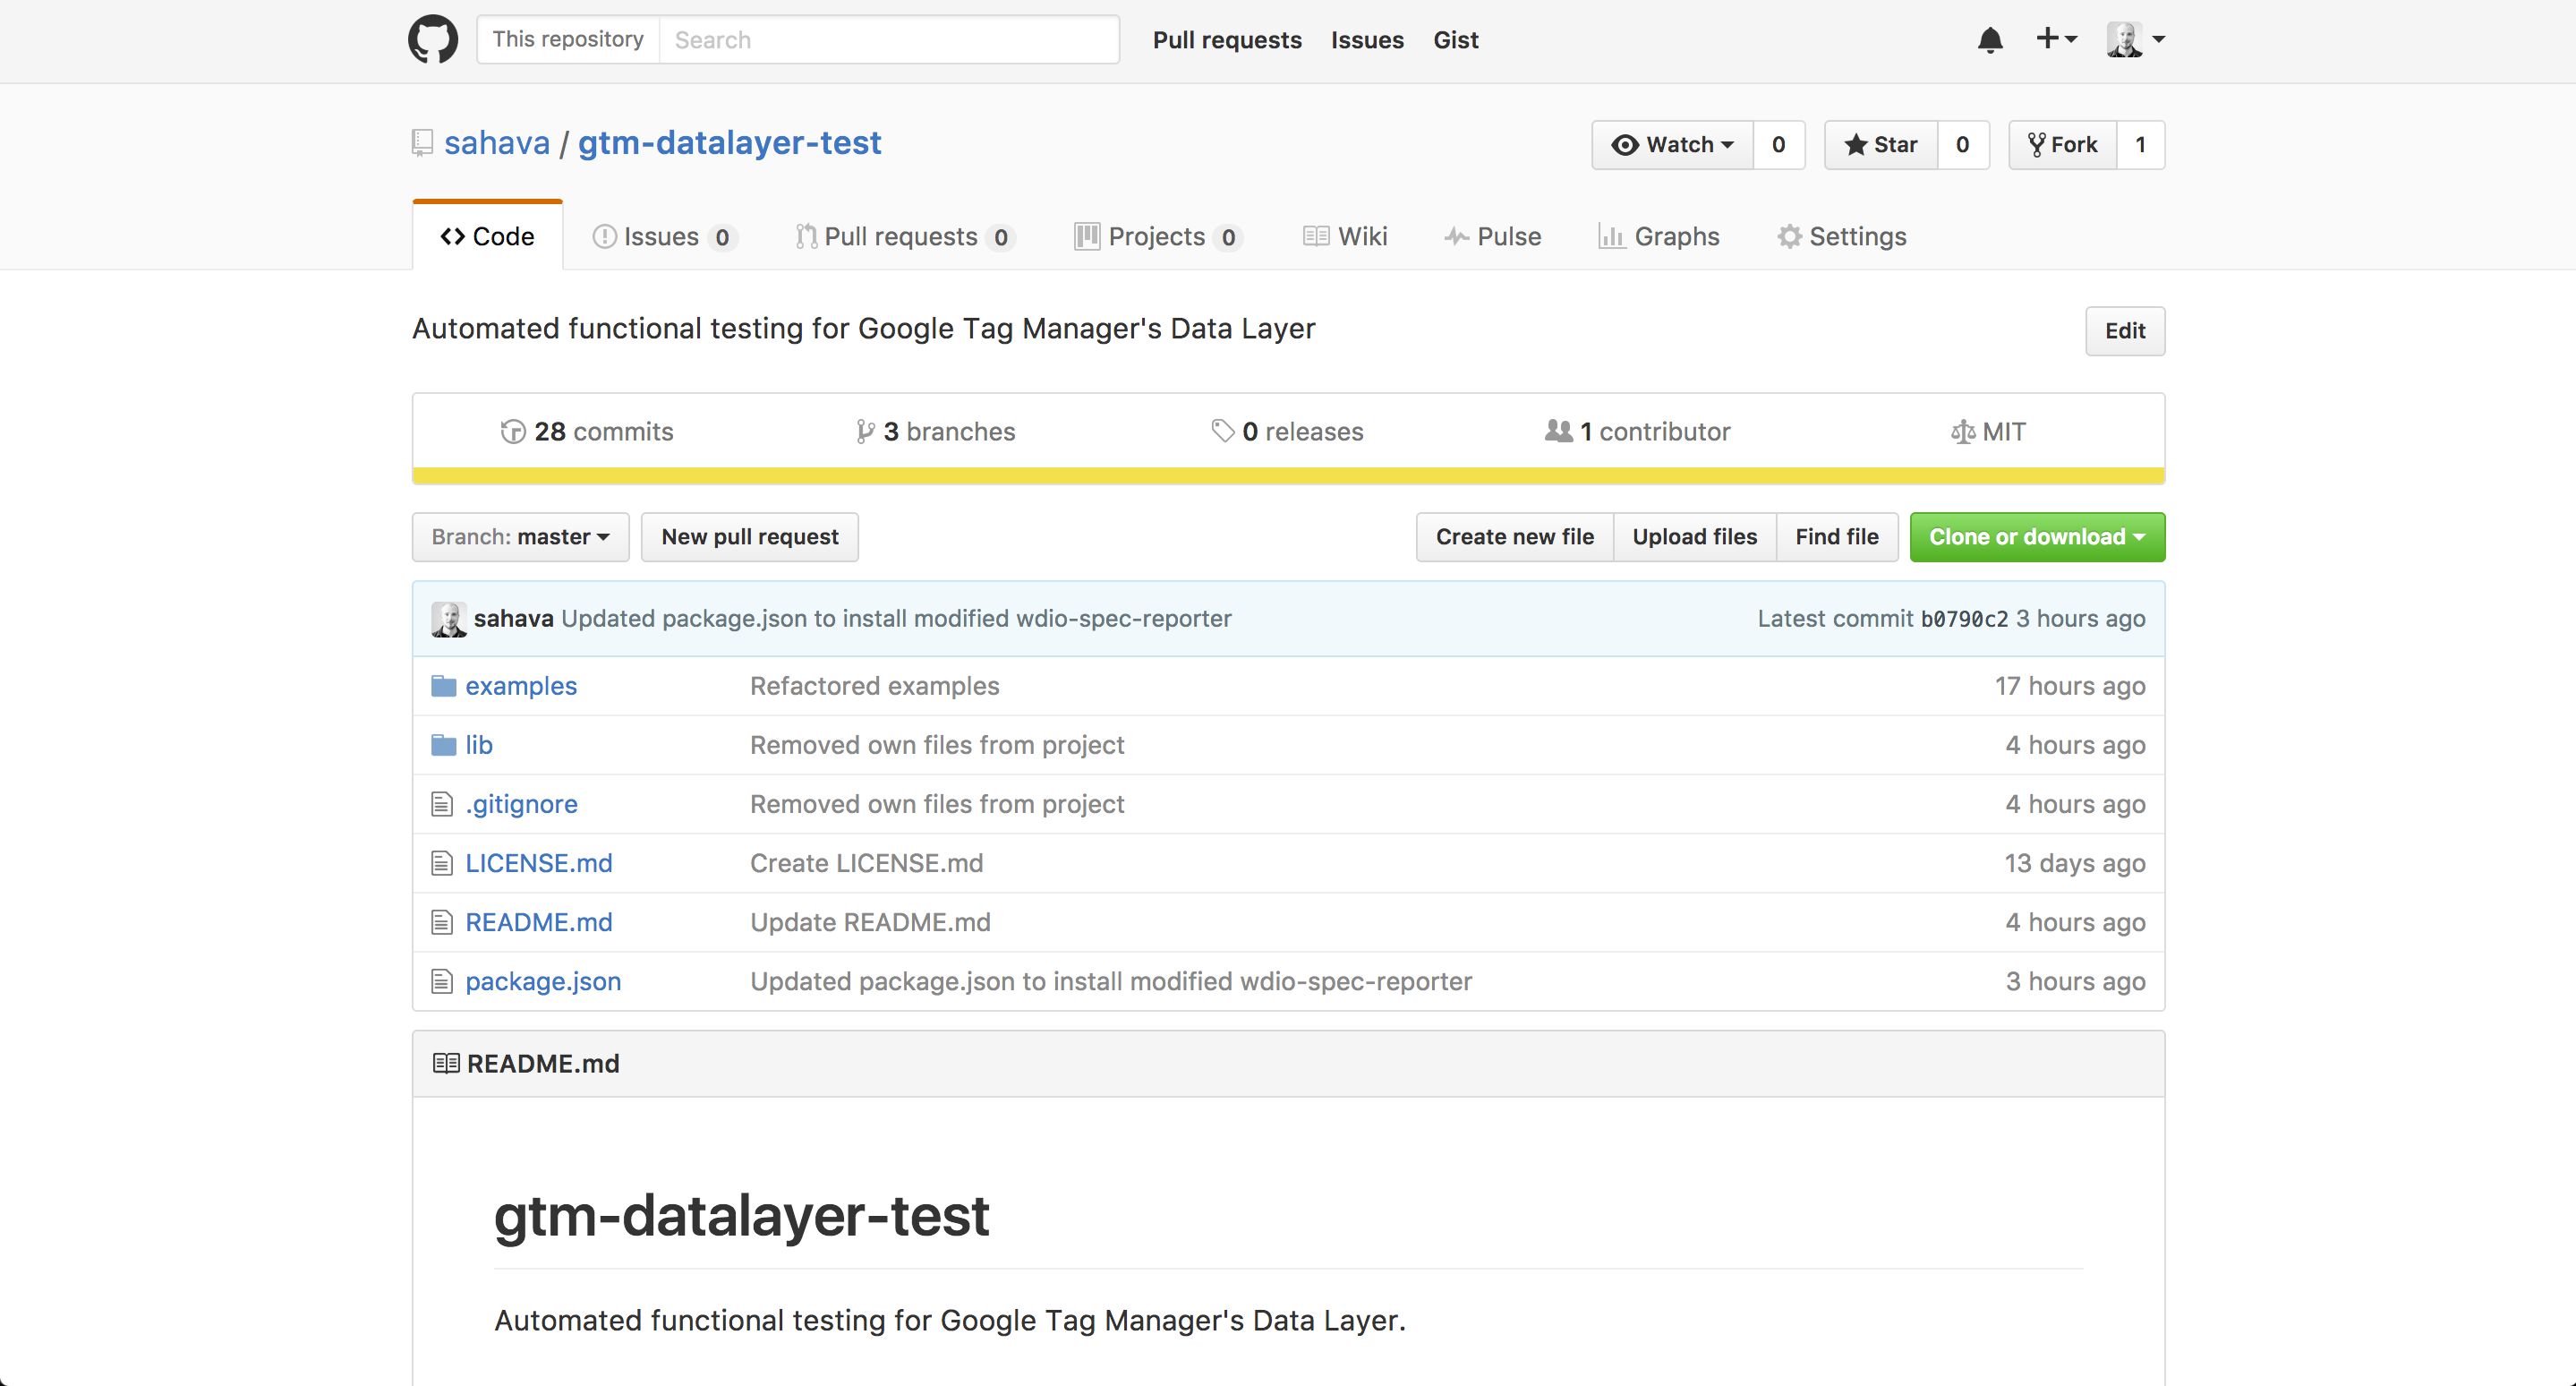
Visit the GitHub repo for gtm-datalayer-test.
The rest of this guide covers how the solution works.
Table of Contents
The Simmer Newsletter
Subscribe to the Simmer newsletter to get the latest news and content from Simo Ahava into your email inbox!
Credit
First credit where credit is due. The solution proposed in this article isn’t ground-breaking in any way, shape or form. Using JSON to control processes is very common in the development world, and there are many test frameworks that directly support JSON validation for tests.
A direct inspiration to this article is Jan Exner’s work with a TDD setup for Adobe Analytics and DTM. You should take a look at the related GitHub repo, where you’ll find that it has many similarities to gtm-datalayer-test.
As often happens, David Vallejo’s been an important brainstorming partner for building the test suite. I hope he will be a regular contributor to the project!
Elevator pitch
The elevator pitch for this solution is this:
gtm-datalayer-test is a functional testing solution for the global
window.dataLayerqueue used by Google Tag Manager. Tests are defined, executed, and reported using a special JSON configuration file, which validates against the latest draft of the JSON Schema standard. The solution can be used to manually or automatically test ifwindow.dataLayerhas an expected structure. This is crucial especially when new releases of the website are pushed live.
1. Get it up and running
First, let’s get things up and running. Before you start, you will need the following things:
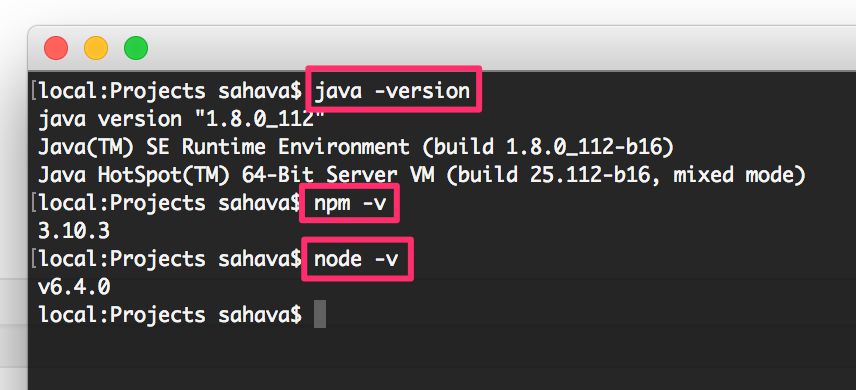
Once you have these installed, you should be able to run the following commands in your terminal and get a valid result for each:
-
java -version -
npm -v -
node -v
Once you’ve installed these successfully, you can get gtm-datalayer-test up and running by executing the following commands. Run the first command (git clone) in a directory where you want the gtm-datalayer-test project directory to be established.
-
git clone https://github.com/sahava/gtm-datalayer-test.git -
cd gtm-datalayer-test -
npm install -
npm test
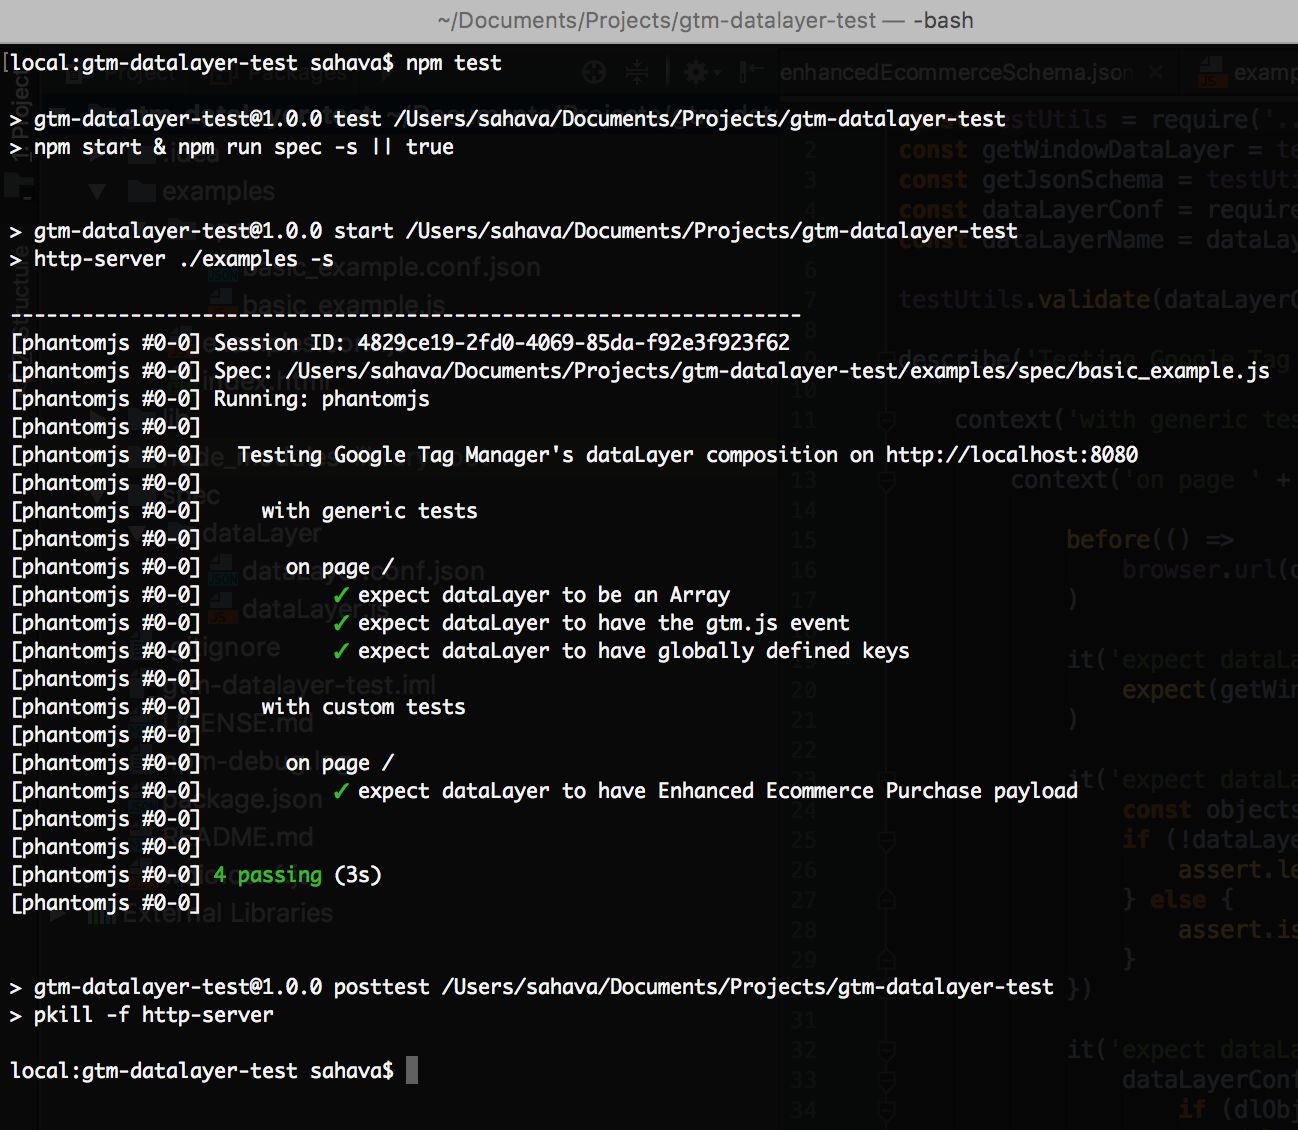
When running the final command, you should see something like this:
With git clone ..., you pulled the source code from my GitHub repo into a directory named gtm-datalayer-test, which is where you then navigated to in the second step.
Next, by running npm install, npm (package manager for Node) runs through all the dependencies listed in the package.json file, and installs them locally to the project. This is very important, as without these dependencies the code itself is useless.
Finally, by running npm test, you are executing an npm script specifically written for this project. It first starts a simple web server, after which it runs the automated dataLayer tests against a mock index.html file on that server. Finally, it outputs the results of the test into the console.
The following chapters explore each of these steps in more detail.
2. Technology stack
Node.js and npm give you a wealth of pre-built modules to work with when building your web application. I mean, you could write everything from scratch, but you’ll end up spending more time, energy, and hair trying to do the stuff that existing npm packages already perform much more efficiently.
This project uses the following technologies / dependencies / packages:
-
Node.js and npm as the server tech and package manager, respectively.
-
Java to run Selenium.
-
ajv for validating the custom test JSON Schemas.
-
chai as the test assertion library.
-
chai-json-schema to provide custom assertions for JSON Schema validation.
-
chai-subset for performing subset checks against
window.dataLayer. -
http-server to act as a light-weight HTTP server for testing purposes.
-
wdio as a test runner, built on webdriverio.
-
wdio-mocha-framework to enable Mocha as a test framework.
-
wdio-phantomjs-service for installing and running the PhantomJS headless browser.
-
wdio-selenium-standalone-service for installing and running the Selenium framework.
-
wdio-spec-reporter (forked from the original) as a custom spec test reporter.
-
webdriverio for running Selenium via Node.js.
You don’t have to know what these modules do, but by looking at the list, one thing should jump out: I’m gunning for a self-contained solution here. I’m sacrificing customization for ease of use, but even in doing so the modularity of gtm-datalayer-test hasn’t been compromised. All the packages above contribute to the framework I have built, but nothing’s stopping you from extracting just some components and integrating them into your own test suite. In fact, I strongly recommend you do so if you already have a functional testing framework set up!
As you might have gathered, the whole thing runs on JavaScript. There’s not much you need to customize, but if you do wish to get your hands dirty, some knowledge of JavaScript, especially ECMAScript 6 and Node.js, is required.
3. How it works
Each test setup comprises some moving parts. There’s the wdio configuration file you feed to wdio, there’s the JavaScript test spec itself, and then there’s a configuration JSON you use to define your expectations for each test.
3.1. wdio configuration file
This solution uses WebdriverIO to manage much of the legwork. WebdriverIO offers a bunch of bindings we can use together with the virtual browsers operated by Selenium. Together with Selenium, WebdriverIO gives us all the tools we need to define, execute, and report on tests we want to run on any given application or web property.
To make running WebdriverIO as smooth as possible, we use a module called wdio to run the tests. The great thing about wdio is that it’s very extendable, and there are already lots of great modules and plugins we can use with it to make our setup purr.
The wdio configuration JavaScript is basically what runs this whole show. The JavaScript exports a config object, which holds all the settings you want to define for the test. This includes what browser drivers you want to use, in which directories to look for spec files, what test runner to use, etc.
You can find the example configuration, used when running npm test, in the ./examples directory, with the name examples.conf.js. Here’s what it looks like:
const enhancedEcommerceSchema = require('../lib/enhancedEcommerceSchema.json')
exports.config = {
    specs: [
        './examples/spec/basic_example.js'
    ],
    maxInstances: 10,
    capabilities: [{
        maxInstances: 5,
        browserName: 'phantomjs',
        'phantomjs.binary.path': './node_modules/phantomjs-prebuilt/bin/phantomjs'
    }],
    sync: true,
    logLevel: 'silent',
    coloredLogs: true,
    bail: 0,
    waitforTimeout: 10000,
    connectionRetryTimeout: 90000,
    connectionRetryCount: 3,
    services: ['selenium-standalone'],
    seleniumInstallArgs: {
        version: '3.0.1'
    },
    seleniumArgs: {
        version: '3.0.1'
    },
    framework: 'mocha',
    reporters: ['spec'],
    mochaOpts: {
        ui: 'bdd'
    },
    before: function() {
        const chai = require('chai');
        chai.use(require('chai-json-schema'))
        chai.use(require('chai-subset'))
        chai.tv4.addSchema('/enhancedEcommerceSchema.json', enhancedEcommerceSchema)
        global.expect = chai.expect
        global.assert = chai.assert
    }
}
First, be sure to check here for the full range of options you can set in the configuration file. It’s a good idea to familiarize yourself with the available options, since you’ll definitely need to modify some of them when extending these examples to your actual use cases.
const enhancedEcommerceSchema = require('../lib/enhancedEcommerceSchema.json')
This command loads a custom Enhanced Ecommerce JSON Schema which you can refer to when you want to test if your dataLayer has valid Enhanced Ecommerce objects within. There’s more on this in a later chapter.
specs: [
    './examples/spec/basic_example.js'
]
Use the specs keyword to list the locations with test files you want wdio to run through. Whenever you run wdio without the --spec command-line parameter, it will run through all the tests listed in this array.
You can use wildcards, too. For example, all my tests are stored in various places within a directory named /spec/. To get wdio to run through all tests within, regardless of directory or file name, my specs configuration looks like this:
specs: [
    './spec/**/*.js'
]
This means that in the director /spec/, look through all the files and directories for any items that have the .js extension, and use them as test specifications.
capabilities: [{
    browserName: 'phantomjs'
},{
    browserName: 'chrome'
}]
This is where you define the browser instances you want to fire with each test. Basically, any browser you list here will be launched when the test runner starts, and the tests will be run through each respective browser. Chrome, Firefox and PhantomJS have support out of the box in gtm-datalayer-test.
By the way, PhantomJS is a very popular headless browser. Basically, it’s a browser without a graphical user interface. It’s thus a very lightweight, quick solution for running your tests on. However, with every major release you should probably run the tests through “real” browsers, too.
framework: 'mocha',
reporters: ['spec']
Here you define that you want to use Mocha as the test framework, and spec as the reporter. With wdio, you can also use Jasmine or Cucumber instead of Mocha. You also have a bunch of reporters to choose from, or you can build your own (quite simple, actually). For more details, see here for test frameworks and here for reporters.
before: function() {
    const chai = require('chai');
    chai.use(require('chai-json-schema'))
    chai.use(require('chai-subset'))
    chai.tv4.addSchema('/enhancedEcommerceSchema.json', enhancedEcommerceSchema)
    global.expect = chai.expect
    global.assert = chai.assert
}
The before hook is executed before any test specs are run. In this hook, I basically tell wdio to use Chai as the assertion library of choice. Chai is a very popular assertion library, and it’s often used together with Mocha to provide a more expressive language for describing your tests. You can use any assertion library you want, or you can use the default Node.js assertion library, if you wish.
Again, remember to read through the wdio documentation. It’s very important to understand what you can customize and how. I hope to add more examples to the GitHub repo in the future, but I still recommend you take a look at the documentation.
3.2. JavaScript test specification
Because this is a self-contained solution (or so I hope), you don’t really need to touch the JavaScript test spec at all. The whole thing is orchestrated with the wdio configuration file and the JSON configuration file.
Each JavaScript test specification executes its respective configuration JSON, running a bunch of tests against the window.dataLayer object on any page it visits.
If you want to run multiple specifications, you will need to copy both the test specification JavaScript (e.g. basic_example.js) as well as the configuration JSON (e.g. basic_example.conf.json) to the spec directory. You can also have all your spec files in a single directory, if you wish. The wdio configuration file simply looks through the /examples/spec directory for any JavaScript test files.
I’m not going to walk you through the entire file, but there are some things you should know about.
// Set the file in require() to point to this test's configuration JSON
const dataLayerConf = require('./basic_example.conf.json')
If you create a new test specification, the JSON file name you point to in the require() method should refer to the configuration JSON you’ve created for this test.
The test specification runs through two main suites of tests:
-
“Generic” tests for
window.dataLayer, where certain keys should be found on every page the test visits. -
“Page-specific” configurations, where you test
window.dataLayeron each given page for page-specific key-value pairs.
All the reports are generated automatically based on certain values in the configuration JSON. Before the test runs, however, the configuration JSON itself is validated against what I’ve defined as a valid JSON Schema for this particular project (you can find this in /lib/validTestConfSchema.json). If anything is missing or incorrectly encoded, the test reporter will stop with an error.
3.3. JSON configuration file
The JSON configuration is what the whole test hinges on. All the parameters you provide govern not only which pages the test loads in the virtual browser, but also what you expect to find in window.dataLayer on any given page.
This is what a fully loaded JSON configuration might look like:
{
    "baseUrl" : "https://www.simoahava.com",
    "dataLayerName" : "dataLayer",
    "multipleContainers" : true,
    "dataLayer" : [{
        "@json" : false,
        "visitorLoginState" : "logged-out"
    },{
        "event" : {
            "pattern" : "^gtm.dom$"
        }
    },{
        "event" : {
            "pattern" : "^gtm.load$"
        }
    }],
    "page" : [{
        "path" : "/gtm-tips/10-useful-css-selectors/",
        "dataLayer" : [{
            "@expect" : "dataLayer to have basic article variables",
            "pageAttributes" : {
                "enum" : [["css-selectors", "google-tag-manager", "gtmtips"]]
            },
            "pageCategory" : {
                "enum": [["gtm-tips"]]
            },
            "pagePostType" : {
                "pattern" : "^post$"
            },
            "pagePostType2" : {
                "pattern": "^single-post$"
            },
            "postCountOnPage" : {
                "type" : "number"
            },
            "postCountTotal" : {
                "type" : "number"
            }
        },{
            "@expect" : "dataLayer to have article impressions",
            "event" : {
                "pattern": "^impressionsPushed$"
            },
            "ecommerce" : {
                "type" : "object",
                "properties" : {
                    "impressions": {
                        "$ref" : "/enhancedEcommerceSchema.json#/definitions/impressions"
                    }
                },
                "required" : ["impressions"]
            }
        },{
            "@expect" : "dataLayer to have clientId",
            "event" : {
                "pattern" : "^trackerReady$"
            },
            "cid" : {
                "type" : "string",
                "pattern" : "[0-9]+\\.[0-9]+"
            }
        },{
            "@expect" : "dataLayer to have product detail view",
            "ecommerce" : {
                "type" : "object",
                "properties" : {
                    "detail" : {
                        "$ref" : "/enhancedEcommerceSchema.json#/definitions/detail"
                    }
                },
                "required" : ["detail"]
            }
        }]
    }]
}
Here are the main keys you can work with:
-
baseUrl (required) - a string containing the full protocol, domain, and port of the site where all the tests are run in this specification. Note! Leave the trailing slash out (
https://www.simoahava.com, NOThttps://www.simoahava.com/). -
dataLayerName - if you’re using some other name for the global
dataLayerobject than “dataLayer”, remember to specify it here. You can leave this out otherwise (the test defaults todataLayer). -
multipleContainers - set this to
trueif you have multiple containers on the page. Otherwise leave this out.
In addition to this, there’s dataLayer, which is an array of objects you expect to find on every single page the test visits (generic configuration).
There’s also page, which is where you specify each page you want the test to visit, with any page-specific dataLayer configurations defined within.
There’s more on the configuration file in the following chapter.
4. JSON configuration
Picking up where we left off in the previous chapter, let’s focus on the two important configuration arrays we haven’t covered yet: dataLayer[] and page[].
4.1. Generic dataLayer
The dataLayer key in the root of the JSON configuration is where you list objects you expect to find on every single page the test visits. These are so called “generic” keys. So, let’s say you expect to find an object that contains the key-value pair "event" : "gtm.dom", as well as an optional object where they key is "visitorLoginState" whose value is any string, this is what the generic object might look like:
{
    ...
    dataLayer : [{
        "@json" : false,
        "event" : "gtm.dom"
    },{
        "visitorLoginState" : {
            "@rootRequired" : false,
            "type" : "string"
        }
    }]
    ...
}
Let’s see what these keys mean.
@json is a special configuration that can only have the false value. Any other value and the schema will not validate. If a dataLayer object has this key in the configuration, it means that any key-value pairs within that object will be looked for verbatim within the global window.dataLayer object. In other words, if window.dataLayer doesn’t have at least one object with the exact key-value pair "event" : "gtm.dom", the test will fail.
You can thus use the "@json" : false setting to run simple subset checks. You can define complex objects, arrays, or any available data types, but they need to be found in that exact format within window.dataLayer. This subset check is a great way to test key-value pairs which you expect to be immutable across releases.
If you don’t provide the @json key, the test will be validated against JSON Schema logic. JSON Schema is a (draft) standard used to describe JSON documents. The window.dataLayer object can be stringified into an imperfect JSON representation, though it’s typically good enough to run JSON validation tests against.
JSON Schema gives you a lot of tools to work with when describing the complexity of window.dataLayer. You can create tests where you expect keys to have a certain range of values, a certain data type, optional or required parameters, et cetera.
In the example above, "visitorLoginState" is simply defined as an optional string. You don’t require window.dataLayer to have it, but if it is found, you expect it to be a string. Thus the test would fail if window.dataLayer had an object with "visitorLoginState" : false.
The special @rootRequired key is used only for keys in the root of the dataLayer object. If you add this key with value false, it means that the parameter it’s attached to is optional. You don’t require window.dataLayer to have that key in the root of any object. The default is that each key you define in the root of the dataLayer object is required, so using "@rootRequired" : false is the only way to impact this. For keys deeper in the structure you can use regular JSON Schema syntax (e.g. "required" : ["someProperty", "someOtherProperty"]).
4.2. Page-specific configurations
The page-specific configurations contain one extra configuration level, after which you define their own dataLayer objects using the methods you read about in the previous chapter.
The first page-specific key you need to define is path. This should be in the root of each object in the page array. The value should be a proper URL path, starting with “/”. For example, to visit three different pages in the test, you would configure the page object like this:
{
    ...
    "dataLayer" : [{
        ....
    }],
    "page" : [{
        "path" : "/first-page-to-test/",
        "dataLayer" : [{
            ...
        }]
    },{
        "path" : "/second-page-to-test/",
        "dataLayer" : [{
            ...
        }]
    },{
        "path" : "/third-page-to-test/",
        "dataLayer" : [{
            ...
        }]
    }
}
For each given page object, you can define the dataLayer composition you expect to find on that particular page. The configuration of each dataLayer object is exactly the same as explored in the previous chapter with one important addition.
In the root of each dataLayer object, you need to define the key @expect with a textual description of this test. In other words, use this key to describe why you are expecting this particular dataLayer object to be found in the global window.dataLayer.
Whatever you type in this string will be prefixed with the verb “expect”, so you can thus use a partial sentence. This is what your configuration might look like:
{
    ...
    "dataLayer" : [{
        ....
    }],
    "page" : [{
        "path" : "/first-page-to-test/",
        "dataLayer" : [{
            "@expect" : "dataLayer to have the userState key",
            "userState" : {
                "type" : "string"
            }
        }]
    },{
        "path" : "/second-page-to-test/",
        "dataLayer" : [{
            "@expect" : "dataLayer to optionally contain userCount",
            "userCount" : {
                "type" : "number",
                "@rootRequired" : false
            }
        }]
    },{
        "path" : "/third-page-to-test/",
        "dataLayer" : [{
            "@expect" : "dataLayer to have the Enhanced Ecommerce detail object",
            "ecommerce" : {
                "type" : "object",
                "properties" : {
                    "detail" : {
                        "$ref" : "/enhancedEcommerceSchema.json#/definitions/detail"
                    }
                },
                "required" : ["detail"]
        }]
    }
}
See the last object? Interesting, eh? First, you expect the global window.dataLayer structure to contain an object named ecommerce with one required property: detail. Next, you’re using the $ref JSON Schema keyword to link to an external definition. In fact, in the directory /lib/ you can find the schema named enhancedEcommerceSchema.json, which I created to make it easier to describe a valid Enhanced Ecommerce object.
You can link to the definitions within from your test configuration JSON files. Hopefully we’ll have more schemas for other complex objects soon, and nothing’s stopping you from creating and linking your own custom JSON for schemas you expect to use over and over again!
5. Running your tests
If you’ve been modifying the basic_example.conf.json, you can use the predefined npm script npm test to run your setup. When you execute that command, the following things happen:
-
The script fires up an http-server instance on http://localhost:8080, which loads the index.html file from ./examples/.
-
The script runs
./node_modules/.bin/wdio ./examples/examples.conf.js -
The test runner automatically starts an instance of the Selenium server, which then proceeds to fire up a phantomjs browser driver.
-
The test runner starts reading your basic_example.js test specification, and opens the test browser on URL http://localhost:8080/index.html.
-
The test runner proceeds to run through all the tests on this URL, keeping tabs on which tests passed and which failed.
-
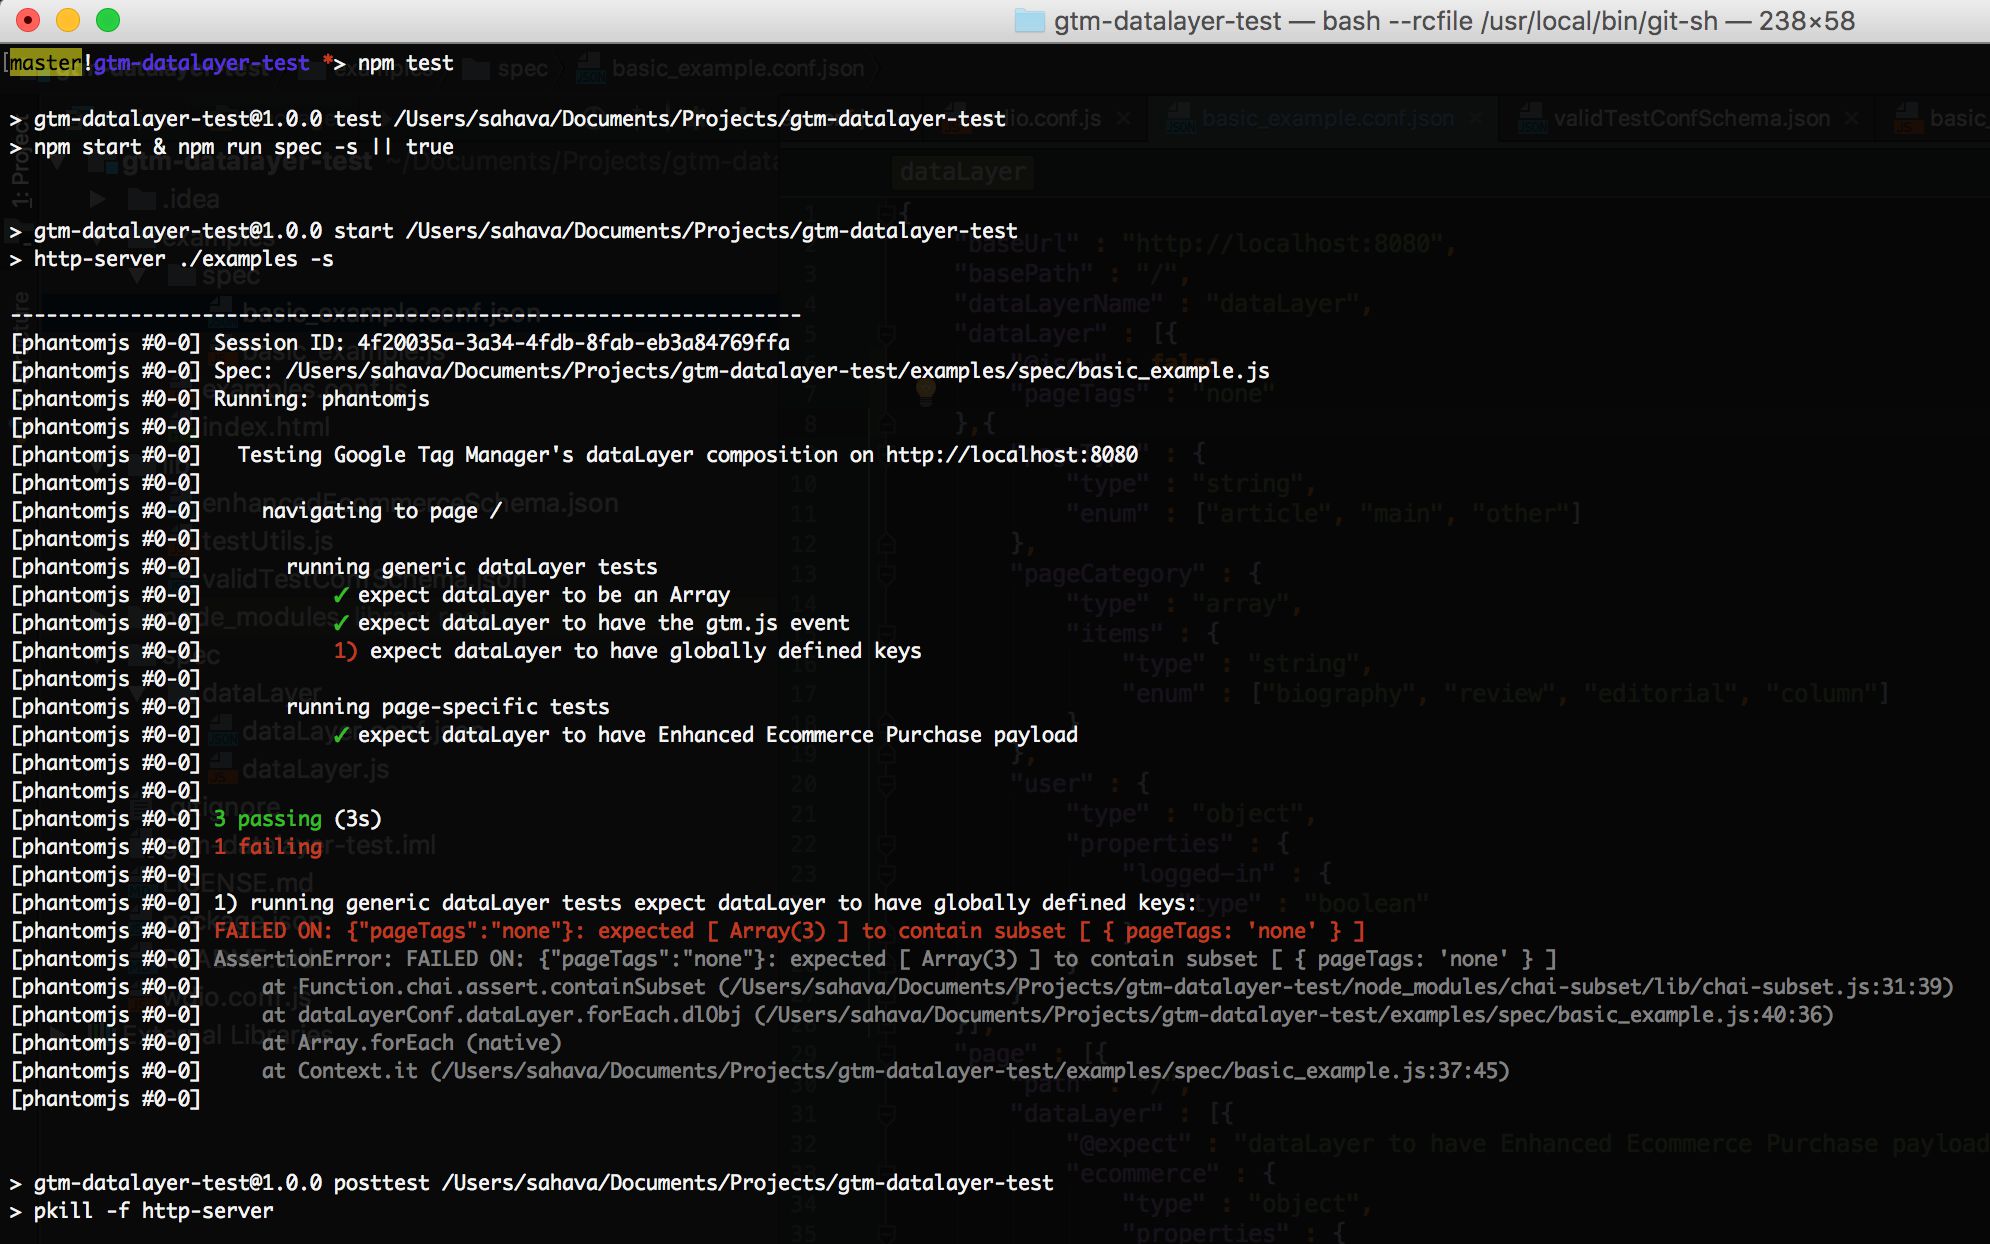
The test runner then reports the results of the test, using green checkmarks for passed tests and red numbers for failed tests.
-
If any tests failed, they are reported as AssertionErrors with each error associated with its respective test number.
-
Finally, wdio automatically shuts down the Selenium instance, and http-server is killed, too.
Once you’ve graduated beyond the basic_example.js file, you might want to create your own tests, store them in their own folders, and create new wdio configuration files for each.
The command for running wdio against your own wdio configuration files is this (executed in the root of your project):
./node_modules/.bin/wdio <wdio configuration file>
This runs the wdio executable against your configuration file, which in turn passes each specification defined in the configuration for the test runner. The test runner, then, starts the browser instances you have selected, running the tests, and channeling the output to the test reporter.
You might want to start using a task / workflow runner such as Grunt or Gulp to manage your test suites. It will make it easier to run arbitrary tests, as you can specify things like custom parameters, and you can chain multiple tests together, if you wish.
6. Contribute
This is an open-source project. I don’t expect you to contribute, but if you do I am very grateful indeed.
To contribute, head on over to the GitHub repo. You can fork the repo, make modifications, and then submit those modifications as Pull Requests. It would be best, however, if you first introduce the thing you want to change as an Issue to make sure we all agree that it’s a good feature to focus on.
Alternatively, you can add your ideas, questions, or bugs in the comments below. I’m fully aware this isn’t a “plug-and-play” solution for testing GTM, since I never intended it to be one. Thus I expect there to be issues that I haven’t considered (I should write tests for this, too!), and I would be very grateful if you’d let me know about any trouble you’ve come across with this solution.
Finally, the latest version of this solution AND the documentation is only maintained in the GitHub repo. It’s possible that this article is already outdated as you’re reading this, so I hope you head on over to the repo to see the latest changes.
