Auto-Event Tracking In Google Tag Manager
There is a new version of this post for GTM V2 here.
The Google Analytics Summit came and went, and thanks to the Live Stream, everyone could participate. We were treated to a rapid-fire selection of Google Analytics’ new features, and this post sheds light on one of these in particular: automated event tracking in Google Tag Manager.
Auto-event tracking introduces a nice feature, which does what tag managers ought to do: it provides functionality without HTML template editing. This isn’t always a good thing, since automation is usually generic and only works for a couple of viable scenarios, but especially for these generic use cases, this new feature is a great addition to GTM’s already impressive feature list.
Auto-event tracking has four different types of event listeners you can create:
- Click listener
- Link Click listener
- Timer listener
- Form Submit listener
A listener is a function which operates in the background. When creating the listener, you tell what operations it should wait for, and once these operations take place, the listener activates and fires any code within.
In this short tutorial, I take a look at the first three listeners. I’ll return to Form Submit listeners as soon as I have a functioning form I can work with.
Note that all these tutorials use Universal Analytics, but it’s easy to do the same in Google Analytics (the only difference is which tag you use to send the event to your account).
XThe Simmer Newsletter
Subscribe to the Simmer newsletter to get the latest news and content from Simo Ahava into your email inbox!
Timer Listener
This is the easiest, so I’ll start with it. If you’ve read my previous posts, it makes the whole concept of “Dwell time” a whole lot simpler, without having to employ custom HTML tags (the whole point of auto-event tracking).
What it does is set off a timer for X milliseconds. After the timer reaches the end, an event is pushed to the data layer, which you can then use as a firing rule for your Analytics event.
Steps:
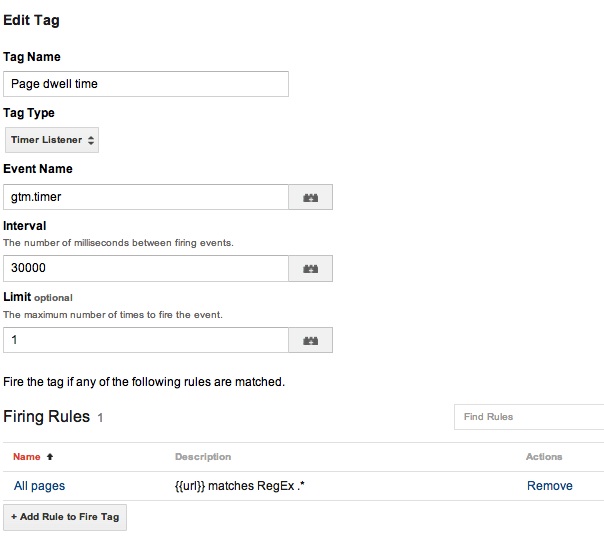
- Create a new Tag with the following settings:
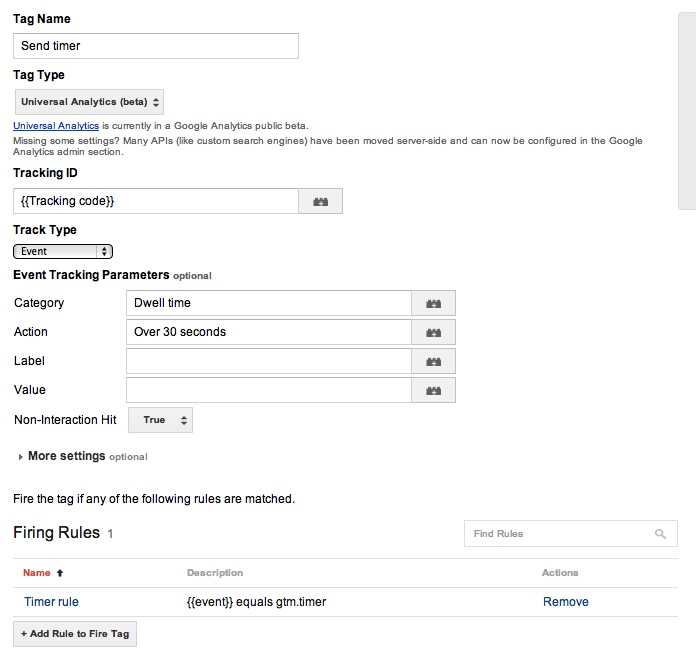
- Create a new Universal Analytics tag with the following settings; remember to add your tracking code to the “Tracking ID” field, and if you want the event to count as a hit, set “Non-interaction” as False:
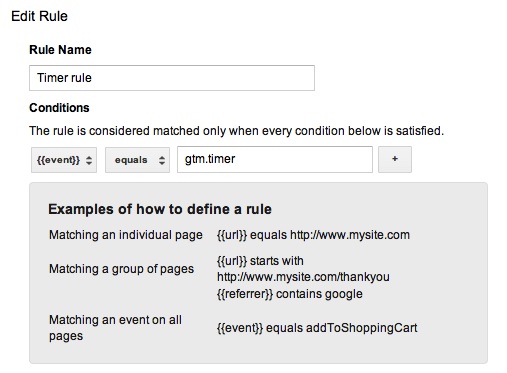
- Make sure you have a rule in place to fire this UA tag:
- Save container version
- Publish container
Here you create a Timer Listener, which starts the countdown upon DOM load. As soon as the timer hits 30 seconds, the event gtm.timer is pushed to the data layer.
The Universal Analytics tag you created is set to launch as soon as the event gtm.timer is pushed to the data layer, so as soon as the timer goes off, the event is sent to your Analytics account.
And no custom HTML editing was involved. Just some tags and rules.
Remember to check that the implementation works by looking, for example, at the Network tab in Firebug:

Link Click listener
This is a bit more complex than the Timer listener, but it’s still much easier than what you had to do before with custom HTML code.
The scenario here is that I have a “Back to top” link on my site, and I want to track its clicks. This way I’ll know a) do people actually read my pages to the very bottom and b) do they have an urge to get quickly back to the top of the page.
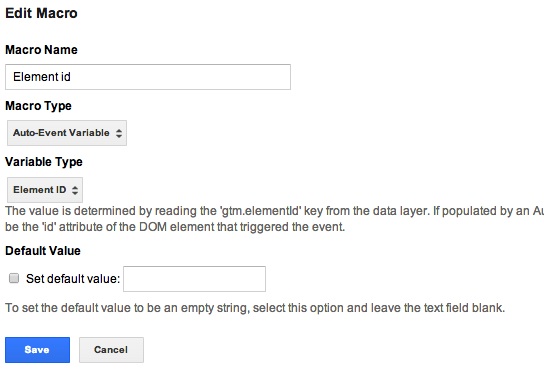
This feature makes use of the Auto-Event Variable, which is essentially a macro that can be used to refer to, for example, the DOM element where a click occurred.
Steps:
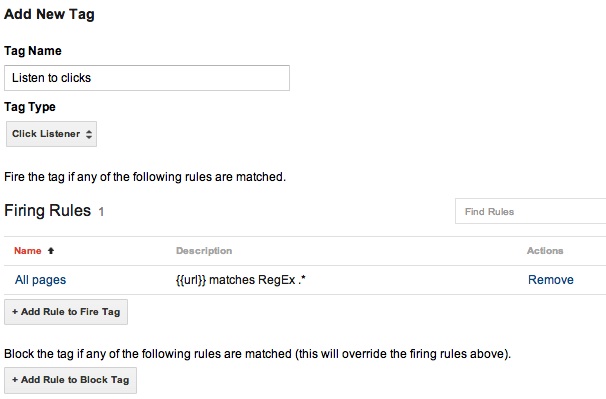
- Create a new tag which listens to link clicks on your site:

- Create a macro which identifies all element IDs on your site (by using the Auto-Event Variable):
- Create a new Universal Analytics tag
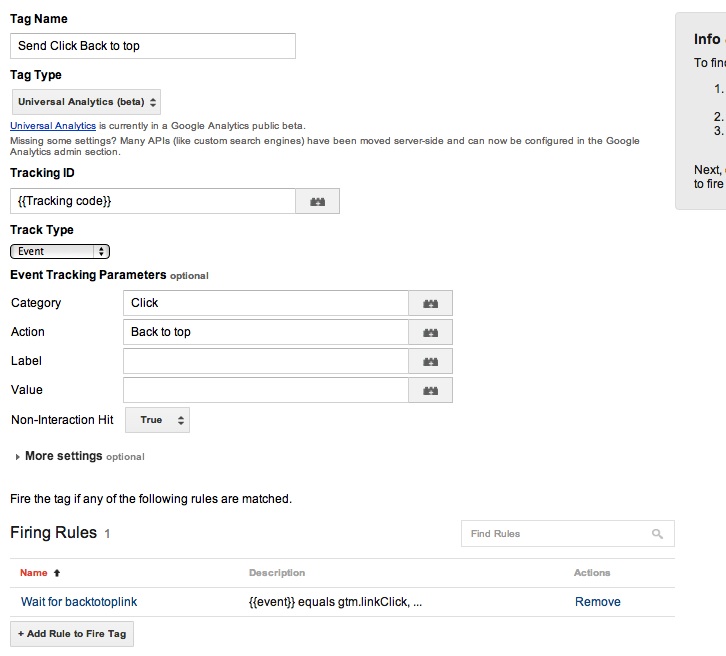
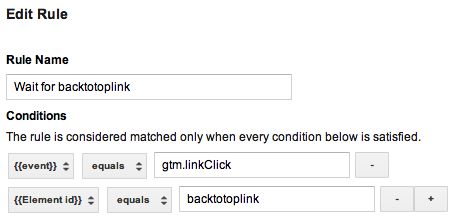
- Make sure you have the correct rule in place:
- Save container version
- Publish container
Here you first create the link click listener. When set up to fire on all pages, it listens to all link clicks throughout your site. As soon as a link click occurs, it pushes the gtm.linkClick event into the data layer.
In the Analytics tag, the important part is the firing rule. See how you’re waiting both for the gtm.linkClick event and for the element ID macro to match a certain DOM element? This is to prevent the event firing when all links are clicked. Instead, now it identifies the DOM element ID (using the Auto-Event Variable of the macro) where the click event occurred (#backtotoplink).
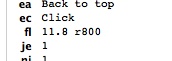
So now you have an event sent each time the Back to top link is clicked. Remember, again, to check the Network data:
Click listener
This is pretty much the same as the previous tutorial, but the crucial difference is that the Click listener listens to all click events on your page.
The scenario is classic landing page optimization: I have a (fictional) blog home page, where article headings are just plain text, not actual links to the articles themselves. I want to employ the click listener to check how many people try to click the heading in vain.
Steps:
- Create a new click listener tag:
- Create a macro for all classes (we use this to identify the headings):

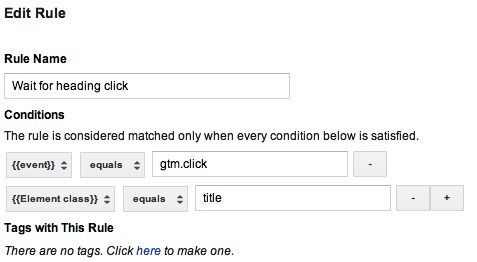
- Create a rule which waits for a click to the .title DOM element:
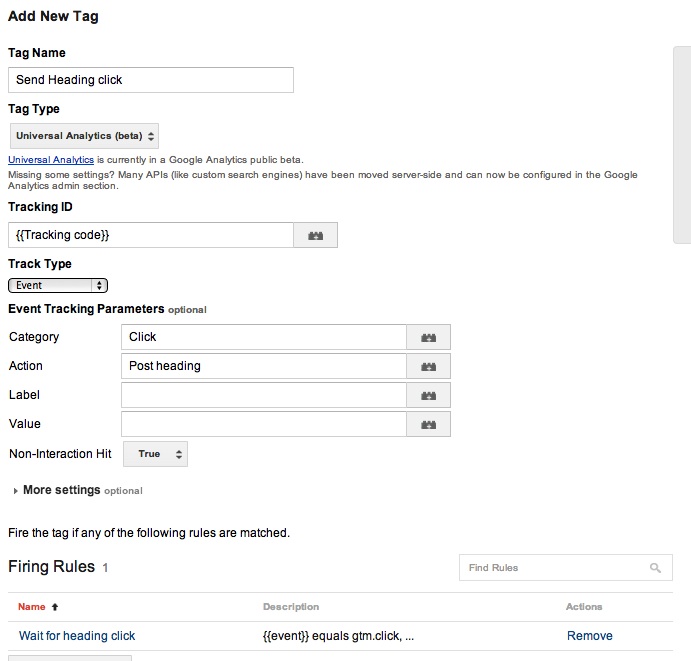
- Create a new Universal Analytics tag:
- Save container version
- Publish container
Here the important thing is to create a rule which waits for the gtm.click event (which means that a click has occurred, thanks to the Click listener) and which requires that the click occur on a DOM element with the class of title, which happens to be the class of the headings on the home page.
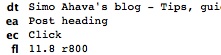
Check the implementation in Firebug:
Auto-event tracking conclusions
Well it’s a nice feature, that’s for sure.
At the moment, implementing listeners requires the following general steps:
- Create a tag which acts as the listener and pushes the appropriate gtm event into the data layer as soon as the operation occurs
- Create a tag which fires as soon as the gtm event occurs and sends the data to Analytics
If you want to be more specific, i.e. wait for clicks on specific DOM elements, you need to create a macro which binds the auto-event variable in the data layer.
I’d also like to see the auto-event variables as default macros (similar to {{url}}) in the system.
Auto-event tracking is a good addition to Google Tag Manager, and it removes a lot of hassle with custom HTML code. However, it’s no a be-all and end-all solution, and there’s still a lot of manual work involved if you want to do anything more complicated (cross-event dependencies, complex chaining of events and so forth).
