I recently published a #GTMTips guide called 10 Useful CSS Selectors, and it was very well received. Inspired by the feedback, here’s the next instalment. This time, we’re going over some useful JavaScript tips and tricks that you can use to make your Google Tag Manager deployment even more efficient. I’ve written a lot about JavaScript in this blog, and I intend to keep on doing so in the future. As always, if JavaScript is somewhat of a mystery to you, I strongly recommend you take the Codecademy (free) course on JS, and take a look at the other available web technology tracks while you’re there!
The Simmer Newsletter
Follow this link to subscribe to the Simmer Newsletter! Stay up-to-date with the latest content from Simo Ahava and the Simmer online course platform.
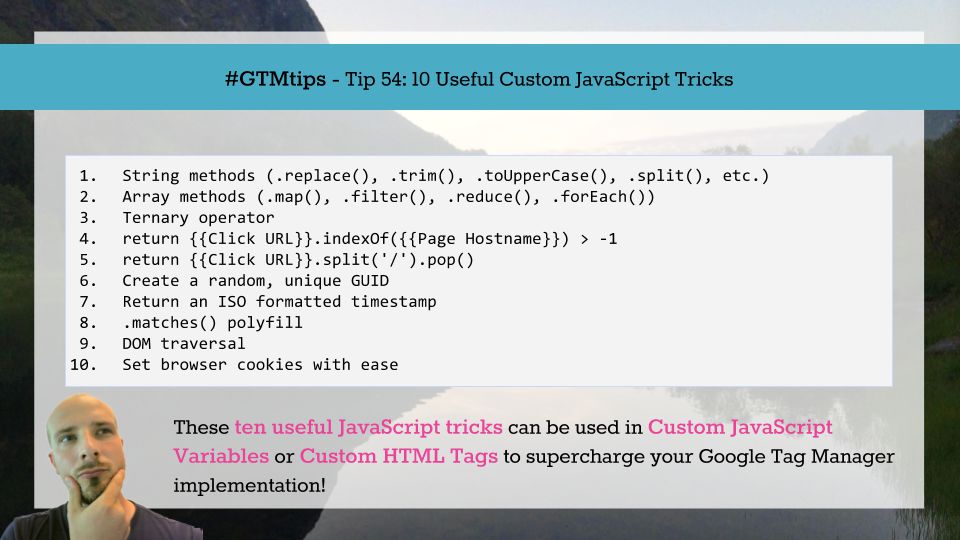
Tip 54: 10 Useful Custom JavaScript Tricks
You can deploy these tricks in Custom HTML Tags or Custom JavaScript Variables, since they are the only contexts within Google Tag Manager where you can execute arbitrary JavaScript. Note that some of the tricks are just code snippets, so you will need to understand enough of how Google Tag Manager and JavaScript mesh together to be able to deploy them successfully.
Before adding any of these to your deployments, remember to use caniuse.com to check for browser compatibility, and the MDN JavaScript Reference to find alternative ways (AKA polyfills) for writing the unsupported methods.
1. String methods
String methods are utilities that you can use to modify any given string. Here are some of the most useful ones, in my opinion.
// Use .trim() to strip leading and trailing whitespace from a string.
"   Oh no! Leading AND trailing whitespace!!   ".trim();
// Result: "Oh no! Leading AND trailing whitespace!!"

// Use .replace() to replace characters or regular expressions with something else.
// .replace() without a regular expression replaces the first instance.
"Food".replace('o', 'e');
// Result: "Feod"
"Food".replace(/o/g, 'e');
// Result: "Feed"

// Use .toUpperCase() and .toLowerCase() to change the case of the entire string
"MixED CaSe String".toLowerCase();
// Result: "mixed case string"

// Use .substring() to return only part of the string.
"?some-query-key=some-query-value".substring(1);
// Returns: "some-query-key=some-query-value"
"id: 12345-12345".substring(4,9);
// Returns: "12345"

// Use .split() to split the string into its constituents
"get the second word of this sentence".split(' ')[1];
// Returns "the"
Naturally, you can combine these in inventive ways. For example, to capitalize the first letter of any string you could do this:
var str = "capitalize the first letter of this string, please!";
str = str.replace(/^./, str.substring(0,1).toUpperCase());
Here we first identify the first letter of the string using a regular expression, after which we replace it with the first letter of the string that has been converted to upper case.
2. Array methods
Array methods are really powerful in any programming language. Mastering methods such as filter() and forEach() is critical if you want to make your JavaScript more compact and often more readable.
filter()
filter() goes through each element in the Array, and returns a new Array for every element that passes the check you provide in the callback. Here’s the syntax:
someArray.filter(function(eachItem) {
  return eachItem === someCondition;
});
So eachItem is the variable where the iterator stores each member of the Array as it is processed. If the callback returns true, it means that the item is added to the returned, new Array. If it returns false, it’s dropped.
Here’s an example:
window.dataLayer = window.dataLayer || [];
window.dataLayer.push({
  'event' : 'addMe!'
},{
  'event' : 'doNotAddMe!'
});

var newArray = window.dataLayer.filter(function(item) {
  return item.event === 'addMe!';
});
// Returns: [{'event' : 'addMe!'}]
The iterator checks every single item for the property event, and returns true if that property has value addMe!. Thus the returned array only has those elements that have the key-value pair "event" : "addMe!".
forEach()
Remember the clumsy for-loop for iterating over an Array? Yuck! Instead, you can use the forEach() iterator.
forEach() receives each item in the array one-by-one, and you can then do whatever you wish with this item. The syntax is very simple and intuitive, and thus should be preferred over the confusing for-loop.
var array = ["I", 4, 2, true, "love", [1,2,3], {chocolate: 'too'}, "you"];
var newArray = [];

array.forEach(function(item) {
  if (typeof item === 'string') {
    newArray.push(item);
  }
});

newArray.join(" ");
// Result: "I love you"
As you can see, it’s more readable than a for-loop, as you don’t have to access the original array in the iterator.
map()
The map() iterates over each member in the array, again, but this time the code in the callback is executed against each member of the array, and a new array is returned with the results. Here’s how to set it up:
array.map(function(item) {
  return doSomething(item);
});
In other words, you are mapping each element in the array against the result of the callback function. Here’s are some examples:
var array = [1,2,3,4,5];
array.map(function(item) {
  return item * 2;
});
// Result: [2,4,6,8,10]

var array = ["  please     ", "  trim", "     us  "];
array.map(function(item) {
  return item.trim();
});
// Result: ["please", "trim", "us"];
reduce()
The reduce() method is often the most complex one, but it actually has a very simple principle: You provide the function with an accumulator, and each member of the array is then operated against this accumulator. You can also provide an initial value to the accumulator. Here’s what the basic structure looks like:
array.reduce(function(accumulator, item) {
  accumulator.doSomethingWith(item);
  return accumulator;
}, initialValue);
This time, it’s definitely easiest to learn via examples:
// Example: calculate the sum of all even numbers in the array
var array = [1,6,3,4,12,17,21,27,30];
array.reduce(function(accumulator, item) {
  if (item % 2 === 0) {
    accumulator += item;
  }
  return accumulator;
}, 0);
// Returns: 52

// Example, concatenate a string of all product IDs in array
var array = [{
  "id" : "firstId",
  "name" : "T-shirts"
},{
  "id" : "secondId",
  "name" : "Pants"
},{
  "id" : "thirdId",
  "name" : "shoes"
}];
array.reduce(function(accumulator, item) {
  accumulator.push(item.id);
  return accumulator;
}, []).join();
// Returns: "firstId,secondId,thirdId"
3. Ternary operator
The ternary operator is just a very simple shorthand for running conditional checks in JavaScript. Here’s an example:
// BEFORE:
if (something) {
  somethingElse();
} else {
  somethingDifferent();
}

// AFTER:
something ? somethingElse() : somethingDifferent();
The ternary operator is thus used to combine an if-statement into a simple expression. First you provide an expression that evaluates to a truthy or falsy value, such as me.name() === "Simo". Then you type the question mark, after which you write an expression that is executed if the first item evaluates to a truthy value. Finally, you type the colon :, after which you type the expression that is executed if the first item evaluates to a falsy value.
// BEFORE:
if (document.querySelector('#findThisId') !== null) {
  return document.querySelector('#findThisId');
} else {
  return "Not found!";
}

// AFTER:
return document.querySelector('#findThisId') ? document.querySelector('#findThisId') : "Not found!";

// EVEN BETTER:
return document.querySelector('#findThisId') || "Not found!";
As you can see, sometimes there are even more efficient ways to process JavaScript statements than the ternary operator. Especially when working with simple binary checks (if value exists, return it), it might be better to just use basic logical operators instead of complex statements or expressions.
4. return {{Click URL}}.indexOf({{Page Hostname}}) > -1
This is very Google Tag Managerish. It’s a simple Custom JavaScript Variable that returns true if the clicked element URL contains the current page hostname, and false otherwise. In other words, it returns true if the clicked link is internal, and false if it takes the user away from the website.
function() {
  return {{Click URL}}.indexOf({{Page Hostname}}) > -1;
}
5. return {{Click URL}}.split(’/’).pop()
Again, a simple Custom JavaScript Variable. This is especially useful when tracking file downloads, as it returns the actual filename of the downloaded item. It does this by returning whatever is in the clicked URL after the last ‘/’.
function() {
  // Example: https://www.simoahava.com/downloads/download_me.pdf
  return {{Click URL}}.split('/').pop();
  // Returns: download_me.pdf
}
6. Create a random, unique GUID
Every now and then it’s useful to create a random ID in GTM. For example, if you want to measure session IDs, or if you want to assign a unique identifier to each page hit, you can achieve this with the following Custom JavaScript Variable.
The variable creates a GUID string (“Globally Unique Identifier”), and even though uniqueness isn’t guaranteed, it’s still very likely. There’s only a microscopically small chance of collision.
This solution is gratefully adapted from this StackOverflow post.
function() {
  return 'xxxxxxxx-xxxx-4xxx-yxxx-xxxxxxxxxxxx'.replace(/[xy]/g, function(c) {
    var r = Math.random()*16|0, v = c == 'x' ? r : (r&0x3|0x8);
    return v.toString(16);
  });
}
7. Return an ISO-formatted timestamp
This is one of my favorite solutions, as it lets you convert the current client time to a proper, readable timestamp. In addition, it has the timezone offset included, so you’ll know just how much the users’ local times differ from your own timezone. I send this to Google Analytics with every single hit, so that I can create a timeline of events when analyzing the data.
This solution is gratefully adapted from this StackOverflow post.
function() {
  var now = new Date();
  var tzo = -now.getTimezoneOffset();
  var dif = tzo >= 0 ? '+' : '-';
  var pad = function(num) {
    var norm = Math.abs(Math.floor(num));
    return (norm < 10 ? '0' : '') + norm;
  };
  return now.getFullYear()
    + '-' + pad(now.getMonth()+1)
    + '-' + pad(now.getDate())
    + 'T' + pad(now.getHours())
    + ':' + pad(now.getMinutes())
    + ':' + pad(now.getSeconds())
    + '.' + pad(now.getMilliseconds())
    + dif + pad(tzo / 60)
    + ':' + pad(tzo % 60);
  // Returns, for example: 2017-01-18T11:58:32.977+02:00
}
8. .matches() polyfill
When working with the Document Object Model (DOM), being able to identify elements is crucial. We already have a bunch of wonderful CSS selectors at our disposal, but now we just need a method we can use to check if any given element matches one of these selectors.
Well, there’s the Element.matches(someSelector) method that you can use, but it doesn’t have stellar browser support, even with prefixes. With this solution, you can always use .matches() without having to worry about browser support. This trick is called a polyfill, as it patches lack of feature support with a workaround using JavaScript that is universally supported.
First, here’s how the method works in general:
// Check if the parent of the clicked element has ID #testMe
var el = {{Click Element}};
console.log(el.parentElement.matches('#testMe'));
// RESULT: true or false, depending on if the parent element matches the selector.
To implement the polyfill, either ask your developers to add it to the site JavaScript as early as possible in the page load sequence, or use Google Tag Manager.
In Google Tag Manager, you’ll need a Custom HTML Tag that fires as early as possible in the container load sequence (i.e. All Pages trigger with a high tag priority).
Here’s the code you need to add to the Custom HTML Tag. It’s gratefully adapted from this MDN reference page.
<script>
  if (!Element.prototype.matches) {
    Element.prototype.matches =
      Element.prototype.matchesSelector ||
      Element.prototype.mozMatchesSelector ||
      Element.prototype.msMatchesSelector ||
      Element.prototype.oMatchesSelector ||
      Element.prototype.webkitMatchesSelector ||
      function(s) {
        var matches = (this.document || this.ownerDocument).querySelectorAll(s),
            i = matches.length;
        while (--i >= 0 && matches.item(i) !== this) {}
        return i > -1;
      };
  }
</script>
The polyfill modifies the actual prototype of the Element object, which all HTML and DOM elements inherit from. After modifying the prototype, you can use the matches() method with confidence in all your GTM and site JavaScript.
9. DOM traversal
Sometimes it’s necessary to climb up (or down) the Document Object Model. For example, if you’re using a Click / All Elements trigger, it always targets the actual element that was clicked. But that’s not always necessarily the element you want to track! Say you have an HTML structure like this:
<a href="takemeaway.html">
  <button id="clickMe">
    <span>Click Me!</span>
  </button>
</a>
Now, if you use a Click / All Elements trigger, the element that is captured in the click is the <span/>. But I’m guessing you actually want to use the <a href="takemeaway.html"> element, since you’re more interested in knowing what happens after the click. So, you can use this Custom JavaScript Variable to return the nearest link above the clicked element in the DOM tree:
function() {
  var el = {{Click Element}};
  while (!el.matches('a') && !el.matches('body')) {
    el = el.parentElement;
  }
  return el.matches('a') ? el : undefined;
}
NOTE! This relies on the matches() method, so don’t forget to implement the polyfill from above, first!
This Custom JavaScript Variable climbs up the DOM until it reaches the first link element it finds ('a'), after which it returns this element. If it doesn’t find a link, it returns undefined instead.
10. Set browser cookies with ease
Cookies are a great, if somewhat outdated, way of storing information in the browser. Since Google Tag Manager operates in the context of a web page, it is essentially stateless. Thus any information you want to persist from one page to another must be stored either in the server or the browser itself. The latter is far easier to do, and with browser cookies it’s just a question of adding a couple of lines of code to your GTM deployment.
First, you need a Custom JavaScript Variable. You can name it {{Set Cookie}}, for example.
function() {
  return function(name, value, ms, path, domain) {
    if (!name || !value) {
      return;
    }
    var d;
    var cpath = path ? '; path=' + path : '';
    var cdomain = domain ? '; domain=' + domain : '';
    var expires = '';
    if (ms) {
      d = new Date();
      d.setTime(d.getTime() + ms);
      expires = '; expires=' + d.toUTCString();
    }
    document.cookie = name + "=" + value + expires + cpath + cdomain;
  }
}
This Custom JavaScript Variable returns a function that takes five parameters:
name (required): the name of the cookie (string)
value (required): the value of the cookie (string)
ms: expiration time of the cookie in milliseconds. If unset, defaults to a Session cookie (expires when the browser is closed).
path: the path of the cookie. If unset, defaults to the current page path.
domain: the domain of the cookie. If unset, defaults to the current domain.
To use the cookie, you invoke it with:
{{Set Cookie}}('test', 'true', 10000, '/', 'simoahava.com');The code above, when run in GTM, sets a cookie with name "test", value "true", expiration time of ten seconds, and it’s set on the root of the simoahava.com domain.
With this helper, setting cookies is a breeze. Remember that you can then use the handy 1st Party Cookie variable in GTM to retrieve values from set cookies.
Summary
Here I listed 10 JavaScript tricks that I use (almost) all the time. There’s plenty more to JavaScript, but with these methods you can get started on making your clunky Google Tag Manager deployment a thing of the past.
Do you have any favorite methods, tips, or tricks you want to share? Please do so in the comments below.