Google Tag Manager introduced the capability to add tests to your Custom Templates. Tests, in this context, refer specifically to unit tests that you write in order to make sure your template code works in a predictable way. Unit tests are also used to drive development, ensuring that you have added contingencies for all the different scenarios that the template, when coupled with user input, might introduce.
In this guide, I’ll introduce how the Tests feature works. Some new APIs are introduced, as well as a grammar of sorts that you might be used to if you’ve already worked with tests in a software development context.
The Simmer Newsletter
Follow this link to subscribe to the Simmer Newsletter! Stay up-to-date with the latest content from Simo Ahava and the Simmer online course platform.
Unit tests in Custom Templates
Unit tests comprise code that is executed against the actual functions and variables of your template code. The purpose of the test is to validate the template code, so that it returns an expected output for any given, tested input.
The purpose of unit tests is to make your code more resilient to changes. By writing tests, you have a tool with which to verify that the changes you make in one place do not break something that happens in another place.
With unit tests, you are testing the most atomic components of your code: the functions and variables. When you write tests, you aim for high code coverage. Coverage means the number of lines of code that are evaluated in some test.
Simple example of coverage
For example, say that you have a simple variable template like this:
const getType = require('getType');
const input = data.input;
if (getType(input) === 'array') {
  return;
}
return input;
This template takes the user input and returns it. If the input is of type array, then undefined is returned instead.
When writing tests for this variable, there are basically two scenarios you would need to test.
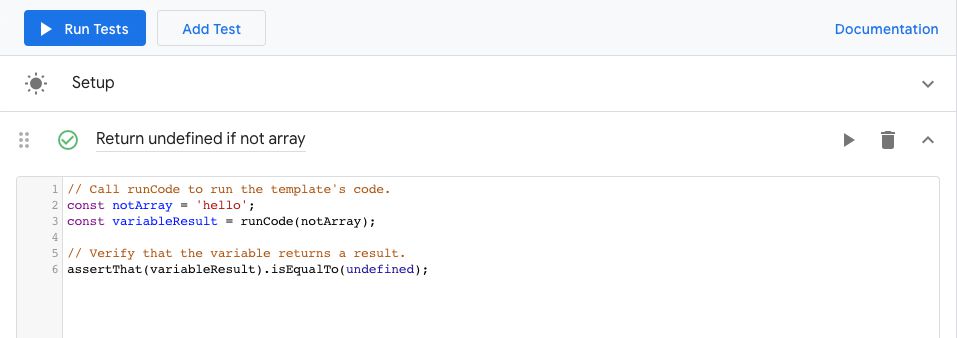
1. Does the variable return undefined for array input
// Call runCode to run the template's code.
const mockData = {
  input: 'notAnArray'
};

const variableResult = runCode(mockData);

// Verify that the variable returns a result.
assertThat(variableResult).isUndefined();
Here you create a mock object that provides the input. This object has key-value pairs where each key corresponds to a property in the data object, reflecting the input the user would have added to the template fields.
This object is passed to the runCode function, which is a template API that runs the template code against the data object.
Finally, the result of runCode is passed to assertThat, which is an assertion method where you check whether the result of the code resolves to an expected value.
2. Does the variable return the input
const mockInput = 'something';
const mockData = {
  input: mockInput
};

const expected = mockInput;

const variableResult = runCode(mockData);

// Verify that the variable returns a result.
assertThat(variableResult).isEqualTo(expected);
As you can see, I’m using constants and variables where possible to avoid hard-coding any values. This prevents simple typos from creating false positives or negatives in your tests.
With these two tests, you actually achieve 100% test coverage for the variable template, because the code tests all the possible variations of the variable.
What about missing input?
When writing tests, you’re faced with interesting design decisions as well.
Take the example above. We’re not specifically testing a scenario where the user didn’t add any input to the field. Why? Because we’ve decided to handle that in the user interface, by adding a validation rule that prevents the template code from running if there is no input in the field.
So when writing tests, you need to know how the template works, and you need to be able to comprehensively approach the different scenarios that imaginative users can exploit when working with your template code.
The anatomy of a test
You’ve learned above that unit tests have some specific components. They are, in order:
Mock of the data object
Mocks of the template APIs (mock())
The test runner (runCode())
(Optional fail())
Assertions (assertApi(), assertThat())
1. Mocking
To test a function, you use mock data. This is because with automated tests there is no prompt for user input. The test needs to run independently of the template itself. With unit tests, you are only testing the code itself, not the user experience.
In Google Tag Manager’s custom templates, mock data comes in two guises: the contents of the data object, and the result of running template APIs.
Mocking the data object
The first is simple to do. You build an object, where each key corresponds to a property of the data object that your code processes.
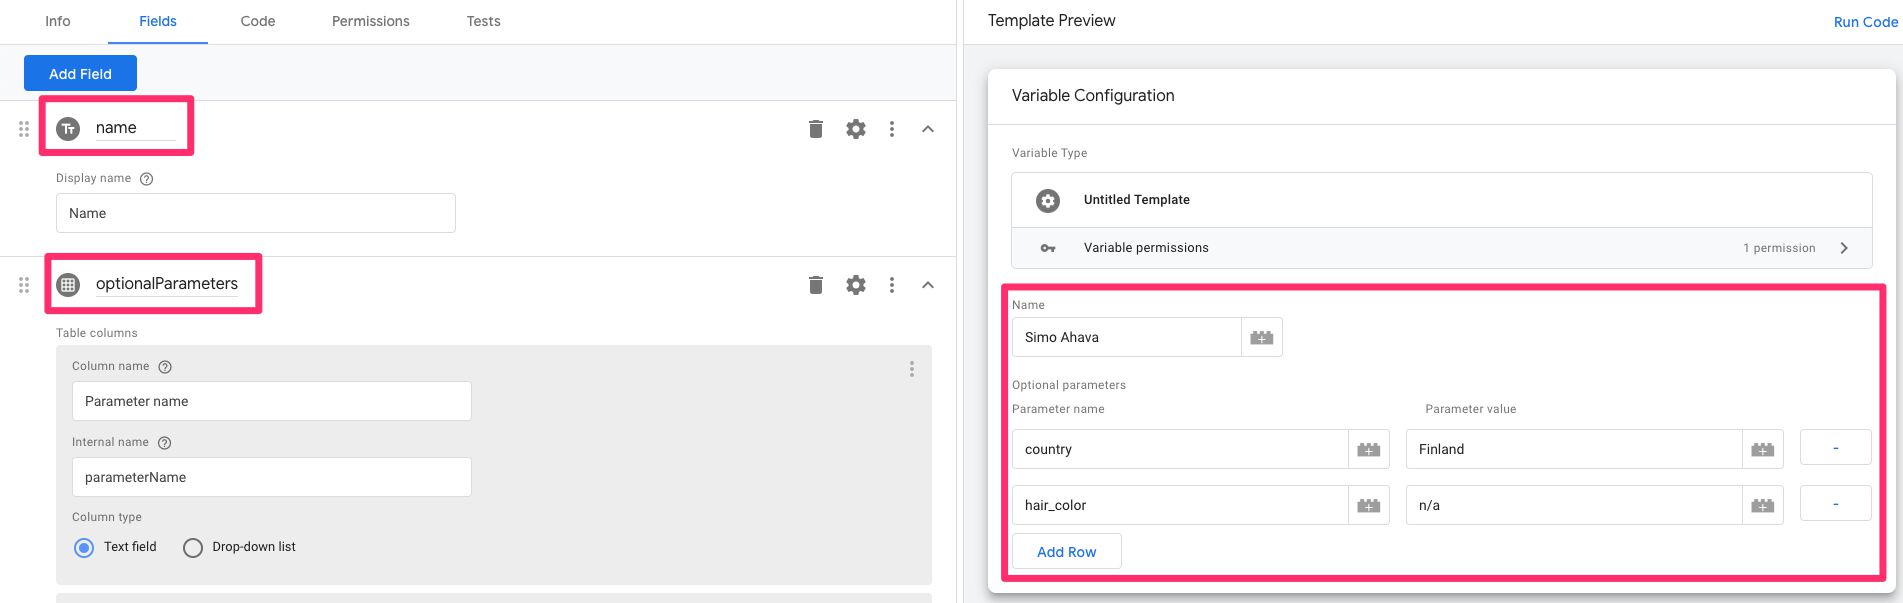
For example, if your template has a text input field named name and then a simple table field named optionalParameters, you could build a mock object like this:
const mockData = {
  name: 'Simo Ahava',
  optionalParameters: [{
    parameterName: 'country',
    parameterValue: 'Finland'
  },{
    parameterName: 'hair_color',
    parameterValue: 'n/a'
  }]
};
This mock data object would correspond with field input like this:
You pass this mock data object to the runCode method (more on this below) so that the template code is run with input from the object.
Mocking template APIs
When you run tests for your template, you might not want the template to actually perform the API calls it is configured to do.
Calling sendPixel over and over again with different inputs might not make a lot of sense.
This is where API mocking plays a vital row. In the Tests interface, you can replace API functionality with a mock function. This way you can run the test as if the template had called the API, and process the returned value as if the API had returned it.
For example, let’s say we have a tag template that injects a script onto the page, where the domain name is input by the user into a template field. This is what the template code would look like:
const sendPixel = require('sendPixel');

const domainName = data.domainName;

sendPixel(domainName, data.gtmOnSuccess, data.gtmOnFailure);
To test this, you could write a test that simply checks if gtmOnSuccess was called for a valid hostname and gtmOnFailure for an invalid one:
const mockData = {
  domainName: 'https://invalid.com'
};
runCode(mockData);
assertApi('gtmOnFailure').wasCalled();
However, this test actually tries to send the pixel request to the domain name, meaning it’s difficult to test positive and negative results without polluting the endpoint.
Instead, you can mock the API like this:
const mockData = {
  domainName: 'https://invalid.com'
};

mock('sendPixel', (url, onSuccess, onFailure) => {
  onFailure();
});

runCode(mockData);

assertApi('gtmOnFailure').wasCalled();
With mock, you instruct the test to use the function stub you provide, meaning whenever the sendPixel API is invoked, it always runs the onFailure() method regardless of input (at least, in this current test).
So when using APIs that invoke external endpoints, it might be a good idea to mock them.
Mocks are reset with every test, so you don’t have to worry about your onFailure() leaking into other tests, too.
2. Running the code
Once you have your mocks ready, you can invoke the runCode() method.
This method runs the template code, mocking the APIs you have chosen to replace, and using the data object that you pass to it as an argument.
If you do not pass any object to it as an argument, or if you pass an empty object, the template will be run as if the user had not added any input to any field.
With tag templates, you just need to execute runCode(), because your assertions will be made against the APIs that have been called. Tag templates do not return anything, so there’s nothing to assess from the result of runCode().
With variable templates, the template should actually return something, and thus your assertions should also be done against the result of runCode().
const mockData = {input: 'test'};

// With tag templates
runCode(mockData);
assertApi('someApi').wasCalled();

// With variable templates
const result = runCode(mockData);
assertThat(result).isEqualTo('test');
Once the test has run, you are ready to assert the results.
3. Failing the test
Custom Templates offer an API you can use to immediately fail a test.
Note that the typical use case for fail() is to evaluate the test itself rather than the code that is being tested.
Some like to use a fail mechanism to indicate tests that have not yet been written, others like to use it to expose paths that should never be encountered by tests.
Typically, you wouldn’t use fail() in production-ready code, because there would not be incomplete tests and assertion logic would handle all possible permutations of the template code.
To use fail() is dead simple - just add the command to a branch of the code, and set the failure message as the argument.
const mockData = {input: 'test'};

const result = runCode(mockData);

if (result === undefined) {
  fail('Result should never be undefined.');
}
assertThat(result).isEqualTo('test');
You can use fail() to create custom assertions. For example, to check if the object returned by the code contains some property, you could do this:
const mockData = {input: 'test'};

const result = runCode(mockData);

if (result.hasOwnProperty('someProperty')) {
  assertThat(true);
} else {
  fail('Variable did not have "someProperty".');
}
It’s not pretty, but it does its job while we wait for new assertion APIs to be added.
4. Assertions
With assertions, you are making statements about the results of the test. The best assertion libraries are a pleasure to use, because assertions are written with a grammar and syntax reminiscent of actual language.
For example, to assert that the variable template code returns a specific value, you add something like:
assertThat(runCodeResult).isEqualTo('some value');The test is a success if the assertion resolves to true. In other words, if the runCodeResult had exactly the value 'some value', the test would pass.
With APIs, you are asserting whether the API was called or not.
assertApi('sendPixel').wasCalled();This test would be a success if the sendPIxel API was invoked during the execution of the test code.
NOTE! To test whether an API was called with specific parameters, you should mock that API instead.
You can add more than one assertion to a test case. All the assertions must pass for the test to be a success. I do recommend trying to keep the number of assertions per test to a minimum, though, as having granular test cases lets you more easily identify the link between the failed test and the broken code that caused it to fail.
Using assertThat
The assertThat API allows you to make assertions about the result of the code execution. The assertions follow the syntax used by e.g. Google’s Truth and the AssertJ library.
The assertThat API is most useful when testing variable templates, because the assertions would be run against the result (the returned value) of the variable template itself.
The syntax is this:
assertThat(someValueToTest).assertion(someExpectedValue);
The assertThat() method takes the value to test as an argument, and it returns an object with all the different assertion APIs listed below.
Some of the APIs (e.g. isEqualTo()) take an argument, where the asserted value is tested against this argument.
Many APIs don’t take any arguments at all - they are used for quick, simple assertions such as whether the asserted value was defined or not.
Here are the assertions supported by the API.
| Assertion | Description |
|---|---|
isEqualTo(someValue) | Checks if the asserted value is equal to someValue. Equality is not strict - you can check if [1, 2, 3] equals [1, 2, 3] and the test will pass. Similarly, you can check complex objects and the assertion will succeed if they have the exact same keys and values. |
isNotEqualTo(someValue) | The assertion is a success if the asserted value is not equal to someValue. Same rules about strictness apply here. |
isStrictlyEqualTo(someValue) | Similar to isEqualTo, except this time the asserted value must have exactly the same value as the target value. Thus objects and arrays would not pass the test, as they would point to different references. |
isStrictlyNotEqualTo(someValue) | The assertion is a success if the asserted value is not the exact equal of someValue. |
isDefined() | Assertion is a success if the asserted value is other than undefined. |
isUndefined() | Assertion is a success if the asserted value is undefined. |
isNull() | Assertion is a success if the asserted value is null. |
isNotNull() | Assertion is a success if the asserted value is anything other than null. |
isTrue() | Assertion is a success if the asserted value is true. |
isFalse() | Assertion is a success if the asserted value is false. |
isTruthy() | Assertion is a success if the asserted value is not falsy (see the next assertion for more details). |
isFalsy() | Assertion is a success if the asserted value is falsy. Falsy values are: undefined, null, false, NaN, 0, and ''. |
This is the current list of available assertions. I’m sure more will be added with time.
Using assertApi
The assertApi() function can be used to check if the template code has made calls to specific template APIs.
This is a typical flow test - you are checking that certain things happen in order.
For example, take the following template code:
const log = require('logToConsole');
const makeTableMap = require('makeTableMap');
const sendPixel = require('sendPixel');
const injectScript = require('injectScript');

// Log input to console
log(data.input);

// Shape into object
const obj = makeTableMap(data.input, 'propertyName', 'propertyValue');

if (obj.someValue) {
  sendPixel('https://endPoint.com/?value=' + obj.someValue, data.gtmOnSuccess, data.gtmOnFailure);
} else {
  injectScript('https://endPoint.com/script.js', data.gtmOnSuccess, data.gtmOnFailure);
}
To test the flow of this template, you could use a test like this:
const mockData = {someValue: true};

runCode(mockData);

assertApi('logToConsole').wasCalled();
assertApi('makeTableMap').wasCalled();
assertApi('sendPixel').wasCalled();
assertApi('injectScript').wasNotCalled();

assertApi('gtmOnSuccess').wasCalled();
Pay attention to the last line - with tag templates you should always have a test that checks whether the gtmOnSuccess API was called. You can also test for gtmOnFailure in some circumstances (specifically, when the template executes data.gtmOnFailure()).
assertApi(apiName) returns an object that has two assertions:
| Assertion | Description |
|---|---|
wasCalled() | Success if the API was called during test execution. |
wasNotCalled() | Success if the API was NOT called during test execution. |
This is very simple, by design. You can only check if the API was called or not.
If you want to know whether it was called with some specific value, you need to mock the APIs instead.
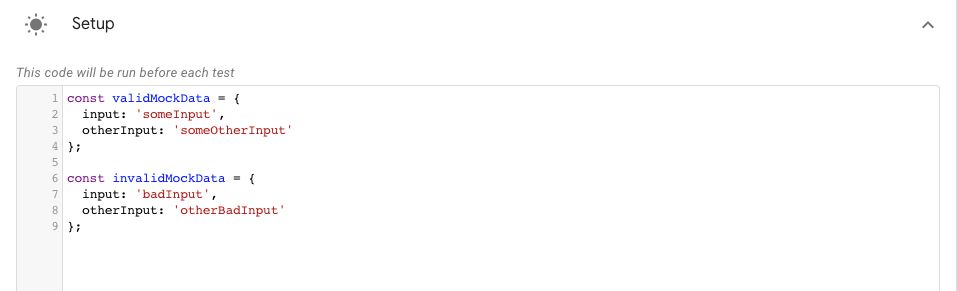
The test Setup
When opening the Tests interface, you’ll see the Setup box. You can use this to establish conditions that apply to all tests. It’s a great place to define your mock objects for example, because then you don’t have to write them over and over again in each test.
I recommend making liberal use of Setup - it can make it much easier to add more tests as your code goes through iterations.
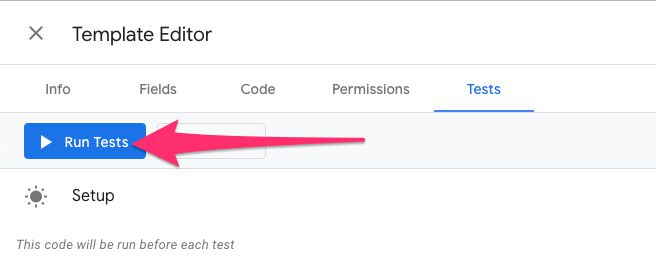
Running tests
To run the tests, simply click the Run tests button at the top of the Tests view, or hit the play button next to any individual test.
The console will log any test results, so play close attention to it.
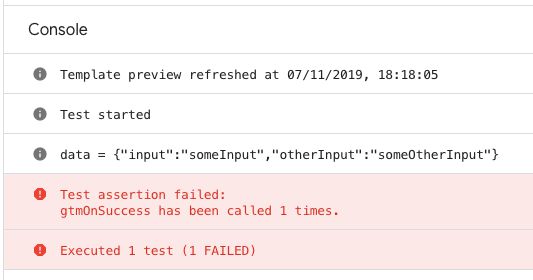
Summary
So. Why should you test? Well, let’s start with this cryptic tweet from Google Tag Manager’s tech lead, Brian.
I imagine at some point tests will become mandatory for templates added to the gallery.
Another point is that tests bring you, the developer, comfort, since you can use them to validate that you don’t generate broken code.
Unit tests are problematic - the tests rely on mock data rather than actual use cases (those are explored with integration and functional tests). Their only purpose is to test the code you write, but the tests are done using … code you write.
However, think of your template’s users. When they download updates to your template from the gallery, they trust that the code works as it used to. Once your test gets more and more complex, it will be more and more difficult to manage the branching code.
At that point, unit tests will be worth every second you spend with them.
Do note that tests alone don’t make your code work. You still need a good template. And writing tests just for coverage’s sake doesn’t make sense - you still need the tests to reflect actual use cases.
I’m looking forward to how the new Tests feature evolves in Google Tag Manager - it’s a great leap forward for avoiding surprises and breaking mistakes in your template code!