A couple of years ago I wrote an article on tracking interactions with the SoundCloud widget via Google Tag Manager. When a platform provides a JavaScript embed API, it’s surprisingly easy to track interactions with the player. You’ve seen this with YouTube, with SoundCloud, with JWPlayer, and now you’ll see how to do this with the Mixcloud player.
If you don’t know what Mixcloud is, well it’s a hugely popular streaming service for DJs, podcasts, radio shows, and other published radio media. Since they offer a handy embed solution for any show you like, it makes sense to start tracking if people are actually using the widget, right?
The Simmer Newsletter
Follow this link to subscribe to the Simmer Newsletter! Stay up-to-date with the latest content from Simo Ahava and the Simmer online course platform.
How to set it up
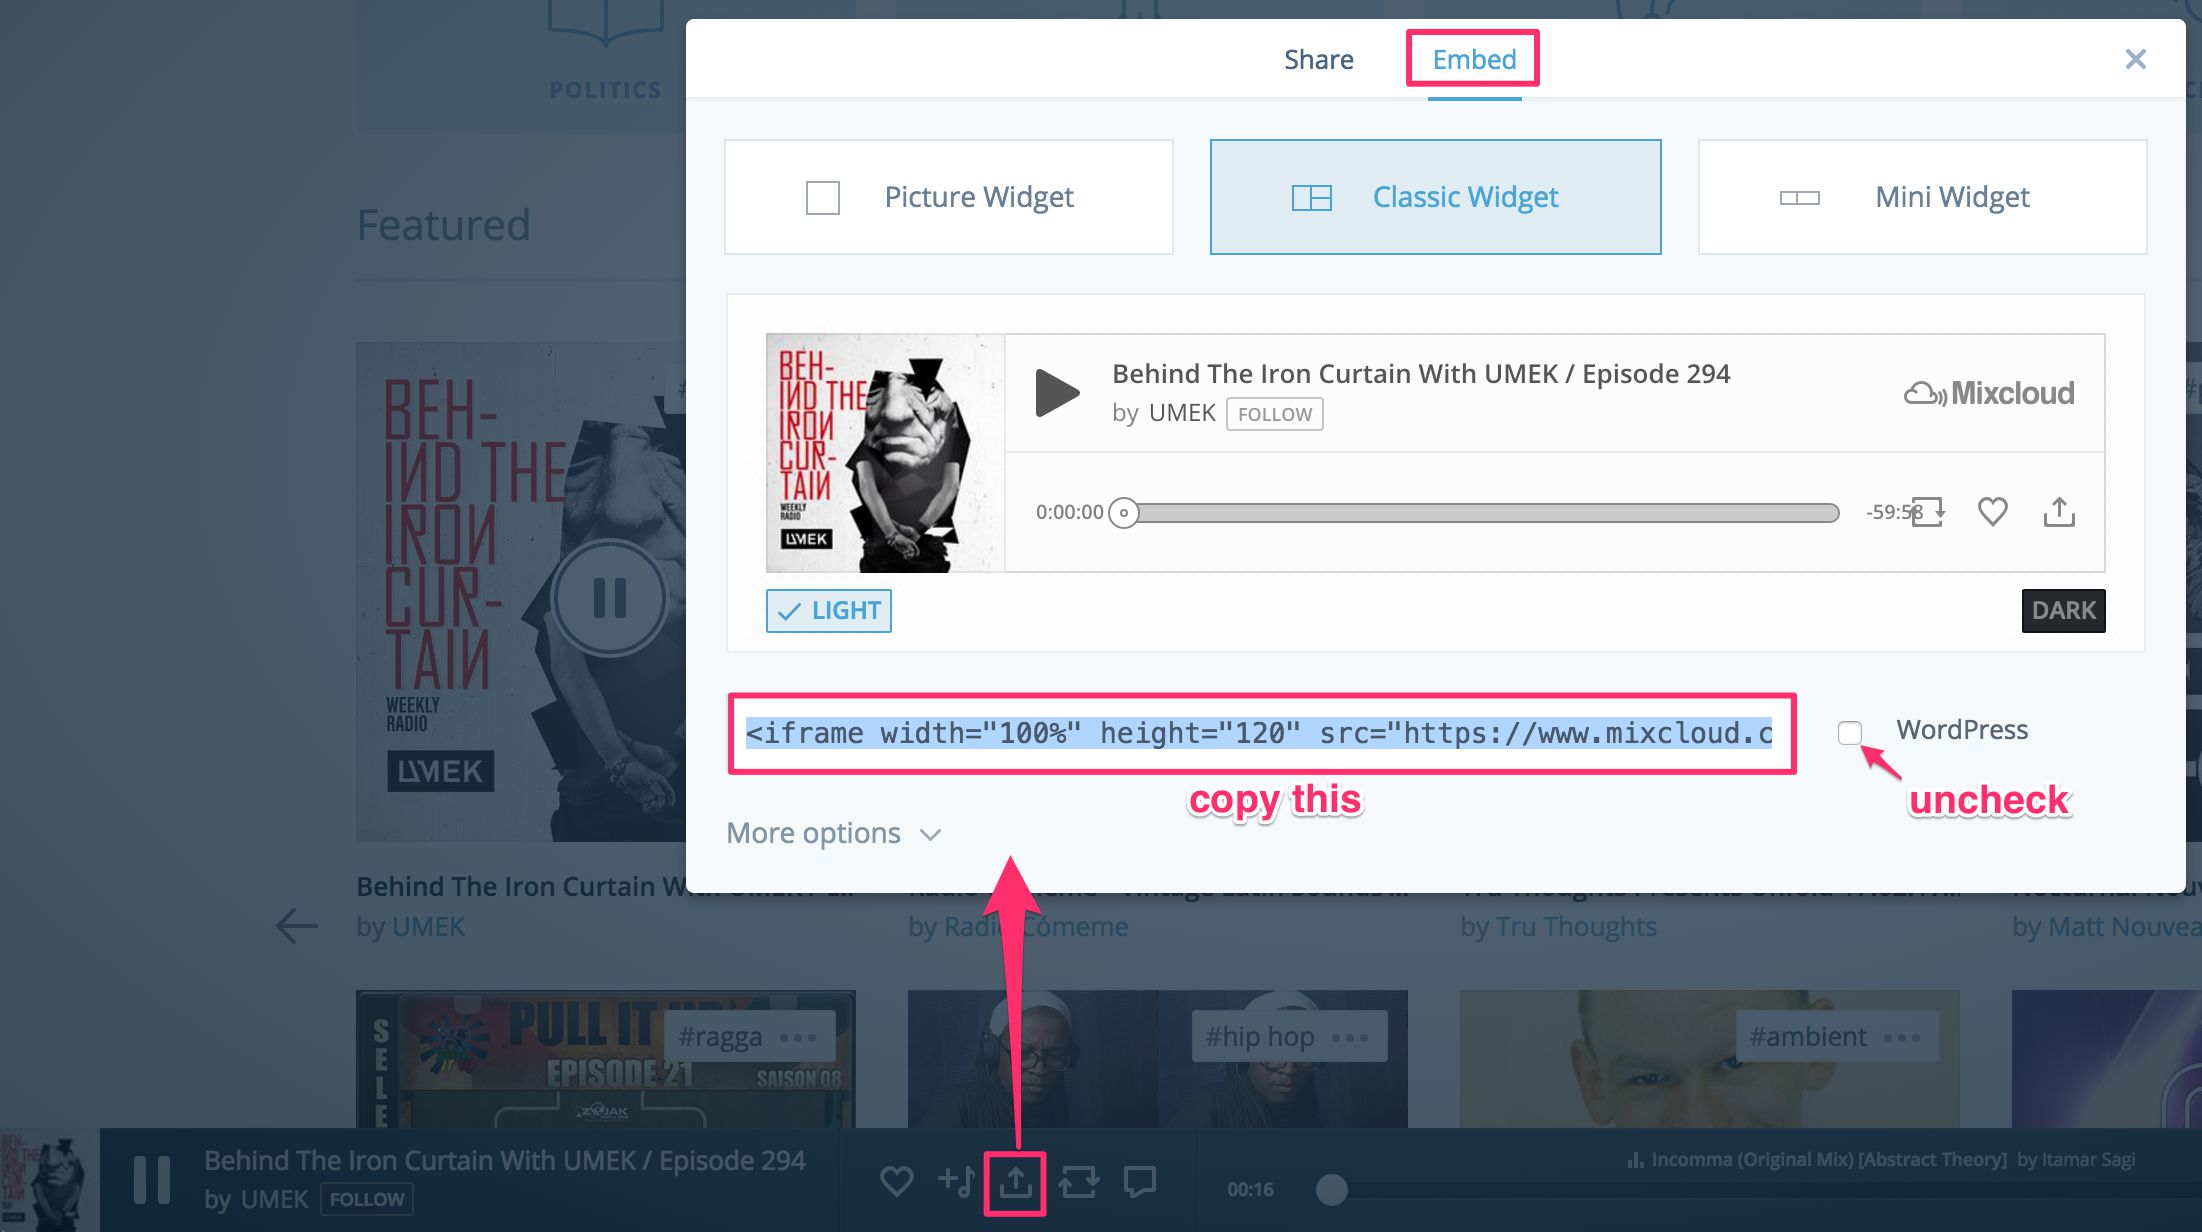
First, you need to add the player widget to your site. To do this, select the show you want to embed, and click the Share button.
An overlay should open with both a Share and an Embed option. Choose the latter.
Setup the player visuals however you wish. Once you’re done, uncheck the box next to Wordpress, after which the text box should contain an iframe embed tag.
This iframe tag is what you need to add to your website. It’s important that you use the exact format provided, so that the JavaScript API works without any problems.
One thing you’ll want to add to the tag, however, is a unique ID attribute. This makes it MUCH easier to target the correct player. So, if the iframe looks like this:
<iframe width="100%" height="60" src="https://www.mixcloud.com/widget/iframe/?feed=https%3A%2F%2Fwww.mixcloud.com%2Fdj_umek%2Fbehind-the-iron-curtain-with-umek-episode-294%2F&hide_cover=1&mini=1&light=1" frameborder="0"></iframe>Add id="myPlayer" like this:
<iframe id="myPlayer" width="100%" height="60" src="https://www.mixcloud.com/widget/iframe/?feed=https%3A%2F%2Fwww.mixcloud.com%2Fdj_umek%2Fbehind-the-iron-curtain-with-umek-episode-294%2F&hide_cover=1&mini=1&light=1" frameborder="0"></iframe>Now this particular player can be identified with the myPlayer identifier.
The Google Tag Manager Custom HTML Tag
The whole tracking solution is contained within a single Custom HTML Tag. So, create a new Custom HTML Tag, and add the following code within:
<script src="//widget.mixcloud.com/media/js/widgetApi.js" type="text/javascript"></script>
<script>
(function() {
/* Change the CSS selector within document.querySelector to capture
* the correct player iframe.
*
* Available events are 'progress', 'buffering', 'play', 'pause',
* 'ended' and 'error'. If you want to stop tracking any one of these,
* just remove them from the events Array.
*/
var playerIframe = document.querySelector('#myPlayer'),
events = ['progress', 'buffering', 'play', 'pause', 'ended', 'error'];
if (playerIframe) {
var player = Mixcloud.PlayerWidget(playerIframe);
var key = '';
var sendDataLayer = function(event, key, currentProgress) {
window.dataLayer.push({
event: 'mixcloud',
mixcloudEvent: {
name: event,
key: key,
progress: currentProgress
}
});
};
player.ready.then(function() {
events.forEach(function(event) {
try {
player.events[event].on(function(progress, duration) {
player.getCurrentKey().then(function(key) {
var currentProgress;
if (progress && duration) {
if (progress === Math.round(duration * 0.25)) {
currentProgress = '25%';
} else if (progress === Math.round(duration * 0.5)) {
currentProgress = '50%';
} else if (progress === Math.round(duration * 0.75)) {
currentProgress = '75%';
}
}
if (event !== 'progress' || !!currentProgress) {
sendDataLayer(event, key, currentProgress);
}
});
});
} catch(e) {}
});
});
}
})();
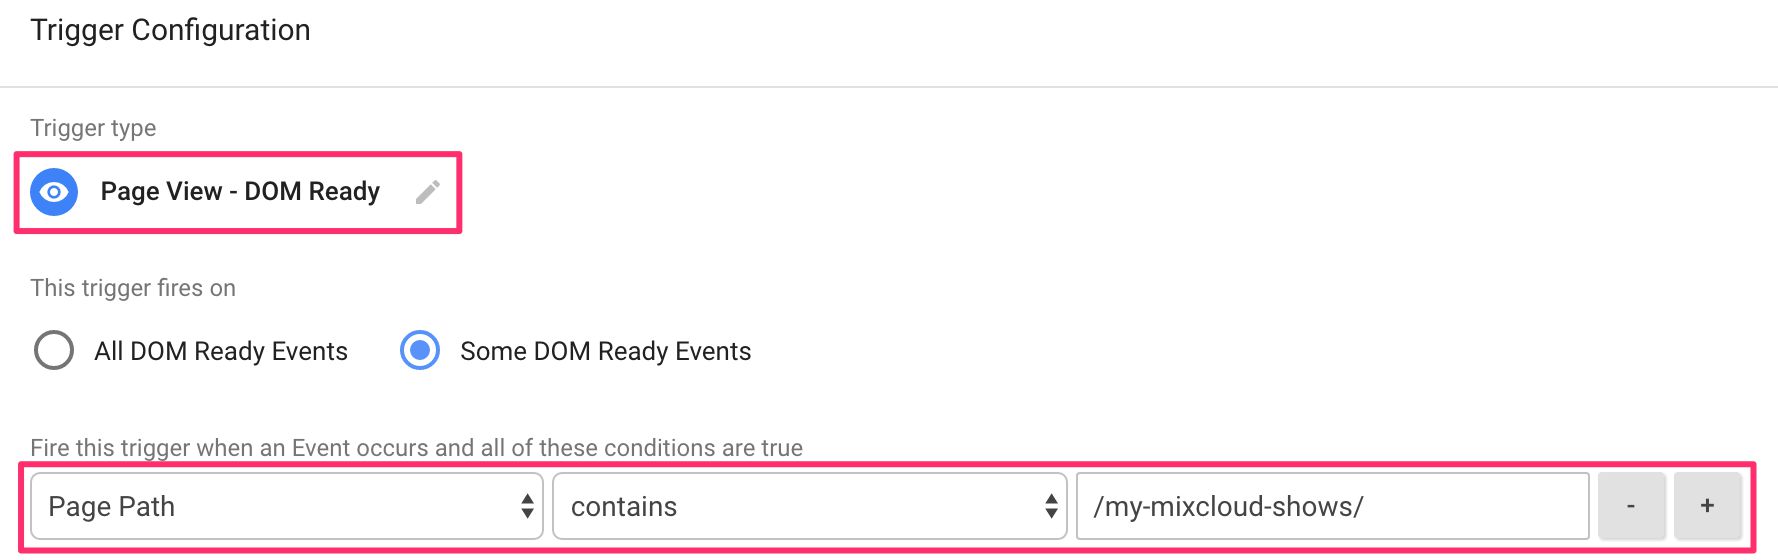
</script>Set this tag to fire on a Page View / DOM Ready trigger, and if you only want to fire this on certain pages, you can modify the trigger accordingly. Here’s an example:
How it works
This tracker adds a listener to the given player for all the events you specified in the events Array. Whenever such an event is registered by the page, a dataLayer.push() takes place with the following structure:
{
  event: 'mixcloud',
  mixcloudEvent: {
    name: '',
    key: '',
    progress: ''
  }
}
As you can see, the progress event measures how far along the show the user is. It has triggers for 25%, 50% and 75%. I didn’t add one for 100%, as the ended event is the same thing.
Triggers and variables
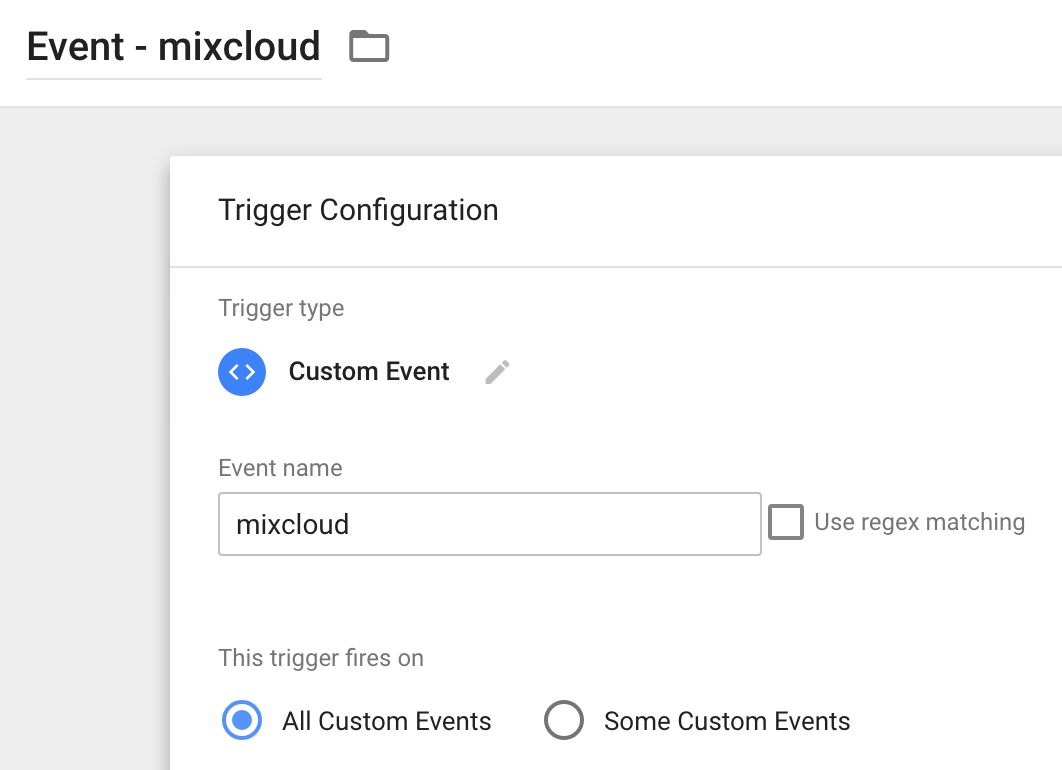
Next thing you’ll need to do is create a Custom Event trigger for the mixcloud event. It’s dead easy, and the trigger should look like this:
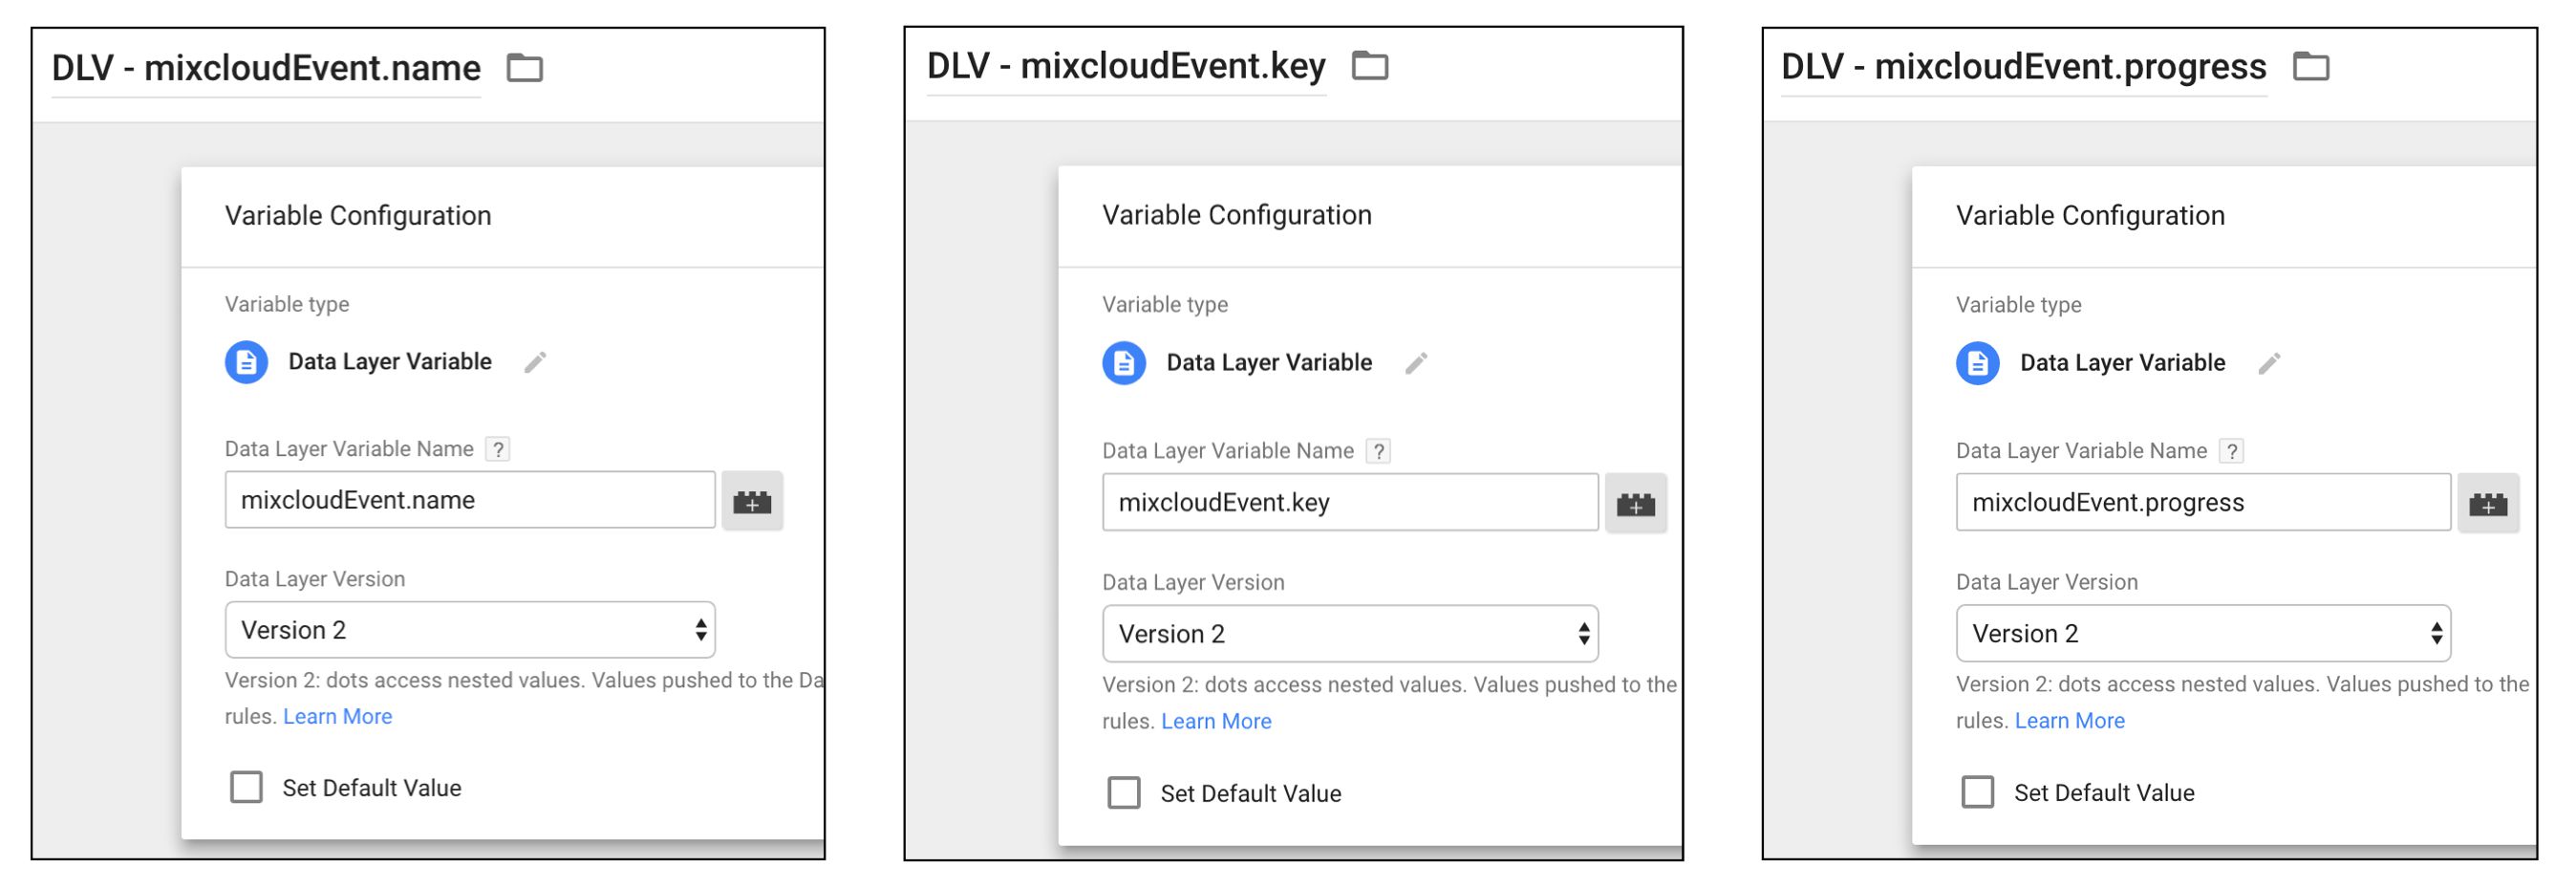
Finally, you’ll need three Data Layer variables. One for mixcloudEvent.name, one for mixcloudEvent.key, and one for mixcloudEvent.progress.
Now you should have everything you need to start tracking interactions with the widget.
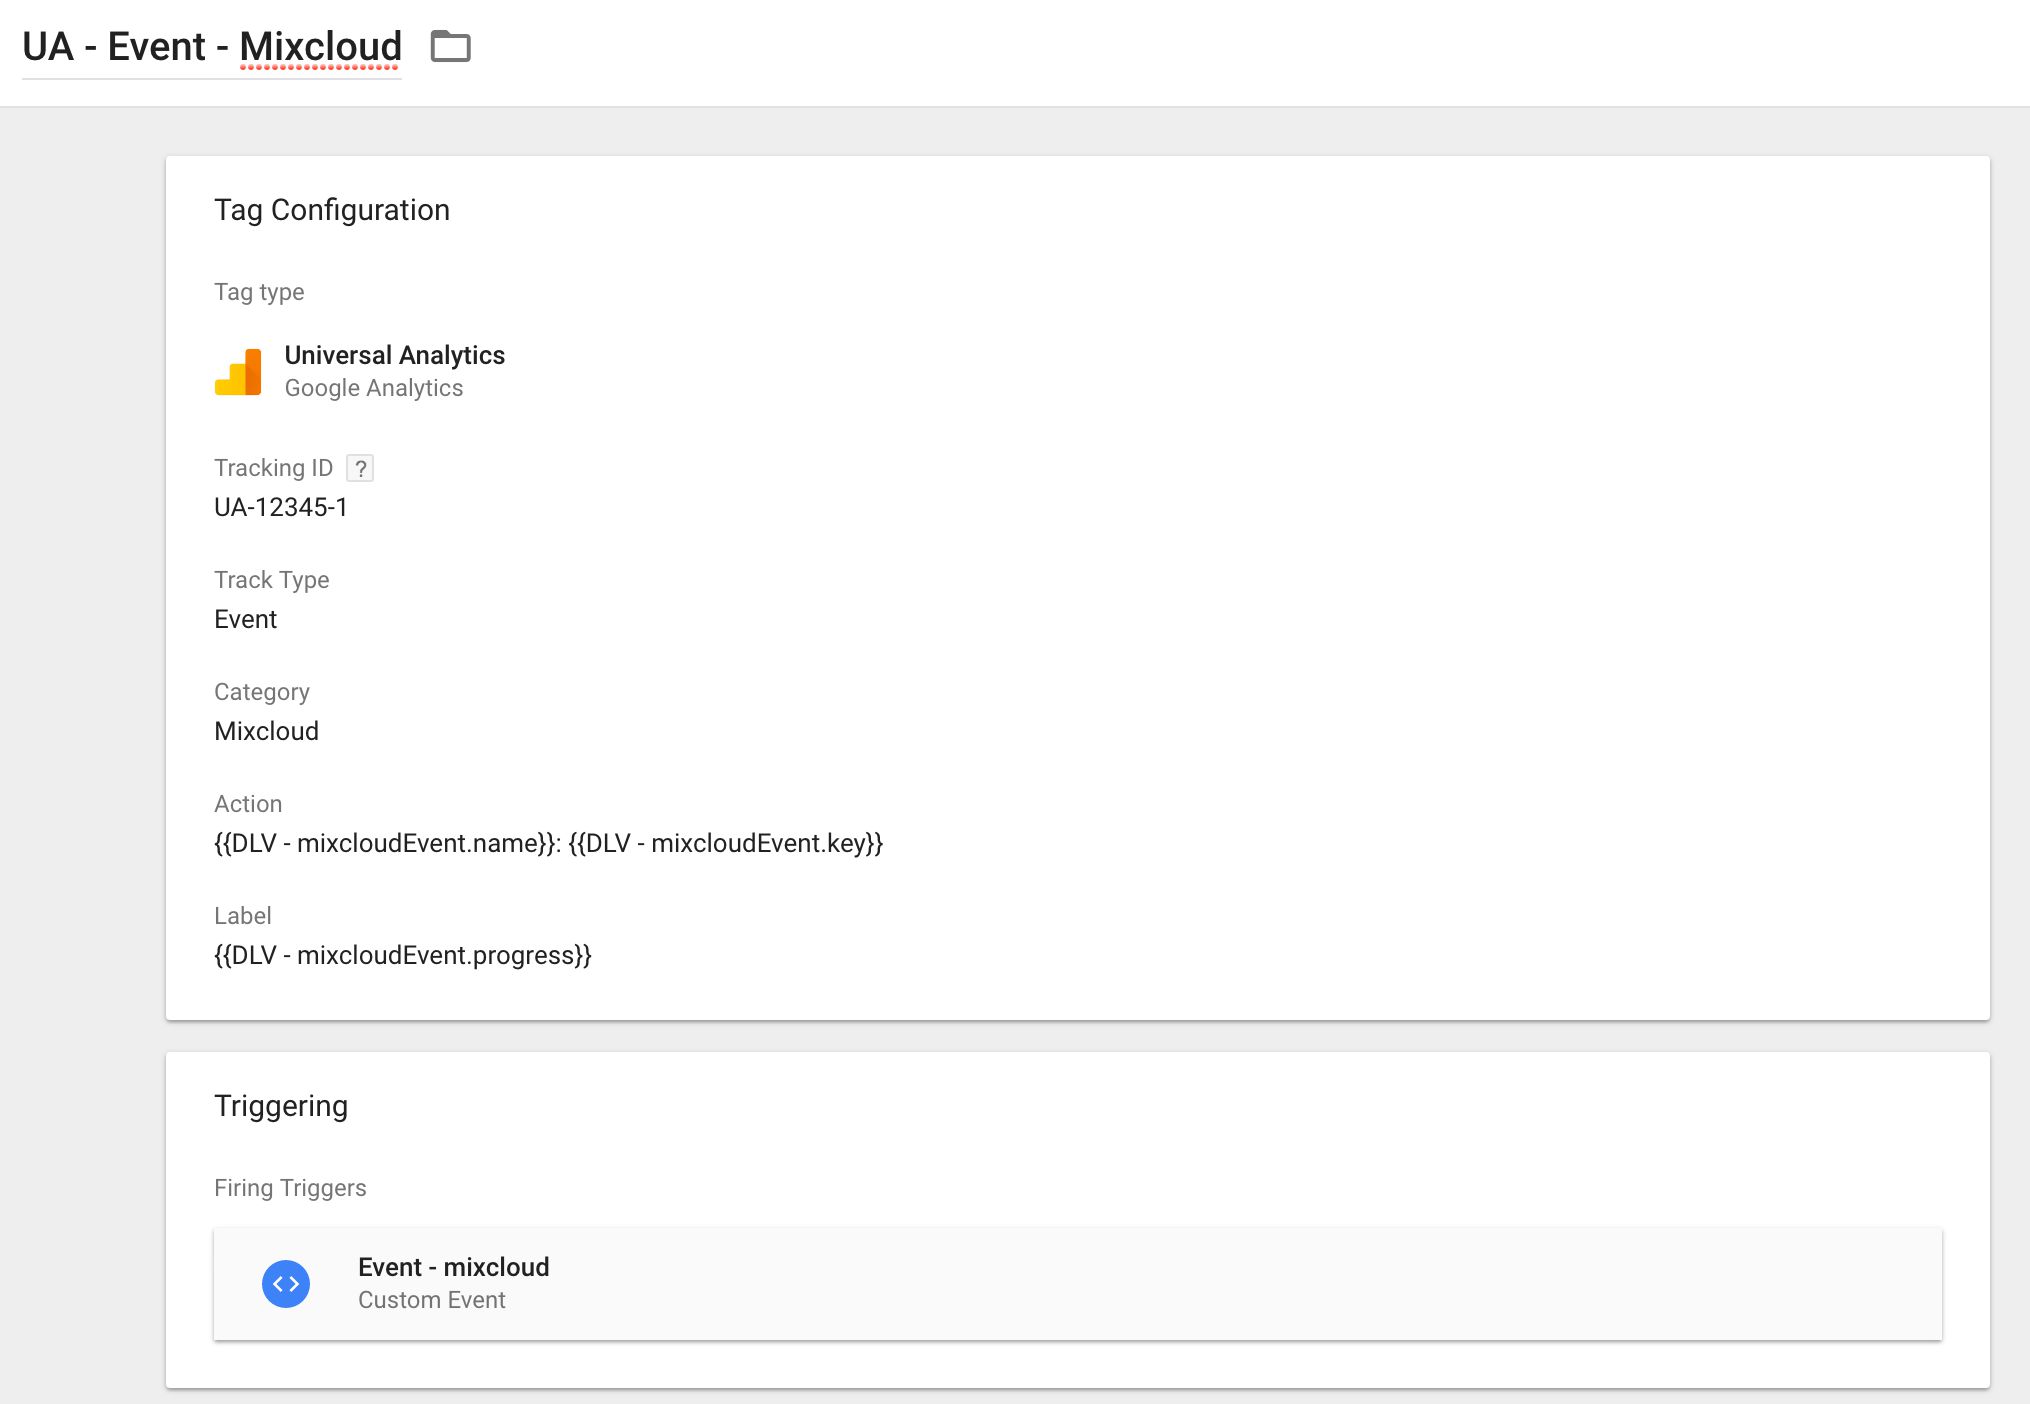
A typical Google Analytics Event tag might look like this:
For example, when a progress event for hitting the half-way mark is recorded, the event would look like this:
Event category: Mixcloud
Event action: progress: /syte/subfm170217/
Event label: 50%
You can make it even more versatile with Custom Dimensions and Custom Metrics.
Summary
This was (hopefully) a simple tip to get you along with Mixcloud player tracking. With a robust JavaScript API it really is easy to do.
The Mixcloud JavaScript API works with promises, so the functional approach exhibited in the Custom HTML Tag might look messy, and as such, there is room for improvement via refactoring.
If you have more than one widget on the page that you want to track, you’ll need to duplicate the relevant code for each player on the page. For example:
...
var player = document.querySelector('#myPlayer');
var player2 = document.querySelector('#myPlayer2');
...
if (player) {
  player.ready.then(function() {
    ...
  });
}

if (player2) {
  player2.ready.then(function() {
    ...
  });
}
...
Have fun listening and tracking those tracks!