#GTMtips: Track URL Fragments As Pageviews
(Updated 15 July 2015: Added a huge simplification. Jump straight to the update at the end.)
URL fragments are strings of characters that follow a hash mark (#) in the URL. Typically, they are used for anchor links, where following a link keeps you on the same page but jumps the browser to some anchored position. They’re also the tool of choice for single-page apps, where content is served dynamically without page reloads.
In Google Analytics, fragment changes are not tracked by default, and the URL paths that are passed to GA with your Pageview hits are stripped of these fragments. With Google Tag Manager, this can be remedied with a History Change Trigger and some Variable magic.
XThe Simmer Newsletter
Subscribe to the Simmer newsletter to get the latest news and content from Simo Ahava into your email inbox!
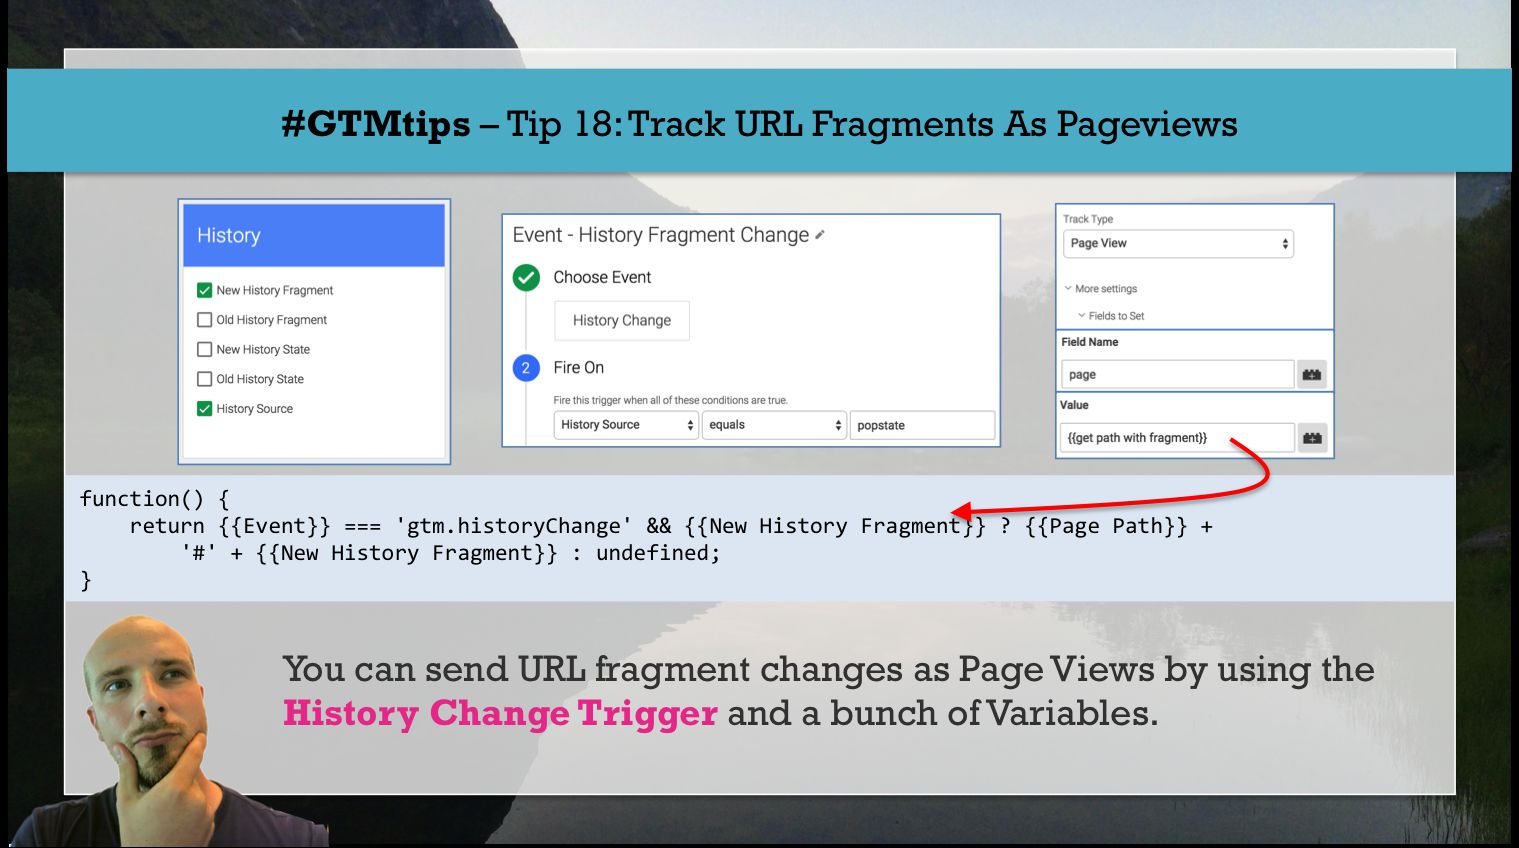
Tip 18: Track URL fragments as Pageviews
When the URL fragment of the page changes, it doesn’t cause a reload. This is problematic for your Analytics tracking, as you probably have the All Pages Trigger firing your Page View Tag, and this Trigger only fires once per page load.
However, when the URL fragment of a page changes, what happens behind the scenes is interesting: a browser history event is dispatched, and this can be hooked onto. Google Tag Manager provides the perfect way to do it with the History Change Trigger. It activates when it captures an event dispatched by a the URL fragment change.
So, to track fragment changes, all we need is the History Trigger and some Variables, so that we can get a nice, lean, flexible setup running.
1. The Variables
First, head on over to the Variables section of Google Tag Manager, and make sure you’ve checked the New History Fragment and History Source Built-In Variables.
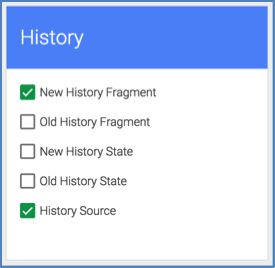
New History Fragment stores the new URL fragment when it changes, and History Source will let us specify that we don’t the tag to fire on all browser history events; just the one that signals a fragment change.
Next, you’ll need a Custom JavaScript Variable that will produce a new, well-formed URI that we can then send to Google Analytics as the page path of the URL fragment. So, create a new Custom JS Variable, name it {{get path with fragment}}, and add the following code within:
function() {
  return {{Event}} === 'gtm.historyChange' && {{New History Fragment}} ? {{Page Path}} + '#' + {{New History Fragment}} : undefined;
}
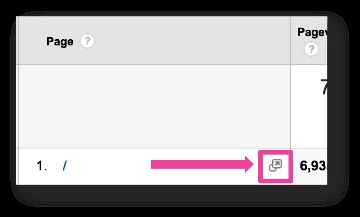
The reason we’re sending the Page Path with the ‘#’ symbol in place is because we want to enable the direct link “Visit this page” functionality in Google Analytics reports. Thanks to Stéphane Hamel and Phil Pearce for this tip.
2. The Trigger
Create a new Trigger, and name it Event - History Fragment Change.
Choose History Change as the Event, and set the following condition in the Fire On section of the Trigger:
History Source equals popstate

We’re using popstate as a condition, because we don’t want this Trigger to go off on other instances where the History Change Trigger can fire. If you don’t have an AJAX or a single-page site, you wouldn’t have to worry about this, but this is a nice way of delimiting a rather generic Trigger to only fire in relevant situations.
3. The Tag
Finally, take your regular Page View Tag, and add the Trigger from (3) to it. This means that the Page View Tag will now have multiple Triggers. Most likely, you’ve used the All Pages Trigger, so now the Tag will fire both when All Pages matches and when a browser history event is detected.
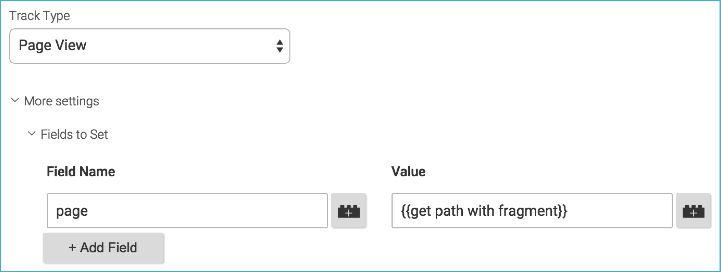
Next, scroll down to More Settings -> Fields To Set. Add a new field, name it page, and set its value to {{get path with fragment}}.
Save the Tag and start testing.
How it works
When the page loads, the All Pages Trigger fires your Page View Tag. At this point, GTM will look at the page field and find the {{get path with fragment}} Variable there. It proceeds to execute the JavaScript within. However, the one-liner JavaScript only works if the value of the {{Event}} Variable is gtm.historyChange, which is not the case when the All Pages Trigger fires ({{Event}} is gtm.js in that case). So, the Variable returns undefined, which ensures that the regular Document Path is sent with the Tag instead.
When someone clicks on a link which only has an anchor in the href, such as <a href="#contact-us">Contact Us</a>, the browser dispatches the history change event, and it’s picked up by the History Change Trigger you created. This causes the Page View Tag to fire again.
This time, as GTM executes the JavaScript code again, the value of {{Event}} resolves to gtm.historyChange, and the Variable returns a string where the URL path of the page, e.g. /home/, is concatenated with the fragment text #contact-us, resulting in /home/#contact-us.
Things to keep in mind
If your site is an AJAX or single-page site, there might be other cases where popstate is dispatched. If this is the situation, you will need to add an additional check into the Custom JavaScript Variable, which compares the Built-In Variables for New History Fragment and Old History Fragment. If they are the same, then it means that the fragment didn’t change and popstate was dispatched for some other reason. In this case, the Variable needs to return undefined as well.
You might want to edit the Custom JavaScript Variable to check for the URL fragment when the page is loaded as well, so that direct visits to a URL fragment will be recorded accordingly in Google Analytics. This would require something like the following:
function() {
  return ({{Event}} === 'gtm.js' || {{Event}} === 'gtm.historyChange') && {{New History Fragment}} ? {{Page Path}} + '#' + {{New History Fragment}} : undefined;
}
Let me know if you have other issues with this solution. For most use cases, this should work just fine.
UPDATE
The solution above has some problems. First, it doesn’t include a possible query string in the returned path. Also, if the page is loaded, i.e. there’s no history change, the hash isn’t included in the returned path.
So, a huge simplification is called for. The {{get path with fragment}} should actually look like this:
function() {
  return window.location.pathname + window.location.search + window.location.hash;
}
Then you can just have your Page View Tag fire on both a Page View Trigger as well as the History Change Trigger. This Variable, once added to the page field, will return the path, the query string (if there is one) and the URL hash (if there is one).
Sometimes I think of way too complicated solutions for simple problems :-)
