Setup Google Tag Manager iOS With Swift
I’ve been meaning to write about Google Tag Manager for mobile apps for such a long time. Finally, I have some great use cases to share, as well as some useful examples for implementing GTM for iOS. That’s right, this is an iOS guide, and, to be more specific, geared towards a successful Swift implementation.
If you didn’t know, Swift is a relatively new programming language, developed by Apple for iOS and OS X programming. It’s got some nice synergies with existing Objective-C implementations, which means you can either gradually migrate to Swift, or just start writing new apps with it instantly.
Table of Contents
In this article, we’ll walk through a simple Swift implementation of Google Tag Manager and Google Analytics. I’ll very briefly review the GTM SDK in the Comments chapter, but this is a how-to article, not a why-should-I writeup. I’m going to be expanding on this theme of mobile GTM in future texts, so this will stand out as a starting point for understanding how the SDK plays together with your application.
Many thanks to my colleague, Sampsa Kuronen, for exposing me to the dark arts of Xcode and Swift.
XThe Simmer Newsletter
Subscribe to the Simmer newsletter to get the latest news and content from Simo Ahava into your email inbox!
Getting started
This guide is written with the assumption that you’re using the latest version of Xcode as your IDE of choice. It’s not the best IDE (by far) out there, but it has been created with iOS and OS X programming in mind, meaning there are certain benefits from using it.
Another, quite obvious, assumption is that you have access to your project source. You will be adding new files, importing headers and modifying project source code. It’s a good idea to run everything you’re doing by your team, as you don’t want to merge unverified source code into your project.
Here’s something you might not yet fully realize:
GTM for mobile apps is not the same as GTM for the web!
The level of freedom you have when working with the latter simply does not exist in the mobile app world. We’re working with projects and applications, so you need to have a solid understanding of how to do software development in a proper and consistent manner, abiding to any design patterns you have found successful.
1. Google Tag Manager setup
To get things rolling, let’s setup Google Tag Manager first. In this tutorial, we’ll create a simple Screen View Tag to test the implementation with. In later chapters, we’ll go over the event payload as well, but it’s up to you to create the Tag for it.
In GTM, create a new Container under some Account. Choose iOS as the container type, and give it a descriptive name.
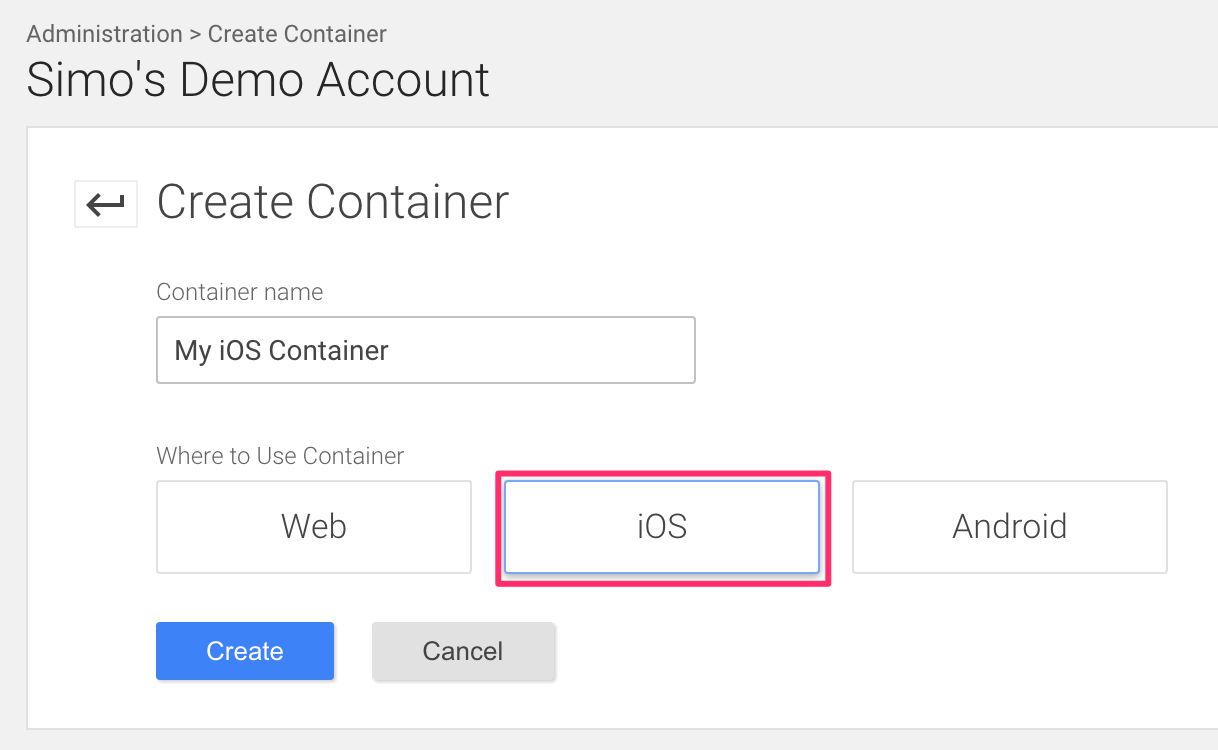
Next, you’ll be whisked to the Container Overview, and you’ll see a small popup saying your container is ready to use. You can close that.
As you can see, it looks pretty much like GTM for web.
Next, go to Tags, and click New.
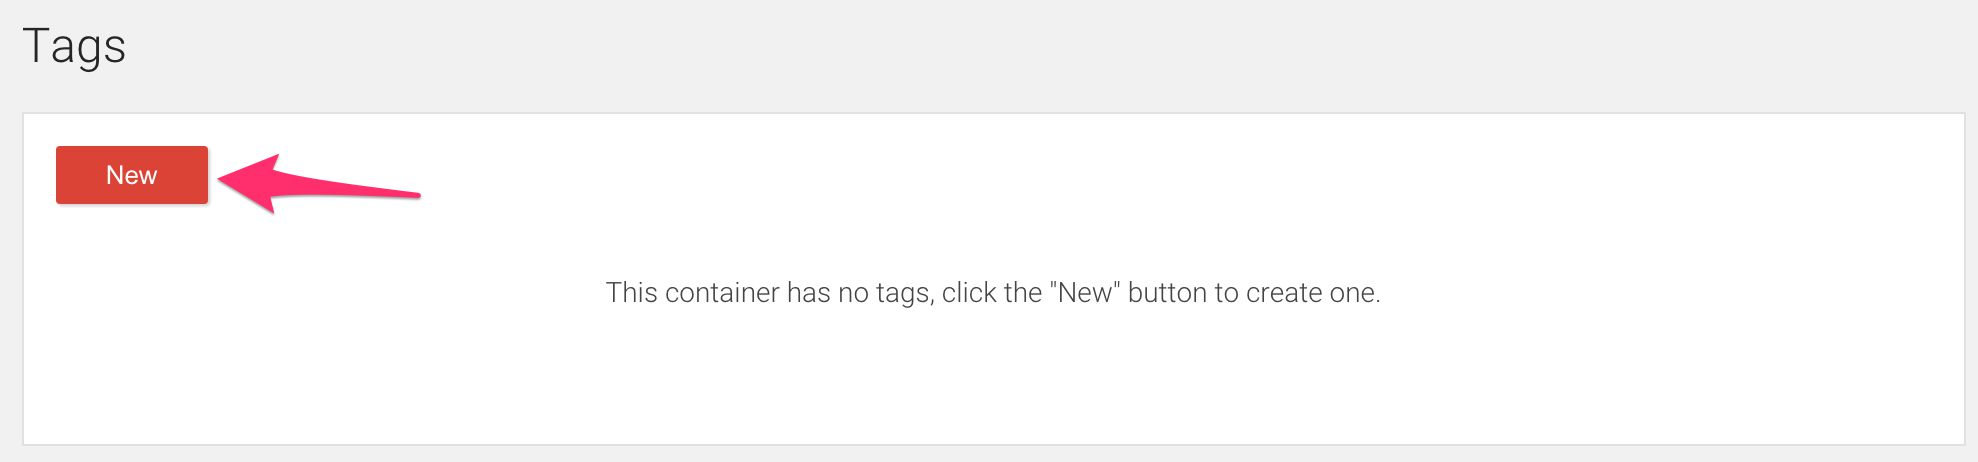
Wow, that’s way fewer Tags than in GTM for web. Let’s hope we’ll get more soon! Also, make note that there is no Custom HTML Tag. It makes perfect sense, since you’re not working with HTML, but I thought I should point it out nevertheless.
We’ll be creating a simple Google Analytics Tag , which sends an App View (also known as a Screen View) to Google Analytics when the first View of the app loads (don’t worry, it will all be clear soon). So, create the Google Analytics Tag, and add the Tracking ID.
Make sure that App View is selected as the Track Type, and expand More Settings -> Fields to Set.
Click + Add Field, and add screenName as the Field Name. In Value, click the “Variable” button and choose New Variable….
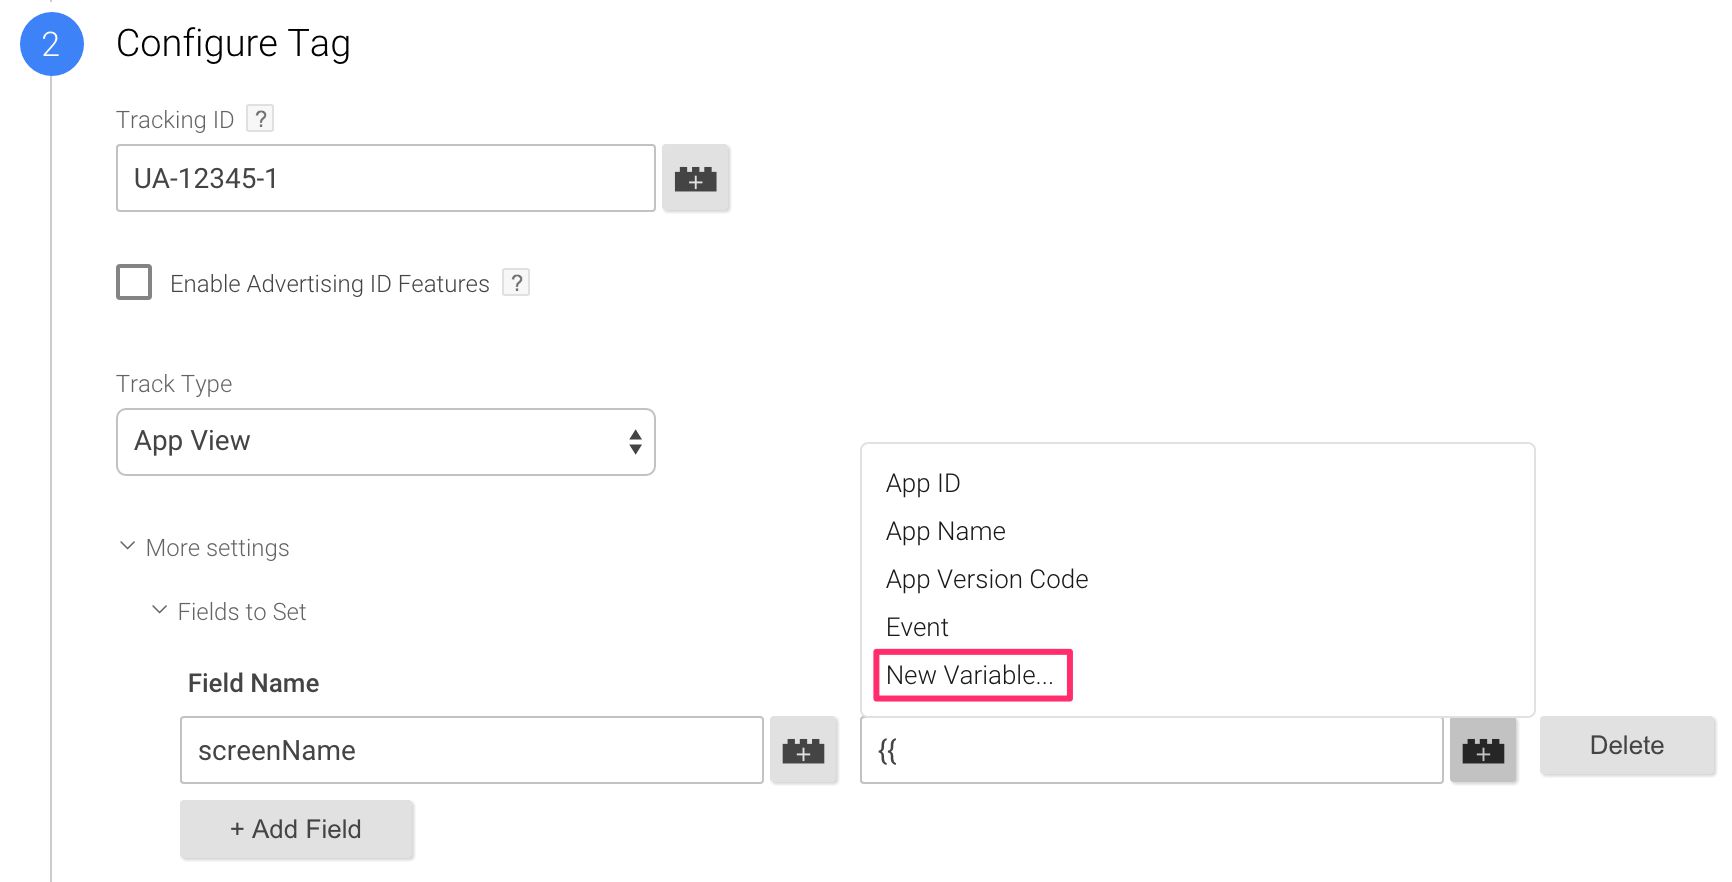
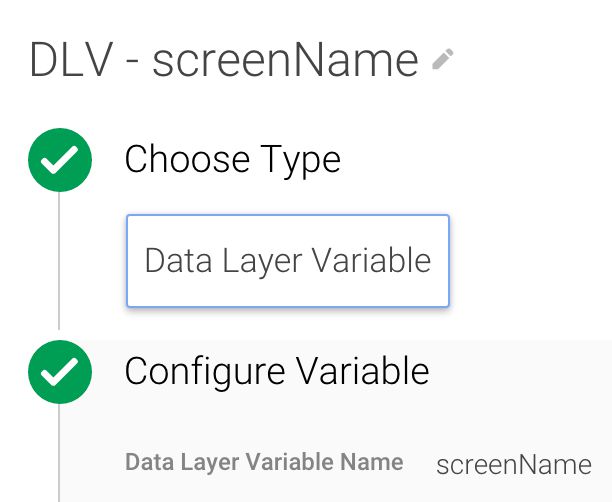
We need to create a Variable, which picks up the desired Screen Name from the Data Layer (Screen Name is to an app what Page is to a website). So, after marvelling the list of Variables that’s completely different from GTM for web, choose Data Layer Variable.
Give it a descriptive name, e.g. DLV - screenName, and set the Variable Name field to screenName. Save the new Variable.
Next, in the Tag screen, click Continue and proceed to the Fire On step.
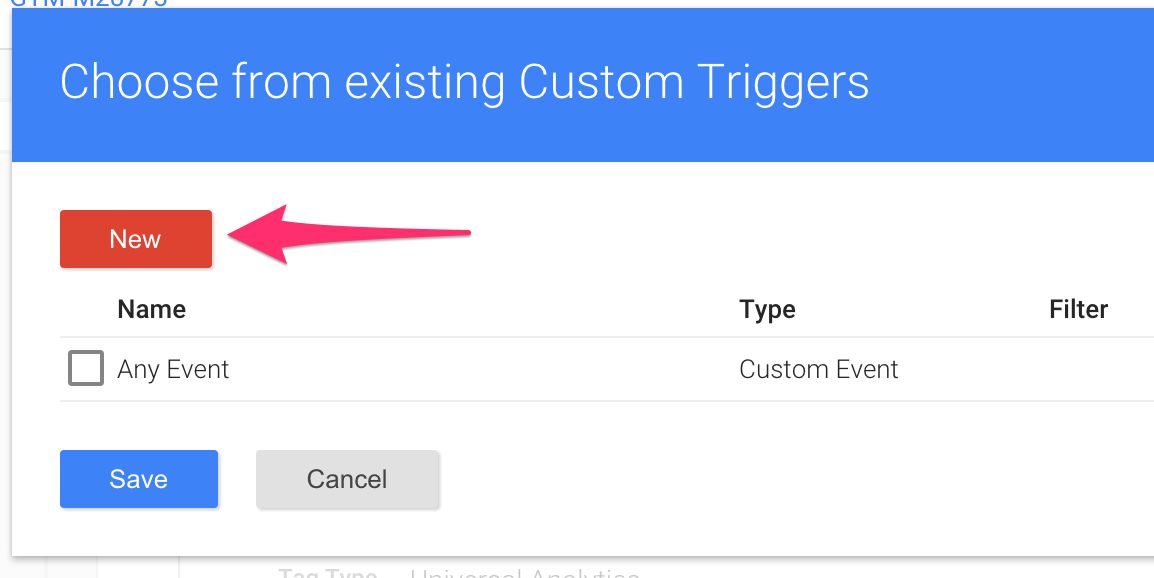
In this step, click Custom, as you want to create a new Trigger for the Tag. So, in the popup that appears, click New.
Give the Trigger a descriptive name, e.g. Event - screenView, and set the condition as in the screenshot below.
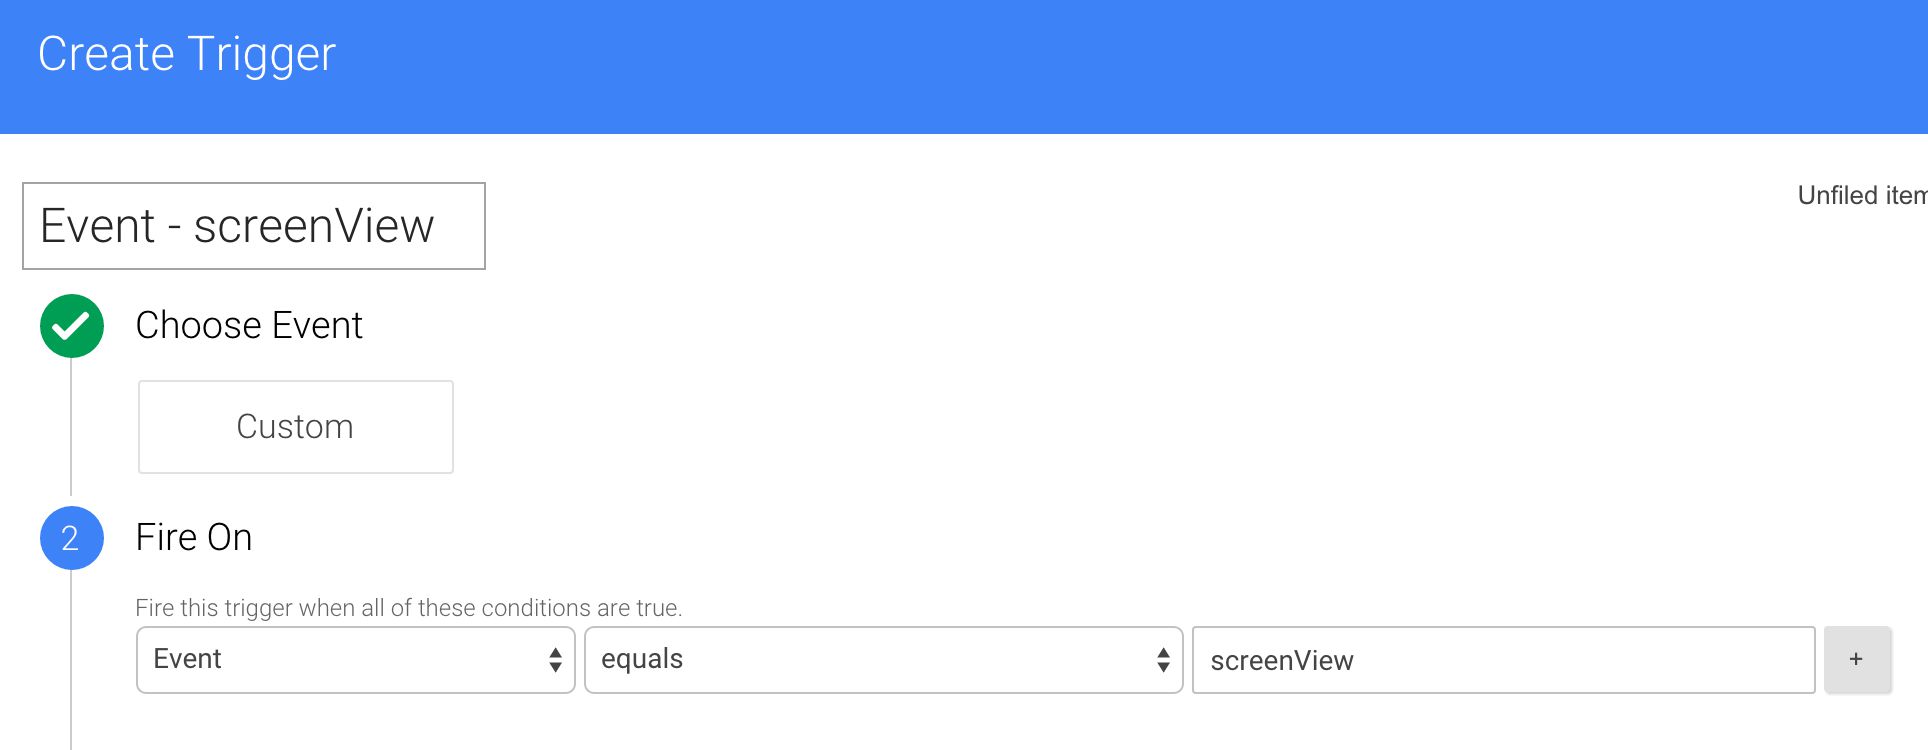
Save the Trigger, and then click “Create Tag” to, well, create the Tag.
Phew, almost done here! We’ll go with just this one Tag, as this is a simple setup guide.
Next, go to the Versions page of your GTM container, and click open the Actions menu for the only container version you’ll see (the initial draft). Click Publish and follow the prompts to publish your container.

There, GTM is almost ready, hungry to process the Data Layer commands you dispatch from your app.
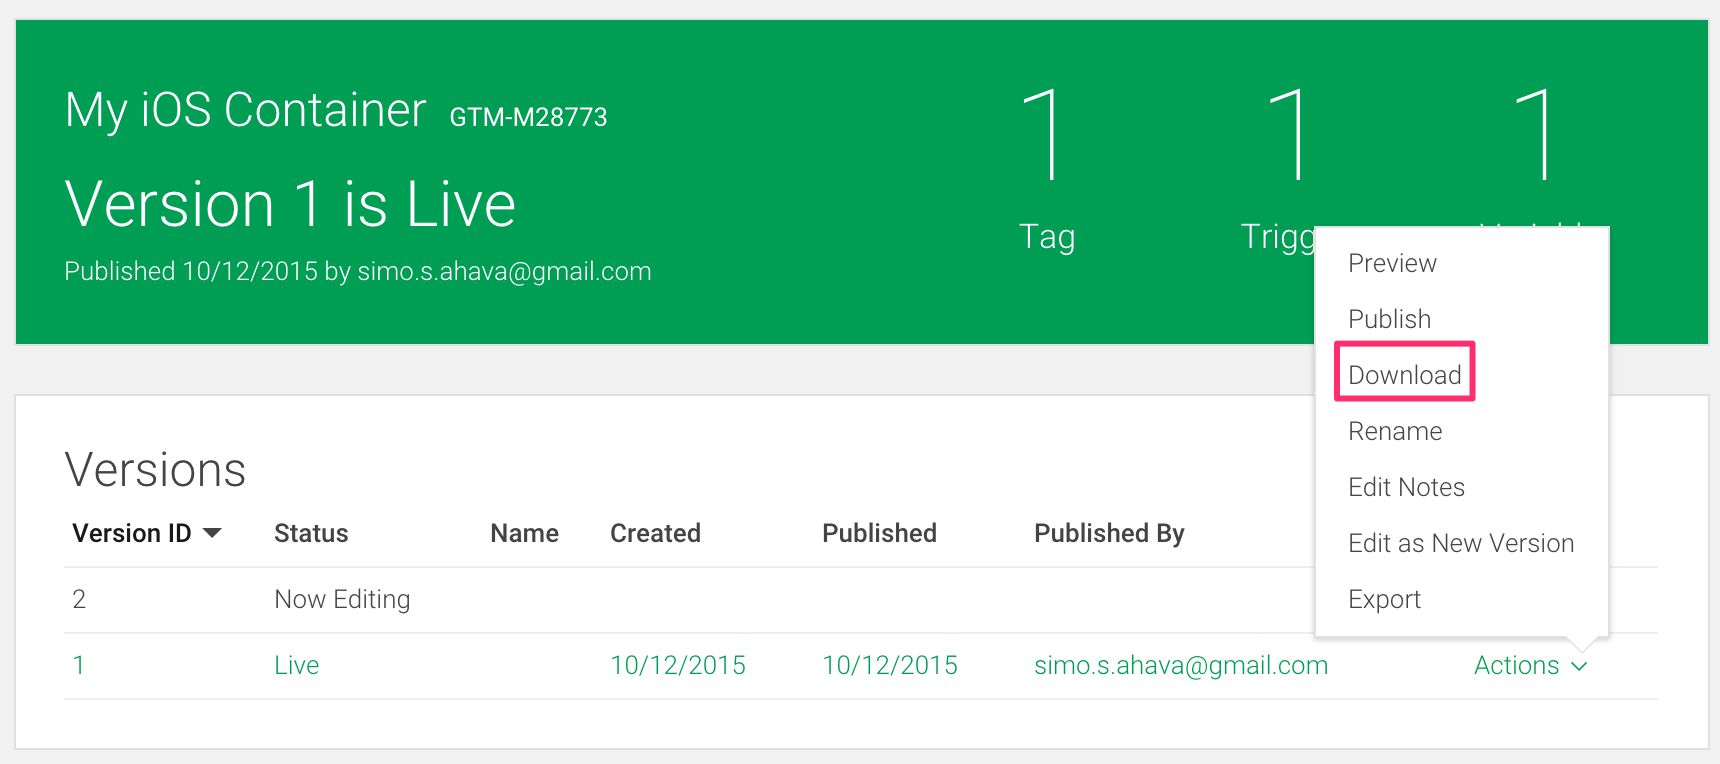
Just one more thing to do. You’ll need to download the container version binary, as GTM for apps is a bit different in how it processes containers. Basically, you can’t trust that the app will have access to a container downloaded over the network, so you’ll always want to provide a local container binary file for the app as well. Read more about this in chapter 5.1.
So, click open the Actions menu for the Live container version, and choose Download. Make sure you download it somewhere you can easily find it from.
That’s it! We’re done with the GTM setup. All that’s left is the minor task of upgrading your App to use the Google Tag Manager (and Google Analytics) SDK!
Congratulate yourself with a power bar and some coffee.
I’ll wait. Maybe get some coffee myself, and boogie silently to your profound success in setting up GTM!
(2. Create a new Xcode workspace)
I won’t linger here, as I’m actually assuming you already have an Xcode project and workspace to work with. If you need something to get started with, take a look at this tutorial by Ray Wenderlich. If you pay close attention to the screenshots in the article you’re reading right now, you might notice that I’m actually using Ray’s Tip Calculator as the basis for this article.
If you only have a project setup and no workspace, keep reading. When you add the required dependencies to your project using Cocoapods (see below), a workspace is automatically generated for you.
3. Download the SDKs using Cocoapods
In order for Google Tag Manager to work with your app, you will need to download the SDKs for both Google Tag Manager and Google Analytics. To do that we’ll use Cocoapods, which is an open-source dependency manager for your iOS and OS X projects. As you might have guessed, both Google Analytics and Google Tag Manager SDKs are also distributed as Pods.

After you’ve installed Cocoapods (if you need help, check e.g. this guide), you need to go to your workspace root directory (the one with your .xcodeproj and .xcworkspace files), and type:
pod init
This command initializes a simple Podfile for your project.
Open Podfile with your favorite editor.
Between the lines target 'YourProject' do and end, you need to add the Pod references you want to download and install for your project, so add the following construct into the file:
target 'YourProject' do
  pod 'GoogleTagManager'
  pod 'Google/Analytics'
end
Once you’ve done this, you can run the command pod install, which will automatically install and import all the files to your Xcode project. Neat, huh?

Now that you’ve installed the Pods, the next thing you need to do is import them into your project.
It’s not exactly straightforward, as Google Tag Manager source code is in Objective-C, which means you can’t just directly import it to your Swift project. Instead, you need to use something called a Bridging Header.
4. Create and edit the Bridging Header file
A bridging header is key to creating projects where the codebase includes code from multiple languages - Objective-C and Swift in this case. Basically, you use a bridging header file to expose Objective-C structures in your Swift files, so that you can, for example, work with the GTM SDK (which is Objective-C at the time of writing) without having to worry about clashes and conflicts that occur when working across languages.
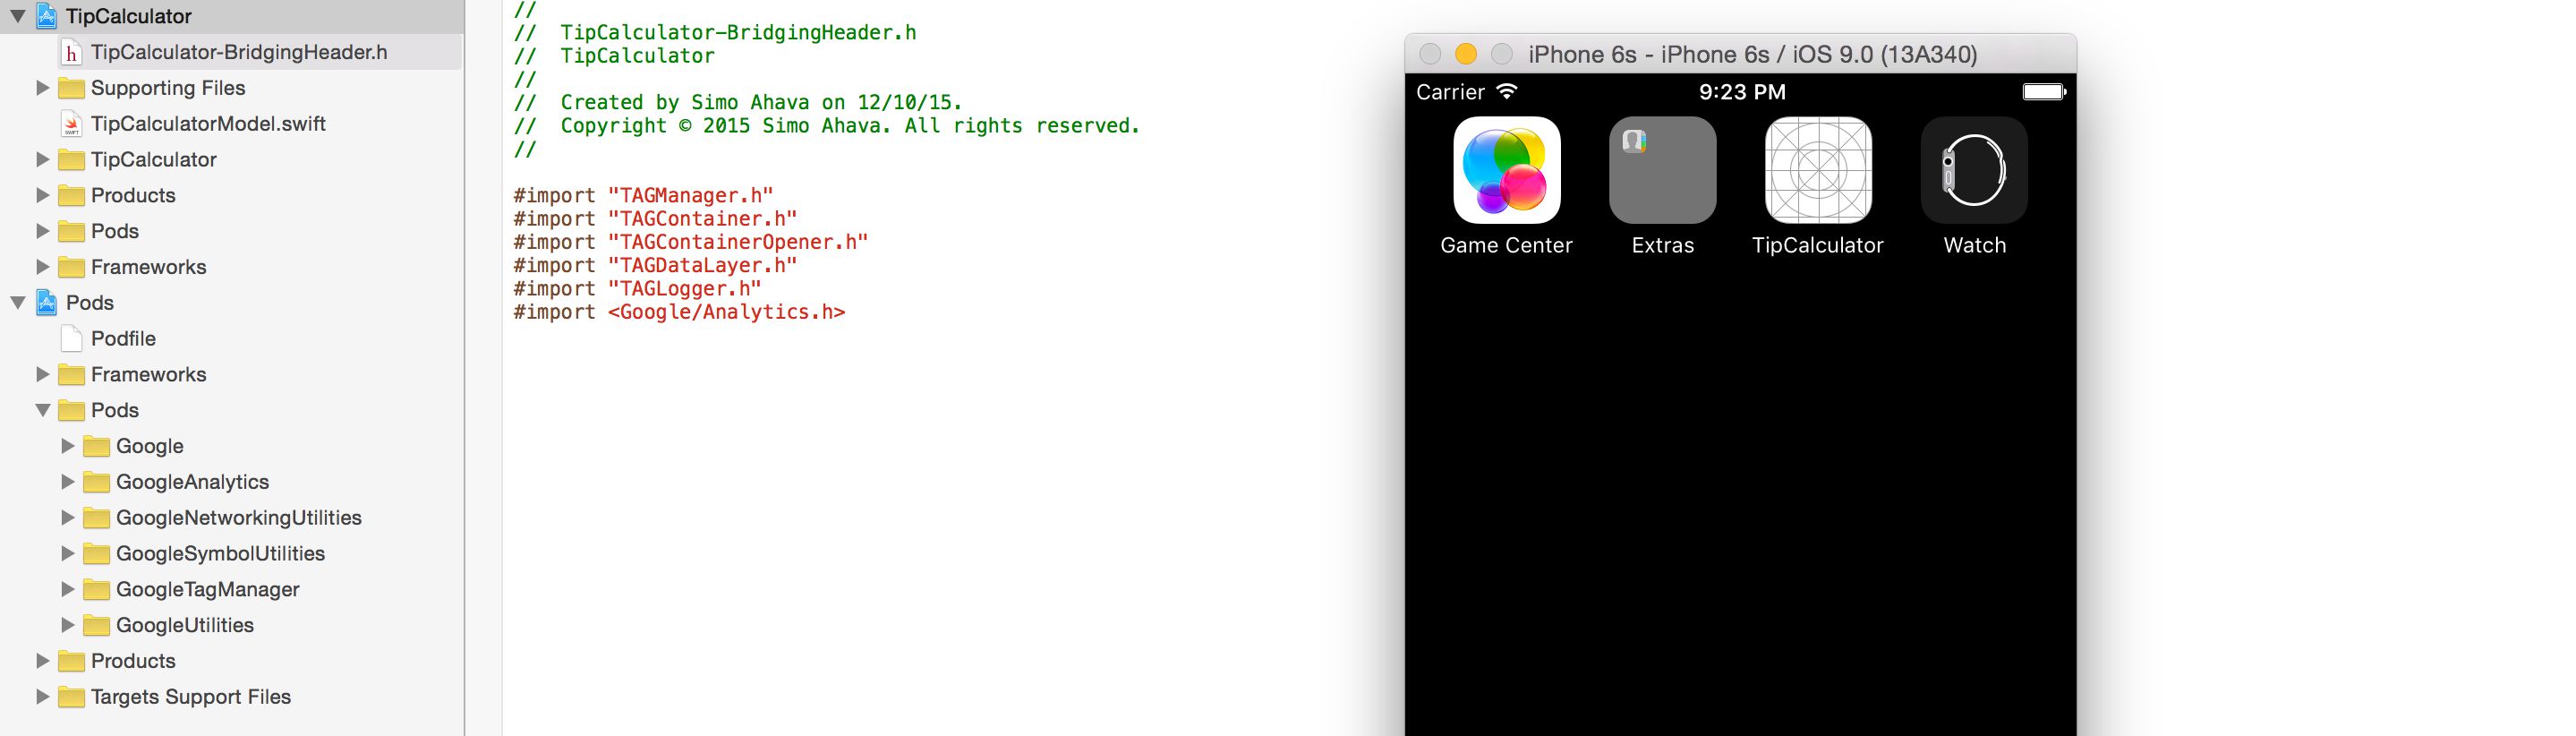
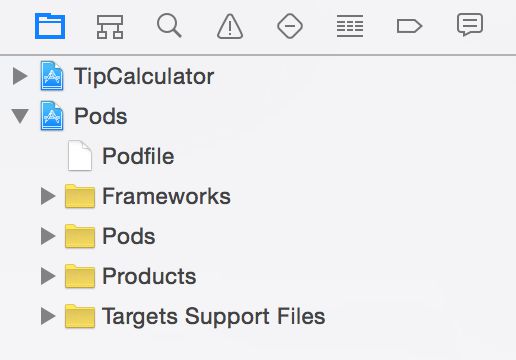
First of all, if you installed the Pods correctly, you should see them in your Project navigator.
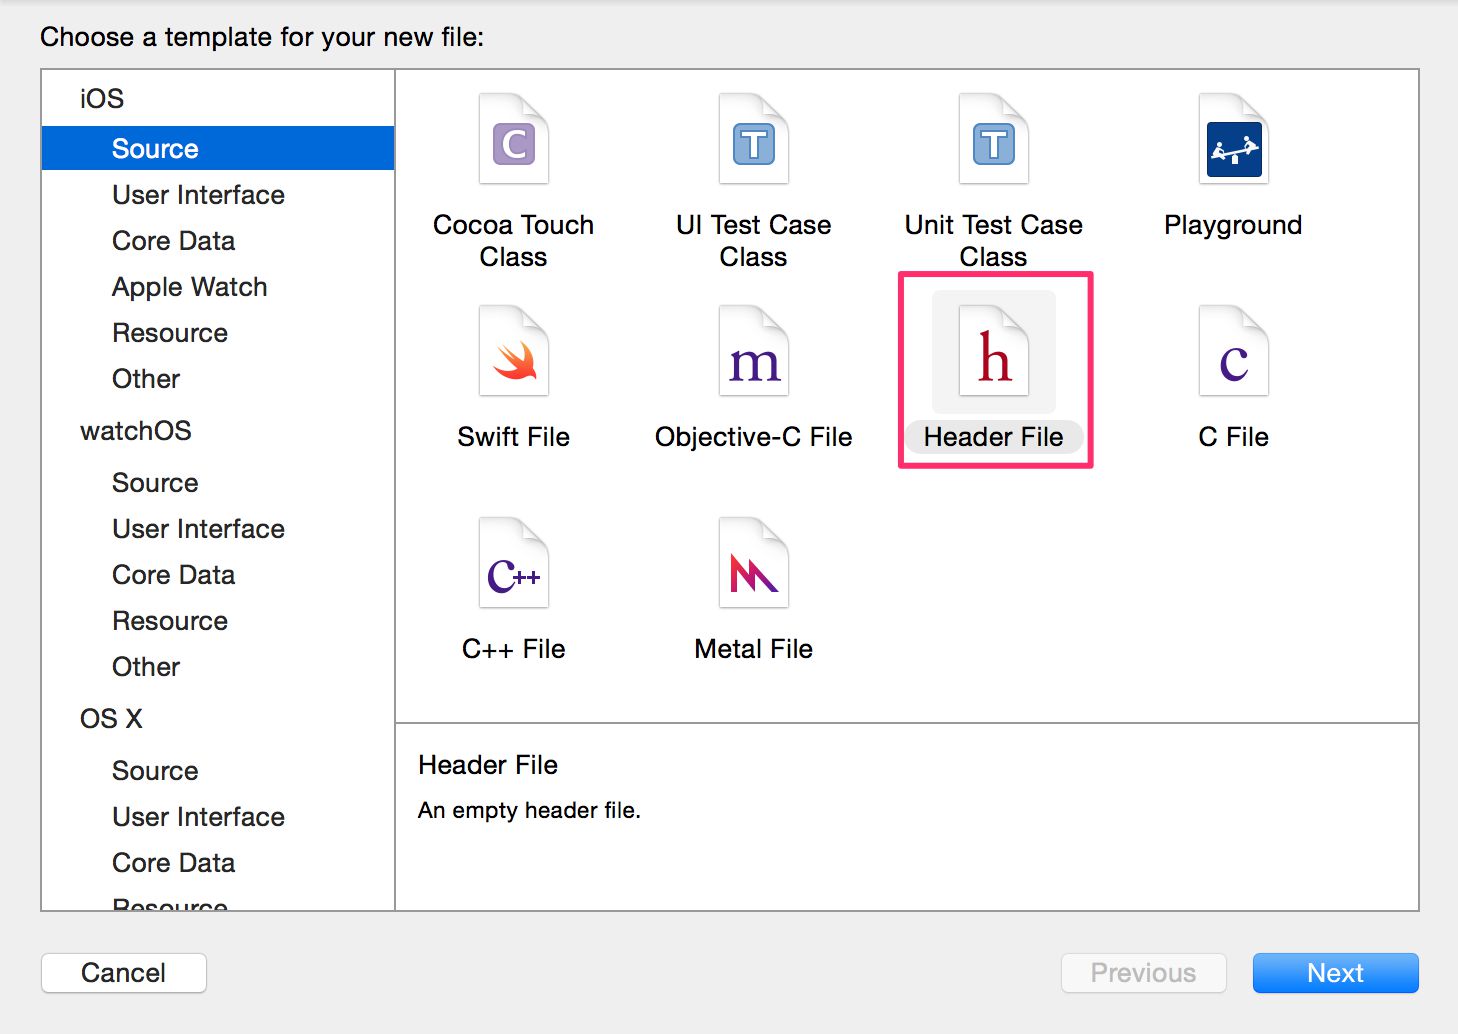
Now, to create the bridging header file, go to File -> New -> File. Under iOS / Source, you’ll find Header File, so select that and click Next.
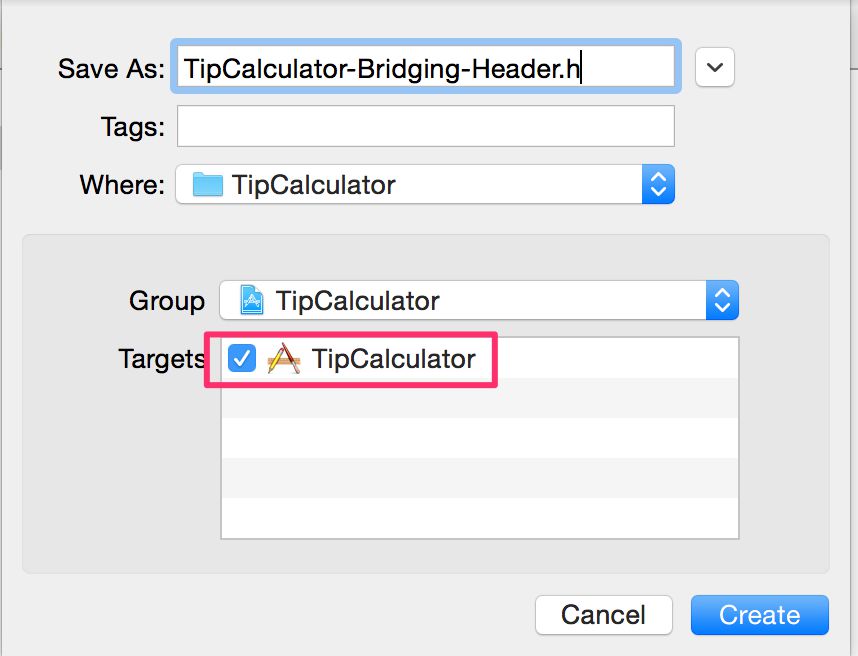
Give the file a name: yourProjectName-Bridging-Header.h, and save it in your project root. Remember to choose a target for the file, so that the header file is properly associated with your project.
You should see the file open in your editor. Add the following import statements to the file, and then save it:
#import "TAGManager.h"
#import "TAGContainer.h"
#import "TAGContainerOpener.h"
#import "TAGDataLayer.h"
#import "TAGLogger.h"
#import <Google/Analytics.h>
These headers include all the necessary Google Tag Manager headers, as well as all the Google Analytics SDK headers.
Finally, you need to include the bridging header file in your build settings.
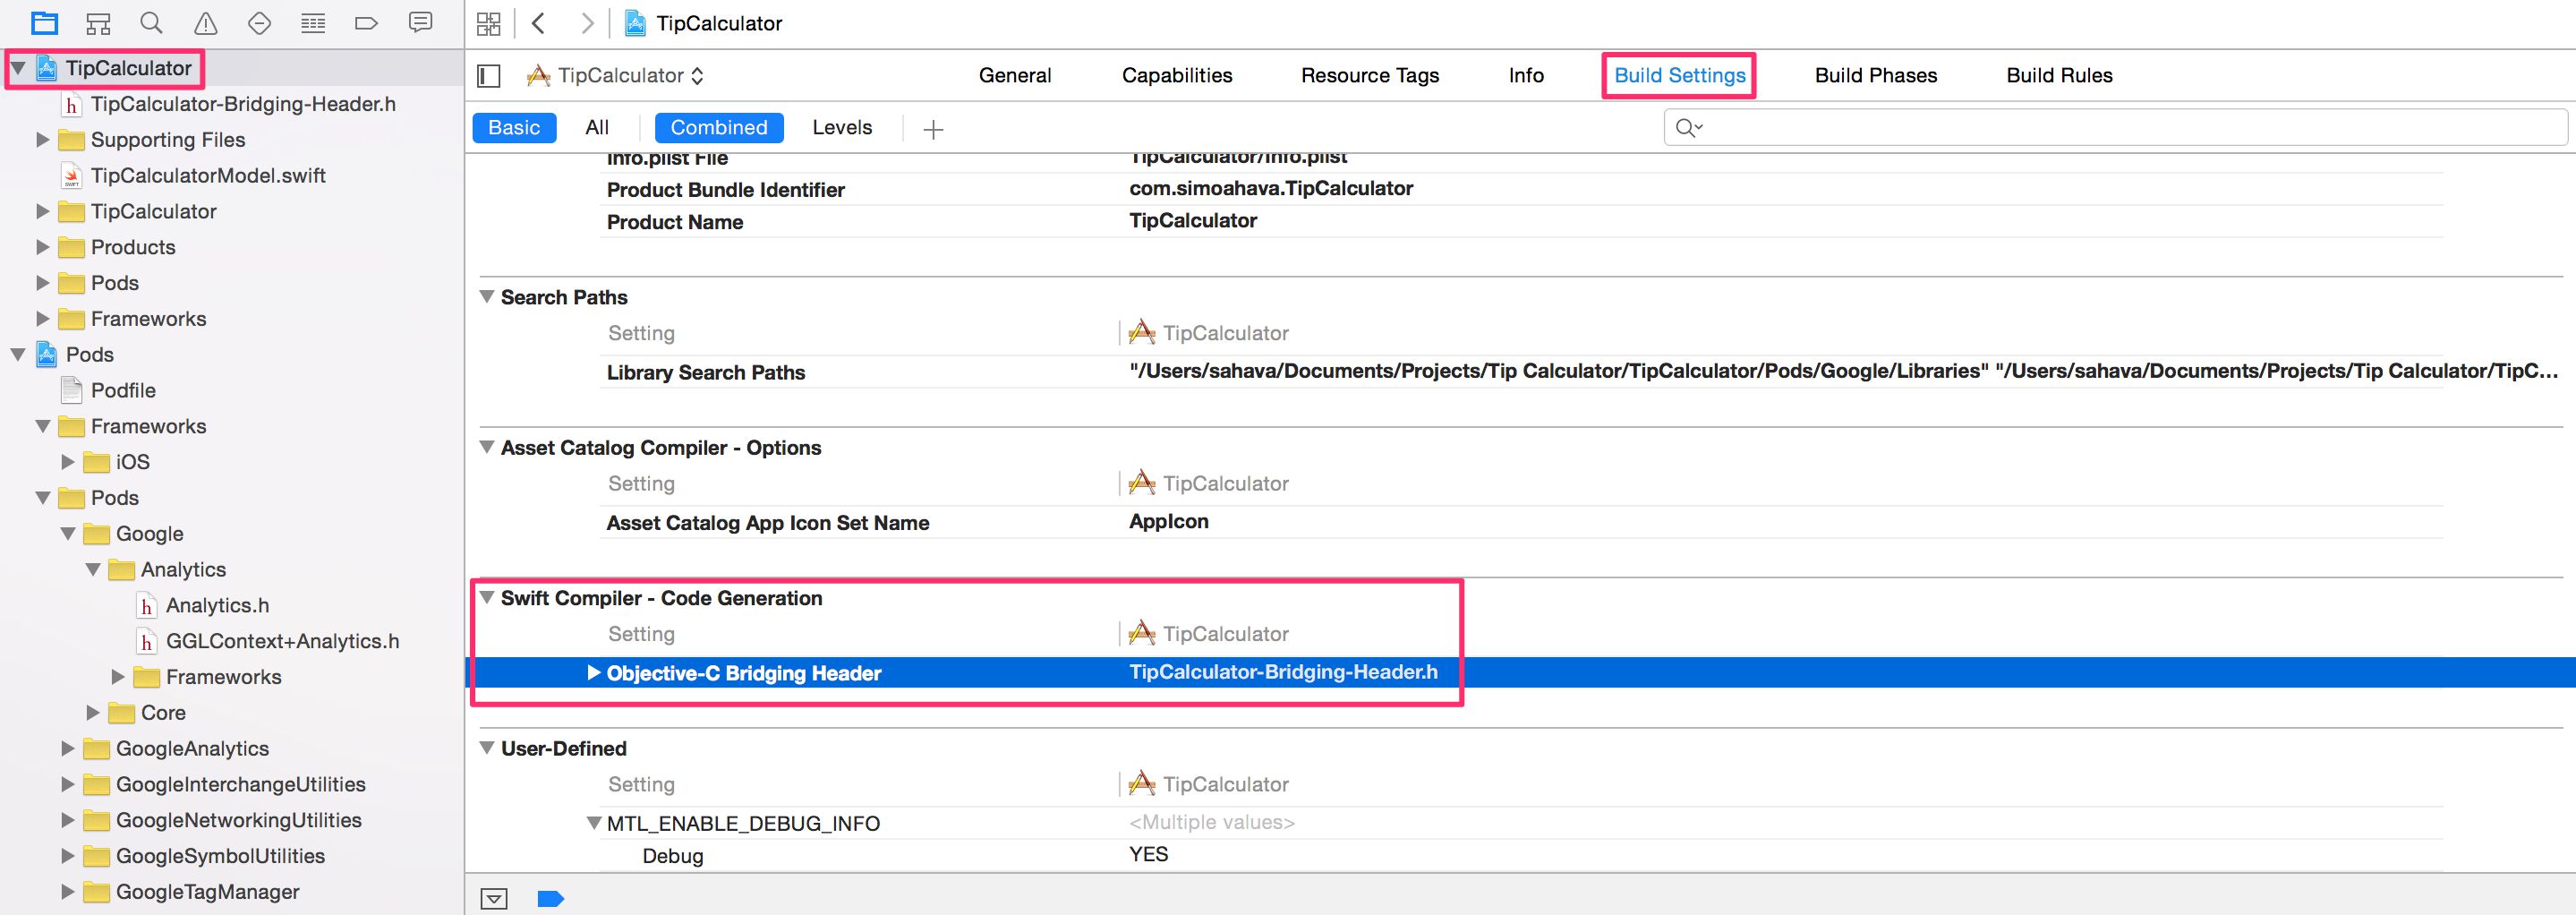
Click your project (the root level node) in your Project navigator. In the settings screen that opens, choose the tag labelled Build Settings, and scroll all the way down to Swift Compiler - Code Generation.
Edit the field next to Objective-C Bridging Header, and type in the file name of the bridging header file you just created.
Now, build your project and make sure everything checks out right.
Next up, setting up Google Tag Manager in the project!
5. Load Google Tag Manager in the project
My, how far we’ve come!
If you look at how the developer guide kicks off, you’ll notice the rather limited capabilities of Google Tag Manager for mobile. For now, at least. Basically, you can dispatch Google Analytics hits and run custom functions. Also, you can change configuration values.
In this tutorial, we’ll focus on the first use case, so we’ll setup a simple interface for tracking screen views and events to Google Analytics.
5.1. Add container binary to project
Before we do anything, however, we’ll need to add the container version binary to the project. This is rather important, as even though GTM can load a “fresh” container over the network, some of the interactions on the site might actually need to be tracked before the asynchronous operation of loading the container is complete. In this case, GTM can fall back to the local container binary, also referred to as the default container.
NOTE! This also means that you should try to keep the binary in the project as up-to-date as possible, so that batches which use the binary would be as similar as possible to those that use the fresh container. So make it a habit that every time you publish a new container version, you download the version binary, and add it to the project (delete the old binary first).
We’ll cover all this very soon, don’t worry.
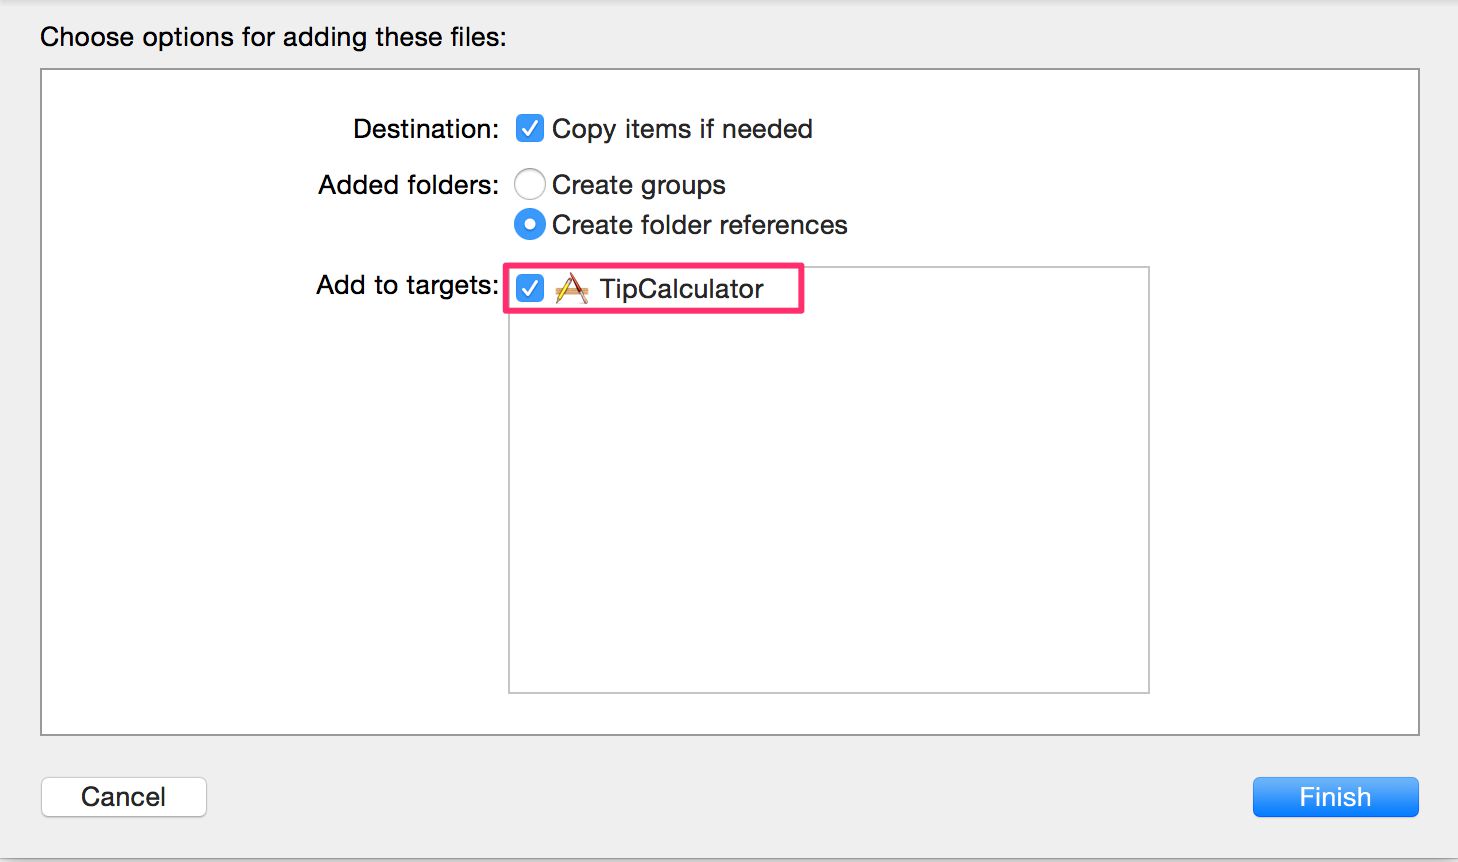
In Xcode, simply drag-and-drop the container binary file to your project. A window should open, where you need to make sure that you add the file to your target (so check the relevant box).
If you don’t have a Supporting Files group under your project, now’s a good time to create one. Right-click on the container binary, and choose New Group from Selection. Name the group Supporting Files. Your navigator should look like this:
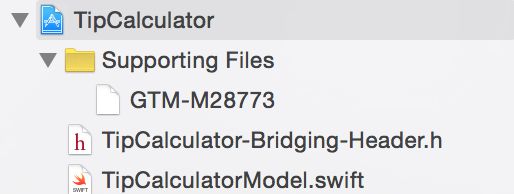
If you already do have a Supporting Files group, just move the binary into that folder.
Next up, source code and stuff.
5.2. Modify AppDelegate
The AppDelegate.swift file is where you control states of your app. For example, when the app loads, AppDelegate, well, delegates operations to different parts of your application. Similarly, when your phone rings and interrupts the application, you’d control this process through AppDelegate.
Since Google Tag Manager is something you want to load as the application loads, you’ll need to make changes to AppDelegate.swift. So, proceed to open the file in your editor.
We want to modify the function which is called once the application is loaded. Aptly, there’s one that looks like this:
func application(application: UIApplication, didFinishLaunchingWithOptions launchOptions: [NSObject: AnyObject]?) -> Bool {
    // Override point for customization after application launch.
    // ...
    return true
}
That’s the callback we’ll open the container in. Here, “open the container” means we’ll make it available for dispatching hits using the available interfaces. On top of that, having a container available is a prerequisite for interacting with the TAGDataLayer interface. This is a slight departure, again, for how things work with GTM for web, where you could create a dataLayer object before the container loading began.
Add the following lines into the function:
let tagManager = TAGManager.instance()
TAGContainerOpener.openContainerWithId(
    "GTM-XXXXXX",
    tagManager: tagManager,
    openType: kTAGOpenTypePreferFresh,
    timeout: nil,
    notifier: self)
// if DEBUG
tagManager.logger.setLogLevel(kTAGLoggerLogLevelVerbose)
Line-by-line, here’s what happens. First, you initialize an immutable variable named tagManager as a singleton instance of the TAGManager class.
Next, you use the TAGContainerOpener interface to signal that you want to fetch a container to work with. Remember to change the “GTM-XXXXXX” to whatever the container ID you’re using is.
This next bit is a bit more complicated.
When you download the container binary into the Supporting Files of your project, it’s called a default container. This is what GTM uses until a saved container is found, or if this saved container is not fresh (> 12 hours old), a new, fresh one is loaded over the network. This is why it’s imperative that the saved binary is usable. The first screen view of the app might well be ready to dispatch before a non-default container has loaded, which means you want the default container to be as accurate as possible.
When choosing the openType value, I suggest you use either kTAGOpenTypePreferNonDefault or kTAGOpenTypePreferFresh.
kTAGOpenTypePreferNonDefault attempts to load a saved container (i.e. one that was previously loaded over the network), regardless of whether it’s stale or not. Stale means it’s over 12 hours old. This means that you’ll have a container to work with sooner. If the container is stale, Google Tag Manager starts an asynchronous request for a fresh container over the network.
kTAGOpenTypePreferFresh only loads a saved container if it’s fresh. If it isn’t, it loads a new, fresh container over the network.
Both revert to the default container if a saved container couldn’t be loaded or if there was a network error.
Next, you can enable logging. I’ve commented if DEBUG because it might be a good idea to verbosely log only if you’re debugging the app, since it produces a lot of console output, which is unnecessary overhead in the live app.
You might have noticed that I skipped over the notifier: self key-value pair in the TAGContainerOpener call. That’s because it requires a bit more attention.
The notifier parameter is basically a setting, where I instruct GTM to notify my app when a container becomes available. Once a container is available, our methods and functions can create an instance of the AppDelegate class to access the loaded container. You can use container to update your app’s configuration values through GTM, for example.
Because you’re invoking self as the parameter value, it means that the class you’re currently in (AppDelegate) needs to implement the TAGContainerNotifier protocol, as self is bound to an instance of the current class.
Scroll up to the beginning of AppDelegate, and change the class declaration to:
class AppDelegate: UIResponder, UIApplicationDelegate, TAGContainerOpenerNotifier {
    ...
    var container: TAGContainer?
In other words, you add the TAGContainerOpenerNotifier to the declaration line, and in the beginning of the class (so not in a func), you create a new variable container, which refers to a TAGContainer optional.
Phew! Almost there.
In the end of the class, after all the other func declarations, add a new one:
func containerAvailable(container: TAGContainer) -> Void {
    dispatch_async(dispatch_get_main_queue(), {
        self.container = container;
    });
}
And now things should start aligning in your mind.
containerAvailable is the callback that TAGContainerOpener invokes once a container becomes available. The container is passed as a parameter to this function.
Next, we initialize self.container with the retrieved container. This way your app can use the loaded container through an instance of the AppDelegate class.
By the way, here’s a nifty trick. If you want to always load a fresh container over the network, you can add the following line to the dispatch_async callback:
container.refresh()This forces a fresh container load over the network.
How you want to load the container is completely up to you. Some methods, such as container.refresh(), impose more network requests than others, so it’s always a compromise between freshness vs. availability vs. network load.
Much of the container load process is explained here, though I have to say it’s not very clearly documented at all (and it’s in Objective-C).
Now, build the project and make sure no errors pop up. You can run the project, and you should already see some verbose logging:

You’re ready to push stuff to the Data Layer to fire your Tags. Awesome!
6. Push stuff to Data Layer
This is where Google Tag Manager for apps is very similar to GTM for web. By invoking the push method of the Data Layer instance, GTM will react to the dictionary you push and fire any relevant Tags.
To try it out, open a view controller file in your project. If it’s a default project setup, there should be one named ViewController.swift.
Now, to send the screen view, it makes sense to only send it once the view has loaded. So, find the method with the following signature, or create one if it doesn’t exist:
override func viewWillAppear(animated: Bool) {
  super.viewWillAppear(animated)
}
Let’s create an instance of dataLayer and push the payload to it. So modify the function to look like this:
override func viewWillAppear(animated: Bool) {
  super.viewWillAppear(animated)
  let dataLayer = TAGManager.instance().dataLayer
  dataLayer.push(["event" : "screenView", "screenName" : "Home"])
}
First you create an immutable variable dataLayer, which is a reference pointing to the dataLayer interface of a TAGManager instance.
Next, you do the dataLayer.push(), sending a dictionary with key-value pairs. As with GTM for web, the 'event' is what makes things tick, and the other variables can (and will) be utilized if that’s how you’ve set the Tags up.
Since we already have a Tag which uses the 'screenName' variable, this code should work, sending a screen view with Home as the screen name.
Go ahead, build the project and run your app. You should see something like this in the debugger:

As you can see, the &cd; (for screen name) and &t; parameters are right there, meaning the payload is OK. Then, there’s the GET request to the Google Analytics endpoint, signalling that the payload has been dispatched.
And that’s it! You’ve got a functioning Google Tag Manager installation in your hands.
BONUS: Simple interface for interacting with the Data Layer
Since we want to be slightly more ambitious, we can actually create an interface (or module) for interacting with the Data Layer. This way you can create elegant code in your app, simplifying some of the complex interactions and mitigating the risk of human error (e.g. typos).
Create a new file called Analytics.swift. Add the following code within:
import Foundation

class Analytics {

    private static let dataLayer = TAGManager.instance().dataLayer

    private struct DataLayerMessage {
        let event: String
        let ScreenName: String

        func getPayload() -> [String:AnyObject] {
            return ["event" : self.event, "screenName" : self.screenName]
        }
    }

    static func pushScreen(screenName: String) {
        let screenViewData = DataLayerMessage(event: "screenView", screenName: screenName)
        dataLayer.push(screenViewData.getPayload())
    }

}
Here, you create a new class called Analytics. Within, you define some variables, structs and methods that can be used by other parts of your app.
You can expand the DataLayerMessage struct and the pushScreen method to include more extensive payloads, such as event objects (with category, action, label, and value), custom definitions, content groups and so forth.
To send a screen view with this interface, all you need is the following command:
Analytics.pushScreen("Some screen name")The class will take care of the rest.
It might seem complex, but it actually reduces a lot of overhead, since everything is neatly encapsulated in this single Analytics module.
In later articles we’ll use a similar structure in all the GTM interactions, so that things will stay nice and functional.
Comments on Google Tag Manager for iOS
It’s not perfect, I’ll give you that. You might wonder what the actual benefit is to just using the Google Analytics SDK, and you’re right to feel a bit confused.
However, as with GTM for web, the main benefit is with the Data Layer. Using the Data Layer interface lets you collect arbitrary semantic information from the app, and push it into the message queue without having to consider platform-specific implications. Instead, you can trust that whatever app uses the Data Layer will be able to transform the data to the form required by whatever endpoint it communicates with.
And that’s exactly why we spent some time to create a custom interface for interacting with Google Tag Manager. We want to decouple semantic information from actual app logic, only sending generic strings and dictionaries through the interface.
This way, when GTM for apps hopefully expands and becomes richer and larger, you’ll have the general infrastructure in place already, and implementing expansions and additions will happen organically and in a controlled, fluid manner, which leaves your app none the worse for wear.
Summary
This has been a rather extensive tutorial for something as “simple” as setting up Google Tag Manager in your mobile app. Well, I hope that bubble has burst. It’s not simple. It’s not meant to be. You’re messing with a software project for goodness sake. You don’t want to mess up your chances with App Store review, or the hundreds of thousands of eager users that cringe if even the smallest thing is amiss in your beautiful app.
GTM for mobile is not perfect. Far from it. There’s still a lot to be done, and I hope the developers come up with some solid selling points for the platform, before people dismiss it entirely in favor of the pretty robust Google Analytics SDKs.
To me, one of the biggest issues is, funnily enough, the terminology used. GTM for mobile is so far removed from GTM for web that it’s weird they even share the same name. There are no “tags” in mobile development. It’s just variables, classes, structs, dictionaries, functions, objects, etc.
It’s not “tag management”, it’s app management, and as such it carries with it far greater risks than anything you could unleash on your website.
And the risks are the main reason I want to stay far away from the value collection methods and the whole idea of updating configuration values of the app through GTM. A mobile app, being a software project, should be governed by the code base, and not some outside dependency.
I don’t understand why you’d want to delegate app operations to a web-based control panel, when all it takes is a single failed network request and a slightly outdated default container to screw up the experience for the user. And I’m sure that app users are less forgiving than web visitors, especially if the app costs money.
Things like automatic screen tracking or automatic exception handling are not things I particularly miss, as creating the Analytics.swift module pretty much gives you a one-liner to track all your screenviews with (and events, if you extend it a little). Thus, ultimately it’s the same effort as setting a self.screenName property or something.
Other than the above, setting GTM for apps up is a breeze once you understand the logic. I love how I can use the Data Layer to decouple semantic information stored in the app from the app logic itself. I also love how I don’t have to write analytics-specific syntax, and I can just use a generic Data Layer syntax instead. Perfection!
I’m looking forward to writing more about GTM for mobile soon. There are many ways you can improve the analytics tracking, and the SDK still has many tricks up its sleeve that you can use to facilitate your app tracking even further.
