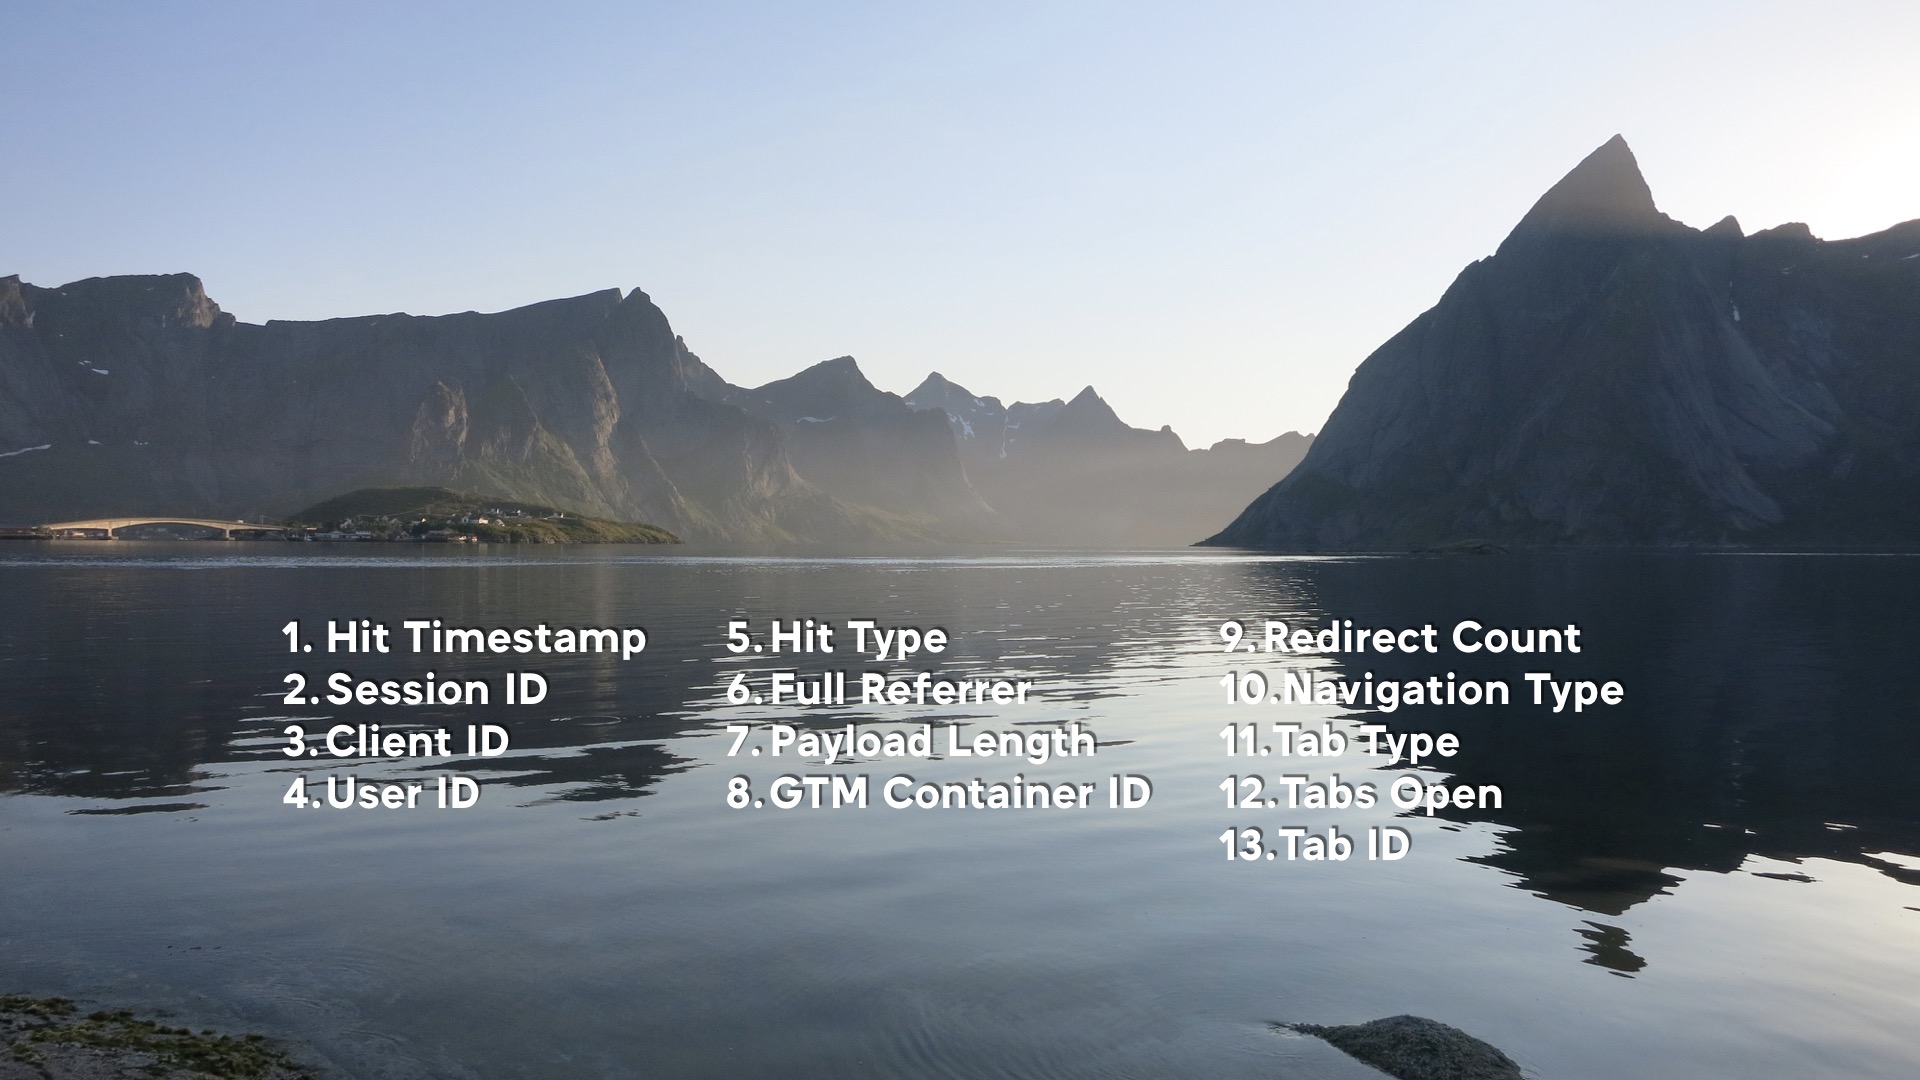
13 Useful Custom Dimensions For Google Analytics
One of my favorite (and most popular) articles in my blog is Improve Data Collection With Four Custom Dimensions. In that article, I show how you can improve the quality and granularity of your Google Analytics data set with just four Custom Dimensions. The reason I chose the four dimensions (Hit Timestamp, Session ID, Client ID, and User ID) is because I firmly believe that they should be in Google Analytics’ standard set of dimensions, but for some inexplicable reason they aren’t.
Since publishing that article three years ago, I have naturally uncovered more of these “need-to-have” Custom Dimensions, and I’ve written a bunch of guides on how to implement them. In this article, I want to pull all of these together into one reference guide, which you can then use to find the relevant information with ease. All of the implementation guides are for Google Tag Manager, but nothing’s stopping you from modifying the JavaScript to work with analytics.js or gtag.js.
Table of Contents
The Simmer Newsletter
Subscribe to the Simmer newsletter to get the latest news and content from Simo Ahava into your email inbox!
1. Improve granularity
The first four Custom Dimensions are those introduced in my earlier article. You can follow the link to see more details about the implementation, but some of the solutions below have been updated, so make sure you follow these guides rather than those in the original article.
The purpose of these four dimensions is to add more information to Google Analytics data sets about the user journeys that take place on your site. Being able to segment and chop the data on a hit-by-hit basis (Hit Timestamp), group them into sessions (Session ID), sort by GA user (Client ID), and finally analyze cross-device paths (User ID), makes so much sense from an analytics point-of-view. It’s amazing that these dimensions are not readily available in Google Analytics’ data sets. They are available in the BigQuery export…
1.1. Hit Timestamp
Original source: Link
Custom Dimension scope: Hit
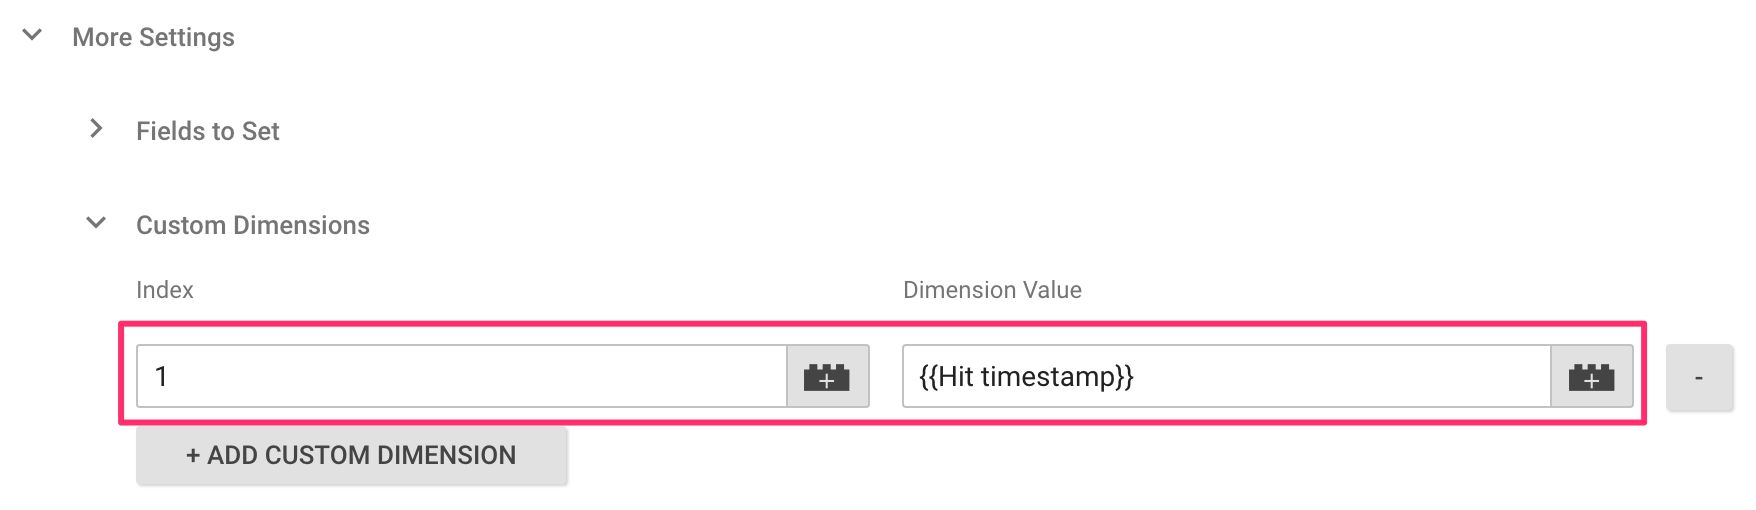
Hit Timestamp outputs the local time (i.e. visitor’s browser time) of the hit in standardized format. An example would be 2018-05-29T15:04:51.361+03:00 (year-month-dayThour:minutes:seconds.milliseconds timezone_offset). Since it’s hit timestamp, it’s important that you add this Custom Dimensions to every single Google Analytics tag that fires on your site. Easiest way to do it is to add it to a Google Analytics Settings variable.
Note! It might actually be wiser to just send the UNIX timestamp (
new Date().getTime()) instead of a preformatted date/time string as below. That way it’s easier to apply normalizations and transformations to the value when passed to a data warehouse, for example. But the preformatted option is better if you’re just interested in viewing the data in Google Analytics.
Thanks to Tuomas Salste for pointing out some bugs in the code!
Custom JavaScript variable: {{Hit timestamp}}
Contents:
function() {
    // Get local time as ISO string with offset at the end
    var now = new Date();
    var tzo = -now.getTimezoneOffset();
    var dif = tzo >= 0 ? '+' : '-';
    var pad = function(num, ms) {
        var norm = Math.floor(Math.abs(num));
        if (ms) return (norm < 10 ? '00' : norm < 100 ? '0' : '') + norm;
        return (norm < 10 ? '0' : '') + norm;
    };
    return now.getFullYear()
        + '-' + pad(now.getMonth()+1)
        + '-' + pad(now.getDate())
        + 'T' + pad(now.getHours())
        + ':' + pad(now.getMinutes())
        + ':' + pad(now.getSeconds())
        + '.' + pad(now.getMilliseconds(), true)
        + dif + pad(tzo / 60)
        + ':' + pad(tzo % 60);
}
1.2. Session ID
Original source: Link
Custom Dimension scope: Session
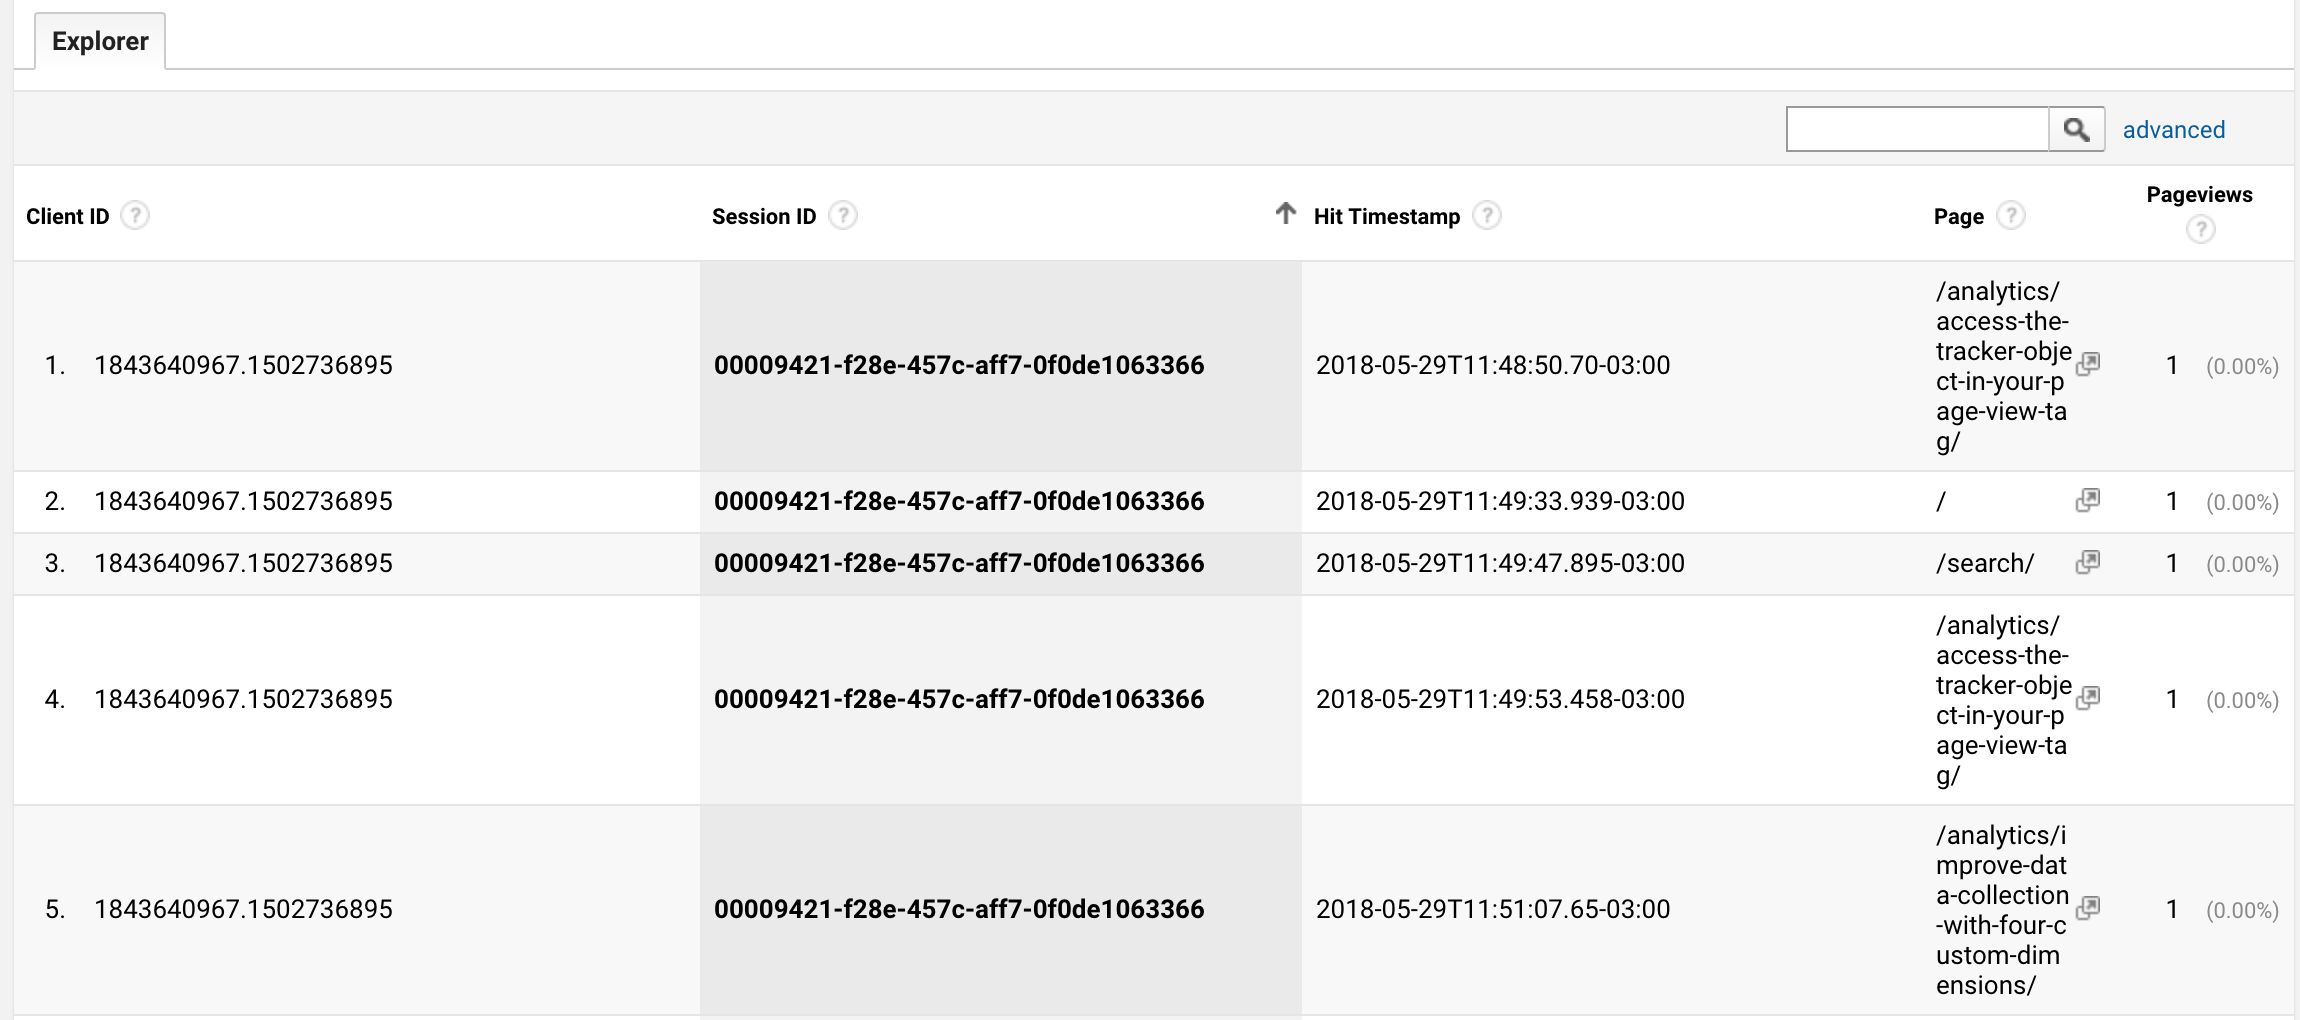
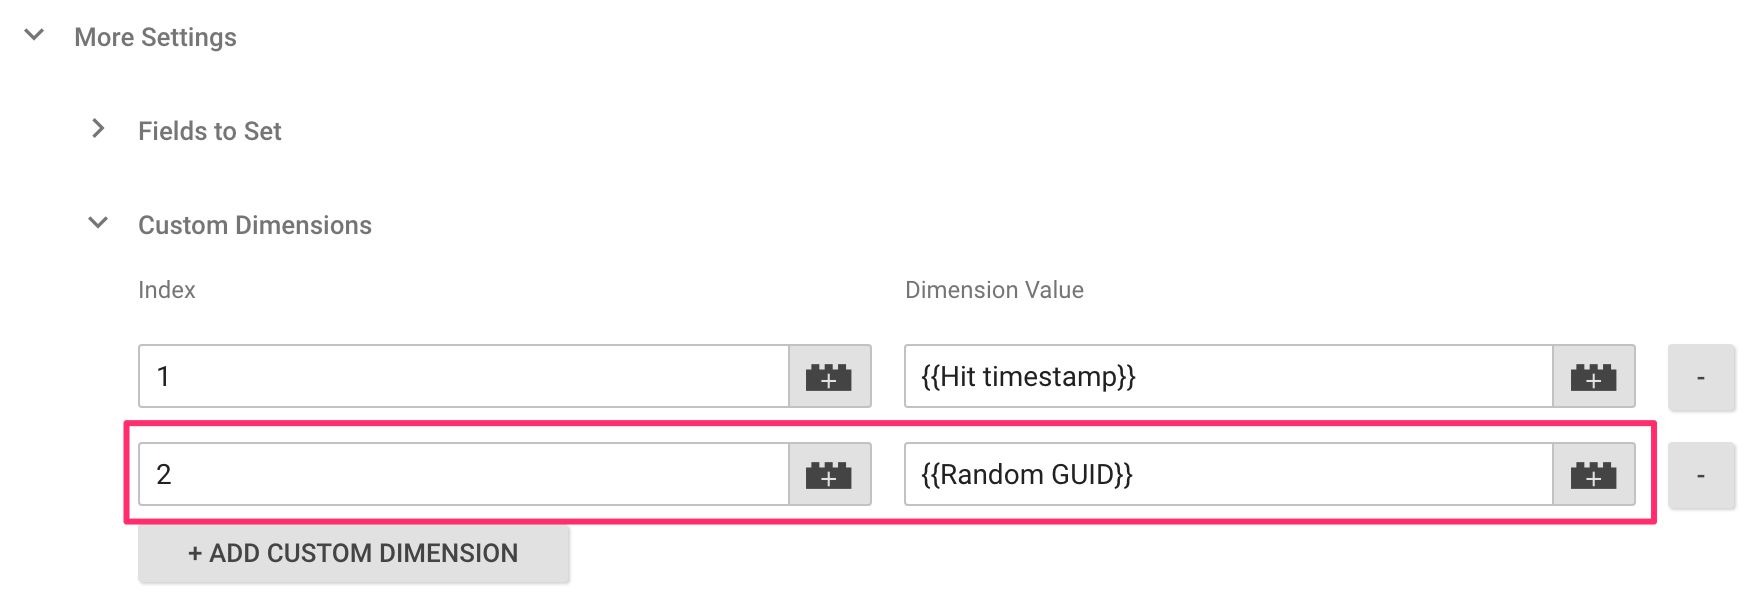
Session ID is a random, unique string (GUID) which is scoped to the entire session. This means that all hits of the same session can be queried with the same ID. This, in turn, means that you have a way of aggregating all related hits directly in the data reports, rather than having to infer them using segments, for example.
You can add Session ID only to your Page View tag, but there’s no harm in including it in every single one of your GA tags. In fact, I actually recommend just adding it to the Google Analytics Settings variable you use for all your tags, because it’s possible that not all of your sessions will have a pageview in them (if the session breaks, and a new one starts without reloading a page).
Custom JavaScript variable: {{Random GUID}}
Contents:
function () { // Public Domain/MIT
    var d = new Date().getTime();
    if (typeof performance !== 'undefined' && typeof performance.now === 'function'){
        d += performance.now(); //use high-precision timer if available
    }
    return 'xxxxxxxx-xxxx-4xxx-yxxx-xxxxxxxxxxxx'.replace(/[xy]/g, function (c) {
        var r = (d + Math.random() * 16) % 16 | 0;
        d = Math.floor(d / 16);
        return (c === 'x' ? r : (r & 0x3 | 0x8)).toString(16);
    });
}
1.3. Client ID
Original source: Link
Custom Dimension scope: User
Client ID is the anonymous cookie identifier that Google Analytics assigns to every single browser instance of any given web visitor. It’s how GA calculates the Users metric in views which don’t have the User ID feature enabled (more on this in the next chapter).
Sending the Client ID as a Custom Dimension to Google Analytics is absolutely necessary. It’s the only way to get row-by-row reports split by user, and it’s the only way to query for data collected from any anonymous user.
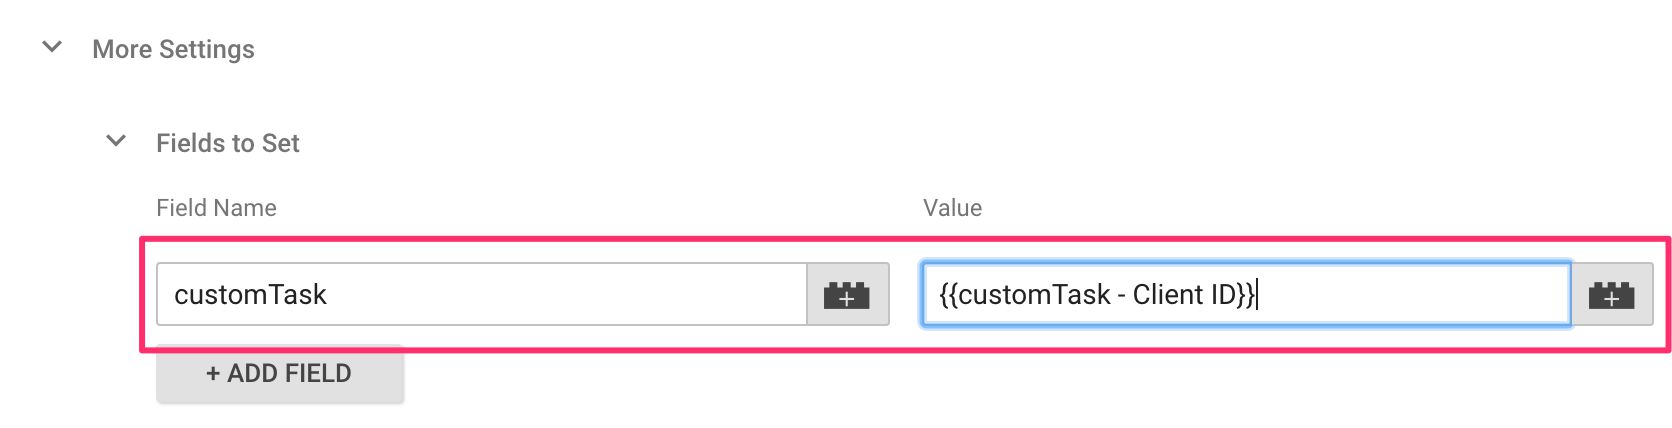
The Client ID is collected using customTask (guide here), so you do not add it to tags using the Custom Dimensions settings. Instead, you add it to Fields to set -> customTask (see screenshot below). Be sure to read my guide on customTask to understand how this mechanism works.
Custom JavaScript variable: {{customTask - Client ID}}
Contents:
function() {
  var clientIdIndex = 3; // Change this number to the actual Custom Dimension index number
  return function(model) {
    model.set('dimension' + clientIdIndex, model.get('clientId'));
  };
}
1.4. User ID
Original source: Link
Custom Dimension scope: User
User ID is an identifier that you have somehow linked to the logged in user. Typically it’s a pseudonymized key written into dataLayer using an identifier attached to the user in your CRM or some other server-side user registry.
Because there are so many ways to implement User ID, depending on how your backend produces the identifier, I do not have a generic guide on how to generate the value. Thus the instructions below apply only to a very specific use case, where the User ID is written to the dataLayer when the page is loaded. But you could just as well have your web server write the User ID in some other global variable, or even in a browser cookie.
Also, because you are collecting data from logged in users, make sure whatever solution you implement is compliant with the privacy legislation and regulations of your region.
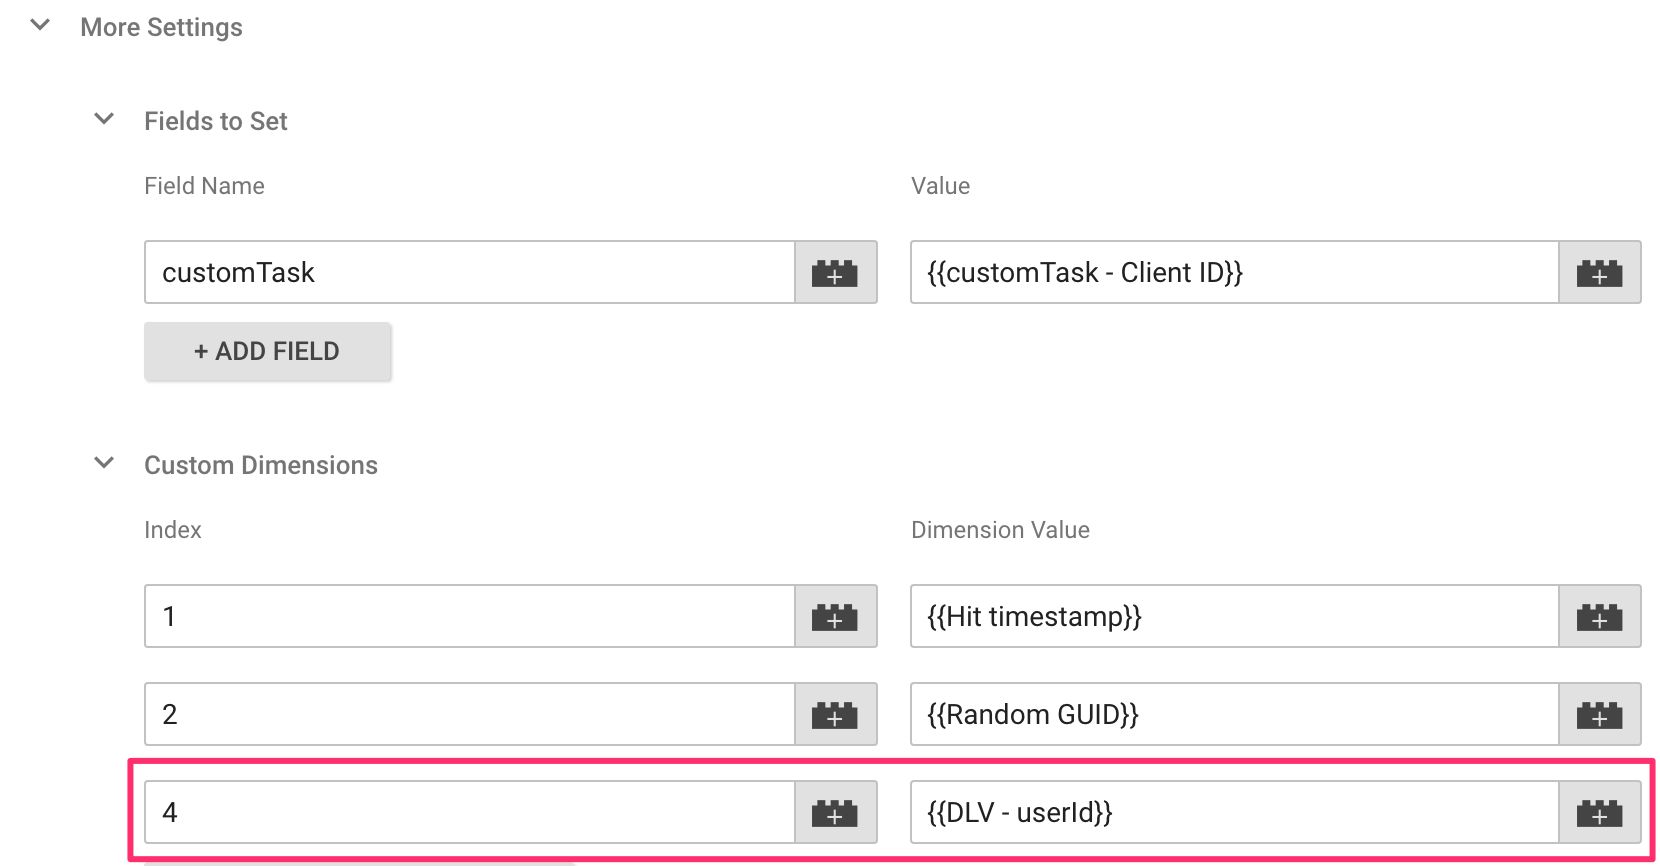
Data Layer variable: {{DLV - userId}}
Contents: Data Layer Variable Name - userId
2. Good all-around Custom Dimensions
The next set of Custom Dimensions are just smart things to add to your data collection. Since they are included in this guide, they aren’t queriable by default in GA’s reporting interface.

2.1. Hit Type
Original source: Link
Custom Dimension scope: Hit
Hit Type tells you explicitly what the type of hit collected in Google Analytics was. So it would be event for Events, pageview for Pageviews, timing for Timing hits, etc. You can use this to build segments (e.g. sessions where the first hit was an event), or to add more granularity to path analysis.
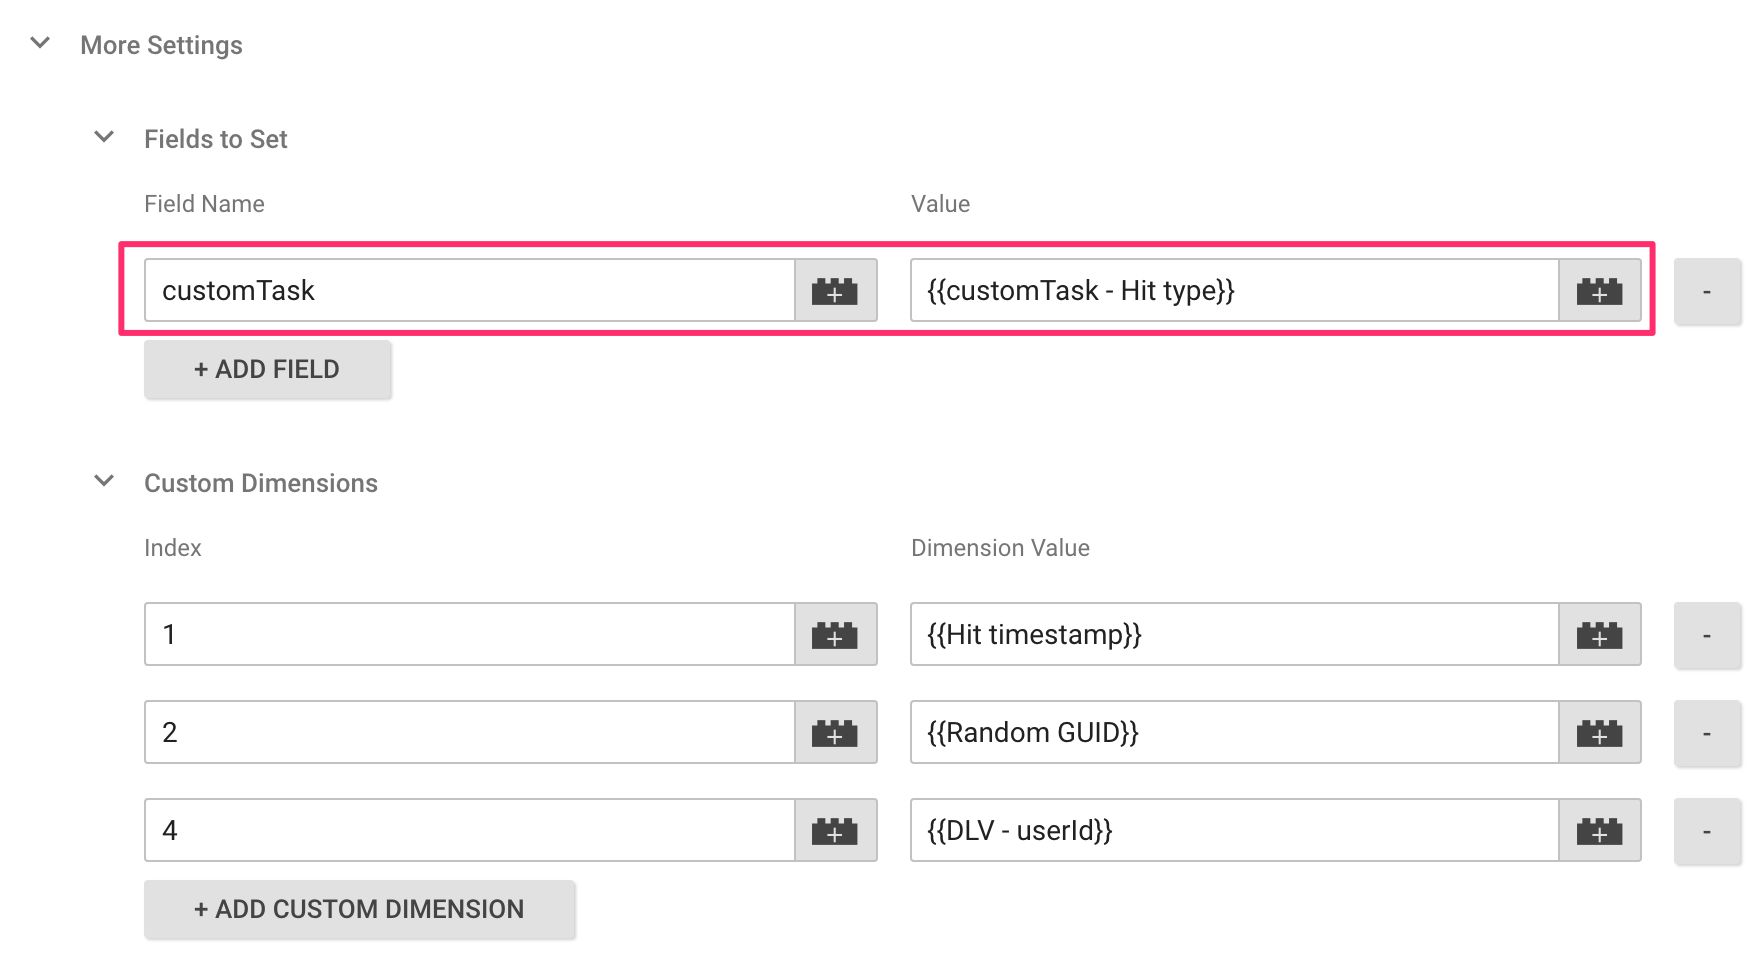
You should add the variable to every single Google Analytics tag in your container. The variable needs to be added using customTask. Be sure to read my guide on customTask to understand how this mechanism works.
Custom JavaScript variable: {{customTask - Hit type}}
Contents:
function() {
  var hitTypeIndex = 5; // Change this number to the actual Custom Dimension index number
  return function(model) {
    model.set('dimension' + hitTypeIndex, model.get('hitType'));
  };
}
2.2. Full Referrer
Custom Dimension scope: Hit
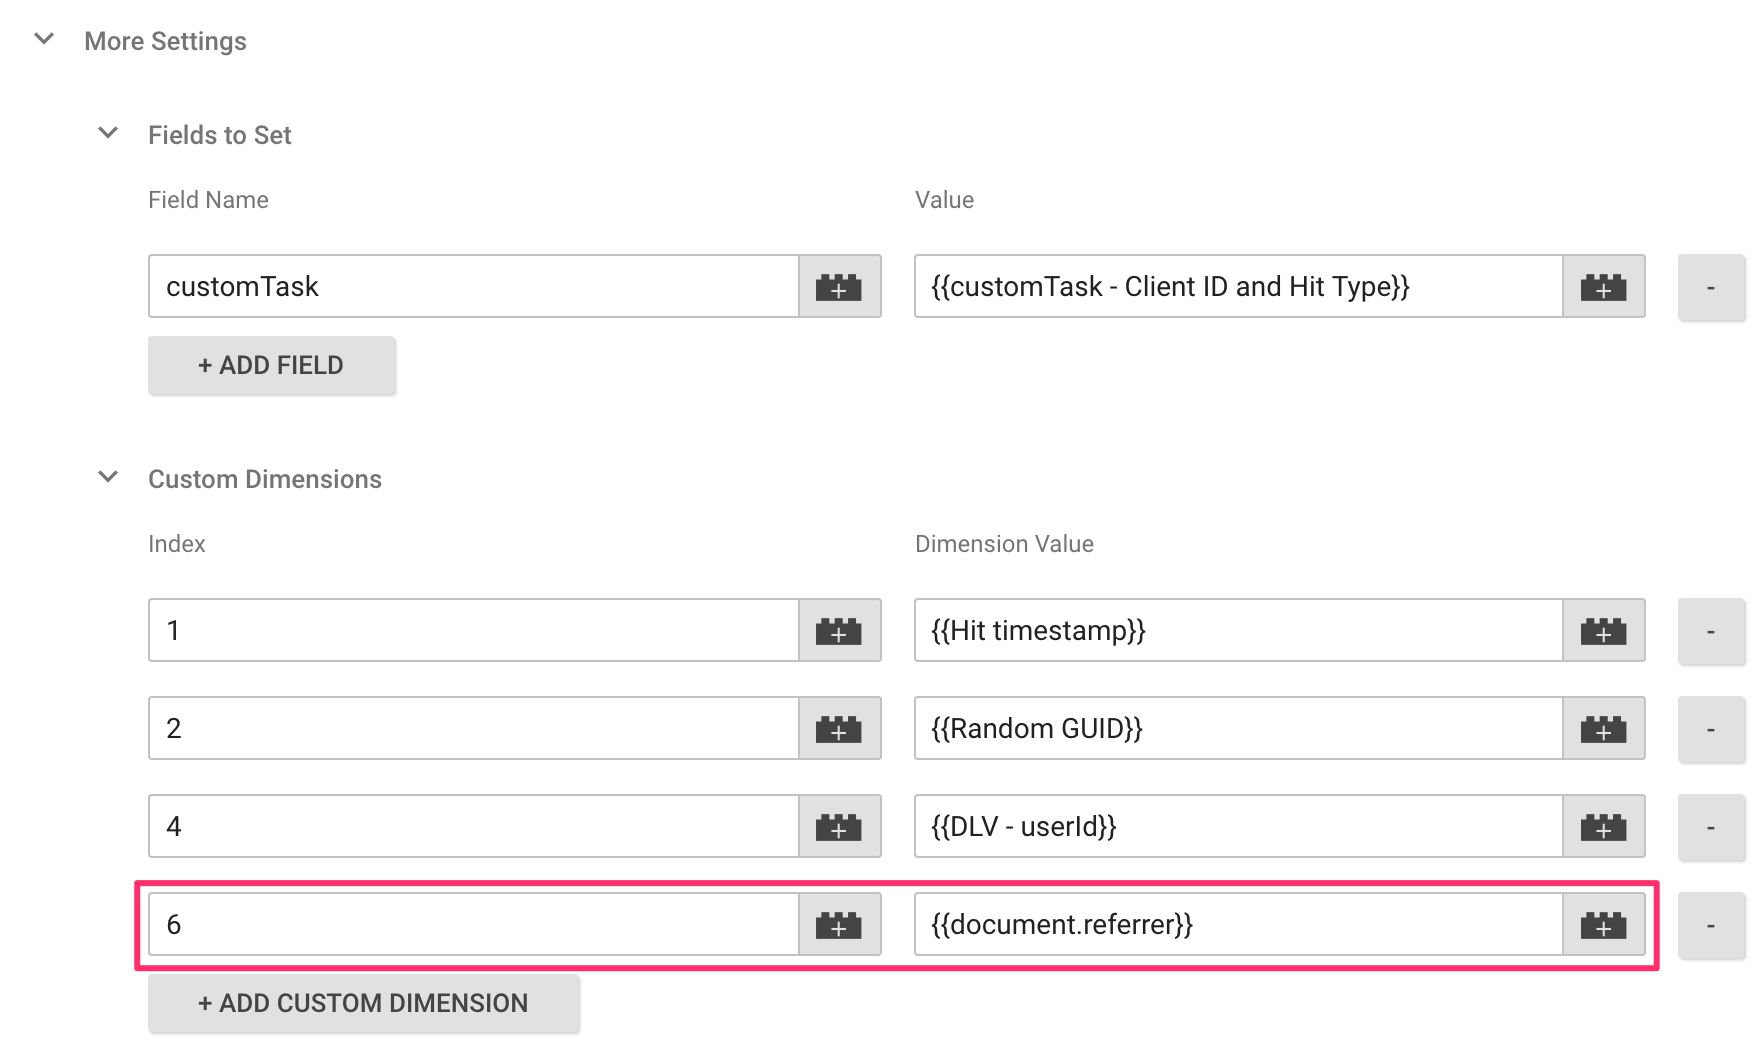
Full Referrer is simply the value of document.referrer added as a hit-scoped Custom Dimension to every single Google Analytics tag in your container. This will let you analyze what the previous page of any given hit was. This makes a lot of sense for pageview tracking, and it makes a lot of sense for hits that start sessions, since you can now analyze the referral information for sessions that came via some other source than a referral hit.
JavaScript variable: {{document.referrer}}
Contents: Global Variable Name - document.referrer
2.3. Payload Length
Original source: Link
Custom Dimension scope: Hit
You can send the payload length of every single Google Analytics hit by adding this hit-scoped Custom Dimension to every single tag in your container. The idea is that you can monitor if you are approaching the 8192 byte limit, since hits that equal or surpass that limit will not get sent to Google Analytics.
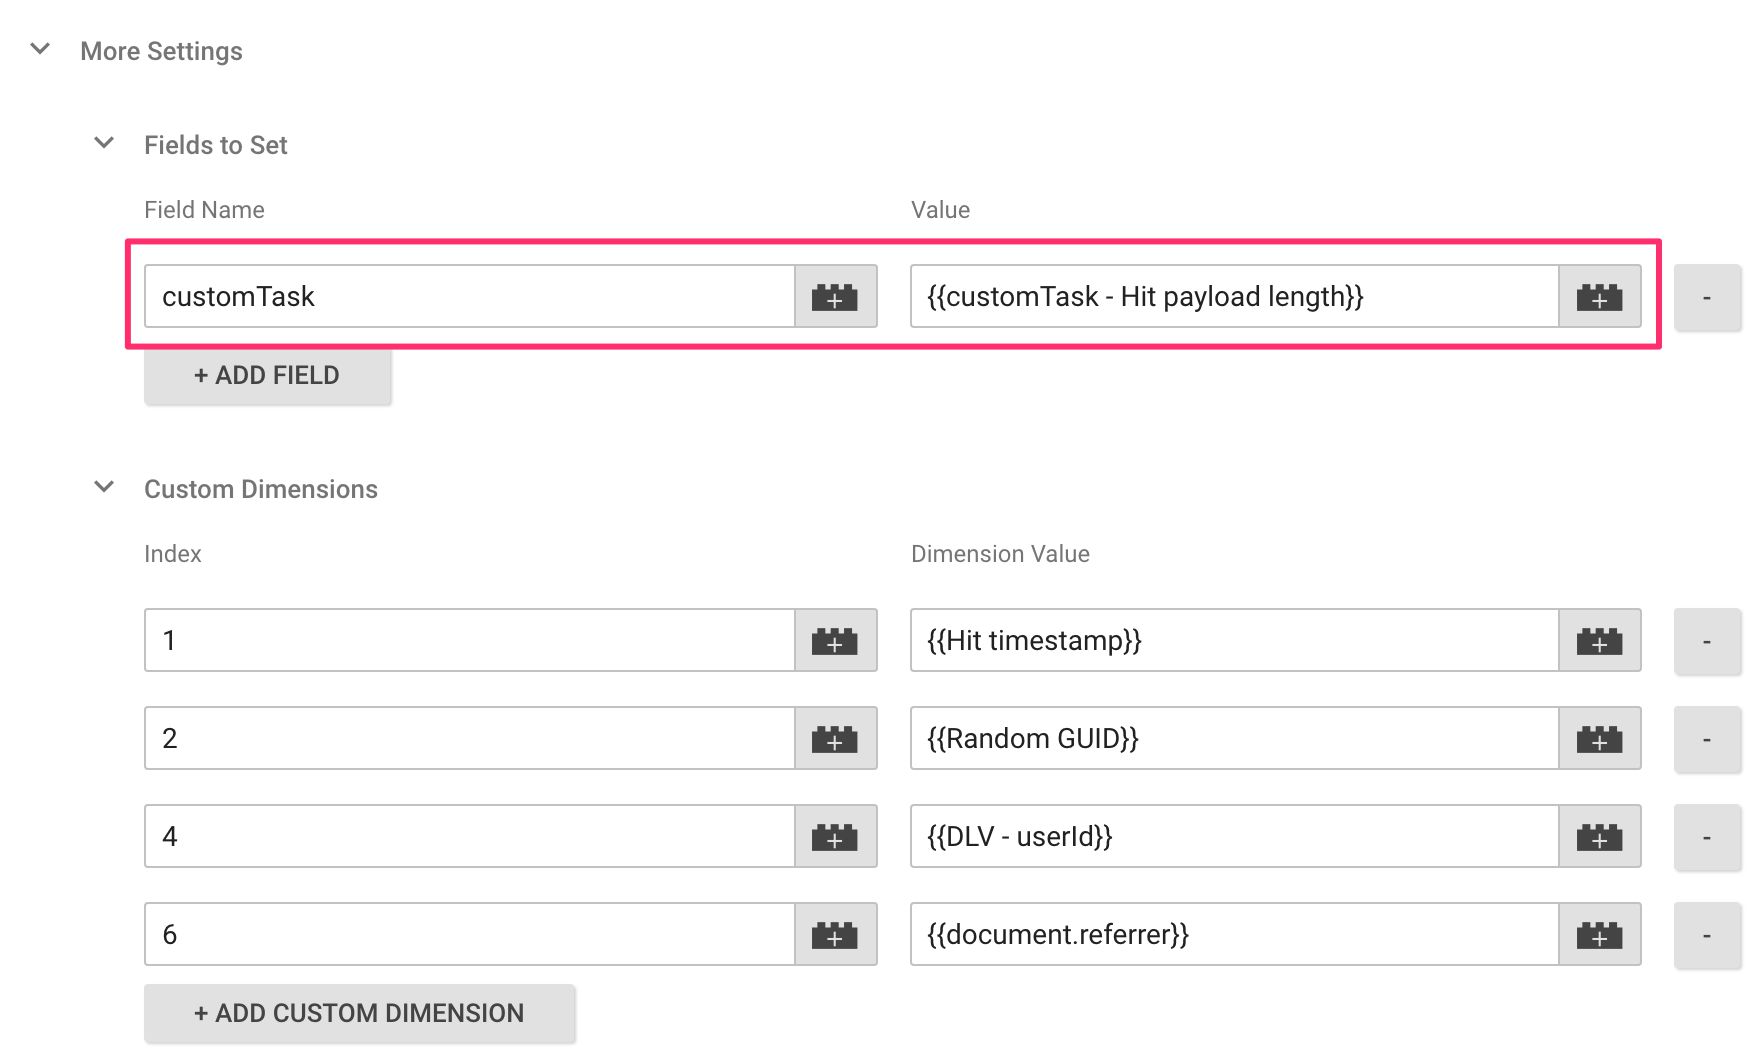
The solution is added using customTask. Be sure to read my guide on customTask to understand how this mechanism works.
Custom JavaScript variable: {{customTask - Hit payload length}}
Contents:
function() {
  // Change this index to match that of the Custom Dimension you created in GA
  var customDimensionIndex = 7;

  return function(model) {

    var globalSendTaskName = '_' + model.get('trackingId') + '_sendHitTask';

    var originalSendHitTask = window[globalSendTaskName] = window[globalSendTaskName] || model.get('sendHitTask');

    model.set('sendHitTask', function(sendModel) {

      try {

        var originalHitPayload = sendModel.get('hitPayload');

        var hitPayload = sendModel.get('hitPayload');
        var customDimensionParameter = '&cd' + customDimensionIndex;

        // If hitPayload already has that Custom Dimension, note this in the console and do not overwrite the existing dimension

        if (hitPayload.indexOf(customDimensionParameter + '=') > -1) {

          console.log('Google Analytics error: tried to send hit payload length in an already assigned Custom Dimension');
          originalSendHitTask(sendModel);

        } else {

        // Otherwise add the Custom Dimension to the string
        // together with the complete length of the payload
          hitPayload += customDimensionParameter + '=';
          hitPayload += (hitPayload.length + hitPayload.length.toString().length);

          sendModel.set('hitPayload', hitPayload, true);
          originalSendHitTask(sendModel);

        }
      } catch(e) {

        console.error('Error sending hit payload length to Google Analytics');
        sendModel.set('hitPayload', originalHitPayload, true);
        originalSendHitTask(sendModel);

      }
    });
  };
}
2.4. GTM Container ID
Custom Dimension scope: Hit
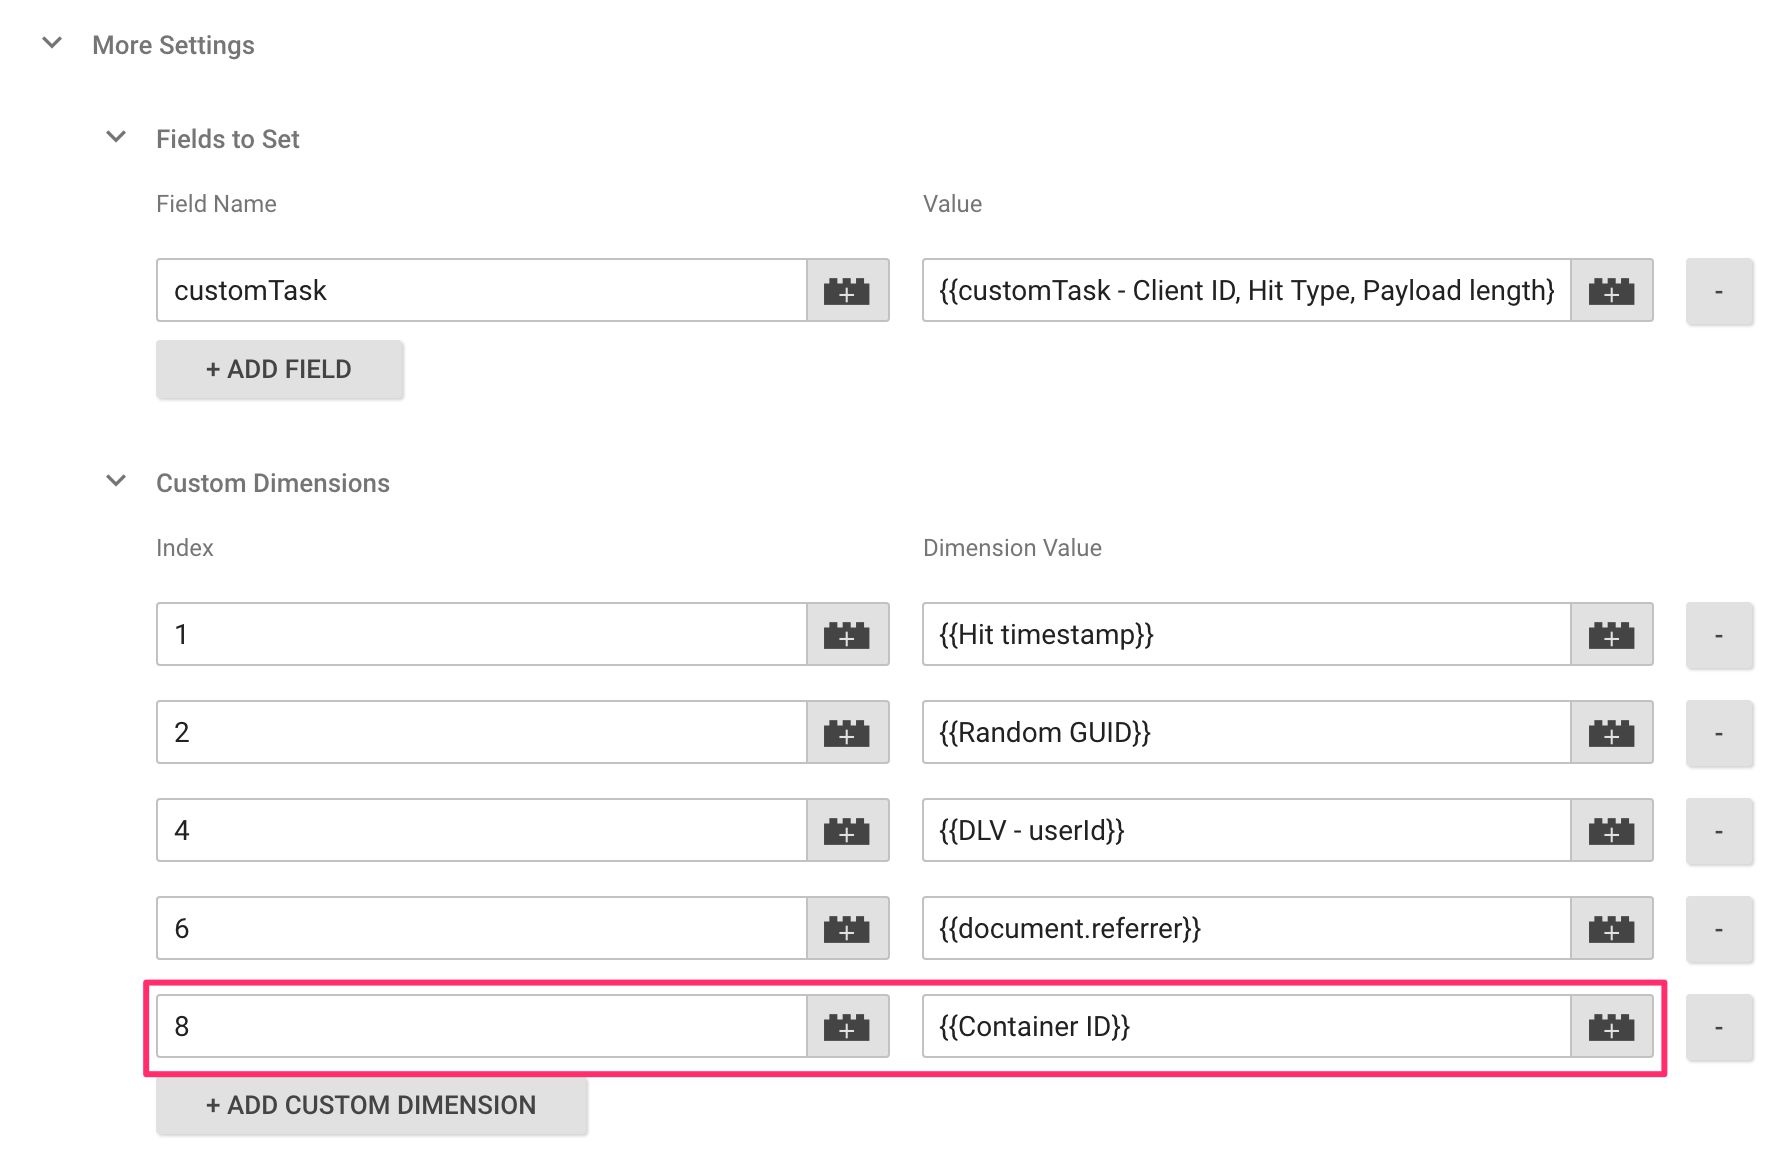
This is another of those no-brainer Custom Dimensions. Sending the Container ID serves multiple purposes: It helps you identify valid hits from spam (particularly spam sent from outside your site), it helps you debug data in a situation where you have more than one container running on the site, and it makes it easy to run parallel installations of Universal Analytics (or Global Site Tag) and Google Tag Manager.
You need to activate the Container ID Built-in variable for this. Add the variable to your Google Analytics Settings variable, so that it’s added to every single Google Analytics tag in your container.
3. Browsing behavior
The final set of Custom Dimensions is all about tracking browsing behavior. Follow the link in the previous sentence to read a thorough guide on how and why to track browsing behavior in Google Analytics.
Suffice to say that by adding these dimensions to your data collection, you can make more sense out of how users navigate to, navigate on, and navigate away from your site. It’s finally possible to segment your data based on how your visitors open pages in browser tabs, do they navigate with the browser’s Back and Forward buttons, and how many tabs they have open at any given time!
Instead of adding solution-specific implementation information, please follow the steps in the original guide.
3.1. Redirect Count
Custom Dimension scope: Hit
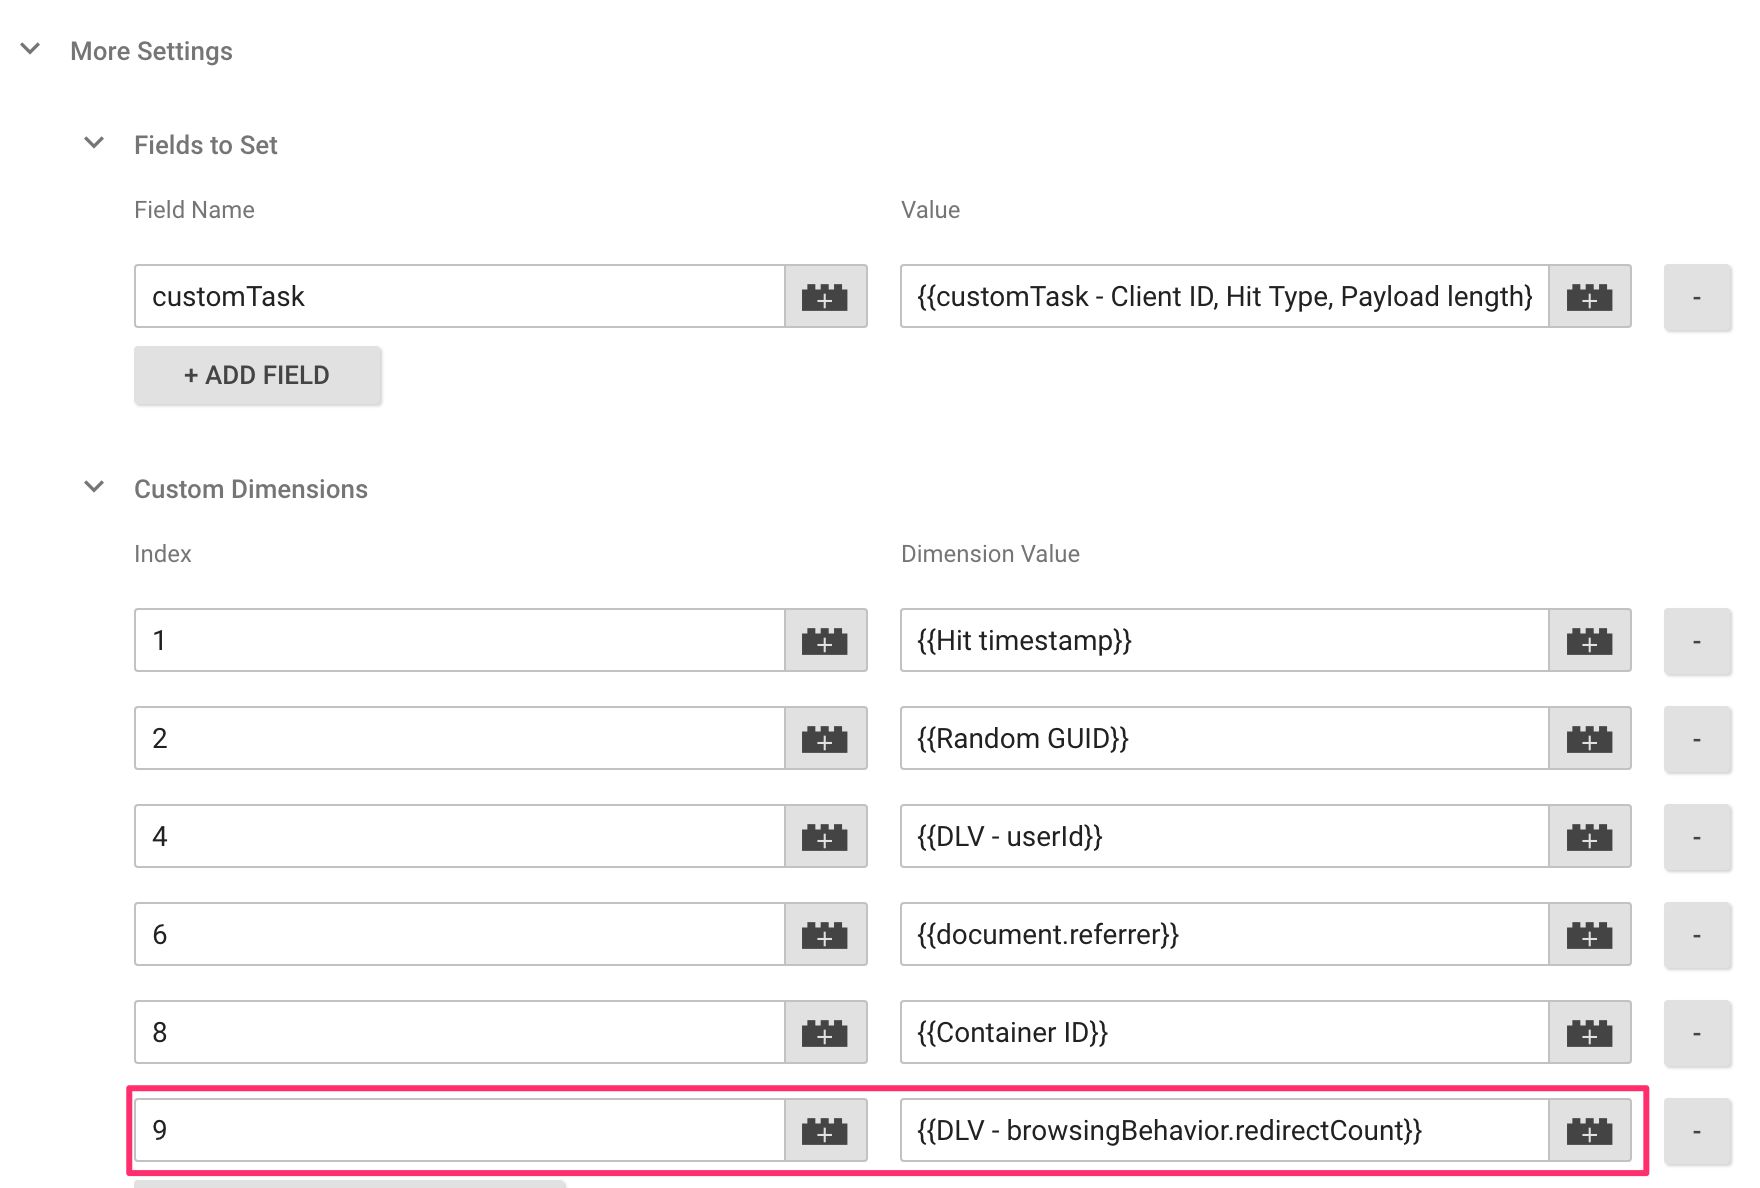
Redirect count is the number of times the initial document request was redirected when the user loaded the current page. There are some inconsistencies here, and I haven’t been able to deduce a consistent description of redirectCount behavior. However, if it works as it should, it offers interesting data about how your site responds to requests, especially when combined with organic search traffic, for example.
Data Layer variable: {{DLV - browsingBehavior.redirectCount}}
Contents: Data Layer Variable Name - browsingBehavior.redirectCount
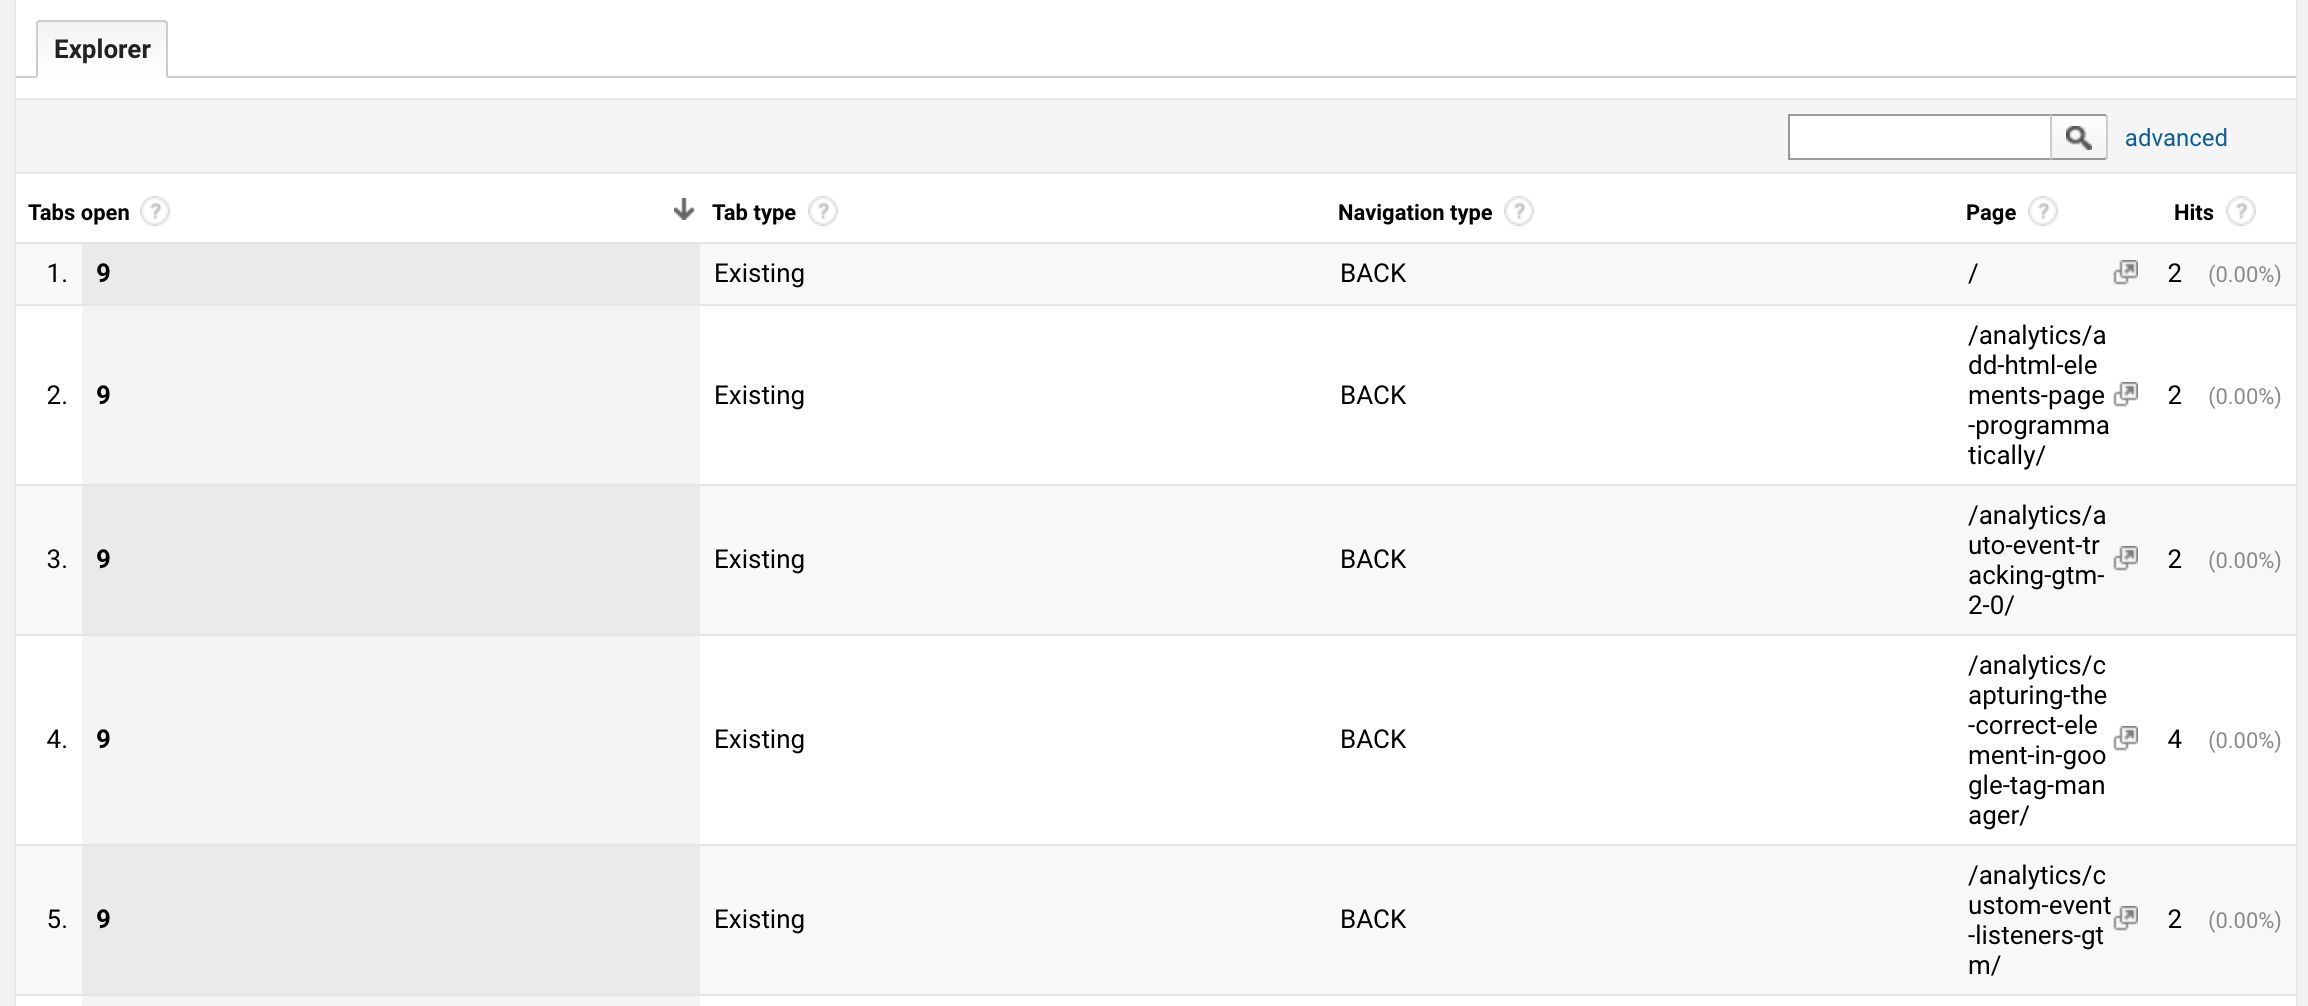
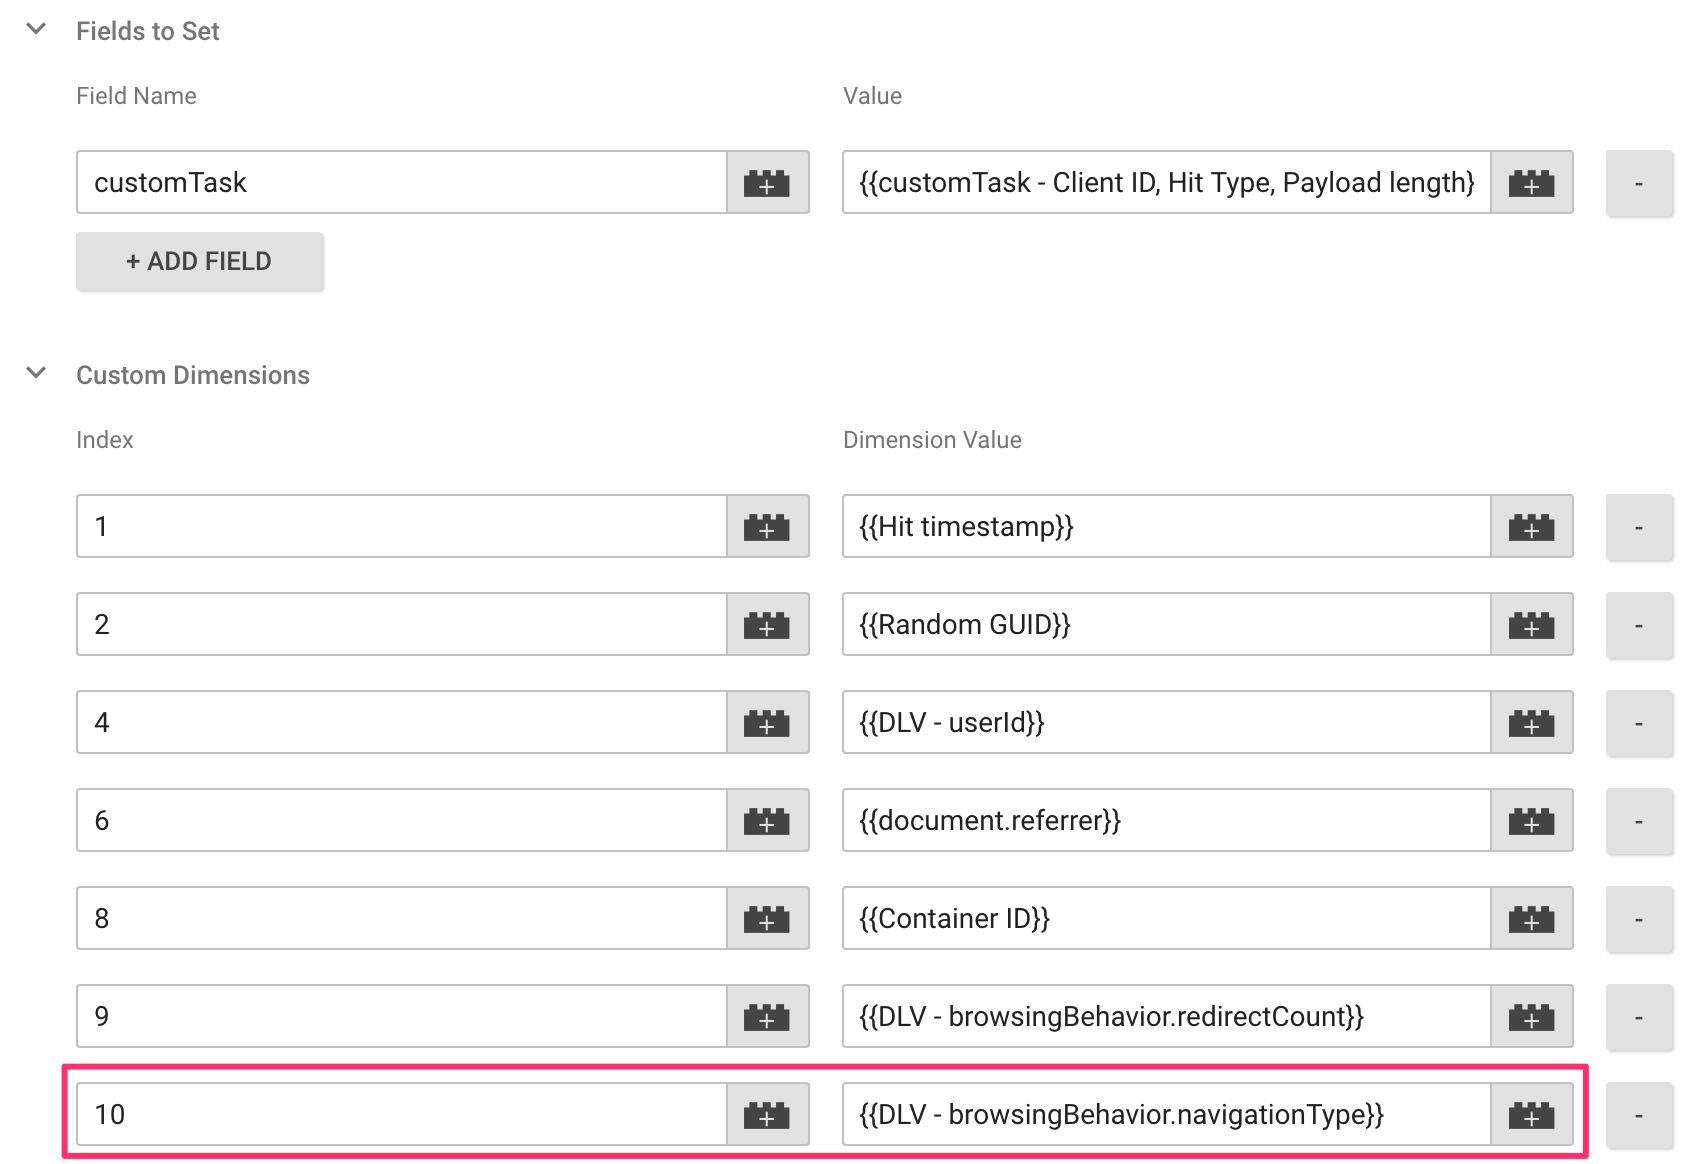
3.2. Navigation Type
Custom Dimension scope: Hit
Navigation type means the method of navigating to the current page. This includes values such as NAVIGATE (user wrote the address in the address bar or clicked a link to the current page), RELOAD (user reloaded the page), BACK / FORWARD (user clicked the browser’s back or forward buttons) and OTHER (some other way of navigating to the page.
Data Layer variable: {{DLV - browsingBehavior.navigationType}}
Contents: Data Layer Variable Name - browsingBehavior.navigationType
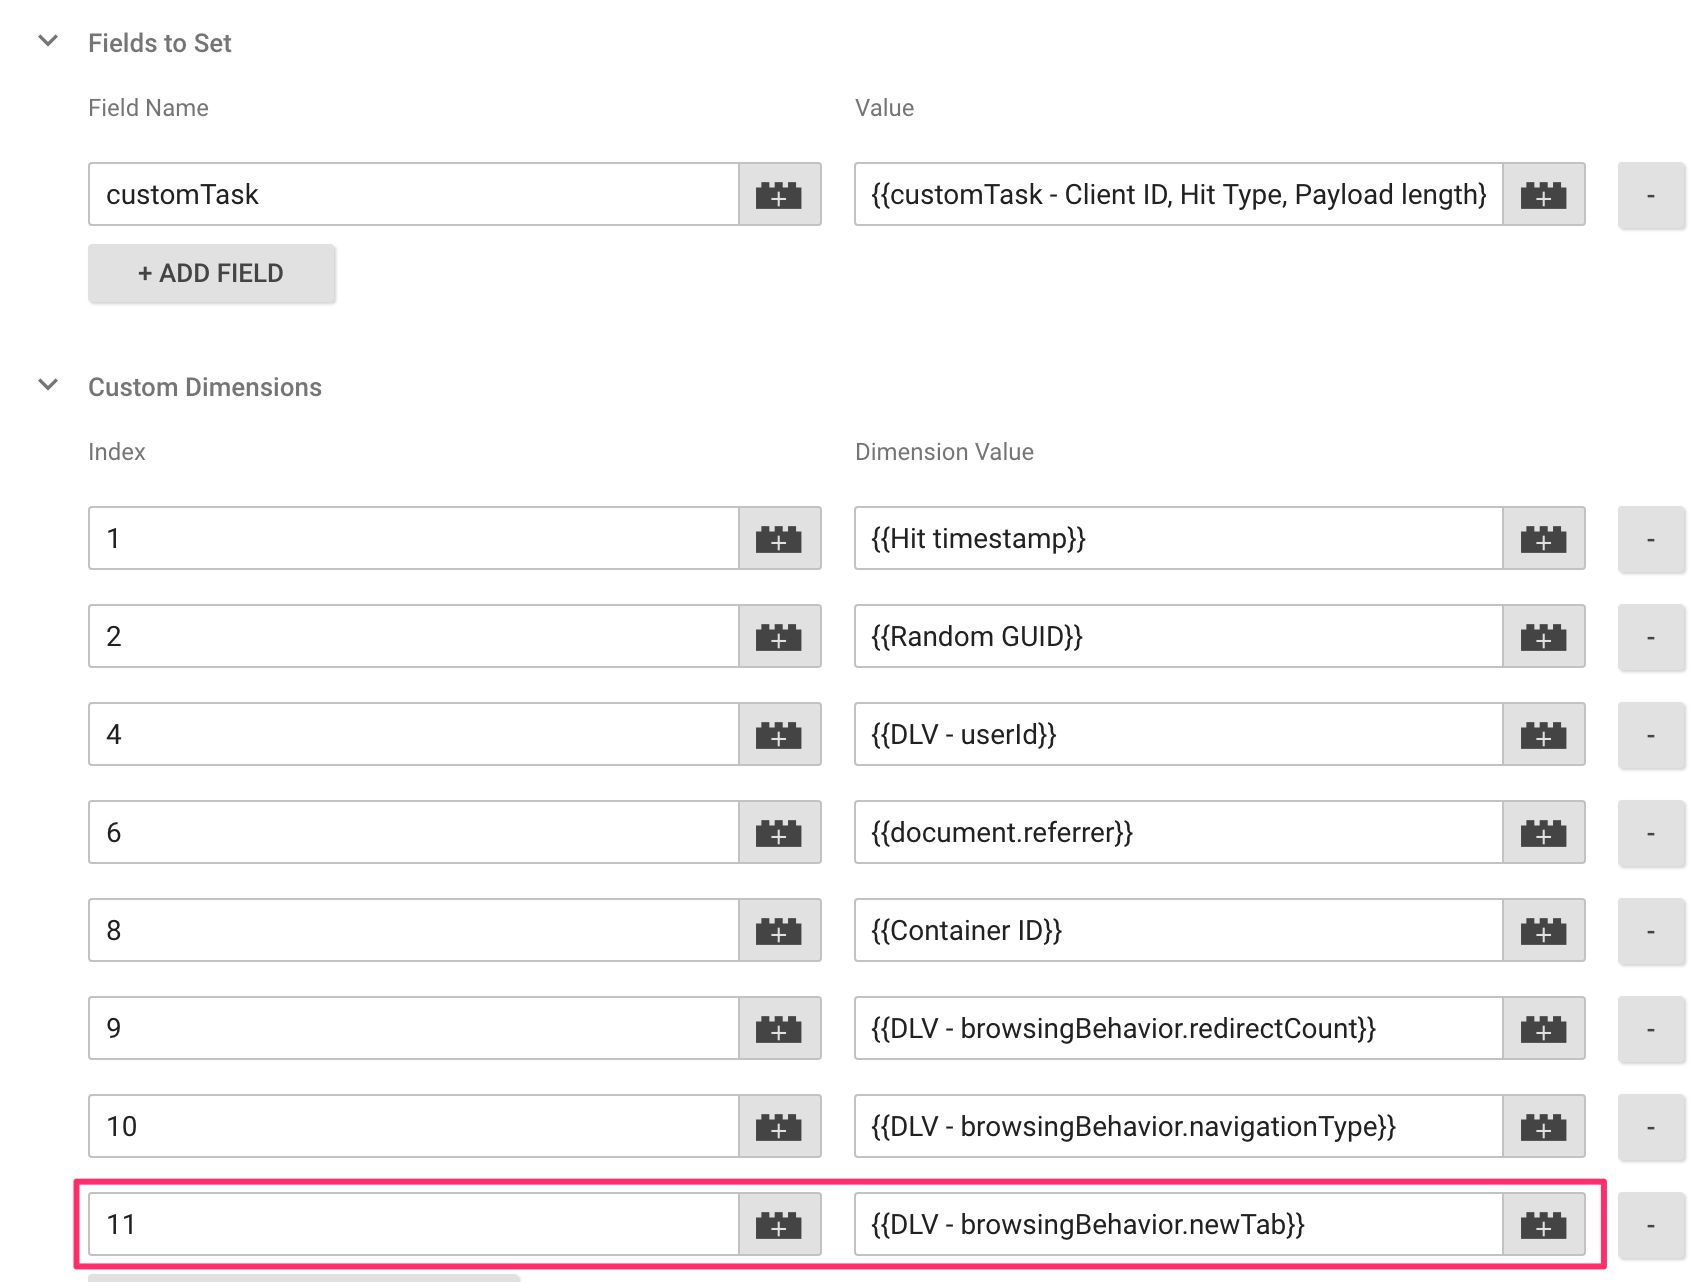
3.3. Tab Type
Custom Dimension scope: Hit
Tab type indicates whether the page load occurred in a newly open tab, or whether the tab already existed. This is done by storing the current tabId into sessionStorage. If the storage doesn’t have the current tab ID, we can deduce that the tab is a new one, since sessionStorage is purged when the tab is closed.
Data Layer variable: {{DLV - browsingBehavior.newTab}}
Contents: Data Layer Variable Name - browsingBehavior.newTab
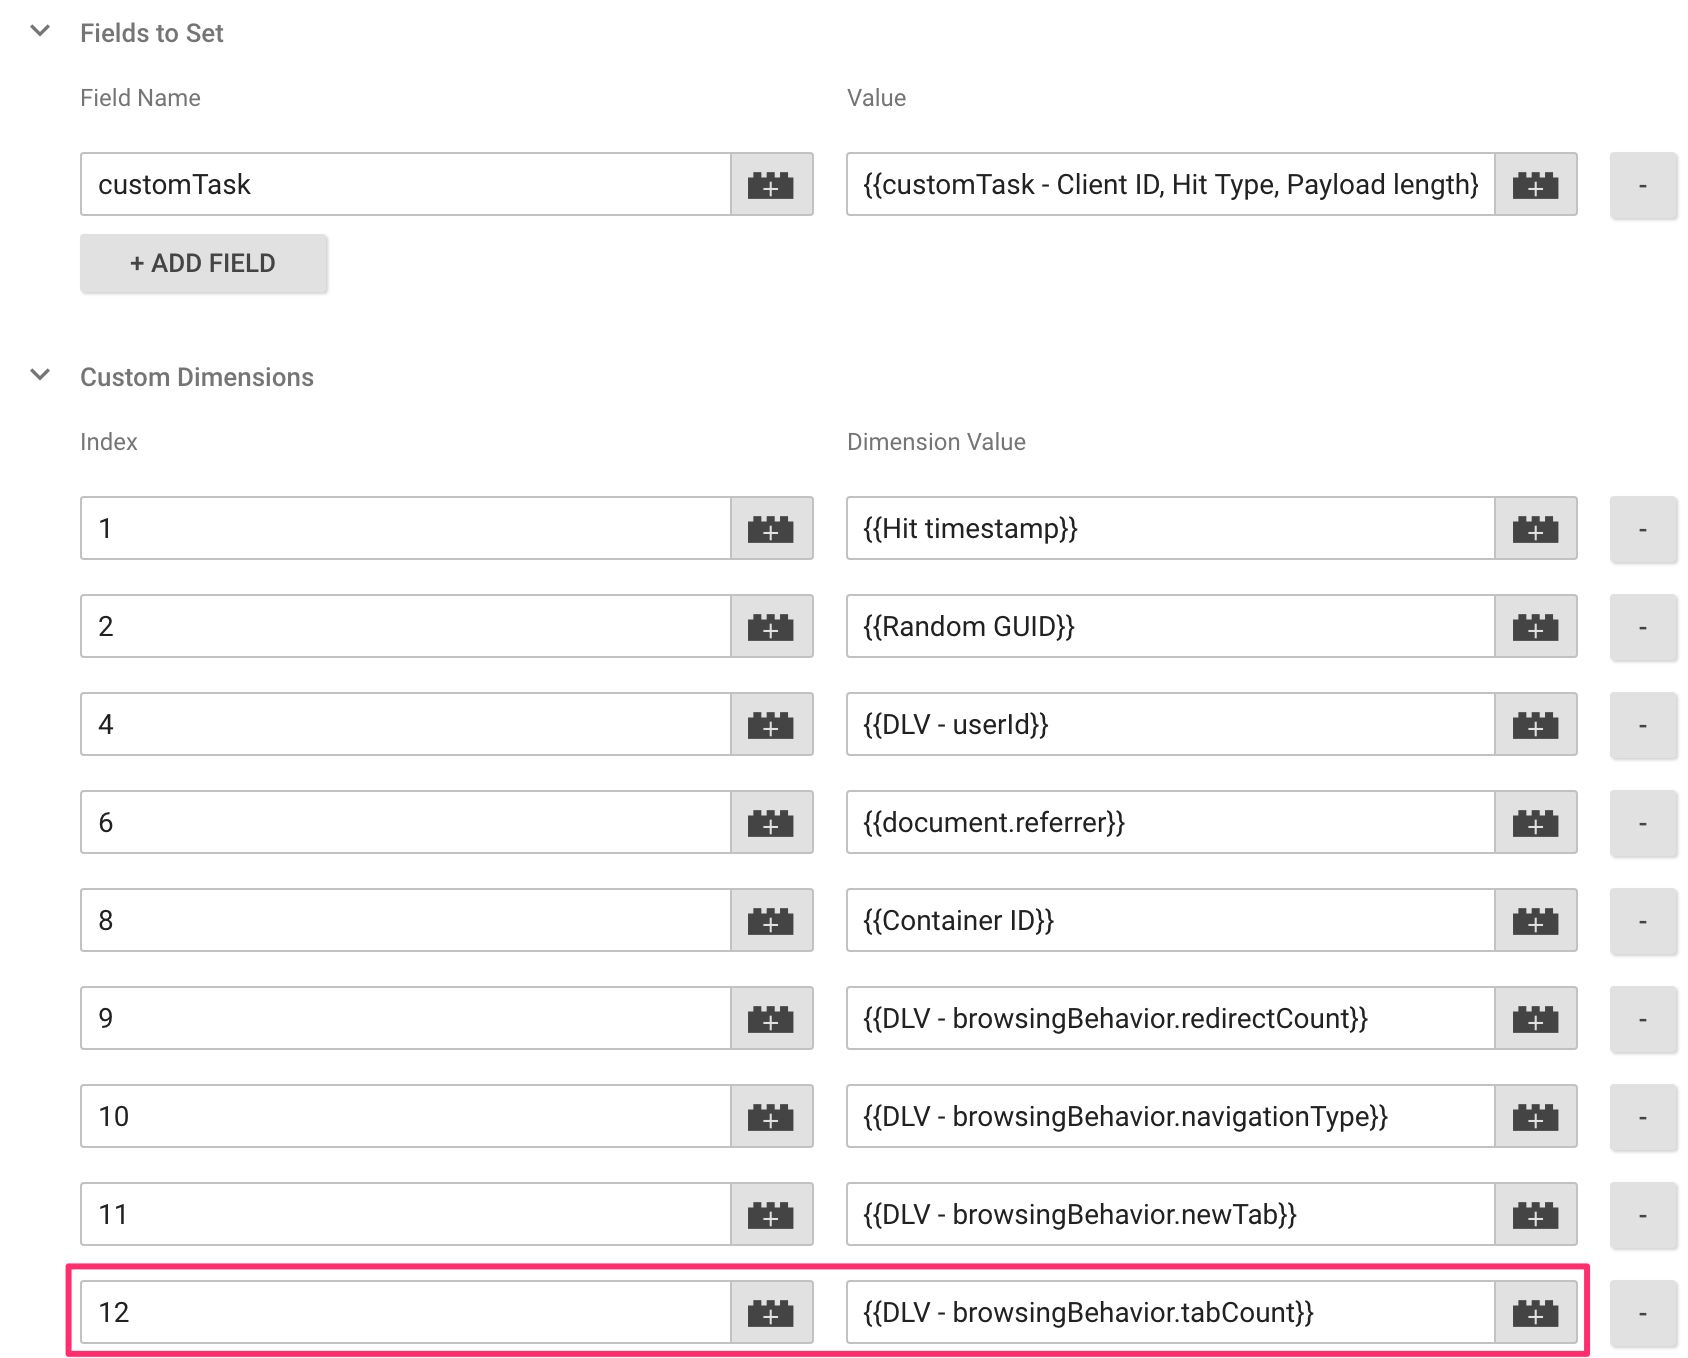
3.4. Tabs Open
Custom Dimension scope: Hit
Tabs open returns the number of tabs currently open in the browser. This is based on a count of currently active tab IDs stored in localStorage. This counter isn’t 100% reliable, because it relies on a number of moving parts which might not always be in sync. But as an indicator it’s very useful, since it tells you how your content is typically being digested.
Data Layer variable: {{DLV - browsingBehavior.tabCount}}
Contents: Data Layer Variable Name - browsingBehavior.tabCount
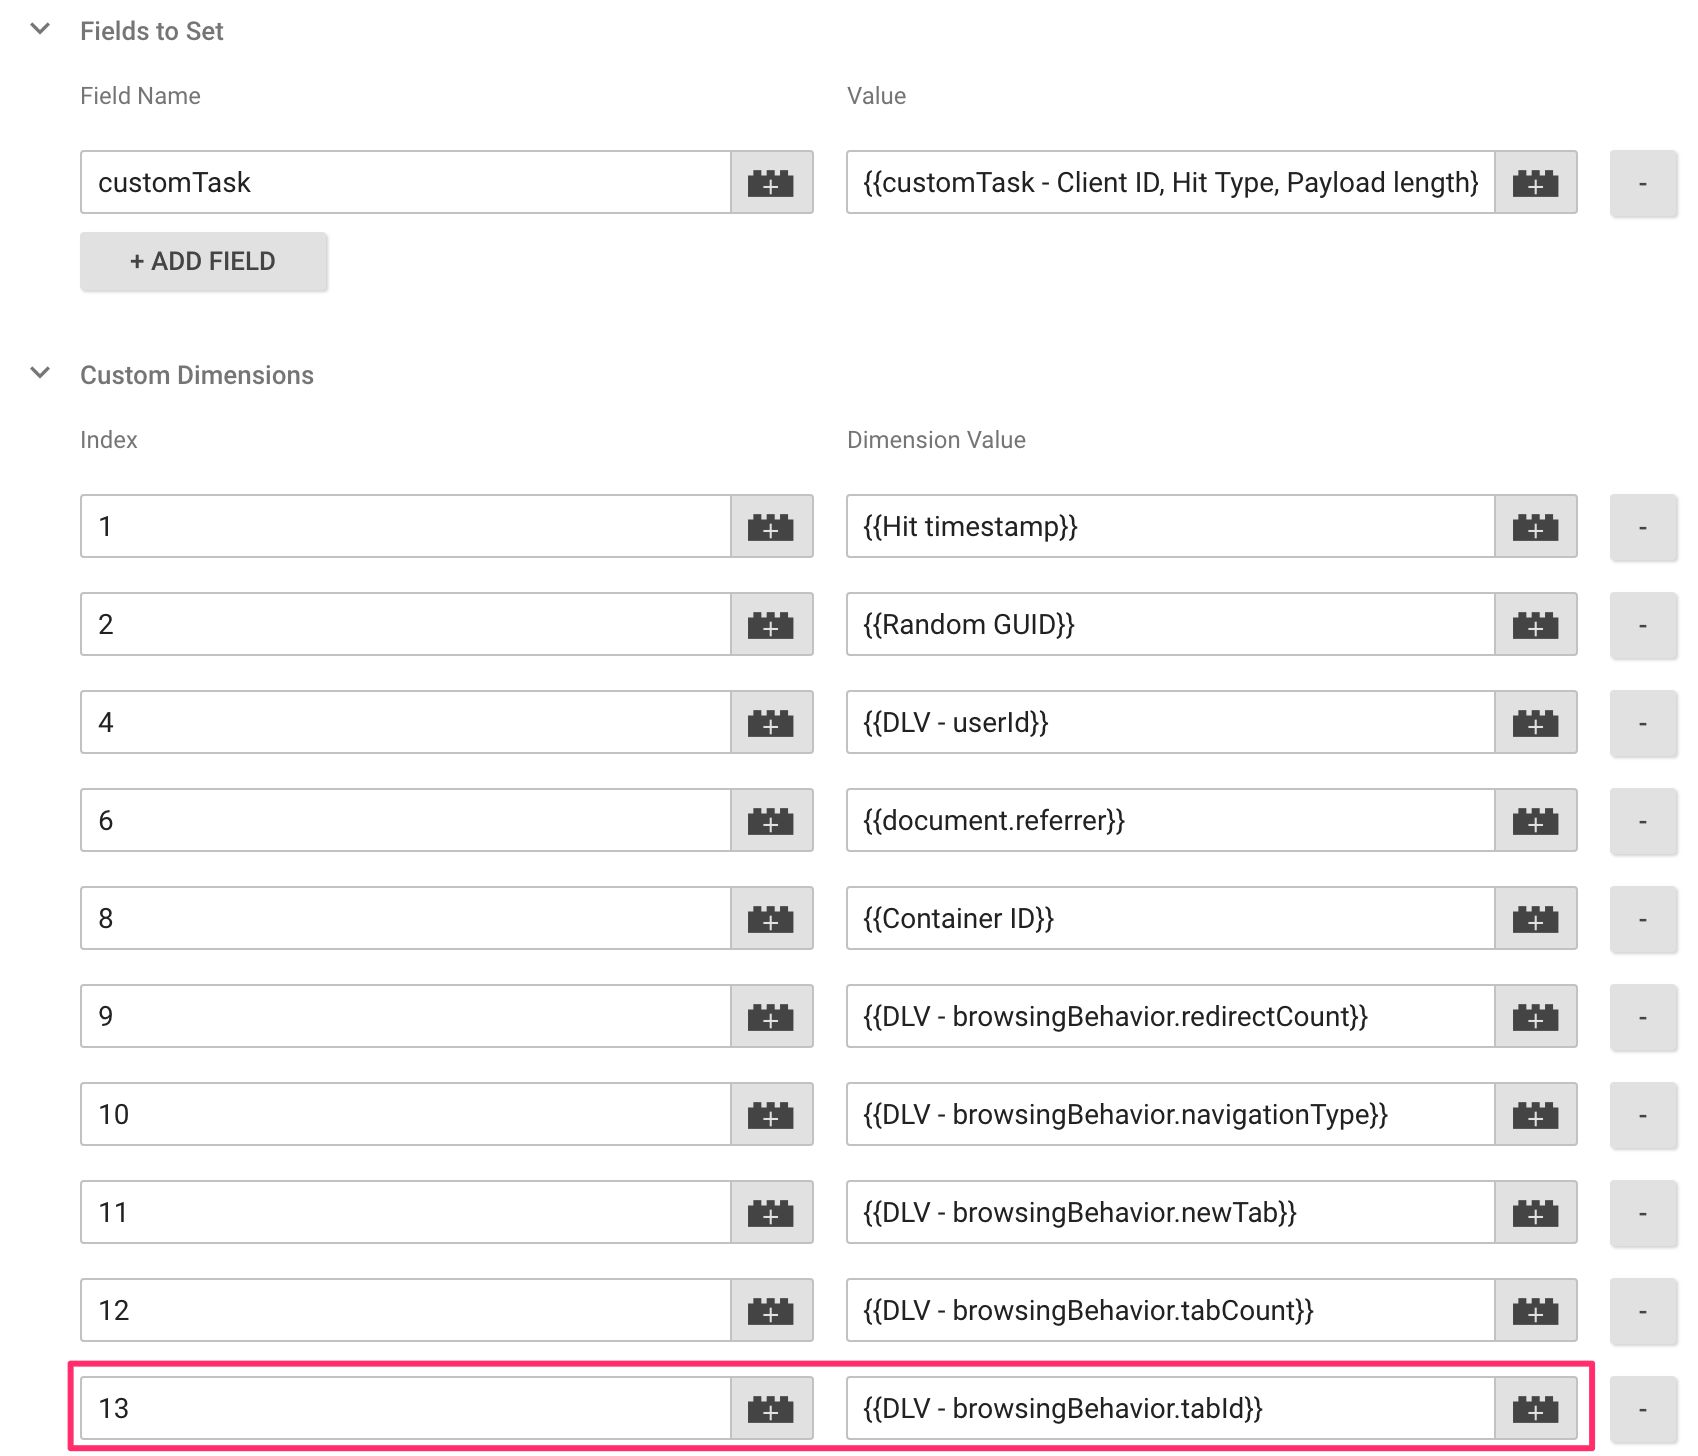
3.5. Tab ID
Custom Dimension scope: Hit
The final cog in the machine is the ID of the current tab. This is useful in case you want to group hits together by the tab in which they occurred.
Data Layer variable: {{DLV - browsingBehavior.tabId}}
Contents: Data Layer Variable Name - browsingBehavior.tabId
4. The customTask variable
You might have noticed that a number of the solutions in this guide utilize customTask. I might have recommended you to read my customTask guide, too!
One of the things you’ll learn in the guide is that you can only have one customTask per tag. That means that if you want to implement all the Custom Dimensions in this article, you will need to combine three different customTask solutions into a single Custom JavaScript variable.
This is fairly easy to do, since it’s more or less just copy-pasting all the code into one long anonymous function, but I’ll show you how to do it nevertheless.
This is the Custom JavaScript variable you’ll be using:
function() {
  var clientIdIndex = 3; // Change this number to the index of your Client ID Custom Dimension
  var hitTypeIndex = 5; // Change this number to the index of your Hit Type Custom Dimension
  var payloadLengthIndex = 7; // Change this number to the index of your Payload Length Custom Dimension
  return function(model) {
    var globalSendTaskName, originalSendHitTask, originalHitPayload, hitPayload, customDimensionParameter;

    if (typeof clientIdIndex === 'number') {
      model.set('dimension' + clientIdIndex, model.get('clientId'));
    }

    if (typeof hitTypeIndex === 'number') {
      model.set('dimension' + hitTypeIndex, model.get('hitType'));
    }

    if (typeof payloadLengthIndex === 'number') {
      globalSendTaskName = '_' + model.get('trackingId') + '_sendHitTask';

      originalSendHitTask = window[globalSendTaskName] = window[globalSendTaskName] || model.get('sendHitTask');

      model.set('sendHitTask', function(sendModel) {

        try {

          originalHitPayload = sendModel.get('hitPayload');

          hitPayload = sendModel.get('hitPayload');
          customDimensionParameter = '&cd' + payloadLengthIndex;

          // If hitPayload already has that Custom Dimension, note this in the console and do not overwrite the existing dimension

          if (hitPayload.indexOf(customDimensionParameter + '=') > -1) {

            console.log('Google Analytics error: tried to send hit payload length in an already assigned Custom Dimension');
            originalSendHitTask(sendModel);

          } else {

            // Otherwise add the Custom Dimension to the string
            // together with the complete length of the payload
            hitPayload += customDimensionParameter + '=';
            hitPayload += (hitPayload.length + hitPayload.length.toString().length);

            sendModel.set('hitPayload', hitPayload, true);
            originalSendHitTask(sendModel);

          }

        } catch(e) {

          console.error('Error sending hit payload length to Google Analytics');
          sendModel.set('hitPayload', originalHitPayload, true);
          originalSendHitTask(sendModel);

        }

      });
    }
  };
}
If you want to drop any of the three solutions from this customTask, simply remove or comment out the respective var ...Index = N; line. For example, if you don’t need to collect the payload length, change the code appropriately:
function() {
  var clientIdIndex = 3; // Change this number to the index of your Client ID Custom Dimension
  var hitTypeIndex = 5; // Change this number to the index of your Hit Type Custom Dimension

  // var payloadLengthIndex = 7;

  return function(model) {
    ...
Summary
This list of Custom Dimensions is certainly not exhaustive, and I’m sure you have other suggestions to what could be considered “useful”.
One thing to keep in mind is the restriction of just 20 available Custom Dimension slots in the free version of Google Analytics. This is very unfortunate, and one of the main gripes I have with GA. So it’s very likely you’re forced to prioritize just which dimension you’ll need to be adding to your data collection. If push comes to shove, I would personally be fine with ignoring the five Browsing Behavior dimensions, and just focus on the 8 dimensions listed first in this article.
Regardless, I consider these Custom Dimensions to add much-needed granularity to GA data. Many of these dimensions are available by default only in the BigQuery export, which, in turn, is mainly available for Google Analytics 360 customers. So by adding these dimensions to your data set, you are, in a way, actually saving money.
Do you have some go-to Custom Dimensions you’d recommend others add to their data collection right this instant? Let us know in the comments.
